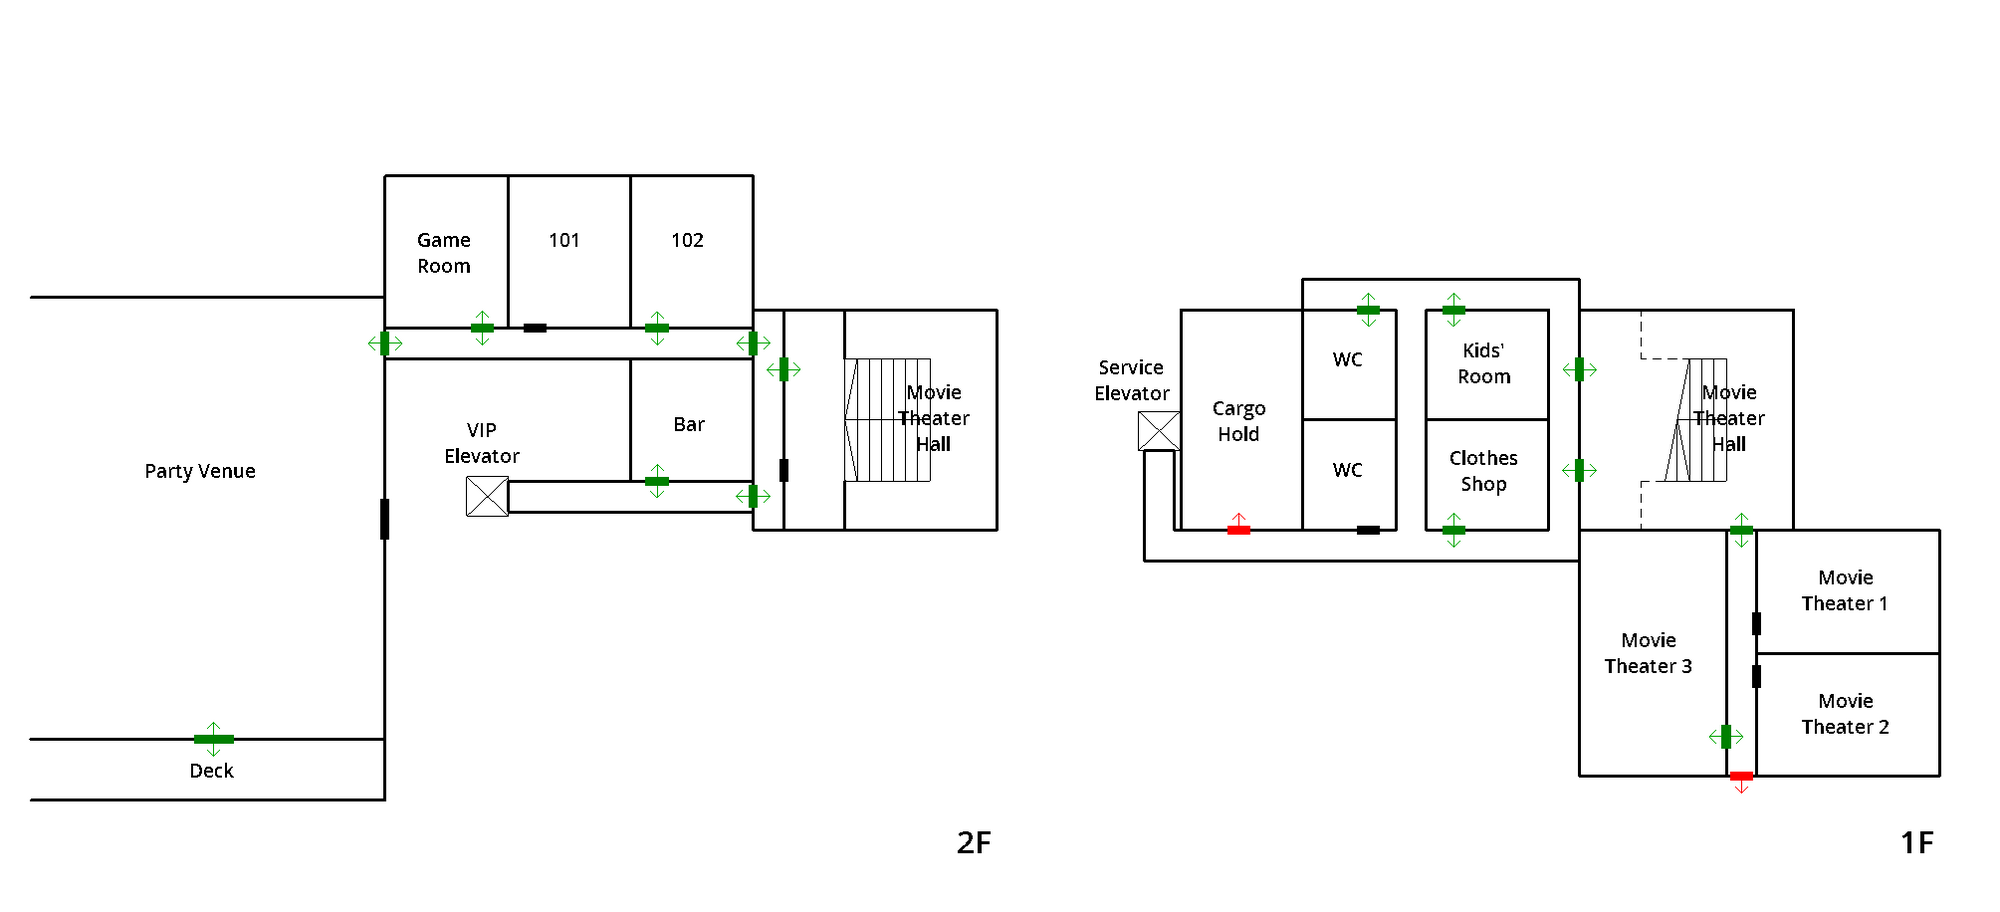
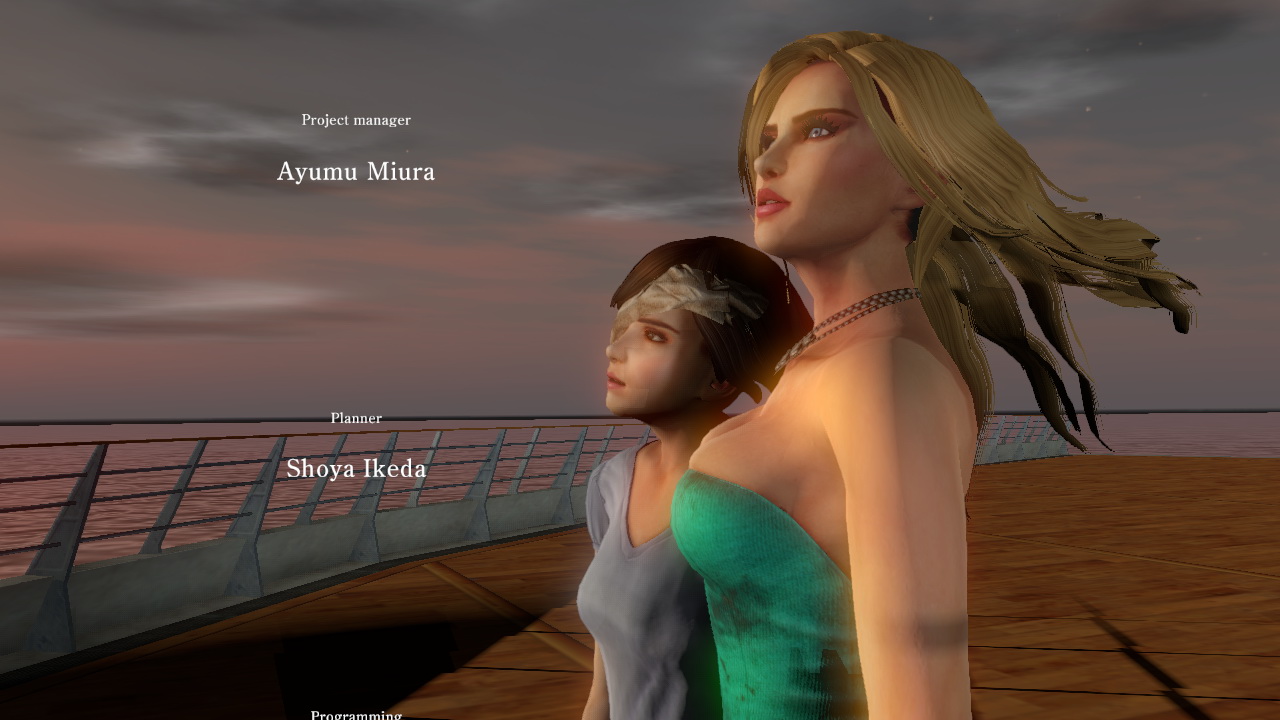
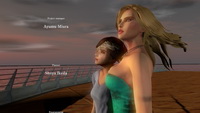
Walkthrough

This walkthrough follows the best story path leading you to the only happy and true ending of the game. You'll be able to get all of other endings as well along the way using this guide.

Navigation

Chapter 1
Chapter 1: Scene 1
Chapter 1: Scene 2
Chapter 2
Chapter 2: Scene 1
Chapter 2: Scene 2
Chapter 3
Chapter 3: Scene 1
Chapter 3: Scene 2
Chapter 3: Scene 3
Chapter 3: Scene 4
Chapter 3: Scene 5
Chapter 3: Scene 6

Chapter 1

August 18, 2016 at 07:26 PM

  • In this chapter you play as Monica Flores.
  • Talk to the clerk several times until Monica asks about Harry (get the habit of talking to the characters as well as inspecting the items multiple times to progress through the game), then you can also click on the dress to ask about it or leave the room through the door.
  • Pass through the corridor, enter a cafe and talk to Vigo, a man sitting at the table. He will ask for a lighter in order to boil his prosthetic eye.
  • Grab Matches from the bar counter.
  • Return to Vigo and use the Matches on the eye in the glass beaker. He will be grateful. You can talk to him once more to hear more game instructions.
  • Exit the cafe and go to the elevator lobby. There you will find two of Monica's friends – Jessica and Kelly. Talk to them, then press the elevator call button and use the elevator to go to the lower level.
  • Go along the corridor and you will run into a creepy little girl with a hat.
  • Enter the central hall with some vending machines to meet Harry.

Chapter 1: Scene 1


Plan of level B3

  • Talk to Harry until he tries to get a soda can from the vending machine resulting in his gruesome death and the first appearance of the Scissorwalker. You'll need now to escape from the monster. Here's a couple of hiding spots (you can use each of them only once as it will be unsafe for the second time):
    • inside the closet in one of the open rooms (303 or 308);
    • shopping area – behind the shop counter;
    • you can also use a fire extinguisher in the elevator lobby to repel the Scissorwalker.
  • Don't try to hide inside the dryer in the laundry – this will end in Monica's death.

Game Over

Trapped and killed in the dryer.

  • Also, if you try to hide behind the shop counter one more time, you'll get another game over.

Game Over

Speared through the counter by scissors.

  • After the Scissorwalker is gone, return to the elevators to inspect a dead body inside one of them and get a Smartphone (Battery Dead) from it. Unfortunately, you cannot use the elevator to get away.
  • Head to one of the open rooms and place the Smartphone into a phone charger on the table to get it charged (using the charger will also save your game progress). You can now use the Smartphone. The phone belonged to John Thompson and you'll get occassional calls from his friend and his wife. You can also use it as a flashlight as well as use the SNS (snapNpost) social networking service for clues and making posts.
  • You can inspect room 306, although it's not required (you need to use a flashlight). It's Monica's room, but you won't find anything useful in it. Go to the bedroom to answer a call from Jessica.
  • Exit to the corridor and go past the serving cart. You will run into a crew member who will soon meet a tragic end killed by the aforementioned cart. Quickly perform the QTE or you'll be dead too.

Game Over

Crushed to death by a moving service cart.

  • Inspect the cart to get the Card Key A fallen from the crew member's pocket.
  • Check the staff elevator. You'll find out that the card key reader is out of power and you need to replace a broken fuse in the fuse box in the opposite wall. Soon after that you should get a call from Thompson's wife – Angie Brown – who will tell you that her husband carries the required tools in his suitcase.
  • Go to room 303. That's the room of the Thompsons. Observe the suitcase. You need a passcode to open it. Check the SNS on the mobile to learn that the Thompson's birthday was March 14. Enter 0314 and get the Fuse from the suitcase.
  • Key action: Finding a Wedding Ring
    Check the shopping area. Inspect the cash register at the counter to get 4 Quarters. You don't want to inspect the freezer (believe me!). Use the Quarters on the third vending machine in the lobby. You'll get a severed hand with a Wedding Ring.
  • Go to the staff elevator. Replace the fuse and use the Card Key A to call the elevator.
  • The elevator will stop halfway. You need to quickly turn on the flashlight and use the control panel or you'll be dead by the hands of the mysterious grandma.

Game Over

Murdered by the old lady in the elevator.

Chapter 1: Scene 2

  • You are now on the first level.


Plan of level 1

  • Go through the cafe (don't inspect the pool of blood in the floor if you don't want to have another encounter with the Scissorwalker), enter the parallel corridor and check the storage to the right. You'll need to move a box in front of it in order to enter.
  • Inside of the storage get the Key for the Cafe from the key rack.
  • Key action: Finding Jessica
    Check the rightmost locker inside the storage to find the dead body of Jessica and also run into the Scissorwalker. You can use a fire extinguisher in the corner of the lobby nearby to get rid of the monster for now.
  • Check the brochure for the cruiser in the lobby to learn there's a way out through the second floor of the cafe. Go to the cafe and use the stairs. Unlock the door at the balcony, but before entering, make sure you turn your flashlight on or you'll get Monica murdered.

Game Over

Failed to light up the dark room and murdered.

Key action: Making a post using SNS

  • Once inside the storage, before going through the metal door make sure you post on SNS about the murders. Otherwise you'll get the first of the bad endings.

Ending

A face floating on waves.

  • On the deck you're going to meet Eric and after the cutscene you will switch to Leonard.

Chapter 2

August 18, 2016 at 09:44 PM

  • In this chapter you play as professor Leonard Cosgrove.
  • After the cutscene talk to Eric and Cobie on the deck.
  • Inspect the yellow box at the end of the deck to find an inflatable life raft.
  • Talk again to Eric and Cobie to tell them about the life raft. The three of them will use the raft to get to the island.
  • On the beach, go past the life boats and inspect the footprints leading to the thicket twice. Inspect the thicket to get through.

Chapter 2: Scene 1

  • Go along the forest path. Be careful not to be spotted by the masked man with a flashlight – slip through when he's looking in other direction. Otherwise, you'll get caught.

Game Over

Discovered and killed by the Faithful.

  • Enter the cabin where the path makes a turn to the left.
  • Inside the cabin you'll find a phone charger on the bookshelf.
  • Check the box by the wall to obtain a Baseball.
  • Key action: Getting the gloves
    Find and take the Non-Slip Gloves from the table.
  • Key action: Requesting help via the radio
    If you inspect the notes on the wall, you'll find the codes for the radio channels. Marked in red is "CH16 Distress". Use the radio nearby, set it to channel 16 and send a distress call to the Coast Guard.
  • If you try to check the radio channels randomly, you'll have a game over.

Game Over

Killed by the miasma while attempting to send an SOS.

  • Head back into the forest, go up along the path and enter the cave.
  • In the cave, first go to the right and enter a chamber with a red-lit well inside. Check the hole for a spooky scene. Inspect some dirty clothes on the floor to obtain a tube of Superglue.
  • Get back into the main tunnel. Go to the left from the entrance. Beware of the Faithful guarding the passage. Don't get spotted or you'll be captured.

Game Over

Discovered and killed by the Faithful.

  • Approach the gong at the end of the tunnel. Check the area to the right and behind the gong to find a Cracked Mask.
  • Now step a little further from the gong so that the guard would be standing between you and the gong and throw the Baseball at the gong. This will distract the guard and you'll be able to slip into the next area.
  • Go straight ahead and enter a room in the dark area to your left. Inside you'll find a phone charger to save your progress. Approach the mirror to find another piece of the mask. Leonard will see a shadowy figure in the mirror. Quickly grab the bottle to the left of the mirror to smash it. If you hesitate you'll experience another dead end.

Game Over

Killed by the shadow reflected in the mirror.

  • After you're finished with the mirror, use the Superglue on the lying mask to make yourself the Mask of the Faithful.
  • Now you can go back to the tunnel and head along the passage towards the bonfire with the Faithful gathered around it. Don't forget to put on the mask before approaching the bonfire or you'll get another game over.

Game Over

Discovered and killed by the Faithful.

Chapter 2: Scene 2

  • With the mask on you can safely approach any Faithful in this area. Go along the path and enter the wooden cabin at the end of it.
  • In the first room you'll find a phone charger in the corner and a phone on the dining table. Inspect the phone to add Will Anderson to your contact list.
  • The other exit from the cabin is guarded by the Faithful, so you can't leave yet. Go to another room, grab a Rope from the floor and climb the ladder to the second floor.
  • Key action: Reading the memoirs
    Inspect the occult books lying on the bookshelf a couple of times and Leonard will find some kind of a diary and read it.
  • Key action: Making a post about the man with the artificial eye using SNS
    Check the boiling false eye in the beaker. Leonard will comment that he needs to warn his students on the ship about this man. Make a post on SNS about it.
  • Grab the Hand of Glory from the shelf with all sorts of formalin jars.
  • Now you're ready to leave the cabin. Make a call to Will Anderson and the guard will get distracted. Attach the rope to the pillar by the open window and use it to descend to the ground.
  • If you return to the first floor's main room after the phone call, you'll get captured.

Game Over

Discovered and killed by the Faithful.

  • If you try to climb through the window without making a phone call, you'll get captured as well.

Game Over

Discovered and killed by the Faithful.

  • Once on the ground, head straight ahead towards the well in front of you.
  • If you have the Non-Slip Gloves use them on the well's rope to safely land in the underground tunnel, otherwise you'll get a game over and a bad ending.

Game Over

Killed at the bottom of the well by the Scissor Walker.

Ending

It's all to late.

  • In the tunnel, approach the dark passage with ghostly hands sticking from the walls. To safely pass through this area you need to ignite the Hand of Glory using the torch on the wall. If you fail the QTE sequence in the passage, you'll get a game over.

Game Over

Killed by ghostly hands on the road to the Room of Rituals.

  • If you try to pass the corridor without using the Hand of Glory, Leonard will get killed as well.

Game Over

Killed by ghostly hands on the road to the Room of Rituals.

  • Once on the other side of the passage, go through the door at the end of the tunnel.
  • You'll find yourself in the Room of Rituals. Inspect a coffin-like box to find heavily injured and drugged Jerome, one of the passengers from Oceanus, inside of it.
  • Check the hanging bloody bodies, the dagger on the altar and then a curtain to the left of it to reveal a hidden door.
  • Observe the geometric patterns on the floor near the coffin. To get the whole picture you need to climb the stairs in the room. Leonard will get the idea that the ritual is going to take place on board of Oceanus. Now you can leave through the door.
  • Leonard with Jerome, Cobie and Eric will try to get back to the ship, but a sudden explosion happens on Oceanus and we then switch to the third playable character – Rooney.

Chapter 3

August 18, 2016 at 06:12 PM

  • In this chapter you play as Rooney Simpson.
  • Talk to the guests of the party, get introduced to Jerome, then leave through the side doors to the deck.
  • Click on the railing for a cutscene, then talk to Jerome.
  • After he leaves, go through the party venue and enter the suite area (to the left of the reception doors).

Chapter 3: Scene 1


Plan of level

  • Before going straight to Jerome, visit the game room (first door to the left) and talk to the First Mate Saul. You will add Saul to your contact list.
  • Get back to the corridor and go to Jerome's room – 102.
  • Talk to Jerome until he leaves the room.
  • Key action: Getting the envelope
    Find the Envelope under the room's entry door and pick it up.
  • Walk around the room checking the things. After some time you'll hear a bathroom shower running. Check the bathroom for a cutscene and the run from the Scissorwalker. This area is pretty big and has many places where you can hide. Although you can simply return to Jerome's room and hide under the bed in his bedroom (use the flashlight to enter the room), a good option would be to run to the left through the door, then through another door to find yourself on the balcony of the movie theater hall. Run downstairs and then enter one of the doors under the balcony to find yourself in the shopping area. Here you have an option to run to the clothes store (to the left), to the kids' room (to the right) or to the public toilet (further to the right past the kids' room). Here are some spots to hide:
    • clothes store – behind the clothes racks in the corner;
    • kids' room – behind the foam blocks or by the metal trash can;
    • public toilet – inside one of the cubicles;
    • movie theater - behind the seating.
  • If you try to use some of these places for the second time, you'll get a game over.

Game Over

Cut up by scissors while hiding in the bathroom.

Game Over

Discovered and killed while hiding among theater seats.

Game Over

Killed by scissors puncturing the bed from above.

  • When you're safe, you can explore the area. The movie theater hall (where the stairs are) has a phone charger on the table.
  • In the kids' room click on the swing to watch an important cutscene with a little girl. After this, check the crib with a doll inside. The doll is going to come alive and attack you. Protect yourself by dropping the bookshelf to your right onto the doll or you'll experience another game over.

Game Over

Attacked and killed by the doll in the kids' room.

  • Check the crib again and you'll find a Billiard Ball B.
  • Get back to the movie theater hall and then go into the aisle with the cinema rooms. Enter cinema 3.
  • Inside you're going to find Kelly among the seats. Talk to her and you'll add Kelly to your contact list.
  • Get back to the theater hall and go upstairs. You'll get a call from Kelly – answer the call.
  • Go under the stairs and head to the cargo hold that Kelly mentioned on the phone. It's just past the clothes shop with the mannequins. When you at the door of the warehouse, call Kelly and she'll let you in.
  • Talk to Kelly to get Monica's and Jessica's contacts.
  • Talk to a woman standing across from Kelly to get her husband's (John Thompson) number. That's the phone that Monica was using in the first chapter.
  • Talk to Vigo standing at the back of the cargo hold to receive the Key to Emergency Staircase from him.
  • Leave the cargo hold and go to the bar at the second level via the theater stairs. There take a Billiard Ball C from the bar counter.
  • Get to the game room in the parallel corridor (that's the room where you talked to Saul) to find Saul's dead body. Inspect him and you'll have to evade darts or else...

Game Over

Killed by darts between the eyes.

  • You have to escape from the Scissorwalker once again. Use one of the places listed earlier in this chapter.
  • When you're safe, return to the body in the game room and check him again to collect a VIP Card Key.
  • Head to the movie theater aisle and unlock the emergency exit doors at the end of it using the Key you got from Vigo.

Chapter 3: Scene 2

  • Go downstairs and talk to Jerome.
  • Key action: Hearing about Jerome's past
    Give the Envelope to Jerome.
  • Go further downstairs and drop yourself down to the floor below. Shortly, you'll receive a phone call from Jessica – answer it.
  • Enter the storage room and go to the left. Evade the falling container or you'll get smashed.

Game Over

Killed by falling container.

  • Escape the Scissorwalker via the conveyor belt. It will start rolling backwards. Perform the QTE to escape the imminent death.

Game Over

Stabbed on the conveyor belt.

Chapter 3: Scene 3

  • Go straight ahead and after a short cutscene enter the warehouse full of storage crates at the end of the corridor. There's a phone charger on the table in the corner by the far wall. Inspect the table to also find a Remote Control for the crane.
  • Key action: Finding Monica / Hearing from Monica about the man with an artificial eye
    Search the open container by the entrance door to find Monica's necklace. To find her in the warehouse you need to call John Thompson, then listen to the signal and locate the crate with the ringing inside. After Rooney finds the correct crate, use the standing forklift nearby to ram into the crate and get it open. Step inside the container and talk to Monica. Eventually, she'll tell Rooney about the man with the prosthetic eye and give her the Wedding Ring.
  • Climb via the ladder onto the container next to the open one and use the Remote Control to lift the crate and access the wall opening to your right.
  • Head downstairs and enter a small storage here. Inside you'll find Eric and the dead body of Cobbie.
  • Talk to Eric, call Kelly, talk to Eric again.
  • Key action: Taking the antibiotics
    If you found Monica, talk to Eric one more time to ask for help and receive the Eric's Medication. You need to return to Monica to give her the antibiotics and take them yourself.
  • After you're done with the things in this area, return to the storage with Eric. Now you can leave through the air duct in the ceiling. Move through the air duct into a room with two ladders marked with numbers 12 and 13. According to Eric you need to take route 13 to access the upper floor. If you enter air duct 12, you'll get a game over.

Game Over

Drowned in the flooding air vent.

  • Climb into air duct 13. If you won't interact with the first vent or inspect it and fail the QTE sequence during the cutscene, you'll receive yet another game over.

Game Over

Stabbed from below the air vent.

  • After the scene, get to the second air vent and climb down into a red-lit room.

Chapter 3: Scene 4

  • The table by the air vent has a phone charger. Move through the room.
  • At this point if you failed to find Monica or take the antibiotics, you'll get one of the bad endings.

Ending

Purgatory.

  • Key action: Stopping the life-support system
    Pull away the second curtain to enter the hospital cubicle. Inside you'll find professor Leonard turned into a some kind of barely breathing monster. Interact with the life-support system in the cubicle to turn it off and end professor's agony.
  • Exit the room, turn to the right, reach the end of the L-shaped corridor and step outside onto the ship's deck.
  • Run through the deck and enter the next door. Go around the corner and check the open elevator to find the Card Key A. Accomplish the QTE sequence to evade a game over.

Game Over

Failed to survive the elevator challenge.

  • Continue your way along the corridor and step into the pool of water to trigger the appearance of the Scissorwalker. Run back and take the loose electrical cable to bail off the monster.
  • After the Scissorwalker is gone, move through the water and reach the elevator at the end of the corridor. Use the Card Key A to call the elevator and step inside.
  • If you didn't stop the life-support system of Leonard, you'll get a bad ending at this moment.

Ending

Seduced by the snake.

Chapter 3: Scene 5

  • You've returned to the level from the the 1st scene. Move along the corridor.
  • Key action: Giving the wedding ring to Angie
    Enter the clothes store and check the changing room to find Angie inside. Talk to her and give her the Wedding Ring to receive in turn a Billiard Ball A from her.
  • Go into the movie theater hall and try to climb the stairs. You'll run into the Scissorwalker. You can use the hiding spots from the 1st scene of this chapter to escape the monster.
  • When the creature is gone, go upstairs, enter the door at the balcony, then go to the left and enter the next corridor.
  • Approach the elevator at the end of the hall and use the VIP Card Key to enter it.

Chapter 3: Scene 6

  • You've reached the captain's and owner's quarters. Enter the captain's cabinet on your left.
  • Key action: Reading Vigo's diary
    Inspect the computer on the table, then the diary lying to the left of the computer and then the computer again.
  • Leave the room, go around the corner to find a locked gate.
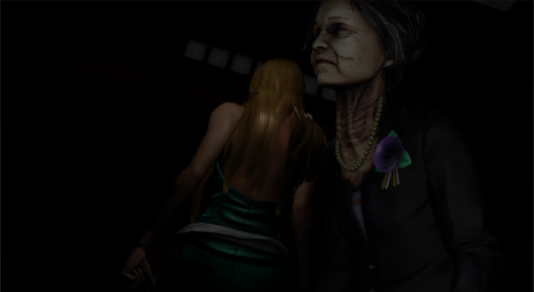
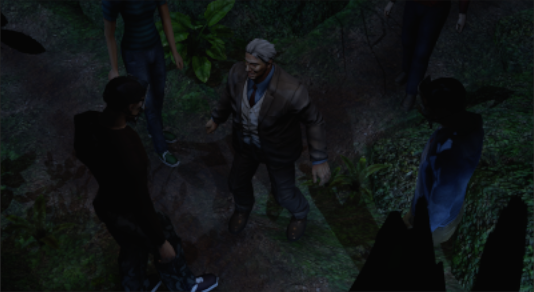
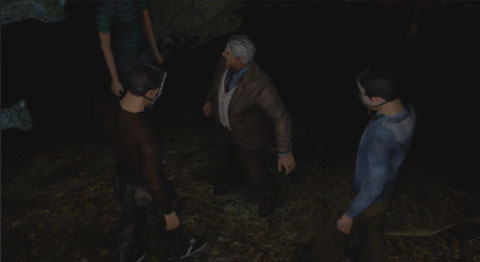
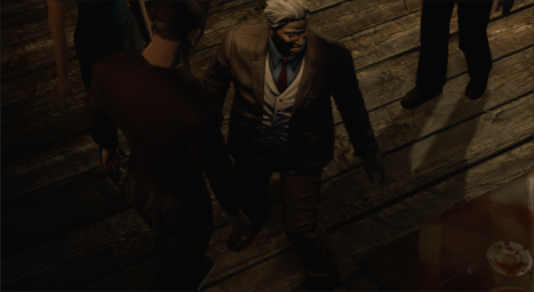
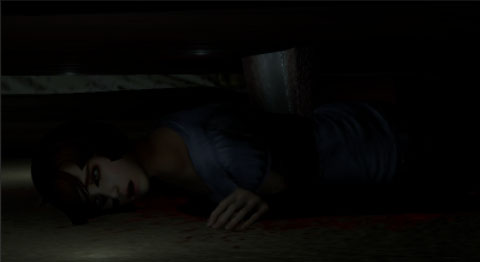
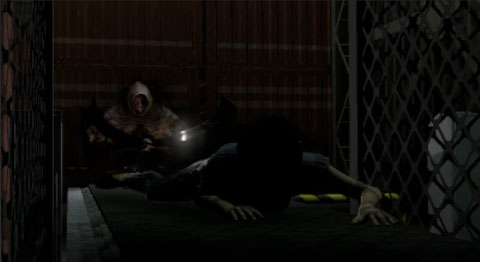
  • If you didn't find Angie in the previous scene and didn't give her the wedding ring, you'll run into Vigo in front of the gate and get a bad ending.

Ending

Pre-established harmony.

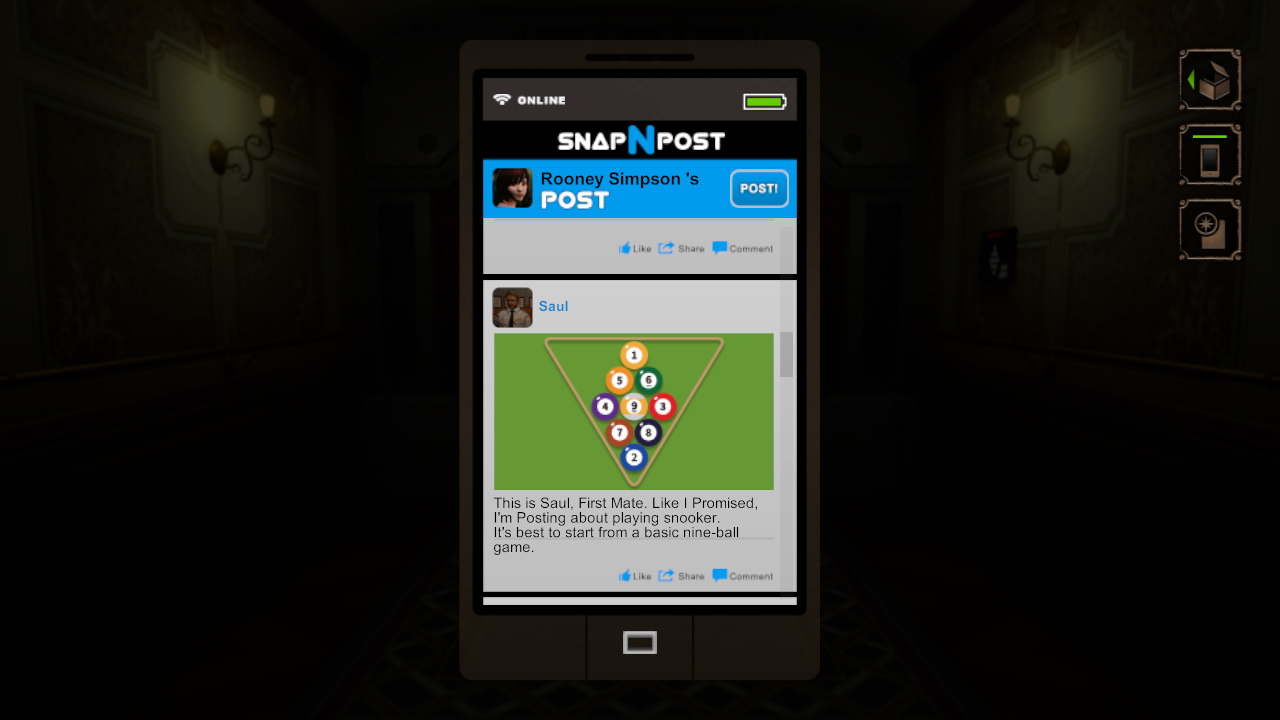
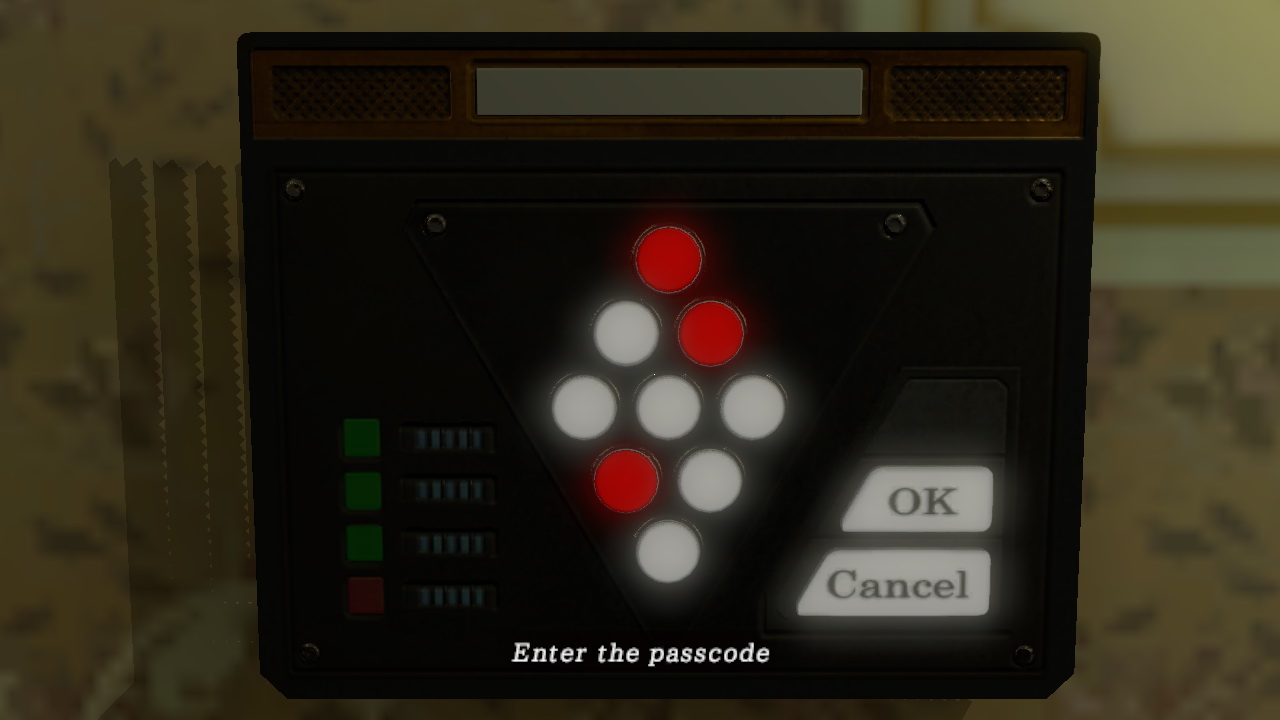
  • To the right of the gate is the panel. You need to enter the right passcode. For the clue check your SNS and find the post from Saul about snooker. Now, you have three billiard balls collected earlier in the game numbered 1, 6 and 7. Compare the picture with the panel and press the right buttons to open the gate.
  • Enter the owner's apartment.
  • Key action: Finding an old family photo
    Check the drawer by the entry door in the room to find an old photo with Jerome's family.
  • Key action: Getting the artificial eye
    Check the unlocked safe in the corner of the room to get the Eye of Kassites.
  • Approach the bookshelf to solve a puzzle. There's a number of similar books standing on the shelf. You need to place the books on the upper shelf in the correct order. To learn how, check Jerome's post on your SNS wall on the smartphone. The right order from left to right would be:

NightCry bookshelf puzzleAmore (love)
Pudicizia (modesty)
Morte (death)
Fama (fame)
Tempo (time)
Eternitia (eternity)

  • After solving the puzzle, the bookshelf will slide to the side revealing a hidden door. Enter the door, cross the passage and enter the door at the end of it.
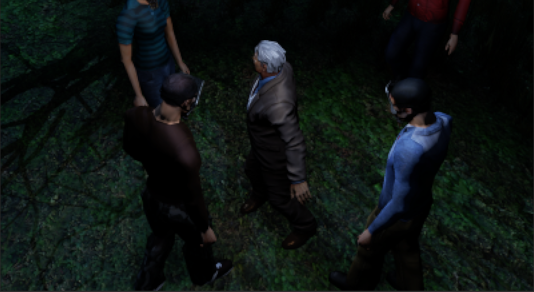
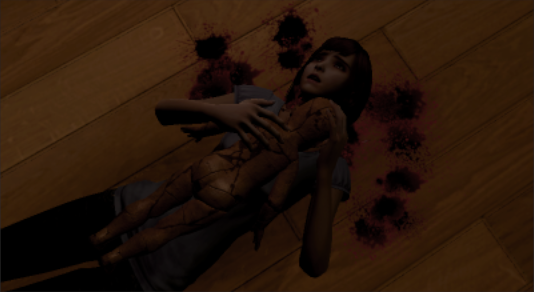
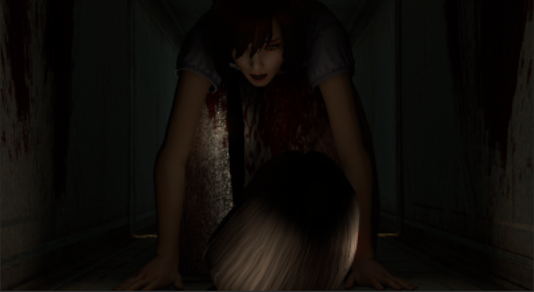
  • If you failed to read Vigo's diary or find the old photo, you'll meet Jerome at this spot and ultimately get another bad ending.

Ending

Trap party.

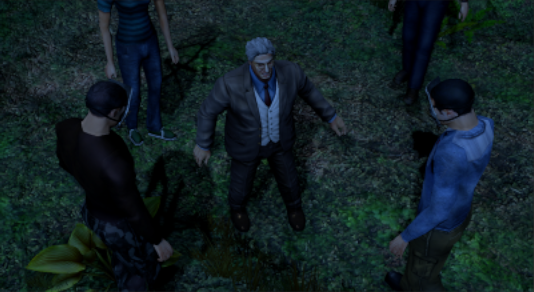
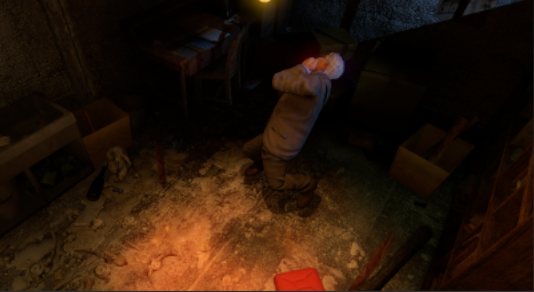
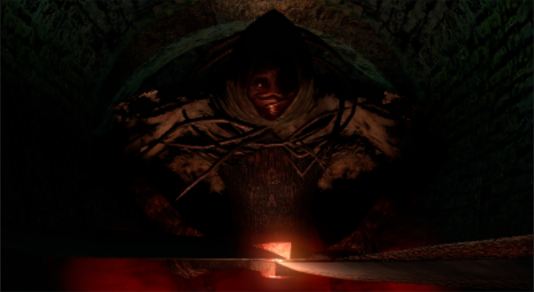
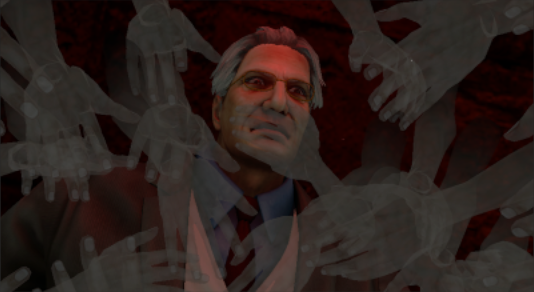
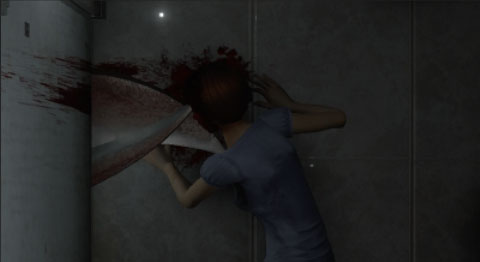
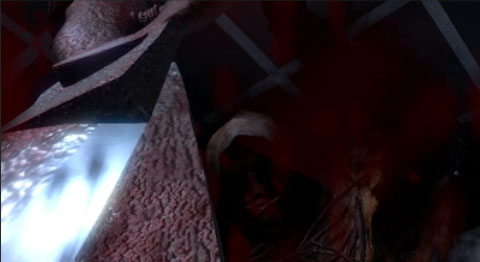
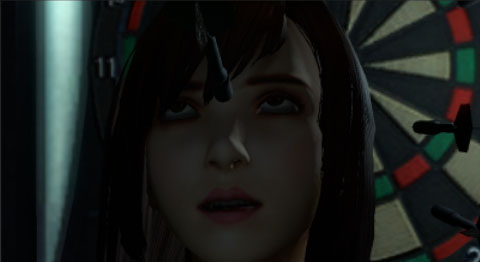
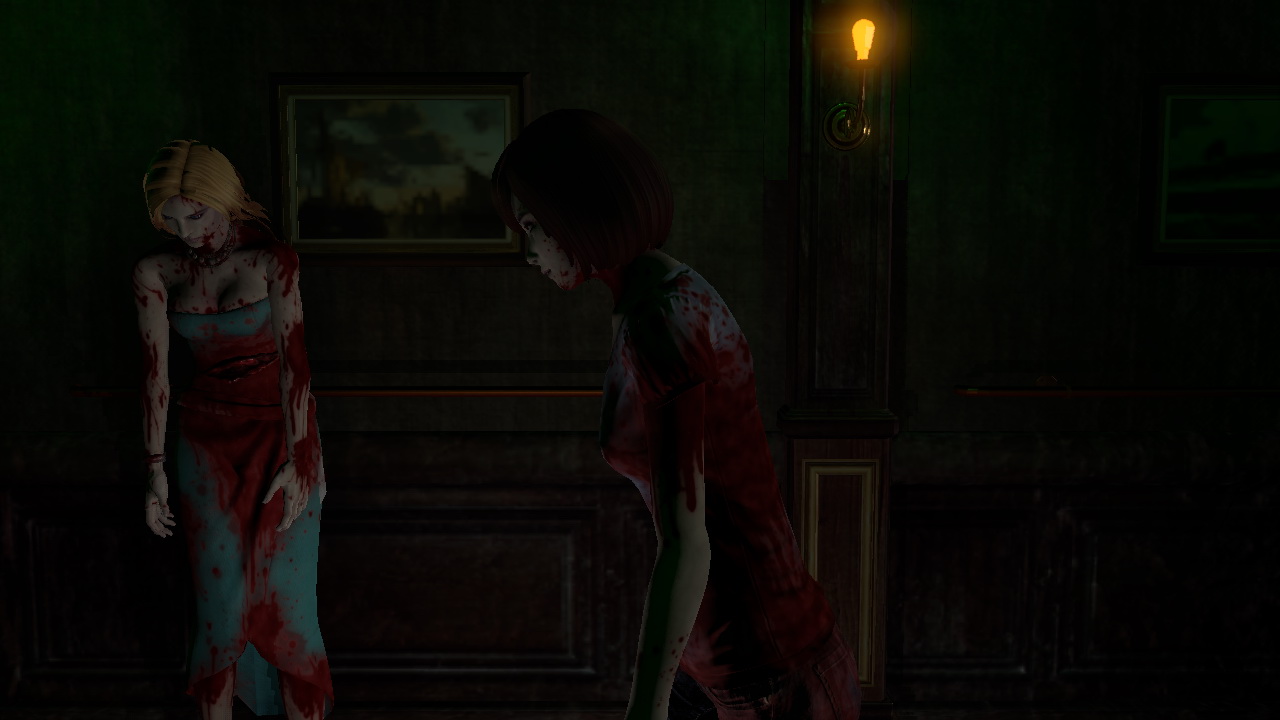
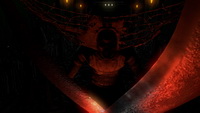
  • Climb down the ladder and enter the final location. You can check the macabre scene, then aproach the stage and encounter Vigo Boradsov – the owner of the ship and the man responsible for all this horror.
  • In the final scene, if you failed to grab the artificial eye from the safe, you have no option, but to stand helplessly and await till the Scissorwalker massacres you and Monica.

Ending

The lone survivor.

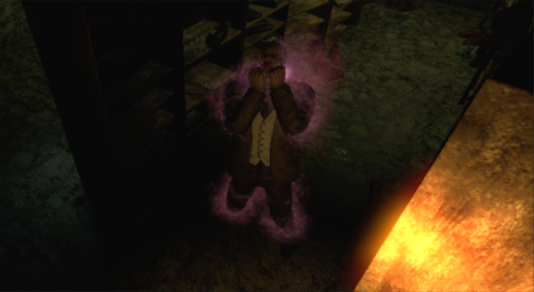
  • If you have the Eye of Kassites, use it on yourself, while the Scissorwalker approaches you and you'll finally achieve the only happy ending in the game.

Ending

Two Survivors.

Congratulation! You've beaten the game.