Walkthrough
BeginningYou start lying on a floor in a concrete chamber. After the protagonist stands up, move through the door into a L-shaped hallway.
|
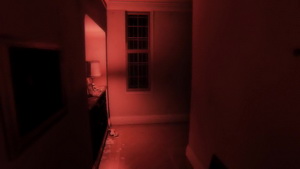
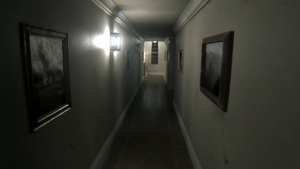 This is the main location of the demo. There are four points of interest in this hallway: a small cabinet with a digital clock to the right at the beginning of the hallway, a cabinet with the phone at the corner, a bathroom just around the corner and the last cabinet with a radio in the foyer before the exit door. Your task is to move through the hallway to the end and exit through the door at the bottom of the stairs, after which you'll re-appear at the beginning of the hallway as if trapped in some sort of a space/time loop. That is what we'll call a "cycle". During each cycle you'll need to accomplish various puzzles to advance to the next cycle.
First Locked Door
|
 Move through the hallway. You can stop by the radio to listen to the story, then proceed through the exit door. Go through the area until you'll bump into a locked exit door. Backtrack past the digital clock around the corner, then return to the stairwell door which should be now open. Notice some banging inside the bathroom as you pass by. Go through the exit door into the next cycle.
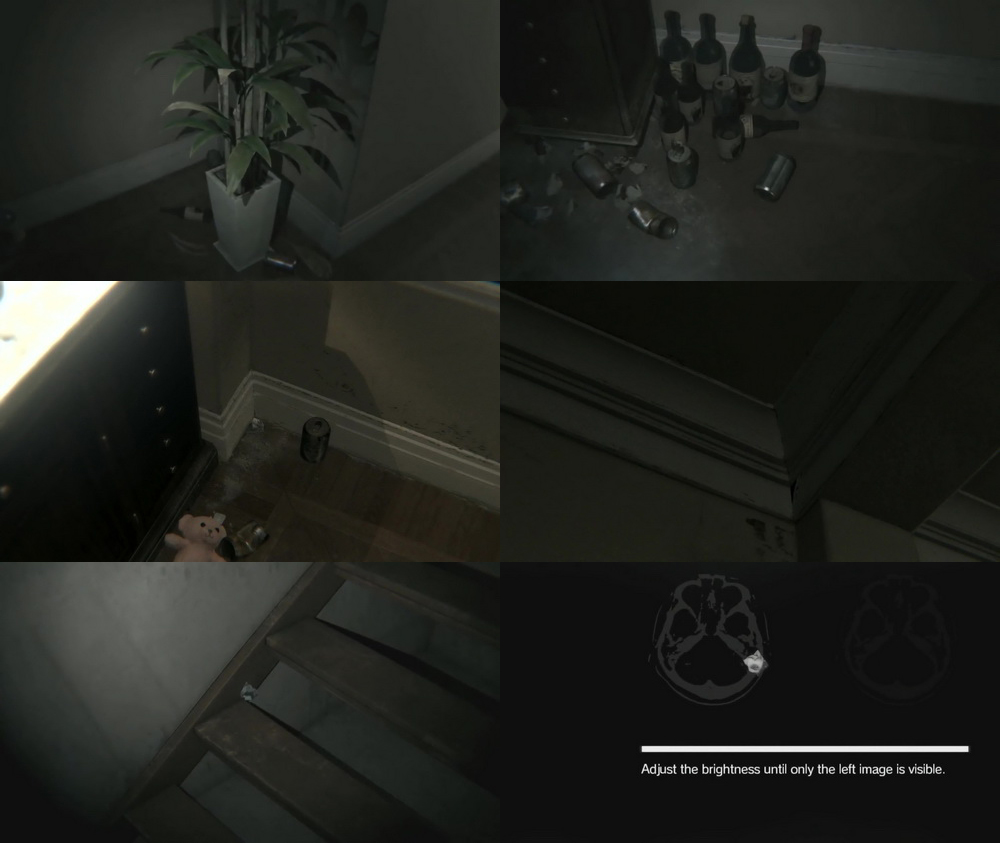
Collecting the Photo Fragments (optional)This puzzle is actually optional. You can do it at any stage of the game during various cycles and it is not required to finish the demo. It may, however, provide some clues for the final puzzle. You need to locate six pieces of a torn photo to complete the photo above the clock cabinet. To collect them, find the fragment and zoom in (R3) until you'll see a phrase on your screen.
By the way, here are the phrases you'll get by collecting the photo fragments:
|
Second Locked Door / Ghost in the Bathroom
|
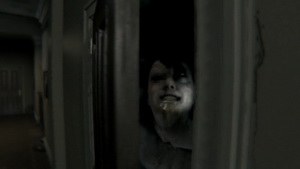 In this cycle the stairwell door will shut as you approach. Try to open it, then turn around to find out that the bathroom door is slightly open releasing some cockroaches. Get close to the opening and stare into the dark (R3) to get a scary image of a ghost, after which the door will slam shut. The stairwell door now opens, so continue through the area.
Ghost in the Hallway
|
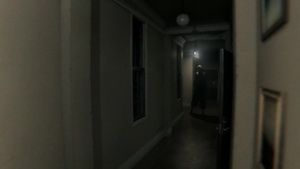 As you move through the hallway, you'll come across a vision of a ghostly figure standing next to the radio cabinet. Continue walking forward and the lights will go out. Just continue throught the exit door after that.
Open Bathroom
|
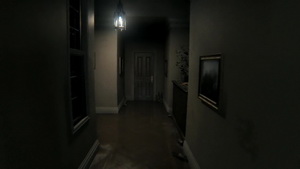
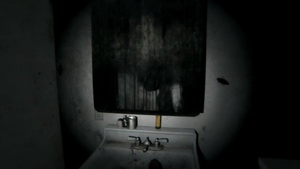 In this cycle the door of the bathroom will open as you walk towards it. Go inside and collect the flashlight on the floor by zooming in. The bathroom door closes trapping you inside. Zoom in at the crying little creature in the bathroom sink triggering some noise from the hallway and door rattling, then look at the scratched mirror above the sink. After some time the noise will stop and the door will open freeing you. Go to the exit door in order to begin a new cycle.
Portrait
|
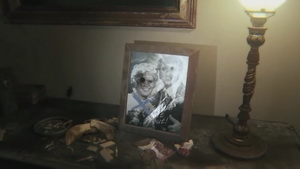 The hallway is now dark. Proceed around the corner and approach the radio cabinet at the far end of the hallway. Look at the portrait of a couple – the message on it says "Gouge it out!" Punch a hole in the photo by pressing X. This will unlock the exit door. Continue to the next cycle.
Notice the message above the exit door: "Forgive me, Lisa. There's a monster inside of me."
The hallway is now dark. Proceed around the corner and approach the radio cabinet at the far end of the hallway. Look at the portrait of a couple – the message on it says "Gouge it out!" Punch a hole in the photo by pressing X. This will unlock the exit door. Continue to the next cycle.
Notice the message above the exit door: "Forgive me, Lisa. There's a monster inside of me."Hanging Fridge / HELLO!
|
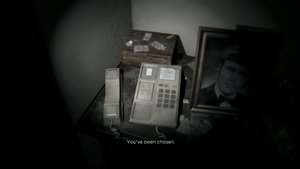
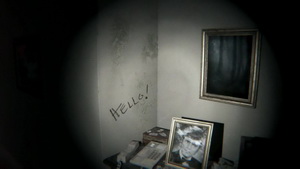 Move through the area – a window will fall down just in front of you in the foyer. Notice a seemingly incomplete message on the left wall of the foyer: "I can hear them calling to me from". Go through the exit and make another loop. The foyer before the exit is now glowing in red and a bloody fride is hanging from above. Continue through the exit door to begin the next loop. The whole hallway is now lit up in red. Approach the phone cabinet to find the word "HELLO!" scratched on the wall next to it. Move back and forth from the telephone to the wall message in the foyer to transfer all the letters from one place to another (alternatively you can just revert your gaze from the wall to collect all the letters in one go) and finish the message: "I can hear them calling to me from HELL". After you do that, continue through the exit door.
Infinite Red Hallways
|
 Pass through the hallway one more time and you'll get into a nightmarish version of the location with deep red illumination and twitching eyeball paintings. You can now move much faster through the area. Run forward and keep looking at the right wall to find a spot with a peep hole. It should be just outside the bathroom. Look into a hole (R3) until the scene is finished. You'll get the message "No turning back now" just above the peep hole. You may go into the open bathroom to hear a message from the creature in the sink, then get to the exit door and start the next cycle.
Glitches
|
 The hallway seems to return to its normal state. You can keep going forward or just stand and after some amount of time you'll start getting display distortions and the game will seemingly crash with a colored screen of death (the color of the screen may be various).
Final Puzzle – Baby Laughter
In the last cycle you need to trigger three baby giggles. First thing you need to do after you step into the corridor is to wait until the clock turns to 00:00 (in the meantime you can either stand still or freely walk around the place). Once the bell begins ringing, you can trigger either of the two baby laughs below at ANY time and in ANY order. Baby laugh #1 Baby laugh #2 Baby laugh #3 |
| Special thanks to Darkside_Hazuki |