Bosses
On this page, you will find all boss strategies for Silent Hill 2 Remake (2024).
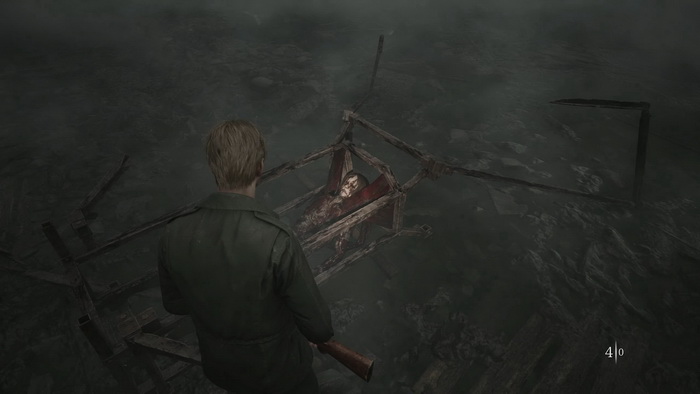
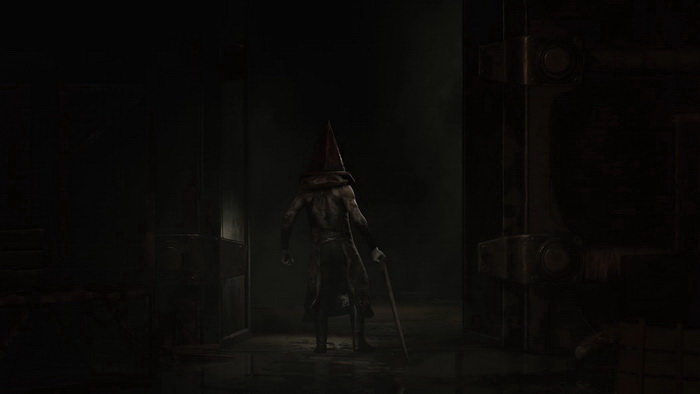
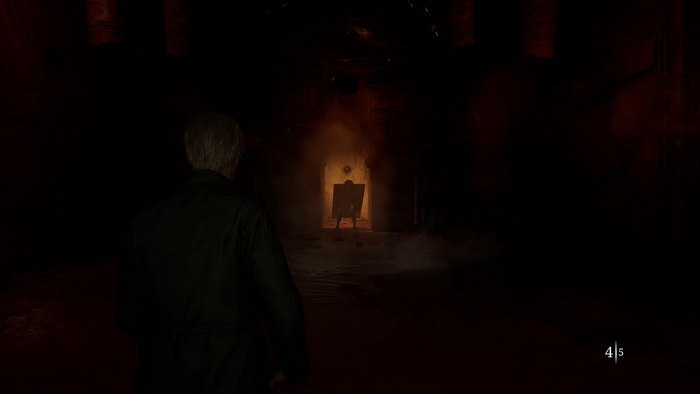
Pyramid Head (Blue Creek Apartments)
Now, it is time to fight this menacing creature you previously met. Pyramid Head cannot be defeated, and this battle is timed. It will last 3 minutes, even if you don't attack the monster (half of it for the first phase and half for the second phase when he becomes faster and more aggressive). Your choice will also influence the ending – read more in the Endings section.
Note: The boss fight arenas will also have supplies - health items and ammo - based on what you have in your inventory before the fight. The game will reward you with more if you are low on supplies, and may give you none if you have enough.
So, you can choose one of the two options:
- Actively attack the boss, making the fight end faster.
- Spend the whole 3 minutes not attacking the boss and evading his attacks.
If you fight Pyramid Head, the handgun is your best choice, allowing you to keep your distance, as his melee attacks are pretty strong. Remember that after 1 minute, the boss will become faster and more aggressive, destroying the barricades around the arena that provide you some cover. Stay alert, dodge his attacks, make a few shots from a distance at a time and repeat until the battle ends.
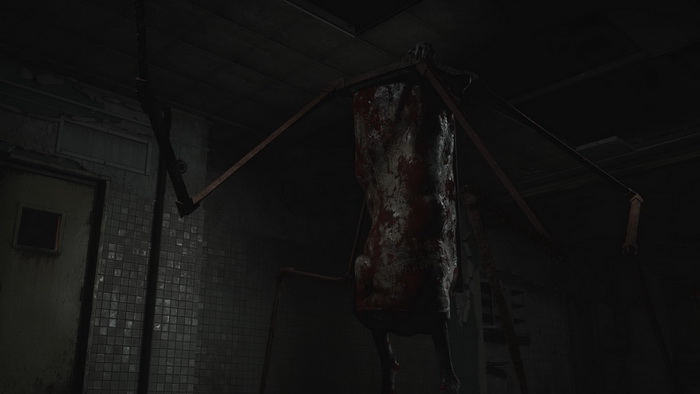
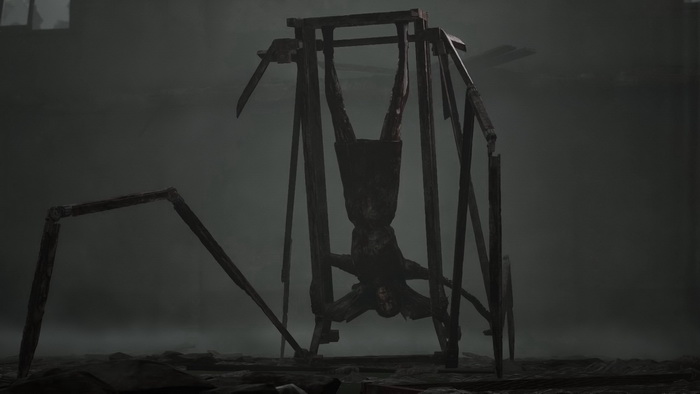
Flesh Lip (Brookhaven Hospital)
Phase One
Flesh Lip stays hidden above the ceiling during the first phase, breaking tiles to surprise James. The metallic cage around its body protects it from the bullets, so it's no use wasting them like that. Instead, move around the room, avoiding the enemy's attacks and aiming for the arm it uses to hang from the ceiling when it appears. When it drops down, staying motionless briefly allows you to approach the monster and use your steel pipe to attack the cage. You can also shoot the creature from a distance, but you must do it from the sides that are not protected by the metal plate. You can also aim for the creature's legs when it is hanging. Eventually, the cage will get broken, and the monster will transform into its following form.
Phase Two
In the second phase, the monster stays on the ground, moving with great speed around the room and attacking with its mechanical arms in wide-reaching multi-hit or spinning attacks, so be sure to dodge a lot. It will occasionally use a sound wave attack to stun James briefly and retract to the ceiling for short periods. The best tactic here is to keep the distance, dodge its attacks, and use firearms to damage the creature. Avoid shooting in its back, protected by a metal plate. The shotgun will serve you well in this battle as it should take 10–12 shotgun blasts to defeat this foe on standard difficulty. Remember to collect supplies around the room to assist you if needed, as you won't be able to grab them after this fight.
Abstract Daddy (Labyrinth)
Phase One
After the battle commences, turn around and create some safe distance between you and the monster by navigating the looped maze. Abstract Daddy has only one relatively easy-to-dodge attack: it lunges forward to grab you. It can also emit a sound wave that temporarily stuns James. You are advised to stay away from the monster and use your rifle to shoot at it from a distance. Once you inflict enough damage, Abstract Daddy will disappear.
Finding TVs
Continue along the maze until you spot running Angela. You can grab some Rifle Rounds from where she started, then follow her through a door. Run through the apartment until you see Angela again – she will hide in a small closet that you can inspect, but it's a dead end. Proceed through the door to the left. In the next room, Handgun Ammo is on a table, and Shotgun Shells is on a dresser. Proceed until you find a TV emitting static.
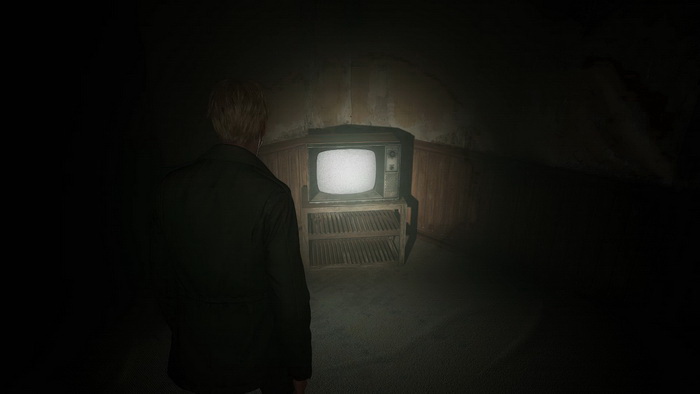
Smash it to summon Abstract Daddy again. Quickly run to the left and escape the room through a wall gap. Proceed through the maze's hallways, dodge the monster again in one of them and squeeze into the next area. Eventually, you will come across the second TV. Smash it, too, to open a new path. Navigate through the collapsing labyrinth to find the third and final TV at the end. Destroy it and head to the final arena. You can grab Rifle Rounds next to a machine on your way there. Pass through a giant fan to start another fight.
Phase Two
You can begin with firing some rifle shots from a distance, but when it gets nearer, you can switch to a shotgun, which will be more suitable here. The boss is relatively slow, so it is not too difficult to dodge its attack by moving around it and making one or two shotgun blasts between its plunges. Repeat the process until the monster is down.
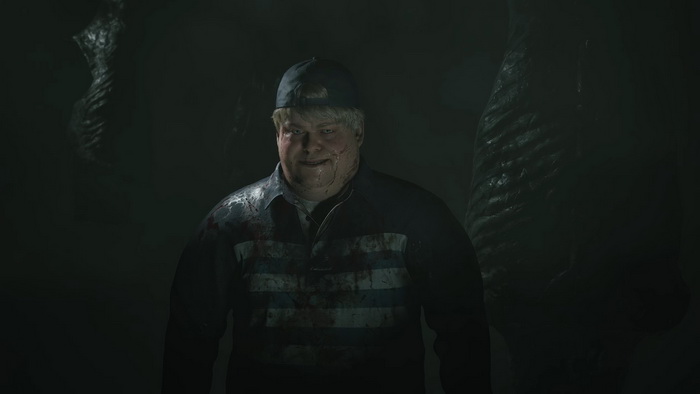
Eddie (Labyrinth)
Phase One
Eddie moves fast around the room during the first phase and uses the carcasses of meat to conceal himself after every shot. If you get close to him, he will also hit you with a melee attack. Because of the limited visibility in the room, sound is the key here. A good strategy would be staying away from, listening to Eddie's footsteps to pinpoint his position (headphones help a lot) and using a long-distance firearm, a rifle or a handgun to shoot at him from a long distance. Since Eddie is using a revolver, you will also be able to know when he's going to fire as he's cocking the hammer and know when to dodge or use a carcass for protection.
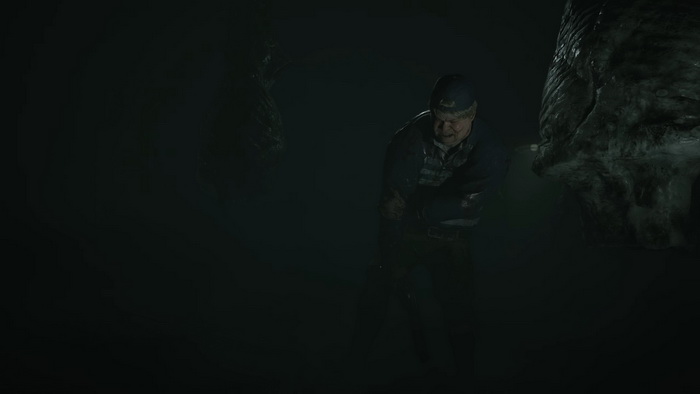
Phase Two
Once Eddie is damaged, he will shoot the pipes, filling the room with fog. Listening carefully becomes even more crucial during this phase. Switch to a shotgun, stay in place and keep listening until Eddie comes at you, trying to hit you with a melee attack. Make your shot at him as he's trying to land his attack. From this point, you can chase after him, keeping a shorter distance and blasting him with a shotgun. If you lose track of him, listen again to find his position.
Phase Three
During the last phase, Eddie activates the conveyor belt with the meat carcasses. He will be significantly slower now. You can use one of the previous strategies: wait for his attack and fire at him from a distance, try to chase him down and keep shooting from a shotgun, or even use a melee attack. Remember to listen to his attacks for successful dodges and use the carcasses for additional protection.
Two Pyramid Heads (Lakeview Hotel)
It is time to face James' biggest enemy, but now there are two of them. This fight is relatively simple and predictable, but it will take time to finish the opponents. Pyramid Heads' primary attack is thrusting with a spear. If you get too close to them, they will try to hit you with a spear, and they can also throw their spear from a distance, so you will have to watch out and dodge them. Note that the two Pyramid Heads share the same health, so it doesn't matter which one you hit.
If you wish to keep yourself safe, you should keep your distance and use your firearms for this battle if you have enough ammo to spare (note that this is not the final boss battle, and you will need ammo later). Make 1-2 shots with the rifle or the shotgun or 3-4 shots with the pistol, dodge Pyramid Heads' attacks and change your position. Reload in a timely manner while strafing and use your health supplies as necessary (there are more supplies in the corners of the room if needed). It should take around 22-24 rifle shots and more than 60 pistol shots to finish the battle on standard difficulty. Note that the rifle is slow to fire and reload, and the arena is small, so shotgun and handgun work better here.
Alternatively, you can use your steel pipe to conserve ammo, but that will require you to time your dodge carefully. Let the enemy approach, dodge their attack and attack from behind by landing one or two blows with the pipe. It will take you only around 22 hits on standard difficulty. It will also be a much quicker fight than using your firearms, albeit a bit riskier.
Mary (Lakeview Hotel)
Phase One
During the first phase, Mary stays hovering above the ground. Occasionally, she transforms into a swarm of moths and reappears elsewhere in the arena. The boss's primary attack is using her tentacle when James is within her reach. She can also grab James and strangle him with it, so you will have to stay away and dodge. Mary also sends swarms of moths from a distance, which can be quickly dissipated by hitting the swarm with the pipe or shooting at them. Mary can also use a sound attack to stun James briefly.
The rifle seems to be the perfect weapon in this phase, as you have enough room to take the boss down at a distance and fully utilize the weapon's long-range damaging power. Additional supplies are around the room if you need them. After around 10 rifle or shotgun shots at standard difficulty, Mary will change her form and drop James underground.

Phase Two
During the second phase, you must observe the sparks from above to see where Mary is moving and steer clear when she drops down from the ceiling. You will also have to avoid the usual moth swarms. Collect supplies lining the walls as needed and move around the corridors until you find Mary hanging from the ceiling and exposed to your attacks. Use the shotgun or the handgun to finish this phase. It should take you around 6-8 shotgun blasts at standard difficulty.
Phase Three
In the final phase, Mary stays on the ground, trying to approach James, attacking with her legs quickly. She will continue to use her transforming into a swarm ability when you have to notice where she will reappear. She will also lunge towards James, knocking him down if you don't dodge this attack.
The rifle works well here from a distance, like in the first phase, although the shotgun might serve you better from a closer range. From time to time, Mary will roar, stunning James briefly. After the third roar, you know you are close to defeating the boss. After Mary is down, approach her to deliver the final blow with a weapon of your choice and enjoy your ending.