Soundtrack
All music for the Silent Hill 2 remake was composed by the series returning composer Akira Yamaoka.
"I have reworked all the tracks. There are segments and bits and pieces of the original tracks that you can hear, but all of the tracks have been reworked from the ground up. I understand that the soundtrack is very much beloved, but ultimately I composed over nine hours worth of music and I'm still wondering how in the world we are going to fit all of that into a soundtrack.
I had to be very creative because I had the passion to make something great. But now, unfortunately, I can't quite remember that part of me as vividly. I can't replicate the same circumstances I was in 25 years ago. But I still want to deliver something that is fresh for both existing fans and newcomers."
Official album was released on November 20, 2024 with a physical release in Japan only.
Contents
Official Releases
- Silent Hill 2 Soundtrack (Deluxe Edition)
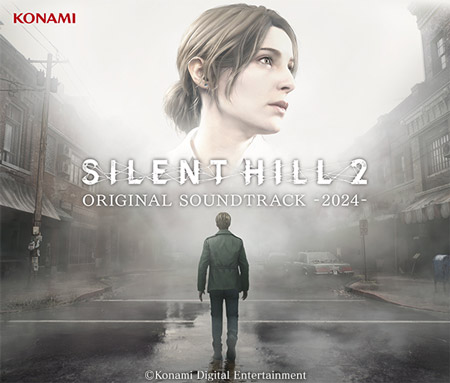
- Silent Hill 2 Original Soundtrack -2024-
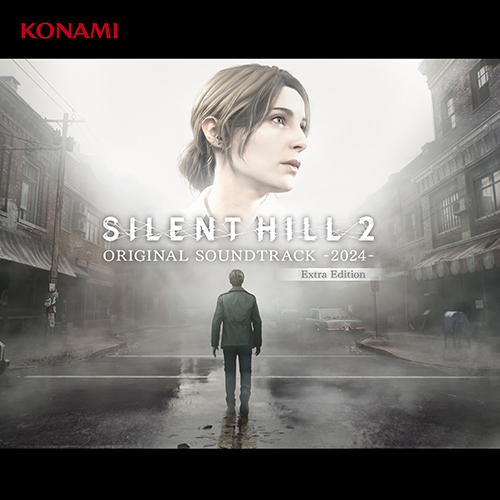
- Silent Hill 2 Original Soundtrack -2024- Extra Edition
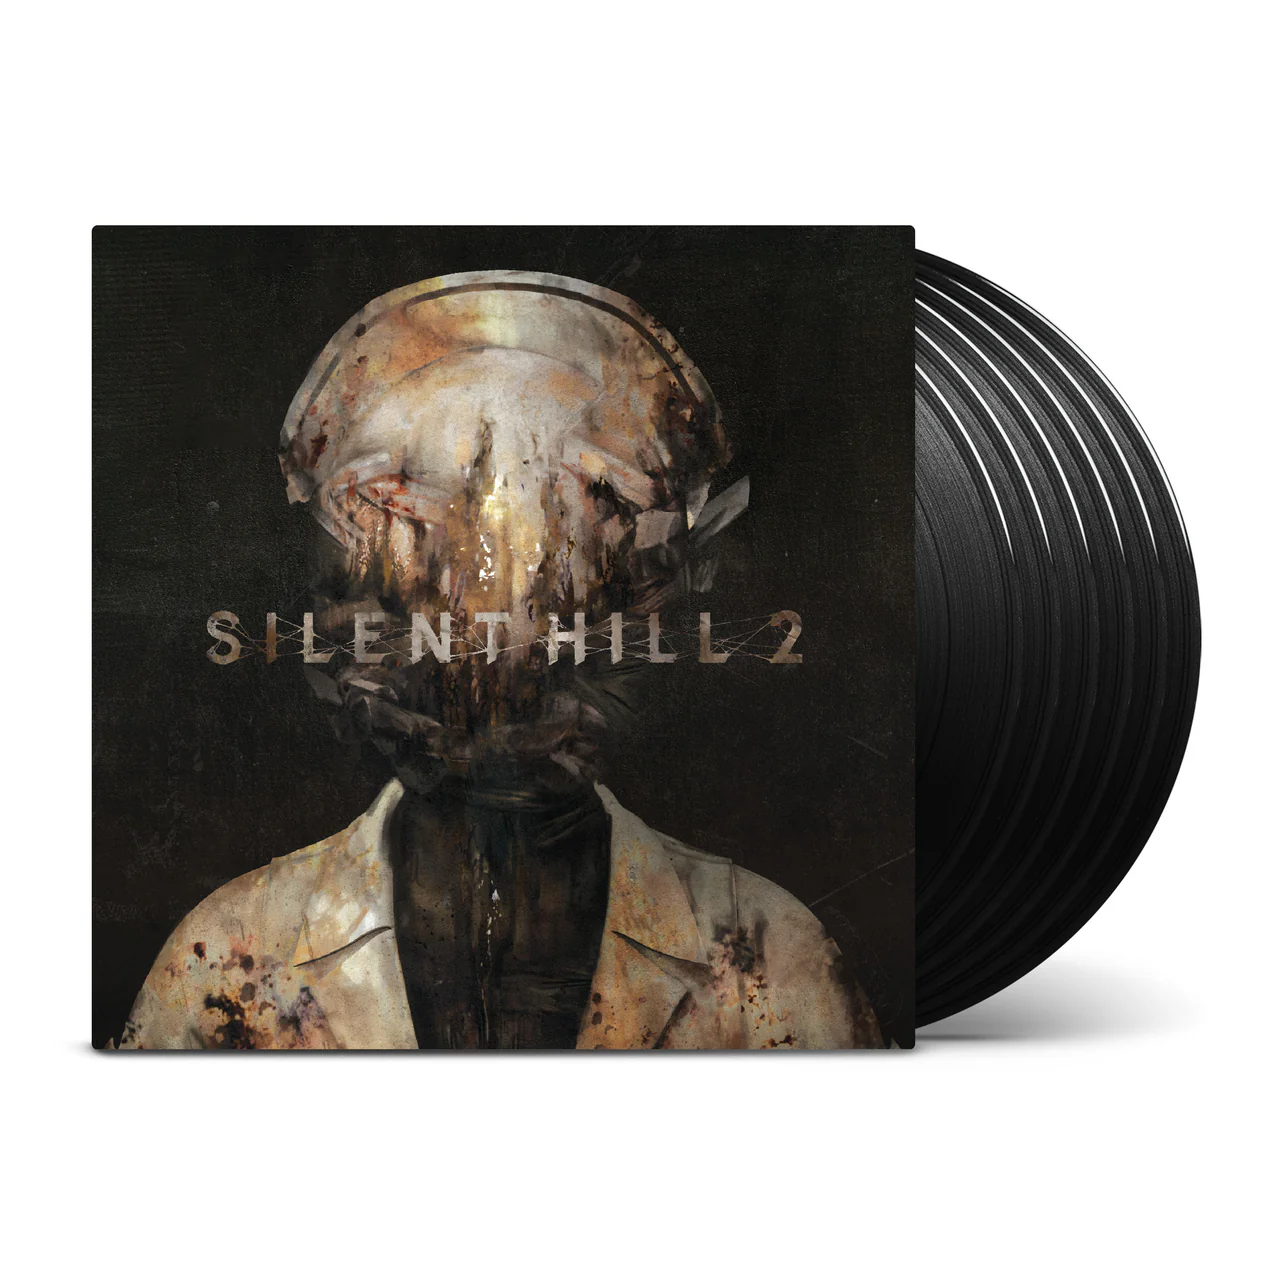
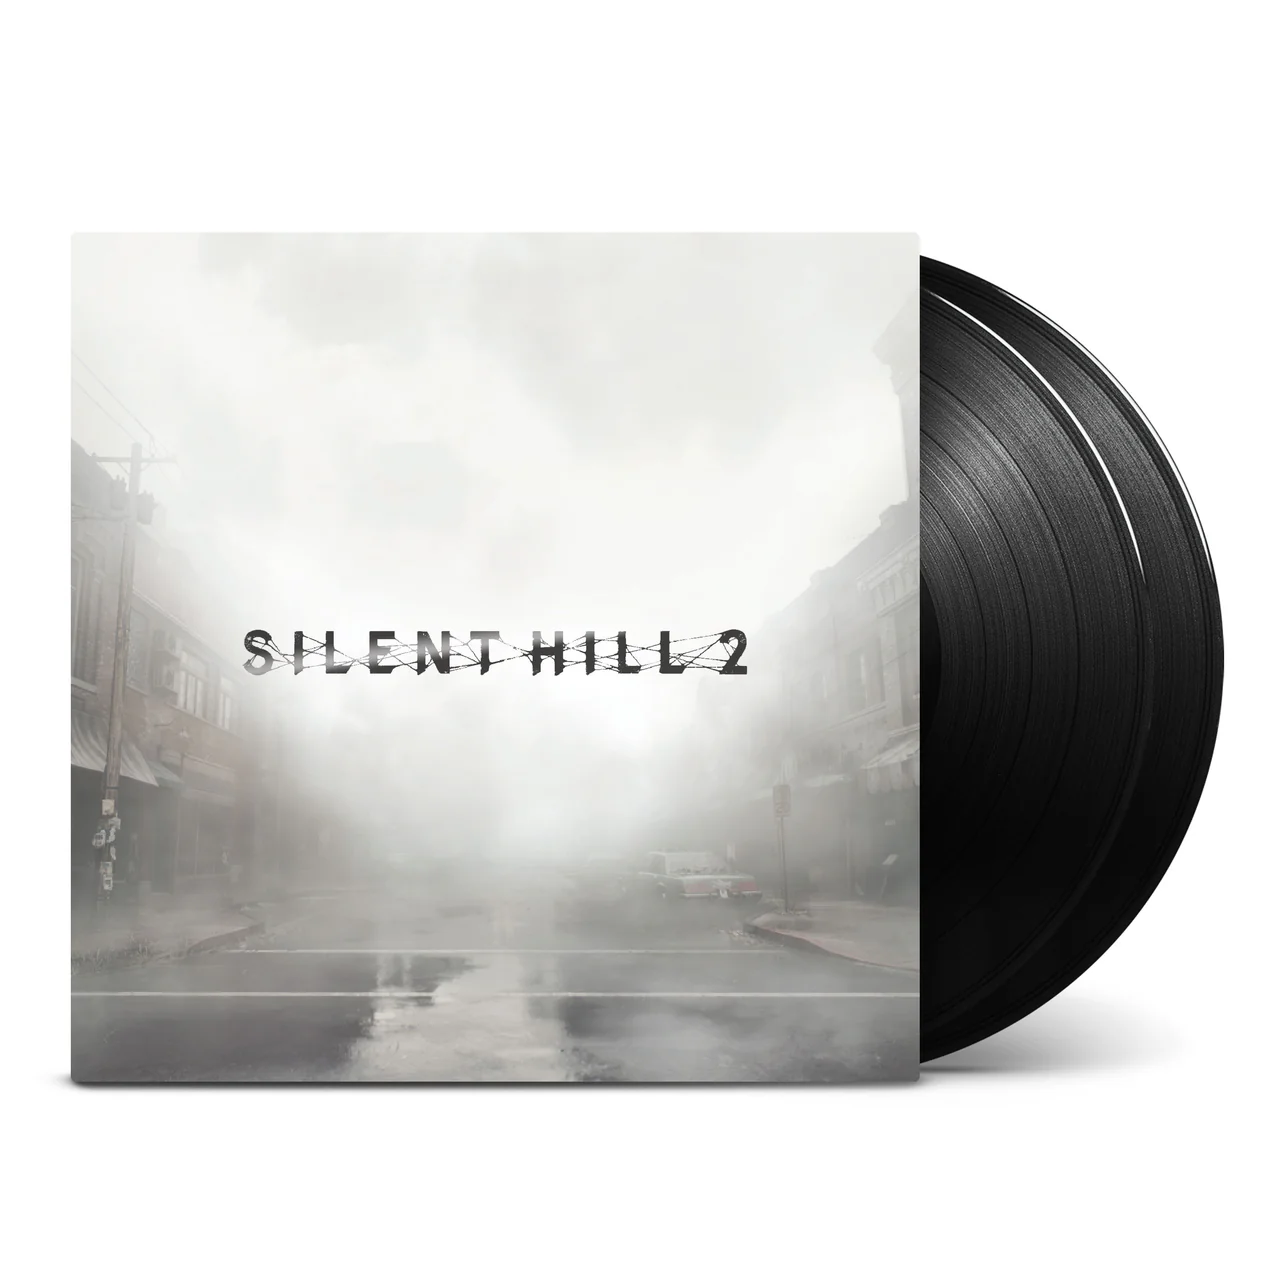
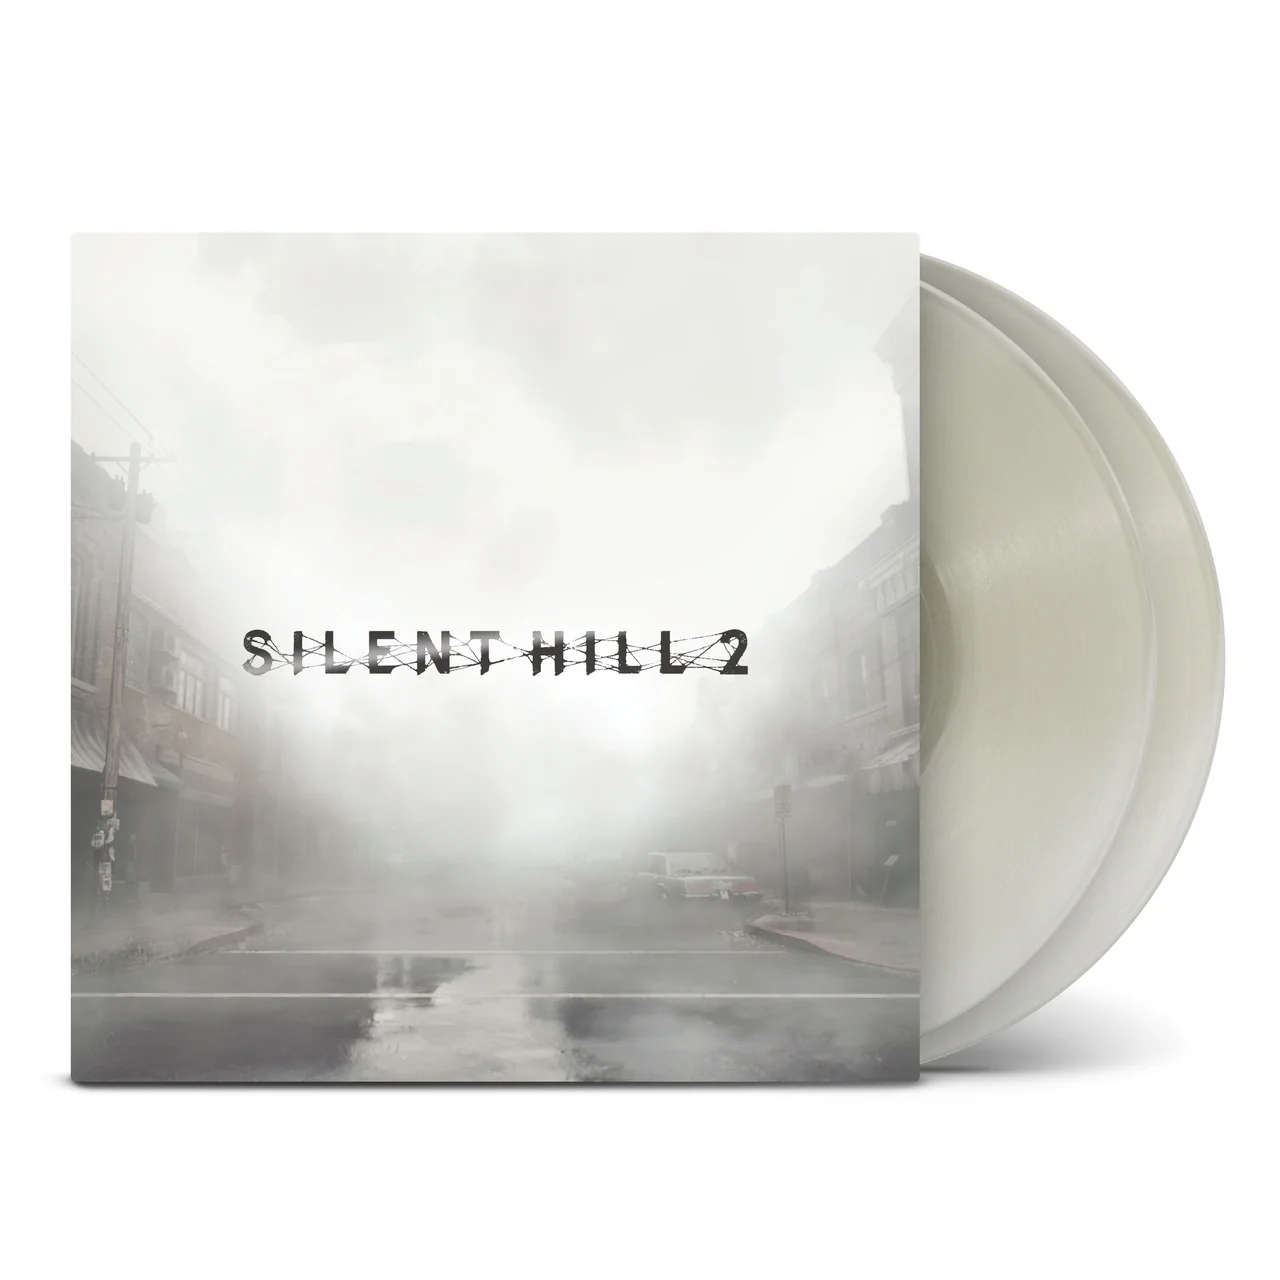
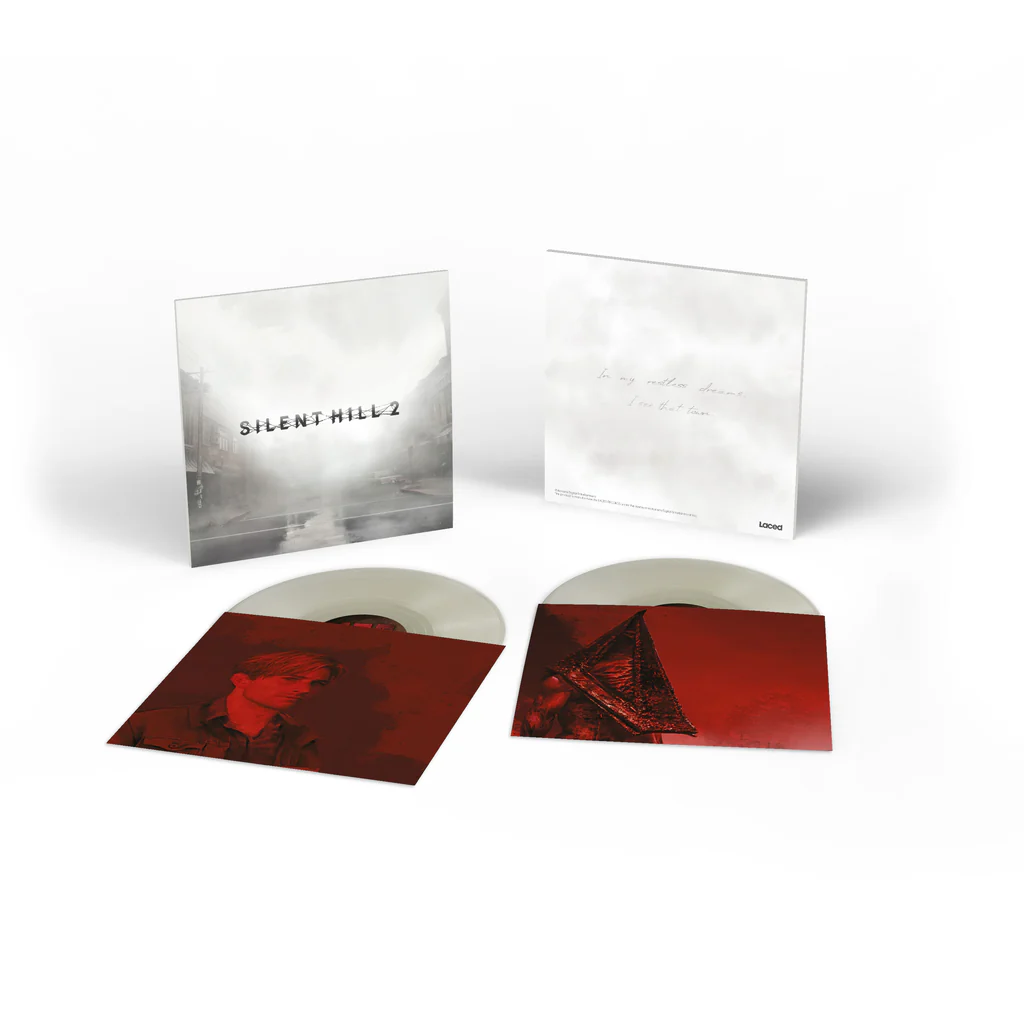
- Silent Hill 2 (Deluxe X6LP Boxset)
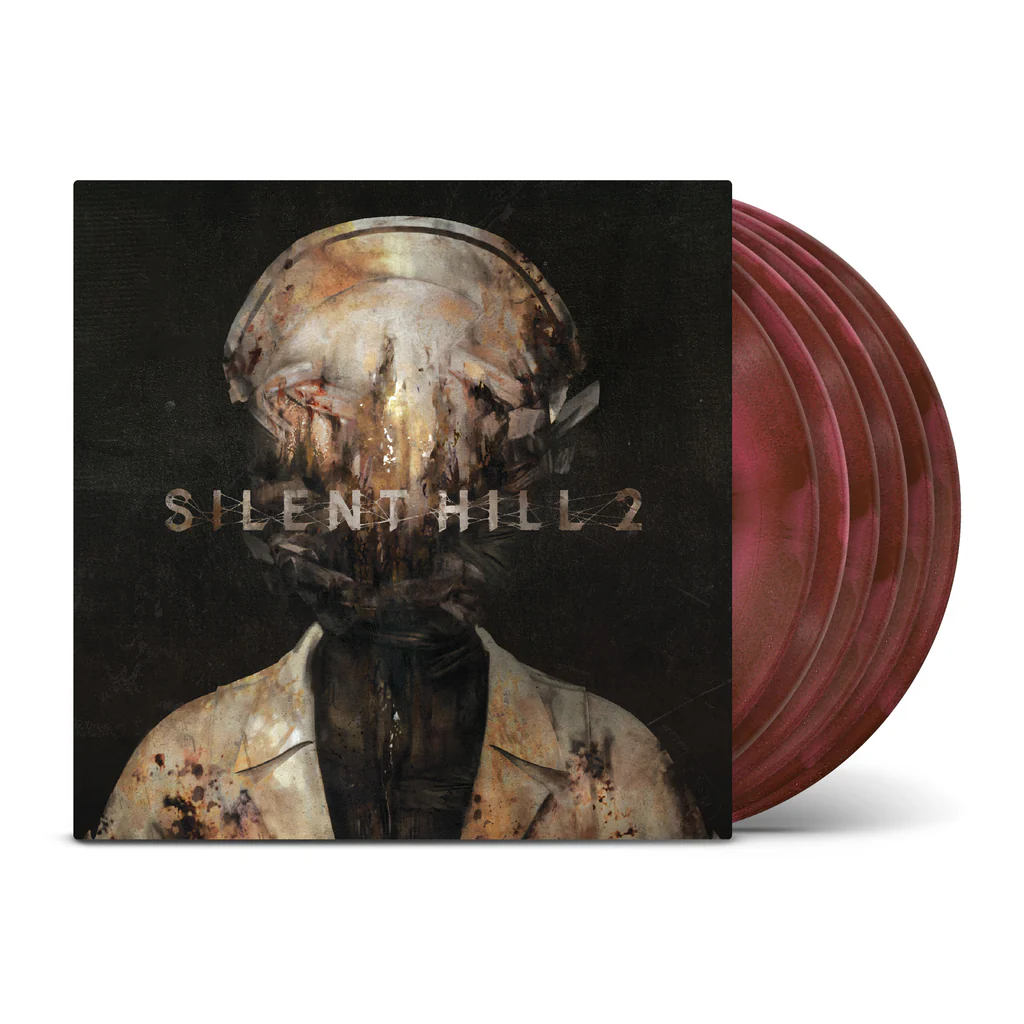
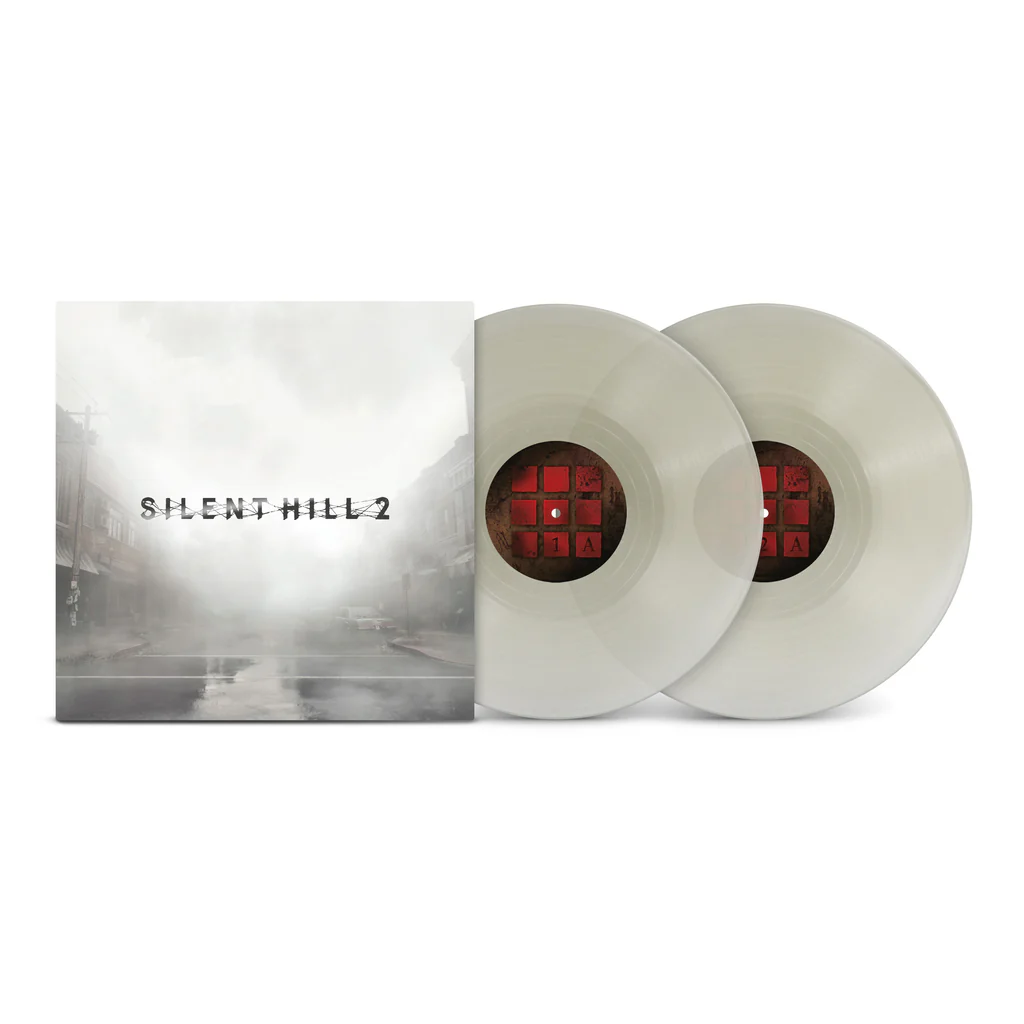
- Silent Hill 2 (Deluxe Double Vinyl)
Complete Soundtracks
- Silent Hill 2: The Complete In-Game Soundtrack (Wwise Edition)
- Silent Hill 2 Remake Ultimate In-Game Soundtrack
Silent Hill 2 Soundtrack (Deluxe Edition)Label: Konami Digital Entertainment This mini soundtrack is bundled with the Digital Edition (PS5/PC Steam). |
| 01 | White Noise (Actual Noise) | |
| 02 | What Lurks In The Forest | |
| 03 | Promise of the Forgotten | |
| 04 | Laura Plays the Piano (2024) | |
| 05 | Beneath the Null Moon | |
| 06 | Shadows Of The Lover's Tree | |
| 07 | Echoes of Silence | |
| 08 | True (2024) | |
| 09 | Twin Pyramid | |
| 10 | Shadows of My Past |
Silent Hill 2 Original Soundtrack -2024- |
 Label: Konamistyle.jp |
Original soundtrack album.
Store Page JP¥4,950
| Disc 1 | ||
| 01 | Theme Of Laura II | |
| 02 | White Noise (Actual Noise) | |
| 03 | What Lurks In The Forest | |
| 04 | The Girl Behind The Gate | |
| 05 | Ordinary Vanity's Solitude | |
| 06 | Arcane Disconsolation | |
| 07 | Wistful Refrain | |
| 08 | Promise of the Forgotten | |
| 09 | Beneath the Null Moon | |
| 10 | Lament of Heavens Night | |
| 11 | Shadows Of The Lover's Tree | |
| 12 | Veil Of Forgotten Dreams | |
| 13 | Angel’s Thanatos & Celestial Reaper | |
| 14 | Phantasmagoria | |
| 15 | The Cry Of The Nurse | |
| 16 | Shadows of My Past | |
| 17 | The Day Of Night Shadows | |
| 18 | Magdalene's Elusive Lament | |
| 19 | Lady Of The Door Finding Key | |
| 20 | Echoes of Silence | |
| 21 | Cryptic Echoes | |
| 22 | Nocturnal Reverie | |
| 23 | The Infinite Heartbeat | |
| 24 | Ethereal Dichotomy | |
| 25 | Madcap Descent | |
| 26 | Desolate Heart | |
| 27 | Arcane Confinement | |
| 28 | Cinderella Music Box | |
| 29 | Eldritch Enchantment | |
| 30 | Theme Of Laura (Repetition) | |
| 31 | Overdose Delusion (Existence & Truth) | |
Disc 2 |
||
| 01 | Anam Cara | |
| 02 | Eddie's Sweet Sorrow | |
| 03 | Ephemeral Despondence | |
| 04 | After Daddy | |
| 05 | Desolate Reverberations | |
| 06 | The Moment Our Paths Entwined | |
| 07 | Manic Delirium | |
| 08 | Savage Requiem | |
| 09 | Transcendental Bonds | |
| 10 | Transitory Melancholy | |
| 11 | Obfuscate | |
| 12 | Lake Of Enchantment | |
| 13 | Savage Crusade | |
| 14 | Abyssal Cell | |
| 15 | Nocturnal Epiphany | |
| 16 | Anathema Of Temporal Veils | |
| 17 | Abstract Daddy Appear | |
| 18 | Twin Pyramid | |
| 19 | Unhinged Betrayal | |
| 20 | Chthonic Symphony | |
| 21 | The Enchanted Abyss | |
| 22 | The Enchanted Abyss Part. II | |
| 23 | Delirium's Embrace | |
| 24 | Serendipity | |
| 25 | The Reverse Will (Unseen Paths) | |
| 26 | Surreptitious Whispers | |
| 27 | Ontological Quandary | |
| 28 | Socratic Ignorance | |
| 29 | Ephemeral Solipsism | |
| 30 | Ethereal Alleyways | |
| 31 | Chimeric Obfuscation | |
| 32 | Serpentine Shadows | |
| 33 | Promise (Pragma Version) | |
Disc 3 |
||
| 01 | Love Psalm Of Eternal Devotion | |
| 02 | Laura Plays the Piano (2024) | |
| 03 | Umbra Veil | |
| 04 | Esoteric Woe | |
| 05 | Tenebrous Anguish | |
| 06 | Metaphysical Inquiry | |
| 07 | Sepulchral Solitude | |
| 08 | Enigmatic Despondency | |
| 09 | Colossal Despair | |
| 10 | Veiled Melancholia | |
| 11 | True (2024) | |
| 12 | James Find Eddie In Prison | |
| 13 | Unhinged Realms | |
| 14 | The Haunting Mirage | |
| 15 | Nocturnal Mirage | |
| 16 | Days Gone By | |
| 17 | Eclipsed Affliction | |
| 18 | Abstract Torment | |
| 19 | Veiled Perdition | |
| 20 | Ethereal Melancholia | |
| 21 | Glimmering Void | |
| 22 | Murmurs In The Gloom | |
| 23 | Inscrutable Lamentation | |
| 24 | Ineffable Lament | |
| 25 | The Monolithic Doors Start To Awaken | |
| 26 | Betrayal's Reverie | |
| 27 | Tenebrous Enigma | |
| 28 | Tears Of Magdalene | |
| 29 | Theme Of Laura (Laura’s Emotions) | |
SILENT HILL 2 ORIGINAL SOUNDTRACK -2024- |
 Label: Konami Digital Entertainment |
This comprehensive digital edition collects tracks that couldn't fit into the CD collection.
| Part 1 | ||
| 01 | Fading Light | |
| 02 | Eclipsed Reveries | |
| 03 | Transcendental Mournings | |
| 04 | Solitude's Elegy | |
| 05 | Shadows Of Infinity | |
| 06 | Ephemeral Nihilism | |
| 07 | Chimerical Paradoxes | |
| 08 | Celestial Dissonance | |
| 09 | Enigmatic Dolor | |
| 10 | Ephemeral Transcendence | |
| 11 | Infinite Desolation | |
| 12 | Lament Of the Transient Soul | |
| 13 | Within Vanished Time | |
| 14 | Eclipsed Synesthesia | |
| 15 | Cognitive Dissonance | |
| 16 | Veiled Despondence | |
| 17 | Fading Epitaphs | |
| 18 | Tenebrous Reveries | |
| 19 | Perpetual Sorrow | |
| 20 | Ephemeral Nightfall | |
| 21 | Forsaken Elegy | |
| 22 | Nocturnal Reverberations | |
| 23 | Abyssal Reverence | |
| 24 | Ephemeral Mourning | |
| 25 | Echoes Of Unending Grief | |
| 26 | Ethereal Desolation | |
| 27 | Spectral Disillusionment | |
| 28 | Obscured Dirge | |
| 29 | Subliminal Dirges | |
| 30 | Mystic Terror | |
| 31 | Cryptic Alchemy | |
| 32 | Silent Agony | |
| 33 | Infernal Despair | |
Part 2 |
||
| 01 | Dialectical Dilemma | |
| 02 | Celestial Luminescence | |
| 03 | Tenebrous | |
| 04 | Absurdist Reflection | |
| 05 | Dissonant Horizons | |
| 06 | Fractured Sanity | |
| 07 | Echoes Of Existential Dread | |
| 08 | Captivity II | |
| 09 | Immutable Despair | |
| 10 | Ethereal Incarceration | |
| 11 | Abyss Of Grief | |
| 12 | Cyclopean Woe | |
| 13 | Epistemic Abyss | |
| 14 | Ethereal Visions | |
| 15 | Sotto Voce In The Twilight | |
| 16 | Sombre Nexus | |
| 17 | Wistful Shadows | |
| 18 | Bedlam Reverberations | |
| 19 | Schizoid | |
| 20 | Psychosis Bound | |
| 21 | Esoteric Vault | |
| 22 | Fading Echoes Of Despair | |
| 23 | Fading Embrace | |
| 24 | Ephemeral Resonance | |
| 25 | Sorrowful Serenade | |
| 26 | Veil Of Sorrow | |
| 27 | Occult Lamentations | |
| 28 | Ruthless Confinement | |
| 29 | Shattered Affection | |
| 30 | Elegy of the Abandoned | |
Part 3 |
||
| 01 | Eclipsed Anhedonia | |
| 02 | Sovereignty Of The Subconscious | |
| 03 | Waning Light Of Hope | |
| 04 | Eclipsed Lamentation | |
| 05 | Veiled Annihilation | |
| 06 | Raving Silhouettes | |
| 07 | Berserk Phantoms | |
| 08 | Pandemonium's Grip | |
| 09 | Captivity I | |
| 10 | Tenebrous Seclusion | |
| 11 | Lunacy Unleashed | |
| 12 | Melancholy's Dirge | |
| 13 | Cacophony Of Infinite Regret | |
| 14 | Temporal Disarray | |
| 15 | Phantasmagoric Introspection | |
| 16 | Lucid Aberration | |
| 17 | Desolate Reveries | |
| 18 | Desolation's Cry | |
| 19 | Arcane Despondency | |
| 20 | Esoteric Suffering | |
| 21 | The Duality Of Love & Loss | |
| 22 | Wistful Longing | |
| 23 | Occult Despondence | |
| 24 | Brutal Lament | |
| 25 | Eclipsed By Heartache | |
| 26 | Twisted Paranoia | |
| 27 | Frenzied Whispers | |
| 28 | Fury Unleashed | |
| 29 | Subterranean Isolation | |
| 30 | Enshrouded Prison | |
| 31 | Encounter With Laura | |
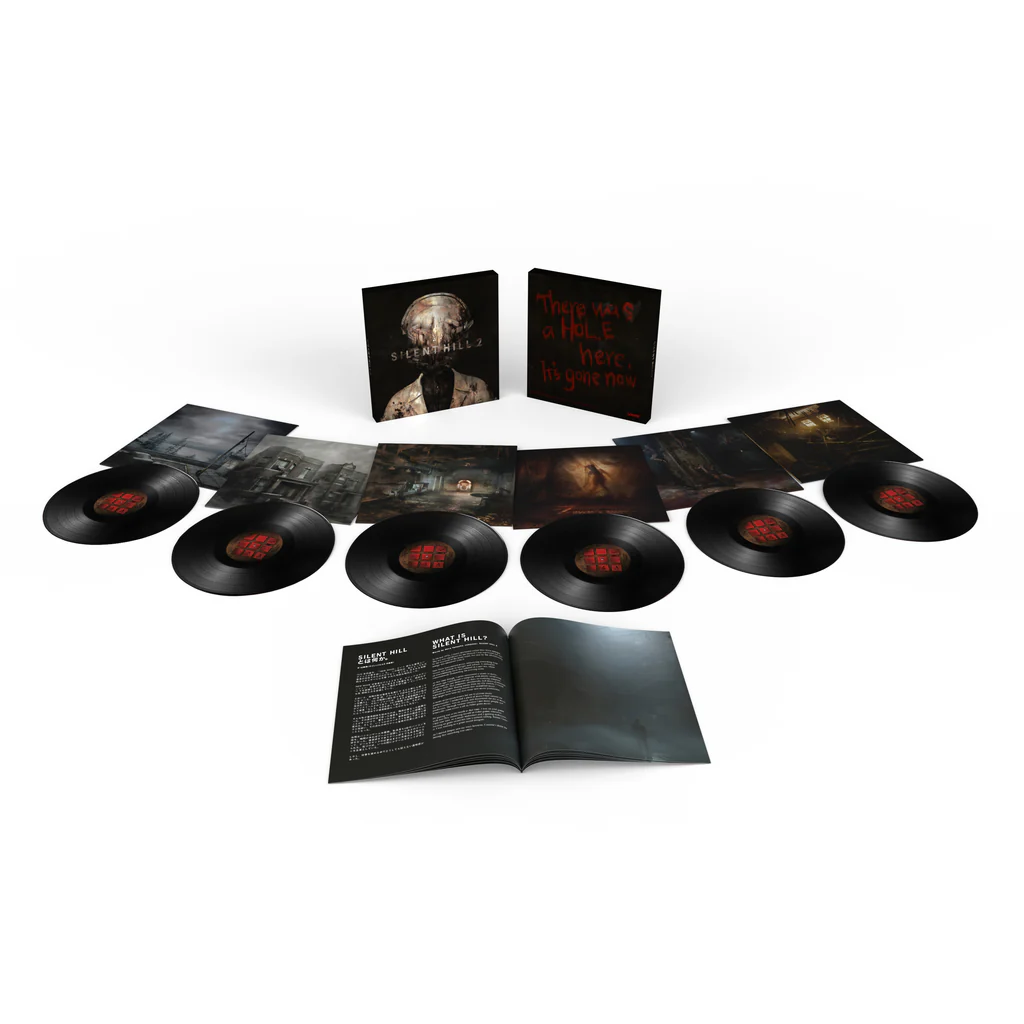
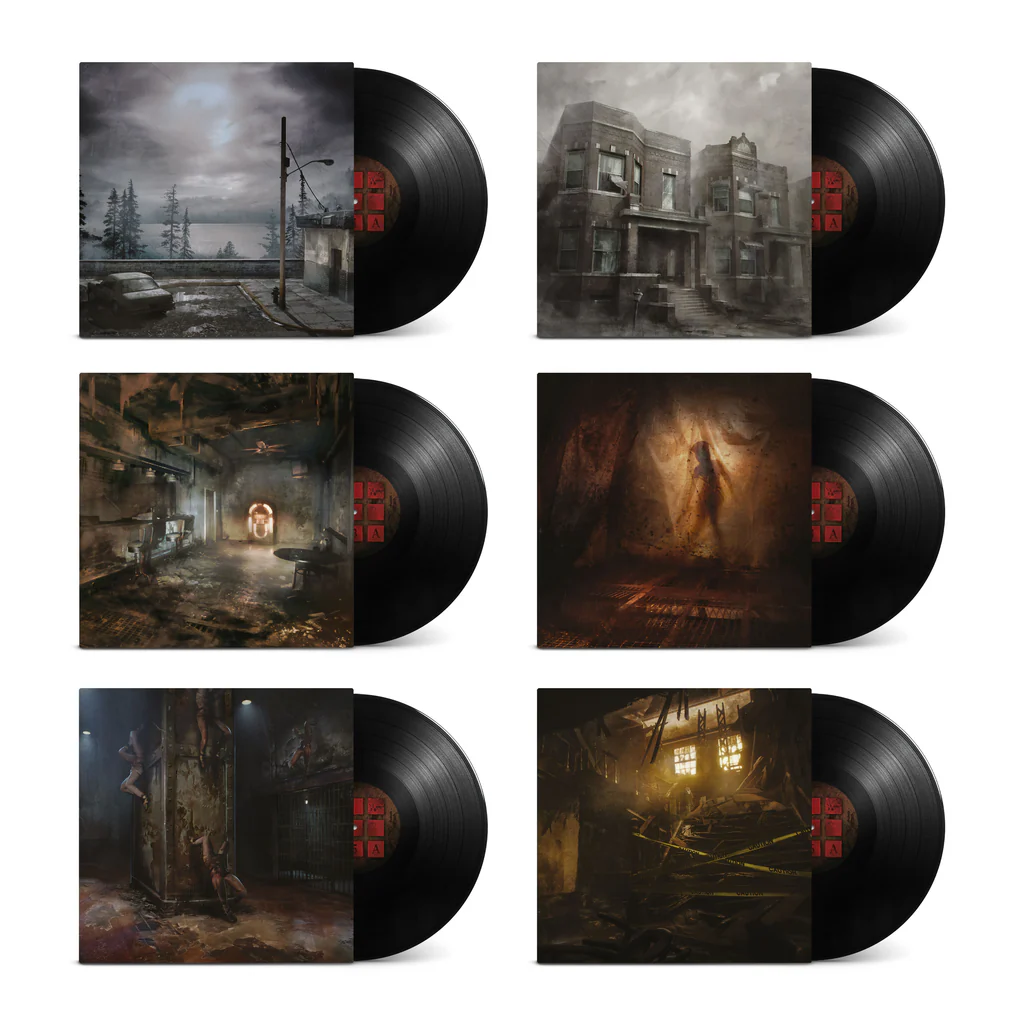
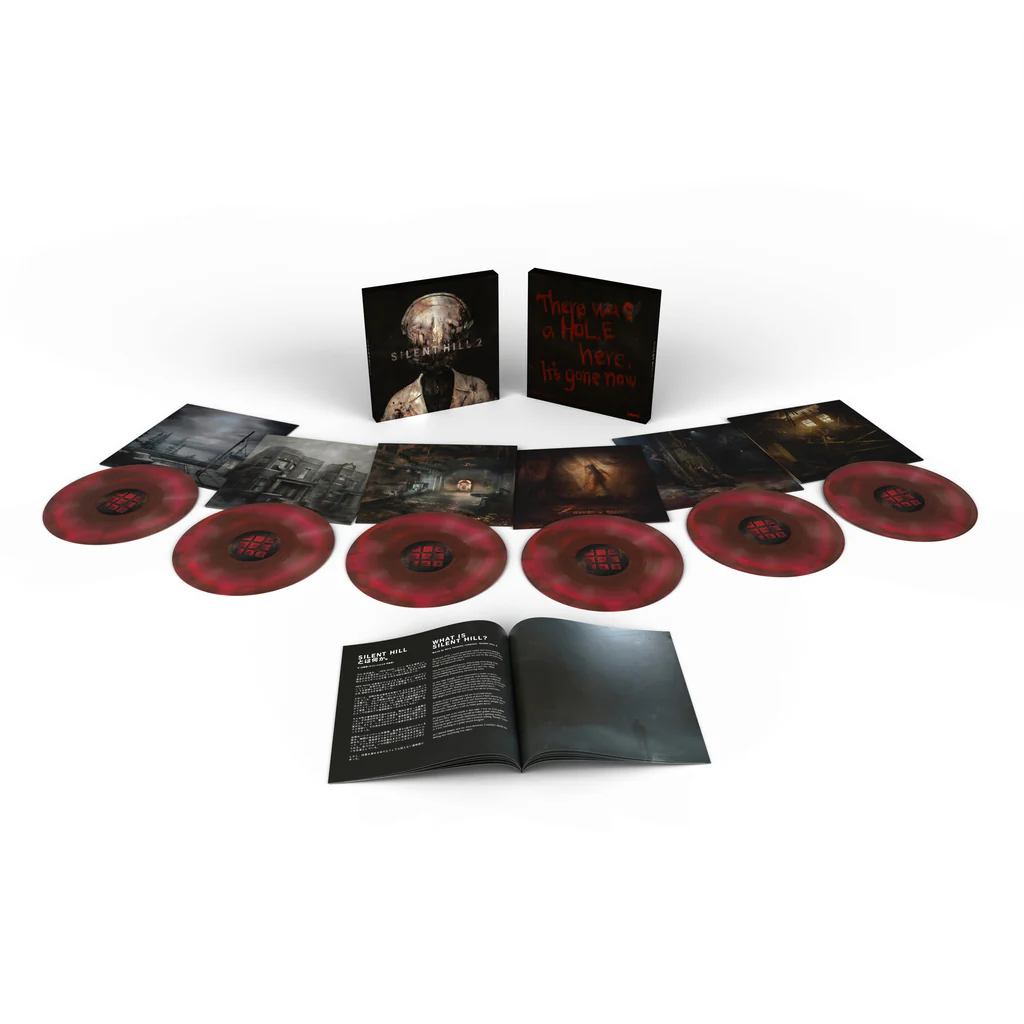
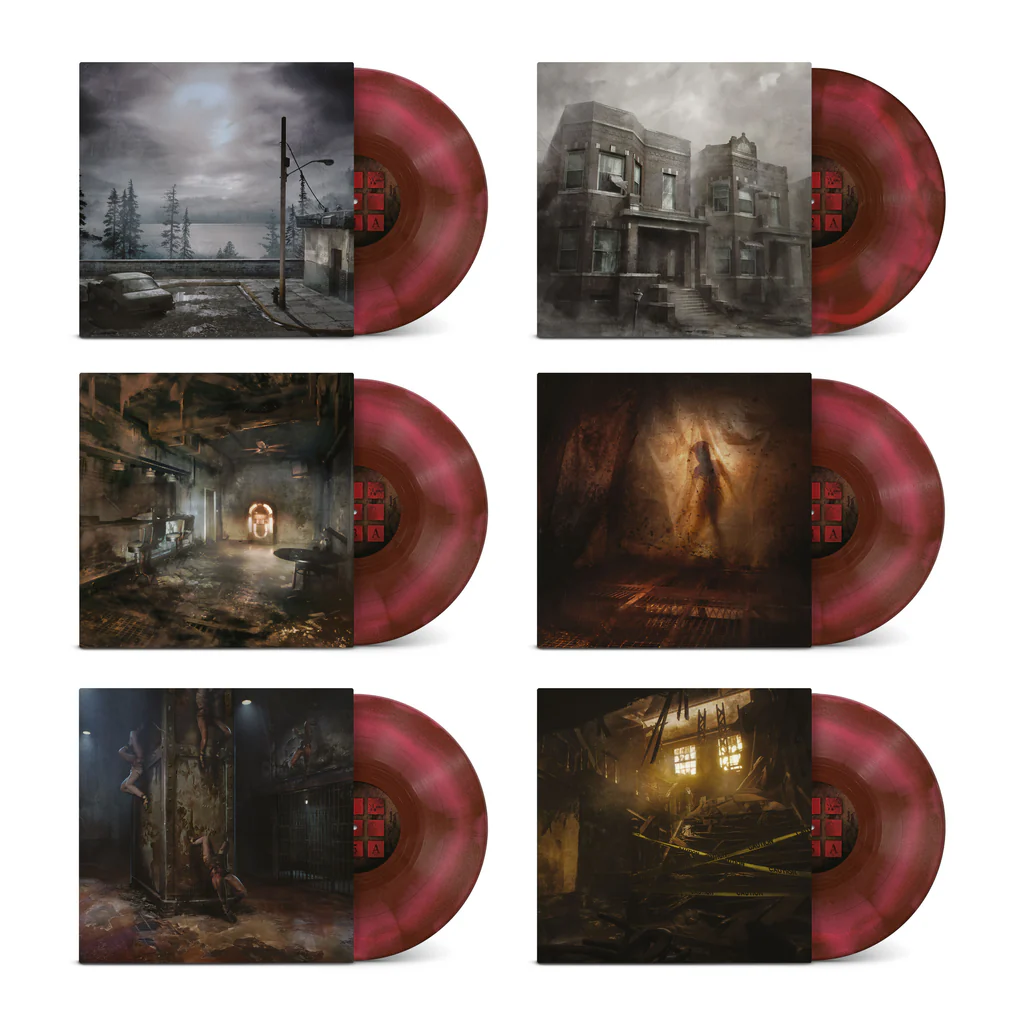
This 6LP box set presents the complete score, crafted by and carefully sequenced by longtime series composer Akira Yamaoka. Special attention has also been paid to the packaging, which includes thoughts from the composer in a liner notes book. Product information:
Store Page (Standard Edition) £125.00
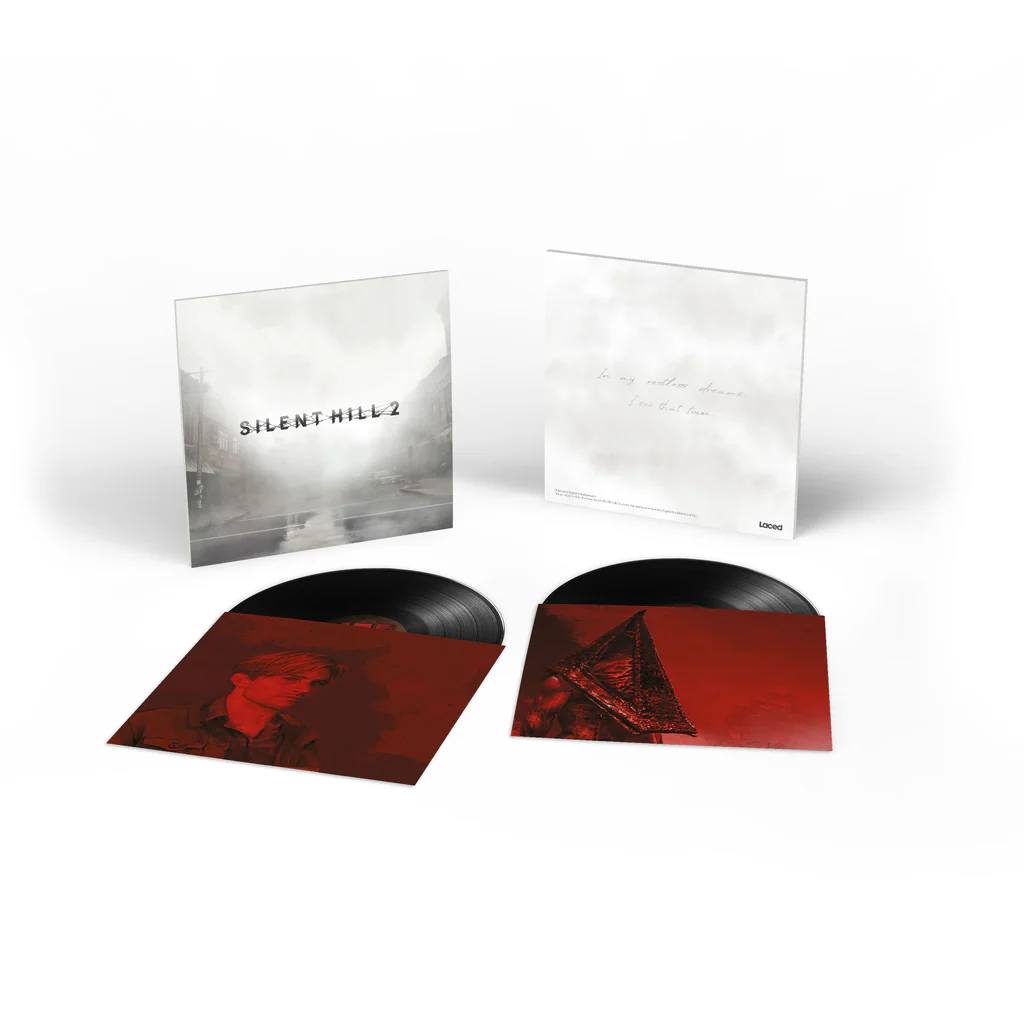
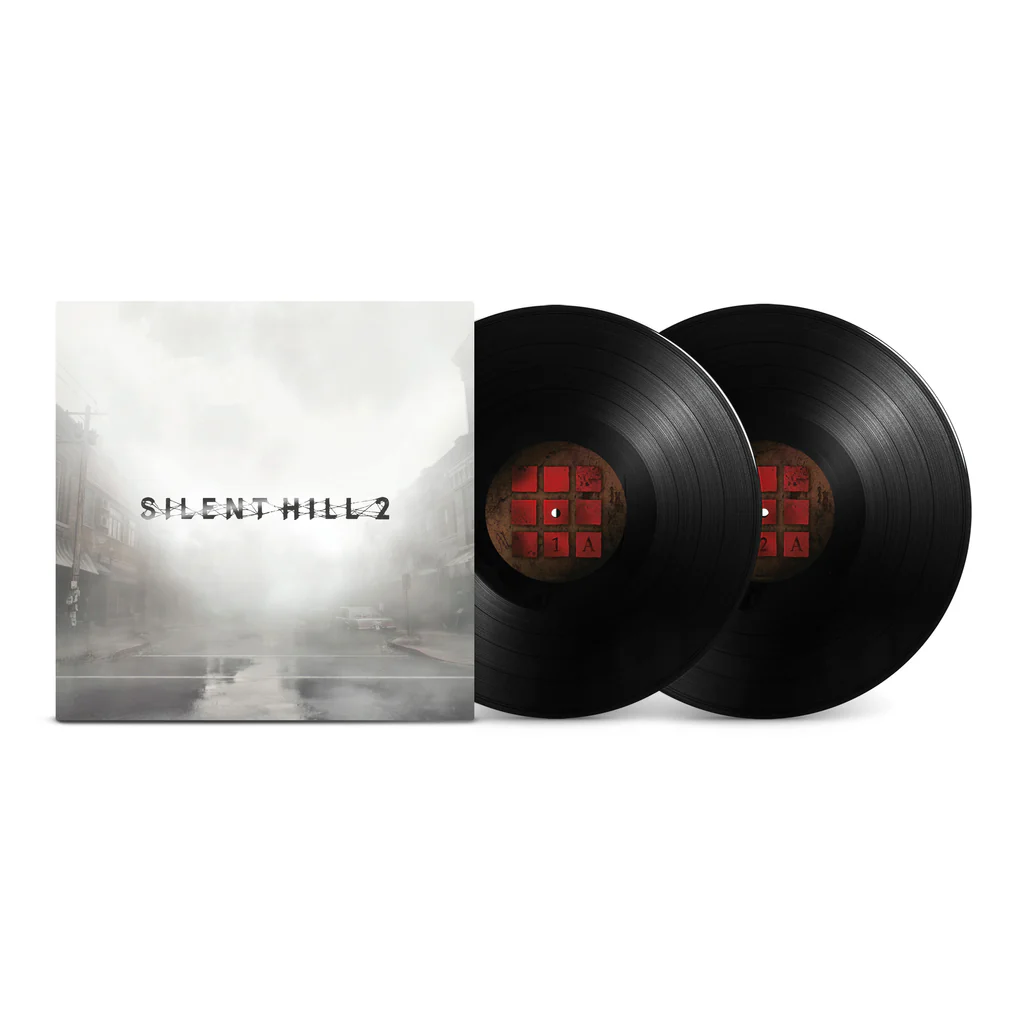
This double LP presents the essential selections from the score, carefully sequenced by longtime series composer Akira Yamaoka. Product information:
Store Page (Standard Edition) £36.00
|
||||||||||||||||||||||||||||||||||||||||||||||||||||||||||||||||||||||||||||||||||||||||||||||||||||||||||||||||||||||||||||||||||||||||||||||||||||||||||||||||||||||||||||||||||||||||||||||||||||||||||||||||||||||||||||||||||||||||||||||||||||||||||||||||||||||||||||||||||||||||||||||||||||||||||||||||||||||||||||||||||||||||||||||||||||||||||||||||||||||||||||||||||||||||||||||||||||||
Silent Hill 2: The Complete In-Game Soundtrack (Wwise Edition) |
 Format: MP3 320kbps |
"The remake of Silent Hill 2 evokes the same fondness and admiration I’ve always felt for the original. That became the engine of this project and lives in its every detail.
Beginning in November 2024, it evolved into a full-scale effort toward completion — 300+ hours of gameplay, meticulous track ID and organization, and a crash course in Wwise.
The final result is a complete body of music — my way of honoring a world and its story that have meant so much to me.
I hope this effort resonates with you, too."
-NXP
- An original & game-faithful listening experience
Built from the ground up and sourced directly from the game’s Wwise assets. - 224-track collection of in-game music & ambience
From subtle room tones to dark corridors and intense boss fights — it’s all here in one definitive package. - Chronological & detailed track organization
Mirrors the player’s journey, with descriptive titles for every in-game location and event — making each cue easy to find. - All combat music variations
Presented as standalone tracks — with all cues and variations, organized by location for your enjoyment. - Multi and single-stem audio
Assembled into listenable tracks with loop structures and timings intact — preserving authenticity and file integrity. - Conditional music included
Music that appears only under specific player states/switches — showcasing the game’s full musical range and atmosphere.
Curated, reconstructed, and sequenced by Nick Parisi (NXP)
Download Soundtrack zip, 2.56 gb
| Road to Silent Hill | |||
| 1 | Main Menu | 04:00 | |
| 2 | New Game | 00:06 | |
| 3 | Loading Screen | 00:49 | |
| 4 | Game Ready | 00:03 | |
| 5 | Game Start | 00:04 | |
| 6 | Letter From Mary (Toluca Lake Observation Deck) [Cutscene] | 03:15 | |
| 7 | Forest Trail | 07:22 | |
| 8 | Save Game | 00:22 | |
| 9 | Save Game — Exit | 00:03 | |
| 10 | James Meets Angela (Toluca Graveyard) [Cutscene] | 02:22 | |
| 11 | Sawmill | 03:23 | |
| 12 | Auto Parts | 01:54 | |
| 13 | Wiltse Road | 04:23 | |
| Eastern South Vale | |||
| 14 | Map Stand [Cutscene] | 00:20 | |
| 15 | City Streets | 04:04 | |
| 16 | Residential Area | 08:30 | |
| 17 | Garage (House on Martin Street) | 04:58 | |
| 18 | House on Martin Street — Lying Figure Encounter [Cutscene] | 00:42 | |
| 19 | House on Martin Street — Lying Figure Encounter | 01:14 | |
| 20 | Martin Street | 00:56 | |
| 21 | Indoors | 01:46 | |
| 22 | Saul Street Apartments — 3F Apartment 9 | 02:18 | |
| 23 | Saul Street Apartments — 3F Apartment 9 Bathroom | 02:34 | |
| 24 | Neely’s Bar — Jukebox Reveal [Cutscene] | 00:18 | |
| 25 | Neely’s Bar — Jukebox Flashback [Cutscene] | 01:39 | |
| 26 | Fog Storm | 03:22 | |
| Wood Side Apartments | |||
| 27 | 2F Apartment 202 | 01:22 | |
| 28 | 1F Corridors | 08:34 | |
| 29 | 1F Exit | 03:14 | |
| 30 | Laura Kicks the 2F Key [Cutscene] | 00:22 | |
| 31 | 1F East Hallway | 01:54 | |
| 32 | 2F Corridors I | 02:40 | |
| 33 | 2F Corridors II | 08:34 | |
| 34 | 2F Apartment 213 — TV Room | 01:01 | |
| 35 | 2F Apartment 206 — Prison Room | 01:39 | |
| 36 | 2F Small Staircase I | 02:50 | |
| 37 | 2F Small Staircase II | 02:50 | |
| 38 | 3F Ambience | 01:20 | |
| 39 | 1F North Hallway | 01:54 | |
| 40 | James Meets Eddie [Cutscene] | 01:59 | |
| 41 | 1F Apartment 116 | 03:38 | |
| 42 | 1F Coin Cabinet | 02:18 | |
| 43 | 1F Coin Cabinet — Puzzle | 02:26 | |
| 44 | Red Pyramid Thing Encounter [Cutscene] | 02:39 | |
| Blue Creek Apartments | |||
| 45 | 2F Ambience | 01:39 | |
| 46 | 2F Apartment 212 — Clock Room | 01:39 | |
| 47 | 3F Ambience | 05:24 | |
| 48 | 3F Apartment 307 — Radio Room I | 06:29 | |
| 49 | 3F Apartment 307 — Radio Room II | 04:55 | |
| 50 | 3F Apartment 307 — Radio Room III | 04:21 | |
| 51 | Angela in Apartment 109 [Cutscene] | 05:05 | |
| 52 | 2F Apartment 202 — Moth Room | 03:10 | |
| 53 | Red Pyramid Thing Boss Fight — Intro [Cutscene] | 00:29 | |
| 54 | Red Pyramid Thing Boss Fight — Phase I | 03:41 | |
| 55 | Red Pyramid Thing Boss Fight — Phase II | 03:32 | |
| 56 | Red Pyramid Thing Boss Fight — Phase III | 00:56 | |
| 57 | Red Pyramid Thing Boss Fight — Outro [Cutscene] | 00:25 | |
| Western South Vale | |||
| 58 | James Meets Laura [Cutscene] | 01:16 | |
| 59 | James Meets Maria [Cutscene] | 04:10 | |
| 60 | Rosewater Park | 05:14 | |
| 61 | Jack's Inn Motel | 05:45 | |
| 62 | Nathan Ave | 05:30 | |
| 63 | Baldwin Mansion — Transition | 00:17 | |
| 64 | Baldwin Mansion | 03:04 | |
| 65 | Residential Area [Cutscene] | 01:28 | |
| 66 | Fog Storm | 03:21 | |
| 67 | Back Alley [Cutscene] | 01:09 | |
| 68 | Heaven's Night | 08:13 | |
| 69 | Moonlight Grove [Cutscene] | 00:31 | |
| 70 | Lady of the Light [Cutscene] | 03:14 | |
| 71 | Reverie Theater — Back Window [Cutscene] | 00:29 | |
| 72 | Reverie Theater | 04:25 | |
| 73 | Reverie Theater — Eddie in Theater [Cutscene] | 02:00 | |
| 74 | Following Laura [Cutscene] | 00:21 | |
| Brookhaven Hospital | |||
| 75 | Front Door — Entrance [Cutscene] | 00:27 | |
| 76 | 1F Lobby | 04:50 | |
| 77 | 1F Reception Office | 02:06 | |
| 78 | 1F Dark Bathroom | 01:18 | |
| 79 | 1F Dark Corridor | 01:18 | |
| 80 | Laura on the Staircase [Cutscene] | 00:24 | |
| 81 | Basement | 05:30 | |
| 82 | Maria Unwell [Cutscene] | 01:58 | |
| 83 | 2F Hallways I | 04:22 | |
| 84 | 2F Hallways II | 04:06 | |
| 85 | 2F Hallways III | 04:18 | |
| 86 | 2F Room C1 | 01:12 | |
| 87 | 2F Director's Office | 03:35 | |
| 88 | 2F Room L1 | 03:22 | |
| 89 | Trapped in the Wall [Cutscene] | 01:15 | |
| 90 | 1F Inner Ward | 06:34 | |
| 91 | 1F Doctor's Lounge | 02:16 | |
| 92 | 1F Garden | 01:08 | |
| 93 | 2F Treatment Room | 04:37 | |
| 94 | 3F Exam Room I | 04:36 | |
| 95 | 3F Exam Room II | 04:36 | |
| 96 | 3F Exam Room III | 04:36 | |
| 97 | 3F Exam Room IV | 04:36 | |
| 98 | 3F Room D1 | 02:38 | |
| 99 | Red Pyramid Thing Encounter [Cutscene] | 01:05 | |
| 100 | Maria Missing [Cutscene] | 00:24 | |
| 101 | Flesh Lip Boss Fight — Intro [Cutscene] | 03:30 | |
| 102 | Flesh Lip Boss Fight — Phase I | 03:46 | |
| 103 | Flesh Lip Boss Fight — Phase II | 02:42 | |
| Brookhaven Hospital Otherworld | |||
| 104 | Transition [Cutscene] | 01:05 | |
| 105 | 1F Hallway | 02:15 | |
| 106 | 2F Hall | 01:28 | |
| 107 | 2F East Section | 05:00 | |
| 108 | 3F Isolation Ward | 01:30 | |
| 109 | 3F Ambience | 05:26 | |
| 110 | Chained Box — Reveal [Cutscene] | 01:14 | |
| 111 | Basement | 06:02 | |
| 112 | Maria Found [Cutscene] | 01:48 | |
| 113 | 2F Hallway — Acid Rain | 03:03 | |
| 114 | Fridge Door — Reveal [Cutscene] | 01:21 | |
| 115 | Lady of the Door — Entrance [Cutscene] | 01:10 | |
| 116 | Red Pyramid Thing Boss Fight — Chase | 01:43 | |
| 117 | Red Pyramid Thing Boss Fight — Outro [Cutscene] | 00:29 | |
| 118 | 1F Elevator | 01:14 | |
| Eastern & Western South Vale Otherworld | |||
| 119 | Carrol Street | 07:22 | |
| 120 | Back Alley | 07:22 | |
| 121 | Rendell & Munson Street | 07:22 | |
| 122 | Saul Street & Happy Burger | 05:20 | |
| 123 | Neely's Bar — Jukebox I | 04:56 | |
| 124 | Neely's Bar — Jukebox II | 11:40 | |
| 125 | Public Phone [Cutscene] | 00:46 | |
| 126 | Angela in Rosewater Park [Cutscene] | 03:29 | |
| 127 | Path to Historical Society | 07:53 | |
| 128 | Historical Society — Staircase | 03:27 | |
| 129 | Historical Society — Well I | 05:35 | |
| 130 | Historical Society — Well II | 02:40 | |
| Toluca Prison | |||
| 131 | Eddie in the Canteen [Cutscene] | 02:46 | |
| 132 | 1F Armory | 06:34 | |
| 133 | 1F Chapel | 06:34 | |
| 134 | 1F Main Section | 05:55 | |
| 135 | 1F Headless Serpent Section | 03:02 | |
| 136 | 1F Execution Chamber | 11:54 | |
| 137 | 2F Hornless Ox Section | 03:51 | |
| 138 | 2F Showers I | 02:08 | |
| 139 | 2F Showers II | 02:16 | |
| 140 | 1F Eyeless Boar Section | 08:42 | |
| 141 | 1F Eyeless Boar Section — Infirmary | 04:36 | |
| 142 | 3F Warden's Office | 01:21 | |
| 143 | B1 Wingless Dove Section | 01:34 | |
| 144 | Gallows [Cutscene] | 00:21 | |
| 145 | Hole | 02:36 | |
| Labyrinth | |||
| 146 | Abstract Daddy Boss Fight — Intro [Cutscene] | 00:56 | |
| 147 | Abstract Daddy Boss Fight — Phase I & II | 05:51 | |
| 148 | Angela's Apartment I | 05:50 | |
| 149 | Angela's Apartment II | 07:42 | |
| 150 | Abstract Daddy Boss Fight — Phase III | 05:49 | |
| 151 | Abstract Daddy Boss Fight — Outro [Cutscene] | 03:02 | |
| 152 | Maria's Cell [Cutscene] | 02:38 | |
| 153 | Labyrinth Cube — Reveal | 00:23 | |
| 154 | Labyrinth Cube | 04:35 | |
| 155 | Rotten Area | 02:56 | |
| 156 | Rotten Room | 06:02 | |
| 157 | Desolate Area | 02:46 | |
| 158 | Underground Tunnel I | 02:37 | |
| 159 | Underground Tunnel II | 02:37 | |
| 160 | Ruined Area | 03:35 | |
| 161 | Ruined Corridor | 02:44 | |
| 162 | Maria's Fate [Cutscene] | 01:53 | |
| 163 | Cemetery | 04:13 | |
| 164 | Eddie Boss Fight — Intro [Cutscene] | 02:29 | |
| 165 | Eddie Boss Fight — Phase I | 02:26 | |
| 166 | Eddie Boss Fight — Phase II | 02:26 | |
| 167 | Eddie Boss Fight — Phase III | 02:26 | |
| 168 | Eddie Boss Fight — Outro [Cutscene] | 00:38 | |
| 169 | Shore (Toluca Lake) [Cutscene] | 00:41 | |
| Lakeview Hotel Otherworld | |||
| 170 | Arrival [Cutscene] | 00:46 | |
| 171 | Garden | 03:38 | |
| 172 | Laura in Lake Shore Restaurant [Cutscene] | 05:14 | |
| 173 | Venus Tears Bar — Jukebox | 04:51 | |
| 174 | 1F Hallway | 03:14 | |
| 175 | 2F Sunrise Wing I | 03:14 | |
| 176 | 2F Sunrise Wing II | 04:10 | |
| 177 | 2F Room 201 & 202 | 03:22 | |
| 178 | 2F Hall & 3F Room 318 | 03:14 | |
| 179 | 2F & 3F Sunset Wing | 08:10 | |
| 180 | Mandarin Boss Fight — Intro [Cutscene] | 00:35 | |
| 181 | Mandarin Boss Fight — Phase I | 01:53 | |
| 182 | Basement | 02:18 | |
| 183 | Cinderella Music Box | 01:30 | |
| 184 | Video Tape Room [Cutscene] | 04:10 | |
| Lakeview Hotel | |||
| 185 | 3F East | 01:36 | |
| 186 | Basement | 04:10 | |
| 187 | Angela's Fate [Cutscene] | 03:57 | |
| 188 | Pyramid Head Twins Boss Fight — Intro | 02:01 | |
| 189 | Pyramid Head Twins Boss Fight | 03:13 | |
| 190 | Pyramid Head Twins Boss Fight — Outro | 00:44 | |
| 191 | MaryMaria Boss Fight I — Intro [Cutscene] | 02:52 | |
| 192 | Mary Boss Fight — Intro [Cutscene] | 02:46 | |
| 193 | MaryMaria Boss Fight II — Intro [Cutscene] | 01:34 | |
| 194 | MaryMaria Boss Fight — Phase I | 03:54 | |
| 195 | MaryMaria Boss Fight — Phase II | 03:54 | |
| 196 | MaryMaria Boss Fight — Phase III | 03:54 | |
| Endings & Credits | |||
| 197 | Leave Ending — Sequence I [Cutscene] | 02:16 | |
| 198 | Leave Ending — Sequence II [Cutscene] | 01:02 | |
| 199 | Leave Ending — Sequence III [Cutscene] | 04:44 | |
| 200 | Leave Ending [Credits] | 20:40 | |
| 201 | In Water Ending — Sequence I [Cutscene] | 02:14 | |
| 202 | In Water Ending— Sequence II [Cutscene] | 03:38 | |
| 203 | Stillness Ending [Cutscene] | 03:09 | |
| 204 | In Water & Stillness Ending [Credits] | 18:08 | |
| 205 | Maria Ending — Sequence I [Cutscene] | 01:04 | |
| 206 | Maria Ending— Sequence II [Cutscene] | 01:02 | |
| 207 | UFO Ending [Cutscene] | 02:29 | |
| 208 | Maria & UFO Ending [Credits] | 19:45 | |
| 209 | Rebirth Ending [Cutscene] | 01:52 | |
| 210 | Rebirth Ending [Credits] | 25:40 | |
| 211 | Dog Ending [Cutscene] | 01:10 | |
| 212 | Dog Ending [Credits] | 18:30 | |
| 213 | Bliss Ending [Cutscene] | 02:54 | |
| 214 | Bliss Ending [Credits] | 22:45 | |
| Combat | |||
| 215 | Eastern South Vale [Combat] | 04:18 | |
| 216 | Wood Side Apartments [Combat] | 05:16 | |
| 217 | Blue Creek Apartments [Combat] | 06:24 | |
| 218 | Western South Vale [Combat] | 03:06 | |
| 219 | Brookhaven Hospital [Combat] | 03:59 | |
| 220 | Brookhaven Hospital Otherworld [Combat] | 06:25 | |
| 221 | Eastern South Vale Otherworld [Combat] | 03:33 | |
| 222 | Toluca Prison [Combat] | 03:14 | |
| 223 | Labyrinth [Combat] | 04:25 | |
| 224 | Lakeview Hotel Otherworld [Combat] | 04:23 | |
Silent Hill 2 Remake Ultimate In-Game Soundtrack |
 Format: MP3 320kbps |
This complete in-game soundtrack, created by two Silent Hill fans, includes every track as they appear in the game in chronological order.
Download Soundtrack zip, 1.47 gb
| General | |||
| 1 | Main Menu (Theme) | 01:55 | |
| 2 | New Game | 00:06 | |
| Eastern South Vale | |||
| 3 | Restroom intro - Mary's Letter | 03:16 | |
| 4 | The Forest Trail-Road into Town #1 | 03:41 | |
| 5 | Save (Theme) #1 | 03:08 | |
| 6 | Save (Theme) #2 | 00:49 | |
| 7 | Toluca Graveyard (James & Angela) | 02:22 | |
| 8 | The Forest Trail-Road into Town #2 | 02:20 | |
| 9 | East Side of South Vale (Auto Shop) | 00:52 | |
| 10 | The Forest Trail-Road into Town #3 | 02:08 | |
| 11 | East Side of South Vale (Picking up Map of South Vale) | 00:20 | |
| 12 | East Side of South Vale (Streets) | 01:57 | |
| 13 | East Side of South Vale (Following the Creature) | 04:10 | |
| 14 | East Side of South Vale (Garage) | 02:24 | |
| 15 | East Side of South Vale (Radio Found - First Encounter) | 00:42 | |
| 16 | East Side of South Vale (Lying Figure Attack) | 01:38 | |
| 17 | East Side of South Vale (Mary Radio Static) | 00:56 | |
| 18 | East Side of South Vale (Glimpses Of The Past) | 00:13 | |
| 19 | Saul Street Apartments (3F Room 9) | 01:12 | |
| 20 | Saul Street Apartments (3F Room 9 - Bathroom) | 01:12 | |
| 21 | East Side of South Vale (James Reveals Jukebox) | 00:16 | |
| 22 | East Side of South Vale (Jukebox #1) | 01:45 | |
| 23 | East of South Vale (Combat 1) | 01:48 | |
| 24 | East of South Vale (Combat 2) | 01:56 | |
| 25 | East of South Vale (Combat 3) | 01:52 | |
| 26 | East of South Vale (Combat 4) | 01:16 | |
| 27 | East of South Vale (Combat 5) | 01:48 | |
| 28 | East-West Side of South Vale (Fog) | 01:38 | |
| Wood Side Apartments | |||
| 29 | Wood Side Apartments (1F Coin Puzzle #1) | 01:08 | |
| 30 | Wood Side Apartments (1F Coin Puzzle #2) | 01:08 | |
| 31 | Wood Side Apartments (1F-2F) | 04:12 | |
| 32 | Wood Side Apartments (Apartment 202) | 01:12 | |
| 33 | Wood Side Apartments (Exit) | 01:32 | |
| 34 | Wood Side Apartments (1F) | 00:52 | |
| 35 | Wood Side Apartments (Laura Steps On James's Hand) | 00:22 | |
| 36 | Wood Side Apartments (2F Laundry Room-2F East Hallway) | 01:15 | |
| 37 | Wood Side Apartments (2F) | 00:26 | |
| 38 | Wood Side Apartments (2F Staircase) | 02:50 | |
| 39 | Wood Side Apartments (2F Graffiti Room) | 00:46 | |
| 40 | Wood Side Apartments (2F Staircase 2) | 02:50 | |
| 41 | Wood Side Apartments (1F Hallway #1) | 00:53 | |
| 42 | Wood Side Apartments (1F Hallway #2) | 01:44 | |
| 43 | Wood Side Apartments (James & Eddie) | 01:59 | |
| 44 | Wood Side Apartments (3F) | 00:35 | |
| 45 | Wood Side Apartments (Pyramid Head Abusing Mannequins) | 02:39 | |
| 46 | Wood Side Apartments (Combat 1) | 01:48 | |
| 47 | Wood Side Apartments (Combat 2) | 01:56 | |
| 48 | Wood Side Apartments (Combat 3) | 01:52 | |
| Blue Creek Apartments | |||
| 49 | Blue Creek Apartments (Radio Music #1) | 02:22 | |
| 50 | Blue Creek Apartments (2F Halls) | 00:45 | |
| 51 | Blue Creek Apartments (Radio Music #2) | 02:05 | |
| 52 | Blue Creek Apartments (3F) | 02:43 | |
| 53 | Blue Creek Apartments (2F Clock Room) | 00:46 | |
| 54 | Blue Creek Apartments (James & Angela) | 05:02 | |
| 55 | Blue Creek Apartments (Radio Music #3) | 03:06 | |
| 56 | Blue Creek Apartments (2F Moth Room) | 01:30 | |
| 57 | Blue Creek Apartments (Pyramid Head Boss Fight Intro) | 00:24 | |
| 58 | Blue Creek Apartments (Pyramid Head Boss Fight #1) | 01:46 | |
| 59 | Blue Creek Apartments (Pyramid Head Boss Fight #2) | 01:41 | |
| 60 | Blue Creek Apartments (Pyramid Head Boss Fight #3) | 00:23 | |
| 61 | Blue Creek Apartments (Pyramid Head Boss Fight Outro) | 00:25 | |
| 62 | Blue Creek Apartments (Combat 1) | 02:46 | |
| 63 | Blue Creek Apartments (Combat 2) | 03:13 | |
| 64 | Blue Creek Apartments (Combat 3) | 01:50 | |
| Western South Vale | |||
| 65 | West Side of South Vale (James meets Laura at the wall) | 01:16 | |
| 66 | West Side of South Vale (James Meets Maria) | 04:19 | |
| 67 | West Side of South Vale (Rosewater Park) | 02:41 | |
| 68 | West Side of South Vale (Jack's Inn #1) | 02:48 | |
| 69 | West Side of South Vale (Pete's Bowl-O-Rama) | 02:07 | |
| 70 | West Side of South Vale (Jack's Inn #2) | 02:55 | |
| 71 | West Side of South Vale (Baldwin Mansion Transition) | 00:17 | |
| 72 | West Side of South Vale (James & Maria) | 01:26 | |
| 73 | West Side of South Vale (James & Maria Flee Through Fence) | 01:27 | |
| 74 | West Side of South Vale (James & Maria Running Away After Fence) | 01:36 | |
| 75 | West Side of South Vale (Maria Unlocks Heaven's Night) | 01:09 | |
| 76 | West Side of South Vale (Heaven's Night) | 04:00 | |
| 77 | West Side of South Vale (Enter Moonlight Grove) | 00:31 | |
| 78 | West Side of South Vale (Lady of The Light) | 03:14 | |
| 79 | West Side of South Vale (James Enters Reverie Theater) | 00:29 | |
| 80 | West Side of South Vale (Eddie & Laura Chatting in Theater) | 02:09 | |
| 81 | West Side of South Vale (James & Eddie in Theater) | 02:00 | |
| 82 | West Side of South Vale (Laura runs out of Theater) | 00:19 | |
| 83 | West Side of South Vale (Laura Enters the Hospital) | 00:27 | |
| 84 | West Side of South Vale (Combat) | 02:55 | |
| Brookhaven Hospital | |||
| 85 | Brookhaven Hospital (Lobby) | 02:21 | |
| 86 | Brookhaven Hospital (Reception Office) | 01:03 | |
| 87 | Brookhaven Hospital (Bathroom) | 01:18 | |
| 88 | Brookhaven Hospital (Dark Corridor) | 01:18 | |
| 89 | Brookhaven Hospital (Laura runs Upstairs) | 00:23 | |
| 90 | Brookhaven Hospital (Basement) | 02:39 | |
| 91 | Brookhaven Hospital (Enter 2F via elevator - Maria Lies Down) | 01:50 | |
| 92 | Brookhaven Hospital (2F West Wing) | 02:01 | |
| 93 | Brookhaven Hospital (C1 Room) | 01:12 | |
| 94 | Brookhaven Hospital (2F Director's Office) | 01:44 | |
| 95 | Brookhaven Hospital (2F Room L1) | 03:22 | |
| 96 | Brookhaven Hospital (2F Falling Through Wall) | 01:15 | |
| 97 | Brookhaven Hospital (1F Inner Ward) | 03:12 | |
| 98 | Brookhaven Hospital (Doctor's Lounge) | 02:16 | |
| 99 | Brookhaven Hospital (1F Garden) | 01:08 | |
| 100 | Brookhaven Hospital (Checking on Maria) | 00:57 | |
| 101 | Brookhaven Hospital (2F Halls #1) | 02:04 | |
| 102 | Brookhaven Hospital (2F Halls #2) | 02:08 | |
| 103 | Brookhaven Hospital (2F Treatment Room) | 02:18 | |
| 104 | Brookhaven Hospital (3F X-Ray Room #1) | 02:16 | |
| 105 | Brookhaven Hospital (3F X-Ray Room #2) | 02:16 | |
| 106 | Brookhaven Hospital (3F X-Ray Room #3) | 02:16 | |
| 107 | Brookhaven Hospital (3F X-Ray Room #4) | 02:05 | |
| 108 | Brook Haven Hospital (Maria Bed Empty) | 00:23 | |
| 109 | Brookhaven Hospital (Rooftop - James grabbed by Pyramid head | 01:04 | |
| 110 | Brookhaven Hospital (Laura Locks James Inside Room) | 03:25 | |
| 111 | Brookhaven Hospital (Combat 1) | 02:32 | |
| 112 | Brookhaven Hospital (Combat 2) | 02:24 | |
| 113 | Brookhaven Hospital (Combat 3) | 00:52 | |
| 114 | Brookhaven Hospital (Combat 4) | 02:07 | |
| 115 | Flesh Lips Boss Fight (#1) | 03:04 | |
| 116 | Flesh Lips Boss Fight (#2) | 01:49 | |
| 117 | Flesh Lips Boss Fight (#3) | 01:18 | |
| 118 | Brookhaven Hospital (Transition to the Otherworld) | 01:05 | |
| Otherworld Hospital | |||
| 119 | Brookhaven Hospital Otherworld (1F-2F) | 01:01 | |
| 120 | Brookhaven Hospital Otherworld (2F Chained Box) | 00:39 | |
| 121 | Brookhaven Hospital Otherworld (2F Observation Room) | 02:24 | |
| 122 | Brookhaven Hospital Otherworld (Electroshock Therapy Room) | 00:40 | |
| 123 | Brookhaven Hospital Otherworld (3F) | 02:39 | |
| 124 | Brookhaven Hospital Otherworld (Opening Chained Box) | 01:14 | |
| 125 | Brookhaven Hospital Otherworld (Basement #1) | 02:00 | |
| 126 | Brookhaven Hospital Otherworld (Basement #2) | 00:56 | |
| 127 | Brookhaven Hospital Otherworld (Basement #3 - James & Maria) | 01:48 | |
| 128 | Brookhaven Hospital Otherworld (Rainy Hallway) | 01:26 | |
| 129 | Brookhaven Hospital Otherworld (Opening Fridge) | 01:18 | |
| 130 | Brookhaven Hospital Otherworld (Staircase) | 01:10 | |
| 131 | Brookhaven Hospital Otherworld (Pyramid Head Chase) | 01:33 | |
| 132 | Brookhaven Hospital Otherworld (James Leaves Elevator after Maria's Death) | 01:34 | |
| 133 | Brookhaven Hospital Otherworld (Combat 1) | 02:12 | |
| 134 | Brookhaven Hospital Otherworld (Combat 2) | 01:37 | |
| 135 | Brookhaven Hospital Otherworld (Combat 3) | 01:55 | |
| 136 | Brookhaven Hospital Otherworld (Combat 4) | 00:59 | |
| 137 | Brookhaven Hospital Otherworld (Combat 5) | 01:26 | |
| 138 | Brookhaven Hospital Otherworld (Combat 6) | 01:31 | |
| Otherworld South Vale / Western South Vale Revisited | |||
| 139 | West Side of South Vale (Night #1) | 03:43 | |
| 140 | West Side of South Vale (Night #2) | 03:36 | |
| 141 | West Side of South Vale (Night #3) | 03:36 | |
| 142 | East Side of South Vale (Night #1) | 02:35 | |
| 143 | East Side of South Vale (Night #2) | 05:45 | |
| 144 | East Side of South Vale (Night James Answers Phone) | 00:46 | |
| 145 | East Side of South Vale (Night Jukebox 1) | 02:23 | |
| 146 | East Side of South Vale (Night Jukebox 2) | 05:44 | |
| 147 | East Side of South Vale Night (Rosewater - Angela & James) | 03:29 | |
| 148 | East Side of South Vale Night (Path to Historical Society) | 03:52 | |
| 149 | East Side of South Vale Night (Combat 1) | 01:48 | |
| 150 | East Side of South Vale Night (Combat 2) | 01:56 | |
| 151 | East Side of South Vale Night (Combat 3) | 01:52 | |
| 152 | Historical Society (Staircase) | 00:33 | |
| Toluca Prison | |||
| 153 | Toluca Prison (Intro #1) | 02:42 | |
| 154 | Toluca Prison (Intro #2) | 01:16 | |
| 155 | Toluca Prison (Canteen - James & Eddie) | 02:46 | |
| 156 | Toluca Prison (1F Armory #1) | 03:48 | |
| 157 | Toluca Prison (1F Armory #2) | 03:48 | |
| 158 | Toluca Prison (1F Main Section) | 03:02 | |
| 159 | Toluca Prison (1F Headless Serpent Section) | 02:58 | |
| 160 | Toluca Prison (2F Hornless Ox Section) | 03:51 | |
| 161 | Toluca Prison (2F Showers #1) | 00:59 | |
| 162 | Toluca Prison (2F Showers #2) | 01:03 | |
| 163 | Toluca Prison (1F Eyeless Boar Section) | 04:16 | |
| 164 | Toluca Prison (1F Eyeless Boar Infirmary) | 02:13 | |
| 165 | Toluca Prison (2F Wardens Office) | 00:40 | |
| 166 | Toluca Prison (B1 Wingless Dove Section) | 01:34 | |
| 167 | Toluca Prison (Gallows) | 00:21 | |
| 168 | Toluca Prison (Hole) | 01:14 | |
| 169 | Toluca Prison (Combat 1) | 00:59 | |
| 170 | Toluca Prison (Combat 2) | 01:49 | |
| 171 | Toluca Prison (Combat 3) | 01:25 | |
| 172 | Toluca Prison (Combat 4) | 01:26 | |
| 173 | Toluca Prison (Combat 5) | 00:49 | |
| 174 | Toluca Prison (Combat 6) | 00:58 | |
| Labyrinth | |||
| 175 | Abstract Daddy Boss Fight (Intro) | 00:56 | |
| 176 | Abstract Daddy Boss Fight #1 | 05:51 | |
| 177 | Abstract Daddy Boss Fight (Hallway Chase) #1 | 07:42 | |
| 178 | Abstract Daddy Boss Fight (Hallway Chase) #2 | 02:49 | |
| 179 | Abstract Daddy Boss Fight #2 | 02:49 | |
| 180 | Abstract Daddy Boss Fight (Outro) | 03:00 | |
| 181 | Labyrinth (Maria in Cell) | 02:33 | |
| 182 | Labyrinth (Reveal) | 00:23 | |
| 183 | Labyrinth (Rotating Cube) | 02:12 | |
| 184 | Labyrinth (Rotten Area) | 02:59 | |
| 185 | Labyrinth (Rotten Area Suspended Cage) | 02:50 | |
| 186 | Labyrinth (Desolate Area) | 02:44 | |
| 187 | Labyrinth (Pyramid Head Chase #1) | 01:13 | |
| 188 | Labyrinth (Pyramid Head Chase #2) | 01:14 | |
| 189 | Labyrinth (Ruined Area) | 03:33 | |
| 190 | Labyrinth (Ruined Area Red Room) | 01:17 | |
| 191 | Labyrinth (James finds Maria Dead) | 01:49 | |
| 192 | Labyrinth (Cemetery Graves) | 02:02 | |
| 193 | Labyrinth (Combat 1) | 01:48 | |
| 194 | Labyrinth (Combat 2) | 01:56 | |
| 195 | Labyrinth (Combat 3) | 01:52 | |
| 196 | Labyrinth (Combat 4) | 00:58 | |
| 197 | Labyrinth (Combat 5) | 00:58 | |
| 198 | Labyrinth (Combat 6) | 00:58 | |
| 199 | Labyrinth (Combat 7) | 01:04 | |
| 200 | Eddie Boss Fight Intro | 02:29 | |
| 201 | Eddie Boss Fight (#1) | 01:08 | |
| 202 | Eddie Boss Fight (#2) | 01:08 | |
| 203 | Eddie Boss Fight (#3) | 01:08 | |
| 204 | Eddie Boss Fight Outro | 00:36 | |
| 205 | Toluca Lake (James Enters Boat) | 00:41 | |
| 206 | Toluca Lake (Arriving to Lakeview Hotel Garden) | 00:46 | |
| Lakeview Hotel | |||
| 207 | Lakeview Hotel (Laura Plays The Piano) | 01:44 | |
| 208 | Lakeview Hotel (Jukebox) | 02:21 | |
| 209 | Lakeview Hotel (James meets Laura) | 05:10 | |
| 210 | Lakeview Hotel (1F Hallway #1) | 01:34 | |
| 211 | Lakeview Hotel (1F Hallway #2) | 01:33 | |
| 212 | Lakeview Hotel (2F Hallway #1) | 01:35 | |
| 213 | Lakeview Hotel (2F Hallway #2) | 02:00 | |
| 214 | Lakeview Hotel (2F-3F) | 04:01 | |
| 215 | Mandarin Boss Fight Intro | 00:33 | |
| 216 | Mandarin Boss Fight | 00:52 | |
| 217 | Lakeview Hotel (3F) | 03:04 | |
| 218 | Lakeview Hotel (Basement) | 02:08 | |
| 219 | Lakeview Hotel (Music Box) | 01:26 | |
| 220 | Lakeview Hotel (Video Tape) | 04:10 | |
| 221 | Ruined Lakeview Hotel (3F Hallway) | 00:43 | |
| 222 | Ruined Lakeview Hotel (Basement) | 02:09 | |
| 223 | Ruined Lakeview Hotel (Angela Flaming Staircase) | 03:55 | |
| 224 | Lakeview Hotel (Combat 1) | 01:47 | |
| 225 | Lakeview Hotel (Combat 2) | 01:56 | |
| 226 | Lakeview Hotel (Combat 3) | 01:52 | |
| 227 | Lakeview Hotel (Combat 4) | 01:16 | |
| 228 | Twin Pyramid Head Boss Fight Intro | 01:59 | |
| 229 | Twin Pyramid Head Boss Fight | 01:32 | |
| 230 | Twin Pyramid Head Boss Fight Outro | 00:44 | |
| 231 | Ending (Leave - Final Boss Intro) | 02:47 | |
| 232 | Mary Final Boss Fight #1 | 01:54 | |
| 233 | Mary Final Boss Fight #2 | 01:52 | |
| 234 | Mary Final Boss Fight #3 | 01:53 | |
| Endings | |||
| 235 | Ending (Leave #1) | 02:16 | |
| 236 | Ending (Leave #2) | 01:02 | |
| 237 | Ending (Leave #3) | 04:44 | |
| 238 | Ending (Maria - Final Boss Intro) | 02:46 | |
| 239 | Ending (Maria #1) | 01:04 | |
| 240 | Ending (Maria #2) | 01:02 | |
| 241 | Ending (Rebirth - Final Boss Intro) | 01:34 | |
| 242 | Ending (Rebirth) | 01:52 | |
| 243 | Ending (Stillness) | 03:29 | |
| 244 | Ending (In Water #1) | 02:30 | |
| 245 | Ending (In Water #2) | 03:38 | |
| 246 | Ending (Bliss) | 02:53 | |
| 247 | Ending (UFO) | 02:27 | |
| Credits | |||
| 248 | Credits (Angel's Thanatos & Celestial Reaper) | 03:14 | |
| 249 | Credits (Beneath the Null Moon) | 04:19 | |
| 250 | Credits (Dog Ending) | 02:02 | |
| 251 | Credits (Echoes of Silence) | 01:44 | |
| 252 | Credits (Overdose Delusion) | 04:36 | |
| 253 | Credits (Promise Pragma Version) | 04:48 | |
| 254 | Credits (The Reverse Will) | 04:00 | |
| 255 | Credits (Theme of Laura) | 03:19 | |
| Misc | |||
| 256 | James Dies | 00:06 | |
| 257 | Loading screen | 00:49 | |
| 258 | Saving The Game | 00:25 | |
| 259 | Magdalene | 03:05 | |