Puzzles
Coffin Puzzle (Rose Heights Cemetery)
|
|
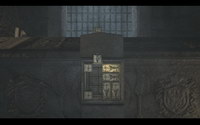 The goal of this sliding puzzle is to move the top piece downward to unlock the coffin. In order to do that you'll have to move long pieces on the left, which are blocking the way, to the right part of the field to free the second column. Here is how you do it:
Wire Box Puzzle (Grand Hotel)
|
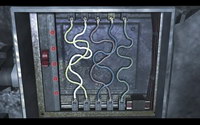
Hit the switch to restore the power. |
Safe Puzzle (Police Station)
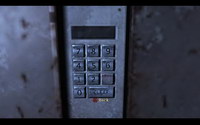
Examine the locked safe with a keypad. For the right combination you need to remember what memo on the police car said:
Look at the clock by the safe. The time is 2:06, so the combination will be 206. |
 Note: Optional Puzzle.
 Fan Puzzle (Hell Descent)
|
Now the fans numbers 4, 5 and 6 are turned off so you can duck underneath them and get to the other side. |
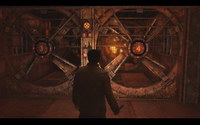 To get through you must turn off all of the fans on one side. To accomplish this task hit the switches between the fans in this order:
Coats of Arms Puzzle (Town Hall)You have to move the sliding pieces to restore the coat of arms of Shepherd's Family. To see how it looks like, take a look onto the flag above the table in the first person view. Important note: if you start to solve the puzzle and mess up completely, exit the Shepherds House and re-enter to reset the puzzle.
|
 Now here is the list of steps to solve the puzzle:
Mask Puzzle (Shepherd House)
"To hide her pain this face she did wear..." The second one reads:
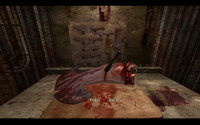
This puzzle is linked to Alex's mother. You have to put the right mask on each corpse's face choosing from three. Examine the masks to find the right ones. To solve this puzzle place the Indifferent Mask on the first corpse's face and the Frowning Mask on the second one's. |
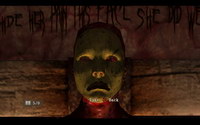 There are two crosses with skinned bodies in the room. The first cross has a following writing above the body:
Medal Puzzle (Shepherd House)
Fallen Star – Heart of Darkness – Vile Acts |
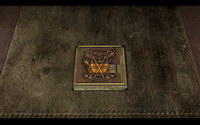
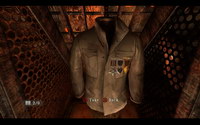 This puzzle is linked to Alex's father. You need to place 3 medals on the coat in the right order. To do so examine the shape of the medals in the case on the pedestal. The Fallen Star Medal was lying there in the first place. The second one belongs to the Heart of Darkness Medal, while the third one to the Vile Acts Medal. So the correct order of medals should be:
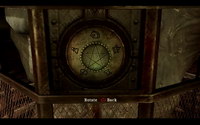
 Clock Puzzle (Shepherd House)
Second part is associated with Joshua. Approach the window glowing with orange light and place the Stuffed Rabbit, since this toy is strongly connected to Josh. This will solve the puzzle. |
 First part is associated with Alex. You must set the right time by adjusting the clock hands. The correct time comes from a Doctor's Memo on the wall. It's the room number – 206. So the right time is
 Knife Puzzle (Shepherd House)
|
 You need to insert knifes in the right spots. It's quite easy to do so, just look at the silhouettes on the board. Place the
 Power Plant Puzzle (Toluca Lake Water and Power)
The Notice on the 2nd floor says we need to shut down the boiler (station B) first. Turn the valve B on the 2nd floor. Now before turning the steam off, you must shut down the station's supplying water. Turn off Water Feed (Station A) on the 1st floor, then return to the 2nd floor to turn off the Steam Feed (Station C). With all valves turned off, approach the control station and pull the lever to switch the power off. |
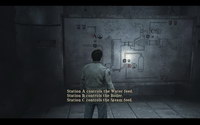 There are 3 stations in the Power Plant, each of them controlling different systems. Station A is on the 1st floor, Stations B and C are on the 2nd. The generator will shut down only after turning station valves in the proper sequence. If you do it wrong the system will reset. We learn from the Diagram on the 1st floor which station controls what:
 Janus Statue Puzzle (Dargento Cemetery)
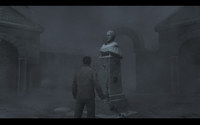
Examine the statue of Janus – the Greek God of youth and adulthood. The are two holes on the side with writings "12 The Old" on the front and the "1 The New" on the back. These circular holes are obviously for the stones to put in. Now, if you examine the stones, you'll see that each one represents a certain month. The numbers on the statue also refer to the months: 1 is January, 12 is December. The birthstone for January is Garnet and the birthstone for December is Turquoise. Place Turquoise into the front circular hole and the Garnet into the rear one. This will open a slot on the side of the statue. Grab the Moon Garden Key from it. |
 Note: Optional Puzzle.
 Wire Box Puzzle #2 (Prison)
|
Hit the switch to restore the power. |
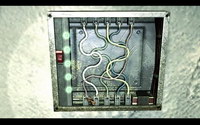 Once again you have to connect wires by trial and error. You can determine how many wires are connected correctly by hitting the switch – green lights will show the number of correct ones. Here's the right answer to the puzzle:
Cage Puzzle (Otherworld Prison)
Look at the corresponding dial. You need to chose from the presented variants. As you can see they all are chess pieces. The holy man is the bishop. Beside it stands either the knight or the king/queen, but "the crooked path" clearly directs to the knight which moves in an a way, no other figure moves, resembling letter L. Turn the dial so that the image of the horse's head would be on top. The second table reads:
Look at the dial on the cage's side for some clues. The answer is rather simple – it's the coffin. Turn the dial so the coffin would be on top. The final table reads:
This might be a little bit tricky, but pay attention to the blank spot on the third dial. It's nothing – that's the answer. Set the blank place to be on top. Now you can approach the hole in the cage and reach inside. |
 The cage has three dials on it. Accordingly there are three tables in the rooms with the riddles. Read the texts to find out how to turn the dials. The first one reads:
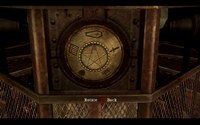 "The man who devised it
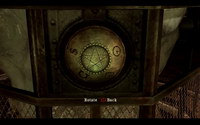 "What man loves more than life
Table Puzzle (Church)
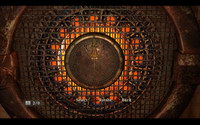
Concluding put the plates into slots in such order:
|
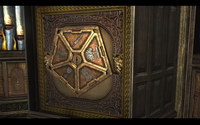 The slots of the organ pentagon are labeled with different emotions. You need to match these labels with the plates. In order to do that, you need to remember the circumstances under which you got the plates. The Chalice Plate was obtained in the baptismal font full of blood and containing a body which resembles some sort of sacrifice. The Kneeling Plate was taken from a person in the confession booth. The man seemed to penitent his sins. The Candle Plate was taken from the statue of the woman with a look of sadness and sorrow on her face. The Tree Plate was behind the painting of the man staring with desire at the woman from another painting. The Sword Plate was obtained from below the image of a knight being stabbed in the back by an executioner. The scene resembles vengeance.
Founding Families Puzzle (Underground)
Check the rings on the floor. There are two rings with symbols here. You need to match the symbols with the places where three members of the families stood. There are only three places here – the symbol of the Shepherd family is missing. The prescription pad indicates the place of the Fitch family. The other should belong to the Bartlett and Holloway families. Rotate the inner ring two times so that the man's symbol (between the bug's and wind's symbols) would be in the place where Doc Fitch left his pad. In this case the wind's symbol (Holloway) will be at the top and the mountains' symbol (Bartlett) in the lower left. Now you need to match family symbols in the inner ring with the family symbols from the tablets in the outer ring. Rotate the outer ring eight times so that the eye's symbol (Fitch) would be in the lower right, the scales' symbol (Holloway) at the top and the triangle's symbol (Bartlett) in the lower left. |
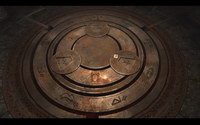 There are four tablets around the room. You cannot read them now. Use your ceremonial dagger on the columns to the right of each tablet to remove the red covering from them and make the text legible. These are the contracts with God of the four founding families of Shepherd's Glen. Draw special attention to the symbols of the families and the method of child's killing:
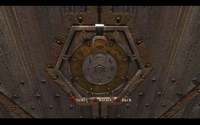 After matching the two rings the lock on the door will open. Approach it to find another ring puzzle. Now you will have to match Shepherd family's symbols in both rings so that they would be at the top. The symbol of Shepherd family in the inner ring is a drop of water and in the outer one is a trident.