Walkthrough
 discover three digits. Examine the memo on the desk to learn that you need three more to get the whole code. Take the
 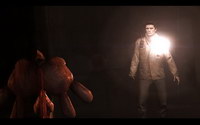 Here you'll meet Josh again. Speak with him (different dialogue options don't affect anything at the moment) and you'll learn that Joshua wants his toy. Leave Josh and open the door to the left to enter the Nurse Center. In this room take the
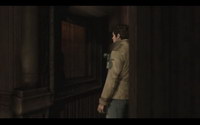
  The trucker (looking like Travis Grady from Silent Hill: Origins) drops Alex off and the first objective is to get home. Look at the Anniversary Celebration Flyer on the building's column. Move down the street to the east and a cutscene will play where Alex meets Judge Holloway. In the end of the conversation she suggests him going home as well. Now you can head for the home as you were advised or visit the Town Hall first.
 Go north along Craven Ave. and enter the Shepherd House to the left. In the house head upstairs. Enter the parent's bedroom with double doors. Check the Letter from Mom to Dad on the dresser. Walk into the restroom to find the
 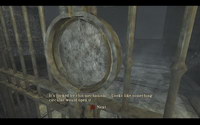 Move down the alley, then through a metal gate and you will arrive at the Cemetery. Take the
 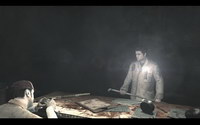 Dunk under the hole in the fence, continue your way around the building, squeeze trough a narrow opening in the wall and enter the Shop. Inside Alex will meet its owner – Curtis Ackers. Talk to him to find out that the guy digging up the graves in the Cemetery is Mayor Bartlett himself. In the end he will give you the
 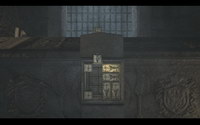 The goal of this sliding puzzle is to move the top piece downward to unlock the coffin. In order to do that you'll have to move long pieces on the left, which are blocking the way, to the right part of the field to free the second column. Here is how you do it:
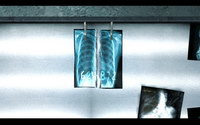
03. HotelAlex is in Silent Hill now. He spots Josh behind a car who runs off again. Head down the street and take a look at the Grand Hotel's entrance. There's Joshua hiding inside, but Alex cannot enter because of the wooden boards blocking the way. Run further and go into the alley on the opposite side of the street. Here's a Smog. Deal with it, go down the alley and climb down. Duck under the fire truck and grab the Fire Axe. Return to the Grand Hotel to hack down the boards. Get inside. In the right hallway there's a Health Drink in the glass case. Proceed down the main corridor to the lobby. The Joshua escapes through the hole in the wall. Approach the reception desk and take the Grand Hotel Map from the mail boxes behind. There are also two memos lying here. Jump across the elevator shaft and collect the Maintenance Key from the toolbox and return to the lobby. The elevator is not responding at the moment – there's no energy. Exit the hotel – beware of the Smog in the main hallway. There will be a couple of Smogs outside. Kill them as you'll need to solve a puzzle in this area now. Use the Maintenance Key to open a chain-link fence to the left from the hotel entrance. Take the Health Drink from the dumpster and read a memo next to it. Turn to the broken down breaker box and examine it.
Return to the Hotel and call the elevator. Inside the elevator pick up Pistol Ammunition. Hit the 5th floor button as it's the only one working and prepare yourself for combat. New monsters called Needlers will attack from all sides of the cabin and try to reach you with their claws. You can use your handgun or your knife (if you want to spare ammo) to defeat them. Aim for the head. After you kill the Needlers, the elevator will start to descend and the doors will open. Climb out of the elevator before it crashes down. Move through the hole in the wall into 406. A memo is in the wardrobe. Swarms will attack you upon entering the hall. There's a Delivery Notice on the little table on the left side of the central hall here. A Nurse will come out from Room 402. Use the Knife to kill her. Look through the hole in the wall in front of 403 to find the last clue message: "You can't wash it off." Enter 402 and push the wardrobe here to reveal a gap in the wall. Enter Room 404 and go into the restroom. Take the Alchemilla Postcard from the cabinet. This is one of those memories the woman talked about. Return to the hall and go in the direction of Room 408. A cutscene will trigger, introducing a Bogeyman. After Bogeyman is gone, Swarms will break into the hall from Room 405. Dispose of them and go into 405. Enter 407 via the hole in the wall and exit to the hall. Use your axe to hack through the wood in front of Room 408, kill a Swarm and collect the Serum from the case on the sink. Return to the hall and hack through the boards to get into the stairwell. Go up the stairs to the 5th floor jumping across the gaps on your way. A Needler awaits you here. Needlers can block your attacks so the best tactic against them would be attack from behind using your Knife or Steel Pipe. When the Needler rises its leg for attack, dodge to one side and attack its weak spot. After you're done with it, grab the Health Drink on the nightstand across the gap. Room 508 has nothing except a Note and Swarms. Hack down the boards to Room 505, push the wardrobe in the room and enter 507. Pick up the Lakeside Amusement Park Postcard from the bed. Another Note is in the wardrobe and a Health Drink is in the bathroom. Return to the hall and hack into Room 504. Beware of the Needler here. Get Pistol Ammunition on the bed. Push the wardrobe to reveal the Child's Drawing (9/18) on the wall. Get into 503 through the hall and jump down into 403. There's the last memory in the bath. Take the Toluca Lake Postcard and backtrack to Room 503. Grab the Pistol Ammunition and the Health Drink from the table. Save your game at the Save Point on the wall and proceed through the double doors toward the atrium. Try opening next doors here only to discover they are locked and the Grand Hotel will transform into its nightmarish version. The doors will unlock. Go into the atrium to talk to Mayor Bartlett and prepare for your first boss fight.
|
 Check the painting of the woman in front of you, cut it with your knife and squeeze through. There's a locked door behind the painting. Take the
 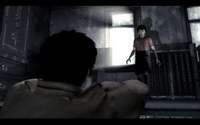 Now you'll have to make all the way back to Room 301. Run through the hall to the stairs (there will be Needlers). Go downstairs to the 4th floor. Here will be 3 Nurses – you better run past them instead of fighting. Get to Room 408 and drop down to 309. The Smog is in the hallway. Get to Room 301 through 307 and 304. Give the postcards to the lady and she will give you the
 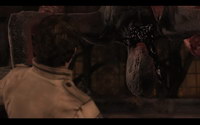 You cannot harm the monster right away. First you need to get rid of the four flesh sacks hanging in circle around the creature. Sepulcher will try to attack Alex stretching its long arms. Hide behind one of the bookshelves around Sepulcher to avoid this attack. The bookshelves can take only a certain amount of damage before it is destroyed, so don’t stay too long in one place. Sepulcher’s second attack is pounding the ground with its punches which causes a rain of glass debris from the roof. Just keep running in circle or dodge to avoid falling fragments of broken glass.
04. Police Station
Use your axe to hack through the doorway and proceed to the Lobby. Here you'll meet two Schisms. If you deal with these, two more will rush from the hallway to the left. Also one more will appear from the hallway you came. There is a Health Drink on the file cabinet in the room with a broken window – hop into the room to get it. Another Health Drink awaits you on the sink in the Restroom. Nothing more here, so go to the end of the hallway and duck under the hole in the wall. Two Schisms are waiting here. Also there is Shotgun Ammunition on top of the file cabinet in the corner. Hack through the boarded up doorway and move to the Garage. One Schism is lurking here by the car. Look at the Wrinkled Memo on the trunk of the police car. Enter the Garage Office. You can solve a little optional puzzle here to get some supplies.
Now pull the lever in the office to open the garage door. Get to the door and duck under it. The cutscene will begin showing as Siam attacks Elle in the car. It's best to use your firearms against the Siam. It will take 3 shotgun shots or 7 handgun shots to finish this beast. After defeating the Siam Alex and Elle escape to the Sewers. |
 Alex wakes up in the cell with all his weapons missing. Check around or just wait for some time and a cutscene will eventually begin. Deputy Wheeler steps into the cell block and asks Alex what happened to Mayor Bartlett. Tell him about the creatures and Wheeler will open the cell. Follow him and you'll finally get to a room with a
 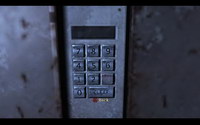 Examine the locked safe with a keypad. For the right combination you need to remember what memo on the police car said:
05. Sewers
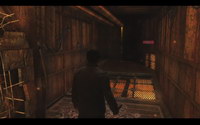
You have to go back all the way to the very start. Two Needlers will attack on your way back; also one Lurker will await you in the water. Run all the way to the Gate 4 and Elle will raise the gate. Duck under and proceed. Another Needler will attack you here. In the alcove to the right there is Shotgun Ammunition. One more Needler will attack you. Move down an proceed down the tunnel. Two Lurkers await you in the Spillway – you cannot continue without killing them because Elle is scared. After you're finished with them, climb up on the other side. A Needler will appear in the next corridor. Collect Shotgun Ammunition and Pistol Ammunition in the end of the hallway. Now find a lit up lever and pull it to open the gate to the left. Drop yourself down and find the room with a Save Point. After this head to the Main Drain Chamber. Let Elle slip under the gate, but she won't be able to get Alex through again. You'll emerge near Shepherd House, but you cannot enter it at the moment because of barbed wire blocking the front door. Go south for a cutscene. Wheeler will call on the radio and suggest Alex to meet up at the Doc Fitch's Office which is on the Main St. Move forward – two Ferals roam the street. There might be more enemies in the streets on your way. Before going to the Doc's Office you might want to explore the boarded up room in the Town Hall since you now have the Axe. Enter the Town Hall – there will be two Smogs in the hallways. Hack through the boards on the left side of the Town Hall to get in. Inside you'll find the Portrait of Isaac Shepherd on the table. Move the shelf by the wall to reveal the Child's Drawing (10/18). You might also want to save your game in the back room. After this return to the streets. |
 Go forward and Elle will draw your attention to the Gate 3 valve. Turn it to let Elle under and she'll turn the valve on her side, so Alex can duck under too. Proceed straight forward. There will be two Lurkers in the flooded area. Climb to the side alcove to find
  Three Needlers will appear and attack lonely Alex. After killing them Alex will hear screams of Elle and a Siam will make its appearance in the chamber. Use your shotgun and when the creature is dead, the gate will open. Continue your way to find Elle's radio in the pool of blood. Check the alcove to find the
  Head straight to the Doc Fitch's Office. You'll eventually trigger a cutscene. Follow the blood trail left by Doc Fitch on the ground and enter his office. Pick up the
 06. Hell DescentAlex takes Scarlet's Doll in the cutscene. This area doesn't have a map, so read carefully not to get lost. Go through a narrow corridor and climb down. Josh will appear up ahead and run away. Don't follow him as it's a dead end. Take another staircase to the left. Hop across the gap and tap the button on-screen to climb up onto another side. Take the path to the left, then jump into the hole in the wall. Move down the hall, jump over the fan. There is a doll at the end of the short corridor to the right. If you examine it, it will say "Behind you" and a Smog will appear in the hall. Drop down through the fan. Kill some Swarms here and take the Pistol Ammunition from the table. Continue to go straight until you'll reach a dead end with an "Exit" sign. Go back a bit and look for a place where you can drop down to a bottom staircase. Go up this staircase to grab the Health Drink from a bench and then go down. Keep going until you see Josh running by in the split. There will be a Smog to the left and the Child's Drawing (11/18) to the right in this area.
After passing through the fans climb down the ladder and you'll find a Save Point on the wall. Proceed further, climb down the ladder. Follow Josh and the wall in front will reveal a hallway. Proceed to the door with a valve. Open it and step into the room. You'll find Doc Fitch in there cutting himself with a razor. Talk to him and give him Scarlet's Doll in the end and then Scarlet herself will make her appearance.
|
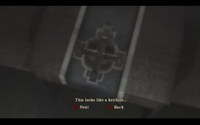
 Continue your way, jump across the gap to the bridge and turn to the left. Keep going. When you see a fork, choose the left path, drop down, jump across the gap with lava. Step down and climb down the ladder. Find the pipes to squeeze through, then duck under the fan. Take the
 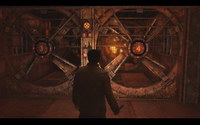 To get through you must turn off all of the fans on one side. To accomplish this task hit the switches between the fans in this order:
 Beautiful Scarlet attacks Alex by swiping with her arms. Before the attack she raises her hand, so you should be able to dodge it. During this stage you need to hack through Scarlet’s porcelain body. Stand in front of her, dodge her hand attacks and deal damage with your Steel Pipe or Crowbar to one of her legs. When a certain amount of damage is dealt, Scarlet will fall to the ground – now you can destroy porcelain on one of her arms. Be quick to do it before she stands again. Repeat it until all of the porcelain shell on her legs and arms is destroyed. Keep attacking Scarlet and when she falls to the ground next time, run to her back and tap the button on-screen to pry her back open.
 07. Town HallAfter the fight Alex will find himself in the Doc's Office again. He'll get the Founders Key. The symbol on the key's head resembles him the one seen in the Town Hall. So let's head there and find it. Exit the office and head straight for the Town Hall. You're now in one of the mausoleums in the Founders Garden of Rose Heights Cemetery. Turn to the left to take the Child's Drawing (13/18) from the wall, then use your dagger to exit the mausoleum. Use the dagger to unlock the other mausoleum in the Founders Garden and grab the Serum from inside on the coffin. Now you should return to the Shepherd House, but if you want to collect all the photos as well as more supplies, you need to make a detour here. Run to the parking lot of the Cemetery and exit to the street. Head to the missing persons billboard to find the Photo (9/11) lying in front of it. Also there's Pistol Ammunition lying to the left of the billboard. More Pistol Ammunition is in front of the Police Station on the left side. Now you can run to the Curtis' Junkyard to collect more stuff. You'll meet two Smogs on your way there. Cross the bridge and you'll find Shotgun Ammunition x2 and a Health Drink in front of the fence. The Junkyard is locked so go back to the Cemetery. From the Founders Garden move southwest and drop down into the pit. Duck under the opening in the wall and there will be two Smogs on the other side. You can kill them in order to get the First Aid Kit and Shotgun Ammunition in the end of the pit. Duck under the opening on the west wall and climb up. Here's another Smog – kill it or run past and squeeze through the gap in the wall. Run through the Family Crypts, duck under the opening, then squeeze through to the Family Crypts North. Use your axe to hack the boarded up crypt to grab the Chrome Hammer Pistol which replaces your Handgun. Continue to go east. Climb down to the pit in the East Garden – two Ferals will attack you here. Climb up to the other side of the pit. Run straight to the house. In the Old Crypts area you'll run into another Smog. Get to the Baker Street and enter the backyard of the Shepherd House.
After solving the puzzle the desk drawer will open up and you'll get the Letter from Dad and a Map of Silent Hill. Go downstairs to talk with Alex's mom. During the conversation you'll be ambushed and the house will transform into its Otherworld version. |
 Proceed to the central room and approach the pedestal with the symbol. It has a keyhole where you can use the Founders Key. The floor panel will rise revealing a set of stairs into the basement. Go down and take the
  Before going to the basement enter the kitchen via the back door. There's a boarded up door which you can hack now. Inside the dining room you'll find a
  Now here is the list of steps to solve the puzzle:
08. The AtticNow the front door is sealed and you'll have to solve four puzzles in the house to unlock it. Examine the writing on the wall hinting that you must know something about the events from the past to escape the house. Go to the living room to save your game at the Save Point. Take the Angry Mask from the stand on the cabinet. Go upstairs. Get the Cleaver from the cabinet by the window. Enter the bedroom and jump across to the bedroom's restroom. Collect the Indifferent Mask from the sink stand and the Stuffed Rabbit from the bloody bath. Return to the 1st floor and proceed to the kitchen. There's a single Swarm here. If you examine the wall hole more Swarms will come. Take the Frowning Mask and the Health Drink from the kitchen counter. Go into the next room where you'll need to solve the first puzzle.
Solving the puzzle will light up one of the four symbols on the front door. Return to the lobby. On your way there you'll meet a Schism. Use your Bluesteel Shotgun – one shot is enough for him. Pull the lever to close kitchen's door and open the door to the attic. Go to the 2nd floor. In the guest room push the cabinet to take the Heart of Darkness Medal from the ground under it. Go up the stairs to the attic. A Schism is hiding here on your right – kill it before it can get to you. To the left from it there is a gap you can squeeze through. Beyond the gap you'll find Pistol Ammunition and Shotgun Ammunition. Return to the main area and look for a place near the stairs where you can duck under the pipes. Collect the Vile Acts Medal from the mannequin there. Be careful as right after you take the medal a Schism will attack you from behind. Return by ducking under the pipes and search for another narrow gap between pipes to squeeze through. One more Schism is lying on the ground waiting for your approach. Don't give him the chance! Go further this way, duck through the opening, then hop over the pipe and you'll enter a room with a circular pedestal. Collect the Fallen Star Medal from the case on the pedestal and approach the mannequin in the same room to solve the second puzzle.
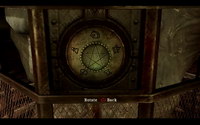
Second symbol will light up. Return to the lobby to pull the lever. Now the door to Josh and Alex's room is open. Go there. Read the Doctor's Note on the wall by the door, then examine the Poem on the wall. After this, approach the clock on the opposite wall to start solving another puzzle.
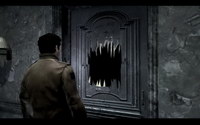
The third symbol on the door is lit up now. Before returning to the lobby find the fleshy gap and cut it to get through. Inside you'll find the Butcher Knife and the Child's Drawing (14/18). Go to the lobby and pull the switch one more time. Now the door to the basement is open. Go downstairs and move down the corridor. A Lurker will move out from the hole in the wall. Deal with it and continue to run forward. Duck through the opening, then squeeze through the gap and finally cut through a fleshy membrane. In the hunter's room take out the Bogeyman Knife from the beheaded corpse of Schism. Examine the preparation table for the last puzzle.
So now all the symbols around the door are lit up and you can finally open it. Before doing that, it's a good idea to save your game at the Save Point. Open the front door and the house will get back to its normal state. Alex will go out of the house and meet up with Elle. Together with Wheeler they're going to Silent Hill by boat. Alas, during the voyage they are ambushed and Alex is separated from his companions. He's now in Silent Hill. |
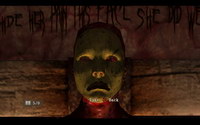 There are two crosses with skinned bodies in the room. The first cross has a following writing above the body:
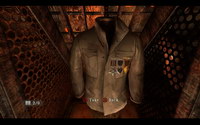 This puzzle is linked to Alex's father. You need to place 3 medals on the coat in the right order. To do so examine the shape of the medals in the case on the pedestal. The Fallen Star Medal was lying there in the first place. The second one belongs to the Heart of Darkness Medal, while the third one to the Vile Acts Medal. So the correct order of medals should be:
 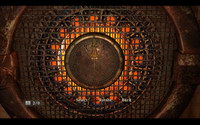 First part is associated with Alex. You must set the right time by adjusting the clock hands. The correct time comes from a Doctor's Memo on the wall. It's the room number – 206. So the right time is
 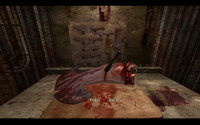 You need to insert knifes in the right spots. It's quite easy to do so, just look at the silhouettes on the board. Place the
 09. Dark TimesClimb up the wooden stairs, jump to the rock platform and climb up to another segment of dock stairs. Move through the hole in the fence to get into the streets of Silent Hill. Wheeler will get in touch with Alex by radio. Apparently he is held in the prison. Check the map. To the west is Dargento Cemetery. You'll need to return there later if you want to get the Rifle, but currently you don't have all the necessary items so just move to the Bait Shop. Beware of Lurkers in the streets that will reappear here. Duck under the hole in the wooden fence. In the backyard you'll find a Save Point, a Child's Drawing (15/18) on the wall and Pistol Ammunition on the crate. Get back to the street. Go via Sagan St. to Overlook Penitentiary's front gate – it's closed. Alex will talk to Wheeler, and Wheeler tells Alex there's a rear entrance on the other street. Continue down the street and enter the door at the roadblock. Inside on the desk to the left is a familiar newspaper. To the right is Pistol Ammunition. Go through the Lower Landing and to the Office. In the Office take the Turquoise from the sink by the door and the Health Drink from the desk. Jump across the chasm. There's a Save Point on the wall. Hack through the boards and grab the Toluca Lake and Power Key from the desk. Make your way back to the Lower Landing and use the key there to open the door and access the power plant. There are 2 Order Members patrolling the area. They should spot you and climb down. Take them out and then examine the white board on the 1st floor with a diagram of Power Generator System. There's Pistol Ammunition on the shelf next to the fire door. Climb up to the 2nd floor. Head to the Foreman's Office. Take Rifle Ammunition x2 from the shelf nearby. Examine the Notice by the door to the Office. Now we need to solve another puzzle to cut off the power.
After the power is deactivated two Order Members will run into the Power Station – one is armed with a rifle. Kill them and head back to the streets via the Toluca Lake Offices building. The streets are now flooded with Ferals and Schisms. Don't waste your time and ammunition fighting all the enemies here – just make your way to the Boiler Room, cross it (another Lurker is in the water) and approach the Prison's rear gate. A Siam breaks through the gate – use your shotgun to defeat it. Now you can head to the Prison or make a trip back to Dargento Cemetery to get a new weapon. If you feel like you don't need it, just skip the next paragraph. Return to Dargento Cemetery, walk through the Sun Garden and find a spot in the wall where you can breach it. Use your axe to get through. Grab the Garnet from the bench and proceed to the Janus Garden. There's a Smog here – dispatch of him. There's another stone – Sapphire – on the bench in the north section, but you don't really need it. Approach the statue in the centre of the Janus Garden to solve the optional puzzle.
Head to the south section of the cemetery. Open the locked gate with the key and enter the Moon Garden. A Smog is here. Head to the mausoleum in the corner to find a crack in its wall by the ground. A weapon is visible under the crack – take out the M14 Assault Rifle. You may return to the Prison now. A Smog will be blocking your way out of the Cemetery. Get to the street and back to the rear gate of the Prison. In the pickup's back in front of the Prison get the Pulaski Axe which replaces your Fire Axe. Go to the alley to the left. Grab the Health Drink on the dumpster and enter the Prison's door. |
 Go south Simmons St. No luck at the rear gate too since it's electrified. We need to switch the power off first. Continue going south and enter the Boiler Room. The Boiler Room is flooded so expect the Lurker hiding in the waters. Take the
 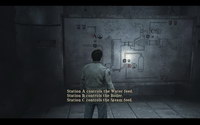 There are 3 stations in the Power Plant, each of them controlling different systems. Station A is on the 1st floor, Stations B and C are on the 2nd. The generator will shut down only after turning station valves in the proper sequence. If you do it wrong the system will reset. We learn from the Diagram on the 1st floor which station controls what:
 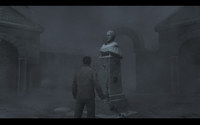 Examine the statue of Janus – the Greek God of youth and adulthood. The are two holes on the side with writings "12 The Old" on the front and the "1 The New" on the back. These circular holes are obviously for the stones to put in. Now, if you examine the stones, you'll see that each one represents a certain month. The numbers on the statue also refer to the months: 1 is January, 12 is December. The birthstone for January is Garnet and the birthstone for December is Turquoise. Place
 10. PrisonThere's a Save Point by the door. Move forward to hear from Wheeler telling Alex he's being kept in Cell Block B. Walk through the door to a locked gate. Come into the Guard Office to pull the lever and open the gate. Move through the gate. Hack through the wooden planks past the gate to get the First Aid Kit. Go down the hall, break the glass window and hop over it. There's a Prisoner's Note lying on the counter. Exit through the door. Find the Prison Map on the wall. Enter the storage nearby to get the Health Drink on the shelf. There's also a Worker's Note on the vehicle. Climb up the stairs. Jump across the gap and enter the Security Office. Here's a control panel, but it's broken. Pull the lever on the wall behind and proceed through the opened gate to the Cell Block B. On the 2nd floor before moving further turn to the Upper Guard Room to take the Child's Drawing (16/18) from the wall. Rejoin Wheeler, cross the gap and duck into the hole. Pull the lever in the office to open the wire gate and Wheeler will lead you to the Security Office with a control panel. Wheeler manages to get the panel working, so he stays to direct Alex and open the way for him. Exit the office and jump across the gap to the gate to Cell Block A. Wheeler will open the gate. Proceed through the double door. Cell A6 contains a Prisoner's Letter on the bed. A5 has a Health Drink on the sink. In the cell A8 there's another Prisoner's Letter on the wall. Go through the double door. Wheeler will try to open the chain-link gate, but it gets jammed. Return to the Cell Block and Wheeler will unlock a gate to the staircase. Descend to the 1st floor. Here a Needler will come out from the hole in Cell A1. After the fight Wheeler will open the gate to the Shower Area. In the Shower Room two more Needlers will come out from the hole in the ceiling. Dispose of them and find a section in the wall which you can breach with your axe. Proceed into the Boiler Room and upstairs to the Save Point. Alex contacts Wheeler who tells him to come back. Go downstairs to another gate, which will then open. Proceed through the double door into the Cell Block A. Exit through another double doors to find a locked door with a keypad which is disabled. You need to restore power first. Return to the Block. Squeeze into Cell A11 and then get into Cell A10 to get the Loose Wire from the vehicle's headlight. Come back and head upstairs. Take the Health Drink from the shelf at the top of the stairs. Jump to the other side of the catwalk. Enter the Upper Guard Room to find a junction box. This is another wiring puzzle, but now there are 3 wires missing. Enter Cell A20 to collect the Radio Wire from the radio. Go through the double door at the end of the catwalk and enter the office. There you'll find the Scrap of Wire from the toolkit on the metal table. You've got all of the wires now so come back to the junction box. Place all three wires into the box and start solving the wiring puzzle.
After the power is restored, pull the switch to the left of the breaker box. This opens Cell A15. Jump to it over a gap to get the Serum. Head down and pull two switches here. One opens A14 with nothing inside. Another opens A12 with a Prisoner's Note which contains the code to the door: 110391. Get to the keypad and enter this number. Proceed into the Solitary Confinement. Move to the end to find Alex's mother bound to the cross. This is the first key moment determining your game's ending. Make your choice between compassion or mercy, watch its consequences and look as the Prison transforms into its Otherworld version. |
 Two Order Members are standing up ahead. Take them out. There's an old newspaper in the Cell B5. Pull the lever on the wall to open a gate to the stairway and go downstairs. B5 has a Prisoner's Letter. In the hallway across there's
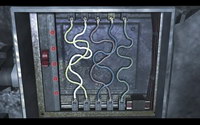
 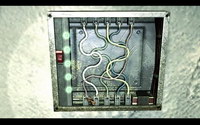 Once again you have to connect wires by trial and error. You can determine how many wires are connected correctly by hitting the switch – green lights will show the number of correct ones. Here's the right answer to the puzzle:
11. Otherworld PrisonLeave the area. Save your game at the Save Point on the fence and proceed to the next room where a metal cage will rise from the centre of the room. The lever will disappear into the hole. Don't reach inside yet – you will be punished with appearance of a Needler. You have to solve a riddle first to pull the lever safely.
The cage will go up revealing a hole in the ground. Jump into the hole. Alex will meet up with Wheeler in this room. Find a Save Point here to save your game and squeeze through the gap in the wall. Go up the stairs and continue along the path to a room where a couple of Needlers descend from the ceiling. Defeat them with the help of Wheeler and run further until you get to the door with a locking mechanism. Before entering turn left into a room with a Save Point, a First Aid Kit and a Health Drink on the shelves. Open the sealed room. After the cutscene Alex finds himself trapped in the chamber with a monster called Asphyxia.
After the fight Alex will see Josh through the broken window running away as always. Follow him through the door and you’ll enter a new area – the Church. |
 The cage has three dials on it. Accordingly there are three tables in the rooms with the riddles. Read the texts to find out how to turn the dials. The first one reads:
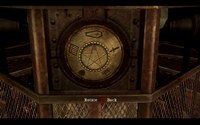 "The man who devised it
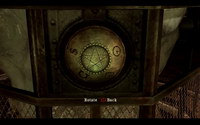 "What man loves more than life
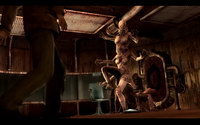 Asphyxia’s close combat attacks can be very annoying and are hard to dodge, so you better stay as far from her as possible. Any kind of frontal attacks don’t seem to make serious damage to her and that’s because her weak spot is her tail. You should follow a simple tactic to finish this fight quick and easy. Make some distance between you and the monster, stand so that room’s wall would be right behind you and wait as the boss approaches you. Wait till the very moment when Asphyxia is ready to rush forward and run to the side. Asphyxia will hit the wall instead of Alex. Use this moment to slash her tail with your axe. Make two or three blows and then quickly run away as furious monster will try to hit you with her tail. Repeat this tactic several times more, before you’ll be able to deliver the finishing blow.
12. ChurchRun towards Josh up ahead – he takes off as usually. Investigate the left side of this area to find Pistol Ammunition x2. A Smog will attack here. Dispose of him and rotate the wheel to proceed through the gate. After the gate on the right is a Health Drink. Another Smog roams this area. Kill it or run past, grab the Rifle Ammunition to the right of the stairs, then enter the Church. Return to the Main Hall and prepare yourself for the attack of two Schisms. Shoot them down and head to the West Wing. Examine the statue on the 1st floor and put the Unlit Candle on the statue's holder. The statue will release the Candle Plate from her arms. To the left of the statue there's Pistol Ammunition. Go up to the 2nd floor. Get the Health Drink from the table, Shotgun Ammunition from the other side of the benches and examine the triptych painting. You can cut through each painting, but you really need to cut only through the painting of the man to get the Tree Plate. The picture of the woman has nothing inside and the picture of a tree hides a Swarm. As soon as you cut the picture of the man, a Schism will rush through the gate and attack. Get rid of it and go through the gate. Grab the Rifle Ammunition at the start of the hallway. Go further to pick up the First Aid Kit on the bench and the Sword Plate underneath the stained glass window with a picture of the knight. A Siam will ambush you breaking through the glass and throw you down to the Main Hall. Here another Siam awaits, so that makes two of them. Equip yourself with the rifle and run to the back of the church to make some distance between you and the Siams. Shoot them and change your position if needed to keep the distance. When the Siams are history, head to the organ as you have all five plates now.
After the plates are fixed in the right spots, the organ opens up revealing a secret chamber with Alex's father, Adam Shepherd, tied to two pylons. During the conversation Adam gives Alex the Shepherd Family Ring and is being eventually sliced by the Bogeyman. After the cutscene go through what is left of Adam Shepherd and collect the Health Drink as well as the Child's Drawing (17/17) from the back of one pylon. Go downstairs. The path to the right is blocked by steam. Go to your left and find a mining suit on the table. With this protection Alex can pass through the steam. Call the elevator and watch the cutscene. The elevator brings Curtis inside. Alex doesn't have any option but to ride together with him. Seems like Curtis is not fooled by Alex's disguise and eventually knocks him out. |
 Pick up the
 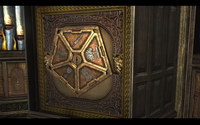 The slots of the organ pentagon are labeled with different emotions. You need to match these labels with the plates. In order to do that, you need to remember the circumstances under which you got the plates. The Chalice Plate was obtained in the baptismal font full of blood and containing a body which resembles some sort of sacrifice. The Kneeling Plate was taken from a person in the confession booth. The man seemed to penitent his sins. The Candle Plate was taken from the statue of the woman with a look of sadness and sorrow on her face. The Tree Plate was behind the painting of the man staring with desire at the woman from another painting. The Sword Plate was obtained from below the image of a knight being stabbed in the back by an executioner. The scene resembles vengeance.
13. UndergroundAlex is brought to a chamber with Judge Holloway. She reveals Alex what's really happening and takes the power drill to end Alex's life which doesn't really get along with our plan, so push the button on-screen to get yourself free and get rid of this crazy bitch. After the fight look around to collect the Lair Map, the First Aid Kit, the Health Drink and the Ceremonial Dagger. This is your only weapon for now as all your weapons were taken away. Save your game at the Save Point and leave the room. Head to Room 212 in Sector 2. There's a single Order Member inside. Dispose of him and grab the Steel Pipe from the corpse of a policeman. Break the glass into the adjacent room and another Order Member will make his appearance. After defeating him get Shotgun Ammunition from the shelf, the Sector 3 Key from the key rack and your Mk 23 Handgun from the counter. You may also examine the Through the Fog book on the table. Exit through the door of Room 211 and find the last Child's Drawing (18/18) behind the dumpster. Return to the hall through Rooms 211 and 212. Two Order Members will attack you here. Go back into Room 320 to get the Health Drink and the First Aid Kit from the counter. There's also a book lying on the same counter. Go to Room 321 and grab the Room 301 Key from the key rack on the wall. Return to the hall. Rotate the valve to let Elle step through and join her as she holds the gate open with the valve on her side. In the next area two Order members will attack, one of which has a rifle. Try attacking the one with the rifle first and then finish the other one. Unlock Room 301 and step inside. There are some memos in this room. Also you will find one Pistol Ammunition in the cabinet and another Pistol Ammunition in the cabinet past the curtains. Check the back to get All Weapons Back. In the back there's a Health Drink in the cabinet and a Serum on the table. Break the glass separating the two rooms and hop over to Room 302. Grab the First Aid Kit from the shelf and examine the Torture List. Step back to Room 301 and exit to the hall. Head to Sector 1 through Sector 2. Get rid of a lonely Order Member and do the trick gate to proceed.
Step inside the chamber. There are four altars here with plaques. Examine the Shepherd family altar to trigger a cutscene and the final boss fight.
Congratulations! You’ve beaten Silent Hill: Homecoming. Watch the cutscene and your ending. Check out the Endings section to learn more about them. Also if you've collected all the drawings and photos, you'll see a bonus cutscene after the credits. |
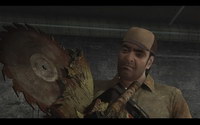 Head to Sector 3, duck under the bars and use the Sector 3 Key to unlock the door. This area is patrolled by one Order Member. Eliminate him, pry the door to the hallway with your steel pipe and continue your way. There are two Order Members around the corner. Defeat them and proceed down the hallway ducking under the bars. The gate will close behind Alex. Move to Room 320 to trigger the scene. Elle is being tortured by Curtis. Now, you must act quickly or Elle will die. Climb over the gate to your left, push the fridge blocking the door and pry the door open with your steel pipe. Step inside Room 321. Curtis will have to distract from Elle and attack Alex with his circular saw. The battle with him is pretty easy. Equip your dagger and attack him without breaks. The saw is so slow that Curtis shouldn't be able to counterattack you. You may also use your handgun to deal with him. Either way, after the fight Alex frees Elle and they leave the room.
 Enter Room 113 and get the
 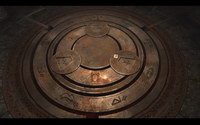 There are four tablets around the room. You cannot read them now. Use your ceremonial dagger on the columns to the right of each tablet to remove the red covering from them and make the text legible. These are the contracts with God of the four founding families of Shepherd's Glen. Draw special attention to the symbols of the families and the method of child's killing:
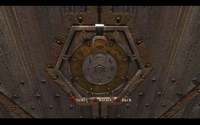 After matching the two rings the lock on the door will open. Approach it to find another ring puzzle. Now you will have to match Shepherd family's symbols in both rings so that they would be at the top. The symbol of Shepherd family in the inner ring is a drop of water and in the outer one is a trident.
 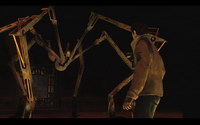 The fight is becoming more complicated if you don’t have much ammo – you’ll need to get close to Amnion’s body in this case. Amnion’s primary attack is swinging with its front leg. Another its attack at this stage is black spray coming from its mouth. To dodge both attacks just keep an eye on the monster’s legs – dodge when Amnion raises one or both of its front legs. Then approach the body and use your knife to slice it. Once the boss has suffered enough damage it will change its stance.