Pearl Creek
Contents
Walkthrough
Escape from Silent Hill
Inside the apartment check the drawers in front of you to get a First Aid Kit. Proceed into the kitchen to hear the next dedication from DJ Ricks on the radio.
Exit to the hallway. Now you can go straight to the ground floor and exit the building or explore a bit to make another side quest.
Side Quest: Stolen Goods
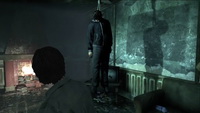 The quest takes place in the apartment building through which you enter Pearl Creek from Hillside. After you enter the apartment through the window, exit into the hallway and climb up the stairs to the 3rd floor. Go to the right and find the door with the Threatening Letter (10/54). Take the note and go through the door. Head into the bedroom, take a look at the hanging body of the thief and pull the bead frame to uncover a stash of stolen items. Grab all the items from the box: Locket, Gold Watch, Money Box and War Medal. The quest takes place in the apartment building through which you enter Pearl Creek from Hillside. After you enter the apartment through the window, exit into the hallway and climb up the stairs to the 3rd floor. Go to the right and find the door with the Threatening Letter (10/54). Take the note and go through the door. Head into the bedroom, take a look at the hanging body of the thief and pull the bead frame to uncover a stash of stolen items. Grab all the items from the box: Locket, Gold Watch, Money Box and War Medal.
Return the stolen items to their rightful owners
To complete the quest you need to return all the items to where they belong. To find the appropriate places you need to explore the apartments in the building and listen for the background sounds which indicate the place and hint what item should be put in that place. Here are the places where the items belong:
- Locket. Apartment on the 3rd floor (across the thief's apartment), living room. Place the Locket on the table with a tray.
- Gold Watch. Same apartment on the 3rd floor (across the thief's apartment), bedroom. Place the Gold Watch on a hand display on the table by the windows.
- Money Box. Apartment on the 2nd floor, child's room (with a disco ball). Place the Money Box on the
nightstand with some coins on top by the window. While returning the item check the drawers in the apartment's bedroom to get some Pistol Bullets.
- War Medal. Apartment on the 1st floor, bedroom. Place the War Medal in the case on the nightstand.
The quest is complete. Now you can collect your reward for it. Go back to the thief's apartment on the third floor. You'll find out that the body is gone leaving a new set of clothes for Murphy to put on. |
Side Quest: The Art
Collector (cont.)
 The third painting - “Wonder” - is hanging in the kitchen of the 1st floor apartment. The third painting - “Wonder” - is hanging in the kitchen of the 1st floor apartment.
|
When you're done with the side quests in the building, approach the mailboxes on the 1st floor to start a cutscene with the Mailman. During the conversation he will hint you where to go next.
Find a way to the Radio Station
 Now, you goal is to reach the Centennial Building on Brite Street. To get there you need to go to Laymond Avenue through a narrow alley between houses, then go through Logan Park and enter the Centennial Building from the west. However there are a lot of things to explore and do in Pearl Creek. Those who're interested in the main story only, please skip to the next section.
After the conversation with Howard take an alley to the west (where the mailman went) and past a playground.
Side Quest: Digging up the Past (cont.)
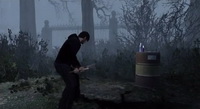
 The third dig site is in Pearl Creek, in a park south of Cook Street. The nearest shovel can be found at the beginning of the alley you've just gone through. The third dig site is in Pearl Creek, in a park south of Cook Street. The nearest shovel can be found at the beginning of the alley you've just gone through. |
After exiting from the playground, take the path to the left along the fence to pick up a First Aid Kit in the dead end. Go to the north and then west into the alley. There's usually a Weeping Bat here. Take it out, then check the area for a radio and a First Aid Kit on the ground further to the west. Also grab a Hook next to the radio as you'll need that soon. To the east there's a green door leading to the art gallery. You don't really need to go in there yet as you don't have all the paintings collected, but check the gallery for some mystery notes.
Side Quest: The Art Collector (cont.)
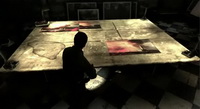 Inside head down the hallway into the exhibition room and take the Gallery Letter 1 (11/54). Return to the hallway and go into the office to the right. Here take the Gallery Letter 2 (12/54) from the sofa and the Gallery Owner’s Note (13/54) from the desk. Find the staircase and head into the
basement to find a big table with three paintings lying on top of it. Inside head down the hallway into the exhibition room and take the Gallery Letter 1 (11/54). Return to the hallway and go into the office to the right. Here take the Gallery Letter 2 (12/54) from the sofa and the Gallery Owner’s Note (13/54) from the desk. Find the staircase and head into the
basement to find a big table with three paintings lying on top of it.
Find the missing paintings
There is a series of nine paintings with a hidden map painted over them. Three paintings are already on the table, six paintings are missing. By now you have collected three. You can place your paintings on the table. Nothing else to do here, so get outside. |
Now run to the east along Cook Street and then up north via Lansdale Avenue. Look for a retractable ladder on the east side of the street. Pull it down with the Hook you took earlier near the art gallery. Climb up the ladder and enter the apartment through a window.
Room 302
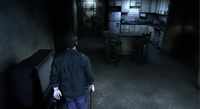 This apartment looks almost exactly like Room 302 from Silent Hill 4: The Room. You can collect some useful items in here - a Colt on the kitchen counter and a First Aid Kit on the chair. Head back outside after grabbing all the stuff. This apartment looks almost exactly like Room 302 from Silent Hill 4: The Room. You can collect some useful items in here - a Colt on the kitchen counter and a First Aid Kit on the chair. Head back outside after grabbing all the stuff.
|
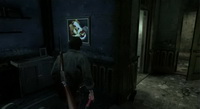
Cross the street and look for the poster on the wall to start the "Ribbons" side quest.
Side Quest: Ribbons
 To start the quest find and read a missing person poster on the wall of the building on Lansdale Avenue just north of Cook Street. To start the quest find and read a missing person poster on the wall of the building on Lansdale Avenue just north of Cook Street.
Find the missing girl
Proceed to the north and find the Mother’s Note (14/54) on the lunch box by the
lamppost with a yellow ribbon to get a new objective.
Follow the girl's trail home
According to the note you need to follow the ribbons tied to the lamp posts and trees across the town. However, you cannot complete this side quest until you go through the Centennial Building. We'll resume this quest later in the game. |
At the intersection of Lansdale Avenue and Brite Street walk to the east. Here you can find the Newspaper Article (Prison Riot) (15/54) on the walkway along the south side.
Side Quest: Bird Cage (cont.)
 The second bird cage is found at the corner of Brite Street and Lansdale Avenue to the south of the Bank. The second bird cage is found at the corner of Brite Street and Lansdale Avenue to the south of the Bank.
|
Now you can enter the Bank for another side quest.
Side Quest: The Bank
 Before you start the quest look around the building for some good weapons as this quest involves a lot of combat. There's a Crowbar in the office on the 1st floor and a Fire Axe up in the director's
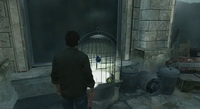
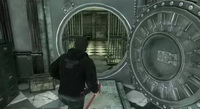
office on the 2nd floor. There's also a First Aid Kit in the back of the teller's area to the left from the entrance. When you're ready head down into the basement and enter the vault. Try to open one of the safety deposit boxes to trigger the alarm and start the quest (Note: If you don't wish to continue the quest, go into the director's office on the 2nd floor and press the kill switch under the table to stop the alarm. This, however, will also close the vault's door, so to try again you need to re-enter the Bank's building). Before you start the quest look around the building for some good weapons as this quest involves a lot of combat. There's a Crowbar in the office on the 1st floor and a Fire Axe up in the director's
office on the 2nd floor. There's also a First Aid Kit in the back of the teller's area to the left from the entrance. When you're ready head down into the basement and enter the vault. Try to open one of the safety deposit boxes to trigger the alarm and start the quest (Note: If you don't wish to continue the quest, go into the director's office on the 2nd floor and press the kill switch under the table to stop the alarm. This, however, will also close the vault's door, so to try again you need to re-enter the Bank's building).
Bank mystery
To complete the quest you need to defeat five increasingly hard waves of coming monsters in the main hall of the Bank. Each victory opens one safety deposit box with some useful items in it:
- One Screamer, a First Aid Kit in the box.
- Two Screamers, Pistol Bullets in the box.
- One Screamer and one Brawler, a Colt in the box.
- Two Brawlers, Pistol Bullets in the box.
- One Screamer, one Brawler and one Stabber, three First Aid Kits in the box.
The quest is complete when you defeat the last enemy. Don't forget to collect the remaining items in the vault as your reward. |
Walk north of the Bank to find another First Aid Kit on the ground in front of the obstacle. Take the path to the west between barricades to get to Laymond Avenue. Here check eastern Pearl Creek underground entrance to start a new side quest.
Side Quest: Homeless
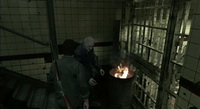 Climb down the stairs via the eastern entrance to find a homeless man named Homer standing by the fire. Talk to the man to hear his proposal and start the quest. He needs some items in return for which he's going to unlock the doors to the underground tunnels leading to other parts of the town. Climb down the stairs via the eastern entrance to find a homeless man named Homer standing by the fire. Talk to the man to hear his proposal and start the quest. He needs some items in return for which he's going to unlock the doors to the underground tunnels leading to other parts of the town.
Find food for the beggar
First the homeless man ask you to bring him some food. Get back to the street and search for a vending machine. Location of the machine for different puzzle difficulties:
- Easy - at the intersection of Brite Street and Laymond Avenue
- Normal - along the south edge of Cook Street between Laymond Avenue and Lansdale Avenue
- Hard - in the alley south of Crook Street
Use the Money from your inventory to purchase a Candy Bar from the vending machine and return to the homeless. As a reward he will unlock the tunnel to Hillside.
Find a warm coat for the beggar
After you give Homer the Candy Bar, he complains about cold nights and asks you to bring him a coat. It's not possible to get that item at this stage of the game, so let's return to this quest later. |
Head north of the subway. Explore the area at the end of the street to collect the Addressed Envelope (16/54). Backtrack a little bit to find a short alley to the east. Duck into a hole in the garage door to find a locked storage. The storage contains another painting.
Side Quest: The Art
Collector (cont.)
 The fourth painting - “Certainty” - is lying in the storage unit on Laymond Avenue to the north of the Pearl Creek underground entrance. To open the door you need a code which is hinted in the Addressed Envelope, found on the pavement to the north of the storage unit. The keypad code is 827 (circled numbers in the address on the envelope). The fourth painting - “Certainty” - is lying in the storage unit on Laymond Avenue to the north of the Pearl Creek underground entrance. To open the door you need a code which is hinted in the Addressed Envelope, found on the pavement to the north of the storage unit. The keypad code is 827 (circled numbers in the address on the envelope).
|
There is a First Aid Kit on the ground to the northwest from the storage. Enter Logan's Park now. Take the right path to collect a Child's Kite - another Silent Hill Artifact.
Side Quest: Digging up the Past (cont.)
 The fourth dig site is in the northwestern corner of Logan’s Park. The nearest shovel can be found in the Pearl Creek underground entrance on Laymond Avenue, just past the gate behind the homeless guy. The fourth dig site is in the northwestern corner of Logan’s Park. The nearest shovel can be found in the Pearl Creek underground entrance on Laymond Avenue, just past the gate behind the homeless guy.
|
It's time to enter the Cenntenial Building. The entrance to the building is located on its west side. Find the path leading south from the center of Logan's park and enter the building.