Walkthrough
Letter from Silent Heaven
01. East South Vale
02. Wood Side Apartments
03. Blue Creek Apartments
04. West South Vale
05. Brookhaven Hospital
06. Nightmare Hospital
07. Dark South Vale
08. Silent Hill Historical Society
09. Toluca Prison
10. The Labyrinth
11. Toluca Lake
12. Lake View
Hotel
13. Nightmare
Hotel
Born from a Wish
01. West South
Vale
02. Baldwin
Mansion
03. Blue
Creek Apartments
Recommendations Before You Start
I highly recommend that you change Walk/Run Control to Reverse. Normally you must hold Square to run while also pushing the analog stick, but changing this option to Reverse allows you to run just by using the analog stick without any other buttons, which is much more simplified and convenient. To change this, visit the Options menu and press L1 or R1 to access the Extra Options menu. Then change Walk/Run Control from Normal to Reverse.
Additionally, if you want to experience Silent Hill 2 at its best, especially your first time, I highly recommend playing it at night with the lights off, loud or at least moderate volume, and all by yourself. It is a horror game after all and this will allow you to soak up the atmosphere at its fullest.
Further, a good surround sound system and sub woofer or headphones will really help place you in the environment and bring out the sound, which is recognized to be among the best in the genre. You may find all this a bit intimidating and that's understandable as the game can be somewhat terrifying, but this is the purest way to experience the game and get the most out of it. If you can handle it, I guarantee you will be happy you played it this way.
Note: This walkthrough was written while playing on Normal Action Level. Therefore enemy locations and numbers may vary on other difficulties, although item locations will always be the same. All riddles and puzzles will be thoroughly explained for all difficulties, as well as tips for each boss fight.
This walkthrough was also written with the Playstation 2 version in mind, thus you will see PS2 button inputs like "X" come up often. If playing on Xbox or PC, keep in mind your button inputs will be different.
Color legend
Letter from Mary – items
Wooden Plank – weapons
Health Drink – supplies
Map of Silent Hill – maps
Save Point – save points
Letter from Silent Heaven
East South Vale
"In my restless dreams, I see that town. Silent Hill."
Contents
- Roadside Reststop
- Observation Deck
- Foggy Trail
- Graveyard
- Path into Town
- Sanders and Lindsey Street
- Vachss Road: Finding the Radio
- Figuring Out a Way to the Park
- Camper Trailer and Neely's Bar
- To the North End of Martin Street
- Finding the Apartment Building
Video Walkthrough |
Complete Maps |

|
Roadside Reststop

Joining our main character James Sunderland in a roadside restroom, you will notice two items in your starting inventory: 1 Letter from Mary and 2 Photo of Mary. Leave the restroom around the corner.
Note on Starting Items:
Whether you do, do not, or how much you examine these two items may influence the outcome of the ending you'll receive at the end of the game, amongst other factors. That means reading the letter and looking more closely at the photo via the "Examine" option. I suggest just forgetting about it and playing normally, but feel free to read more in the Endings section, although I suggest waiting to complete the game to avoid any minor spoilers with the ending titles.
New Game Plus Item: Blue Gem
|

Observation Deck

On the desolate and foggy observation deck, James takes a moment to set the stage and explain why he's come to Silent Hill. He believes his wife Mary must be waiting for him at Rosewater Park, deeper into town.
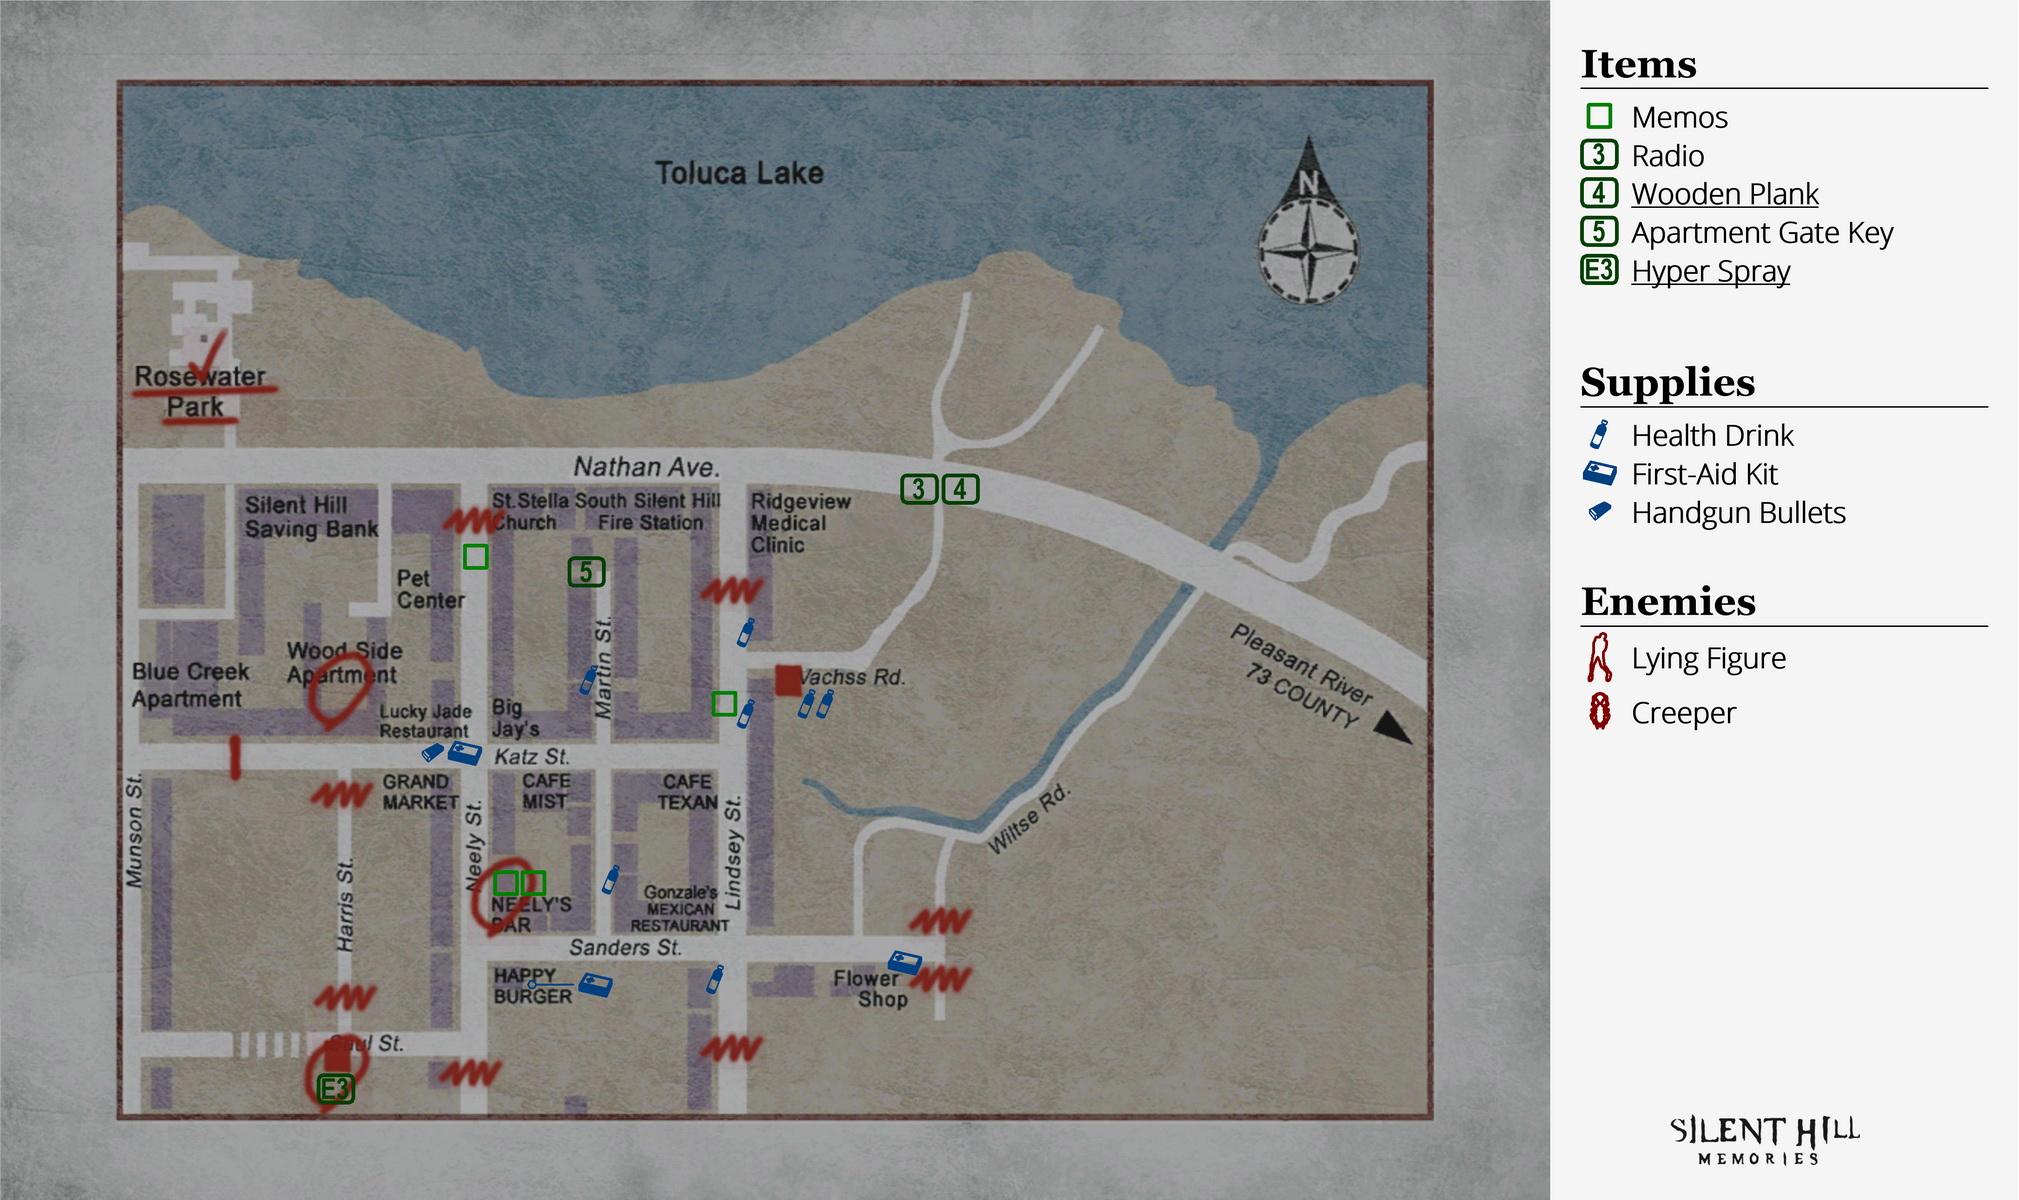
Head to the open door of the blue car and grab the Map of Silent Hill on the driver's seat. Looks like leaving the door wide open is of no concern to James... To the west is a blocked off road tunnel, but there's a staircase on the north side by the white van, right beside the "Toluca Lake" sign. Descend it to begin your adventure.
Foggy Trail

Follow the trail wherever it leads, trying to ignore the sounds of hungry dogs following you. Terrifying though, isn't it? You will soon reach a well that has a red square sheet of paper inside it, which is the first Save Point. You'll find many more of these over the game. To save, approach and examine them. It's too early to save anyway, so continue through the steel gate at the end of the path.
Graveyard

Follow the path into a graveyard ahead. Near the graves, James meets a confused and young dark-haired woman in a cutscene and asks her for directions to Silent Hill. Afterwards, head past her and through the northwest gate in the corner, to the right of the nearby building.
Path into Town
Keep moving down the linear path as you continue to soak in the game's very deliberate early pacing. Move along the fenced-off area and through the gate in the roofed hallway to hit the beginning of Wiltse Road, which takes you all the way into town.
New Game Plus Item: Chainsaw
|
Sanders and Lindsey Street
When you reach Sanders Street, you're now very much in Silent Hill. If you head to the other side of the road and east past the Flower Shop, you'll find a First-Aid Kit on the table. Now head west back the other way towards Lindsey Street.
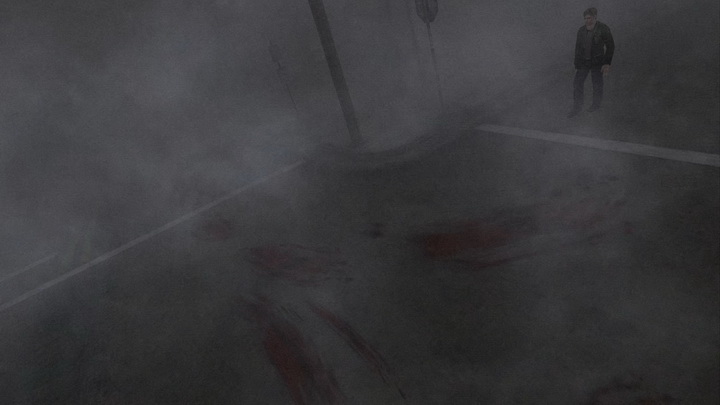
At the Lindsey/Sanders Street intersection, James spots blood streaks on the road while a disturbing creature disappears into the fog to the north. First, grab the Health Drink on the mini-staircase at the southwest corner of this intersection, then head north to see what that thing was.
You'll find Katz Street blocked off with caution tape ahead, so continue along the east side of the road where you'll find a Health Drink sitting by the garage door before Vachss Road. Just ahead in front of Vachss you'll notice more blood streaks on the ground leading down the narrow road, but first grab another Health Drink by the garage door on the north side, just past the road opening.
Vachss Road: Finding the Radio
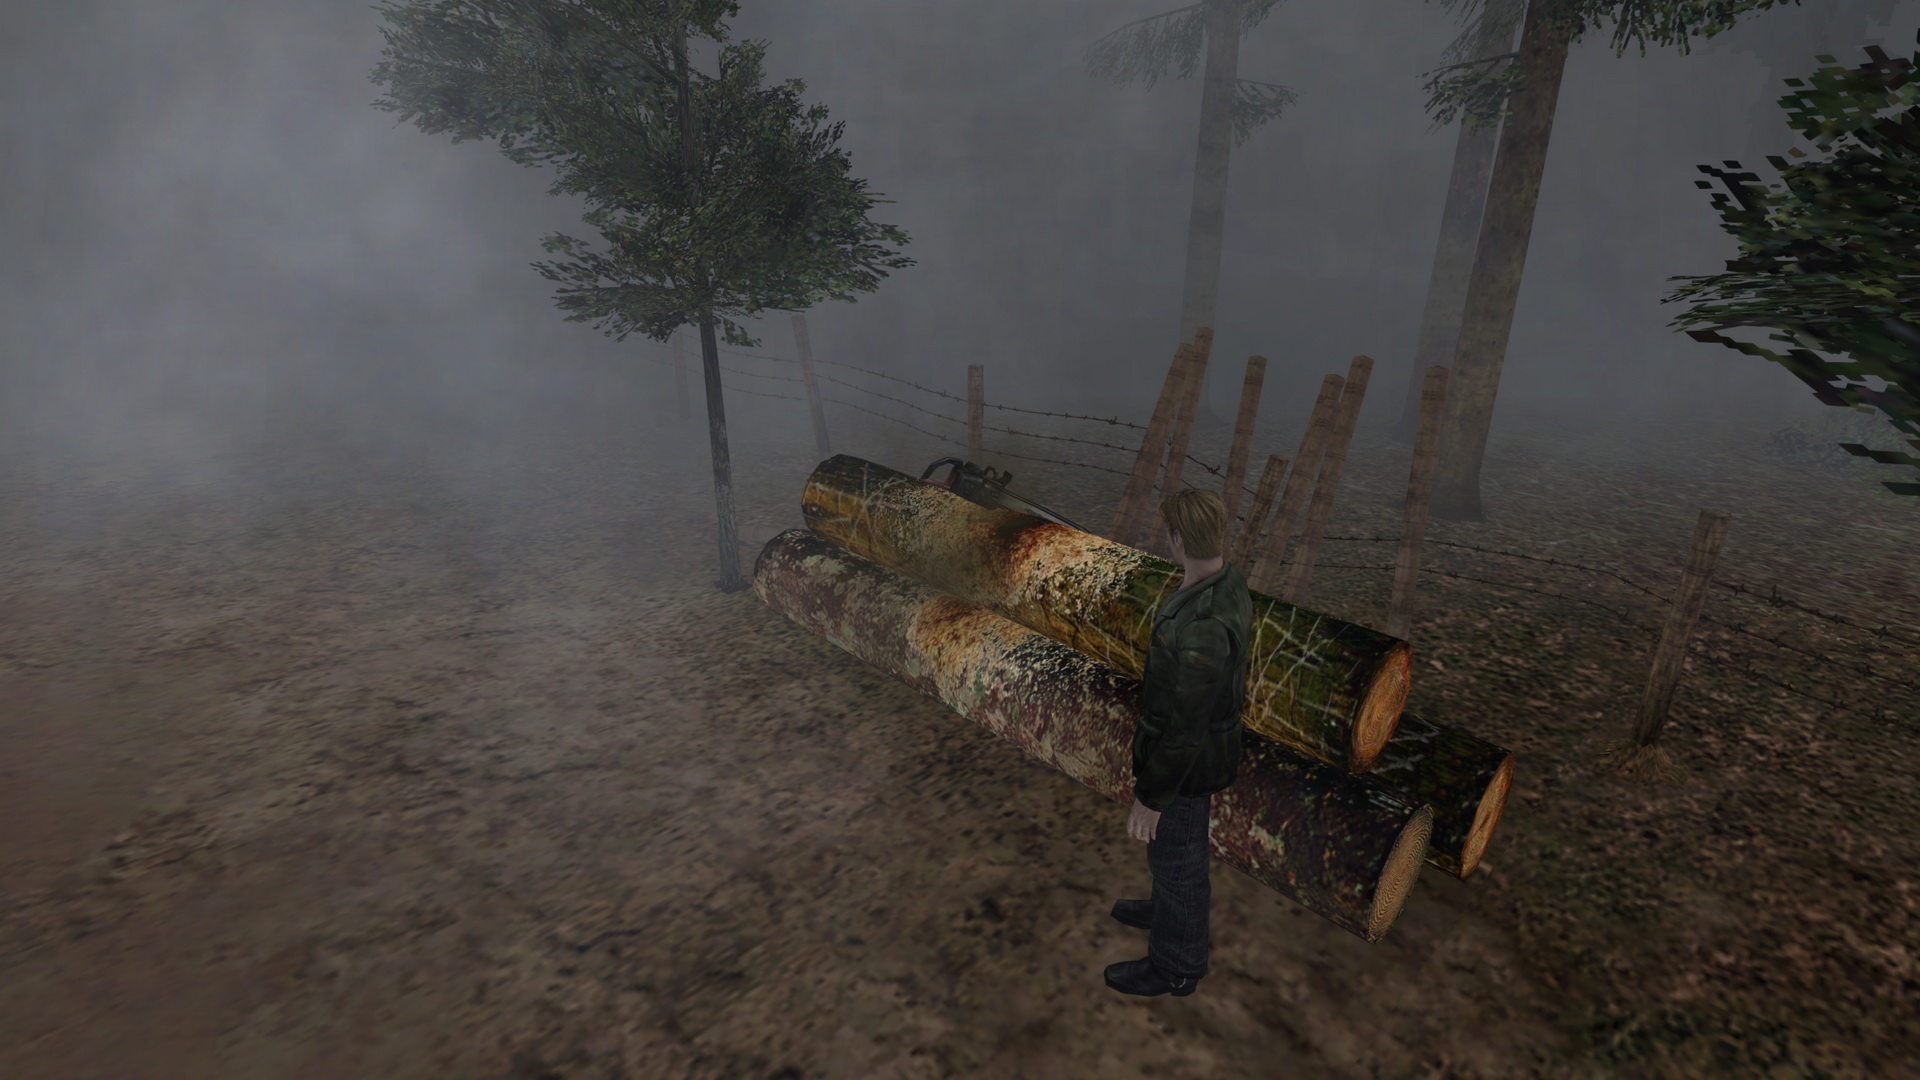
Now head east down Vachss to follow the blood streaks, where you'll find a fence-enclosed area with two more Health Drinks and a Save Point inside. Continue down Vachss, through the partially opened gate, and you'll start to hear radio static once you reach a bunch of planks in front of a small tunnel. Enter it to check it out.

James finds a 3 Radio inside before noticing the first enemy of the game emerge from the shadows: a Lying Figure. James grabs a 4 Wooden Plank from the barricade, so get ready to beat it down while avoiding its acid spit attack. This enemy dies upon dropping, but in the future you'll need to kick most enemies to finish them off. Leave back through the planks for another brief cutscene.
Note on Radio:
The Radio is a helpful tool that will emit static each time an enemy is nearby, warning you of their presence. You can turn it off in the inventory menu if you wish as it can also alert enemies to your presence, but I suggest just keeping it on as it hardly makes a difference and is fairly helpful in keeping you alert anyway.
Now head back to Lindsey Street, where you may hear and see a few Lying Figures walking around, so be careful or feel free to practice your plank-wielding skills on them.
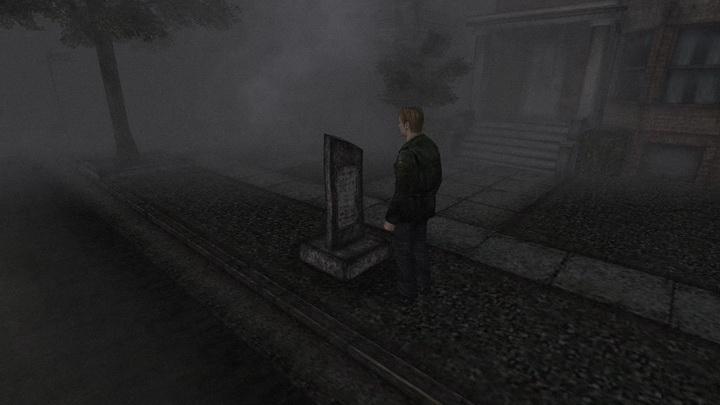
North of the Katz and Lindsey intersection on the west side, you'll find a stone monument that's partially-legible if you're interested in lore, but it's not too important. You'll also find that the caution tape blocking Katz Street is now cut, allowing you to head deeper into town. But who did that now...?
Figuring Out a Way to the Park
All right, so now we need to figure out how to get to Rosewater Park at the northwest corner of your map, but it won't be so easy. The north ends of Neely and Lindsey Street are blocked, and the west end of Katz Street is blocked off by a large construction sheet wall with a locked door, but there is also a locked gate near that spot that leads to an apartment building, so we may be able to find a way through. There is a natural solution to figure out where to go which we will follow, but if you wish to take a shortcut, you can skip or speed read through the next few paragraphs to locate the next key you need.
Your next step is the check out Saul Street, so head that way now. Coming from Lindsey, you can find a Health Drink past halfway down the south section of Martin Street (between Katz and Sanders), which is essentially an alleyway. You'll also probably encounter an annoying roach there called a Creeper, plus more Lying Figures roaming about.
Still on the way to Saul, there's a Health Drink on the steps of the Post Office to the east of Neely's Bar, while there's a First-Aid Kit at the east side of the Happy Burger restaurant to the south.
Camper Trailer and Neely's Bar
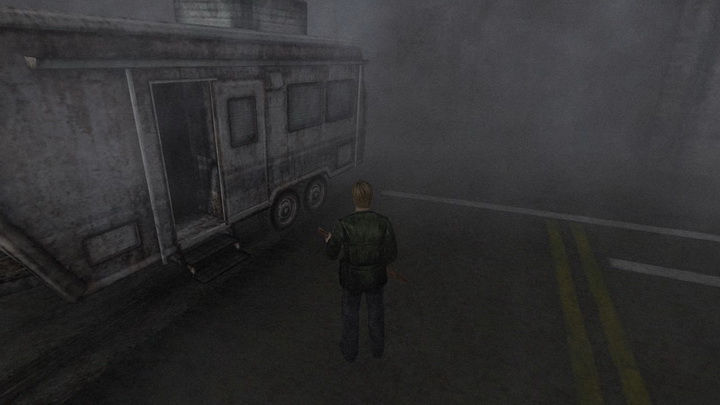
Once at Saul, you'll notice it's also blocked off with a large construction sheet with a locked door, but there's an accessible camper trailer very close to it. Enter it to find a memo on the couch saying, "I'll wait at 'BAR Neely's'", which becomes your next destination. There's also a Save Point on the bed.
New Game Plus Item: Hyper Spray
The mysterious can of spray can freeze most enemies, allowing them to be killed while defenseless, but depending on its colour may have other benefits. The freezing power of the spray is also helpful for getting some practice with the Chainsaw. The colour and effectiveness of the Hyper Spray depends on your ranking in your previous run. Read more about it in the Unlockables and Secrets section, while the Hyper Spray Upgrades segment of the 10-Star Ranking Guide goes into full detail. |

Exit the trailer through the left door and head to Neely's Bar at the northeast corner of Neely and Sanders Street. You'll find a First-Aid Kit on the way in front of the Chiropractic and Sports Injury Center at the west side of Neely.

The front door to Neely's won't open, but there is a side door along Neely Street you can slip through. Inside, you'll find a map on the counter with some places of interest. James notices a question mark at the north end of Martin Street and circles that spot on his own map, so that's your next destination. Before leaving, have a look at the paper-covered window for a strange message.
To the North End of Martin Street
Outside the bar, head north up Neely, east down Katz and move all the way to the north end of Martin Street, past any Lying Figures and Creepers on the way. A bit north up Martin, you'll find a Health Drink by the left fence. Continue ahead, and if you want a surprise, run right beside the white van ahead. At the north end, move off the road to the left to find a corpse along the wooden fence. Examine it to find the 5 Apartment Gate Key.

Finding the Apartment Building
If you open your inventory and examine the key there, James will notice it's the key for "Wood Side Apartment". Checking your map, Wood Side is at the west end of Katz Street, which is exactly where we pointed out a locked gate in front of a large building earlier, so head there.
On the way, you may want to head north up Neely Street to find a corpse and six scattered memos providing some tips on dealing with monsters, plus it's a pretty cool read. Do be sure to kill the nearby Lying Figures before reading, or just keep track of them, as the game will continue normally while reading small notes like this when you can still see James.
At the northwest corner of Katz and Neely in the open area under the roof, grab the First-Aid Kit and a pack of Handgun Bullets. Don't worry, you didn't miss the Handgun; you're just getting a head start on ammo.

Continue west until you reach the gate on the north sidewalk where the camera angle changes, and head through it using the Apartment Gate Key. There's one entrance here, and if you head east inside here, you'll find another entrance but it's locked for now, so enter Wood Side via the double doors right by the gate.
| 02. Wood Side Apartments |