Weapons
Silent Hill 4 takes the franchise to new territory by introducing a much heavier focus on action than before, and as a result there's 15 different weapons to choose from, including 12 variations of the golf club. Also a change, just two of those are firearms as the series has shifted more towards melee combat. Refer to the charts below for a brief overview of which weapons work best for which enemies. As you can see, the Rusty Axe is the best overall weapon in the game. |
| Melee Chart | WB | BWB | SP | STG | AB | SPA | RAX | BS | PCK | T | PAX | GC | C |
| Sniffer Dog | NE | NE | E | VE | VE | VE | VE | NE | VE | E | E | VE | E |
| Wall Man | NE | NE | E | NE | VE | E | VE | NE | E | E | E | VE | NE |
| Hummer | NE | NE | VE | NE | VE | NE | VE | E | E | VE | NE | VE | NE |
| Twin Victim | NE | NE | E | VE | VE | VE | VE | NE | VE | E | VE | E | E |
| Toadstool | E | E | VE | E | VE | E | VE | NE | VE | VE | E | VE | NE |
| Whitestool | E | E | VE | E | VE | E | VE | NE | VE | VE | E | VE | NE |
| Tremer | E | E | VE | E | VE | E | VE | NE | VE | VE | E | VE | E |
| Gum Head | NE | NE | E | VE | VE | VE | VE | NE | VE | E | VE | E | E |
| Patient | NE | NE | E | VE | VE | VE | VE | NE | VE | E | VE | E | E |
| Wheelchair | NE | NE | E | NE | E | E | VE | NE | E | NE | E | E | NE |
| Bottom | NE | NE | E | VE | VE | VE | VE | NE | VE | E | VE | E | E |
| Man with the Coat | NE | NE | E | E | E | E | VE | NE | NE | NE | VE | E | NE |
| Ghosts | NE | NE | E | E | E | VE | VE | NE | NE | NE | VE | E | NE |
| Firearm Chart | P | RR |
| Sniffer Dog | VE | VE |
| Wall Man | VE | VE |
| Hummer | E | E |
| Twin Victim | VE | VE |
| Toadstool | E | E |
| Whitestool | E | E |
| Tremer | E | E |
| Gum Head | VE | VE |
| Patient | VE | VE |
| Wheelchair | E | VE |
| Bottom | VE | VE |
| Man with the Coat | NE | E |
| Ghosts | NE | NE |
Legend: VE - Very Effective * - Extra Weapon |
Melee Weapons
Instead of the usual handful, Silent Hill 4 has 13 different melee weapons, not counting the 12 variants of the golf club. Combat has changed significantly from Silent Hill 3 and melee weapons will be your best friends since ammo is scarcer than ever, but the controls have also been modified to compensate. Hold R2 and use X to swing. Most weapons have a 1-2-3 combo of standard swings ending with an overhead downward swing. Beyond that and new to The Room, almost all weapons contain a special charge up attack. Hold X to charge up your special meter at the top of the screen and release to unleash that weapon's most powerful attack. You'll find this extremely useful as you go on, especially since Henry is invincible while performing it. |
Wine Bottle |
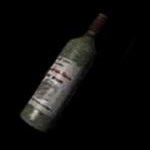
Description: "Bottle of white wine from the refrigerator. It'll break eventually if I keep using it as a weapon." Similar to the Knife in previous games, the Wine Bottle is a weapon to be ignored since you'll immediately find something much better. It is a small weapon only usable at extremely close range and offers very limited power and no charge up attack, although it is fairly quick to swing. Its only attack is an underhand swing but the best thing about the Wine Bottle is that it will soon break after some usage and become the more powerful Broken Wine Bottle (read about it below), but it's still not great. The Wine Bottle is the first weapon found in the game, sitting in Henry's fridge inside Room 302 from the very start. |
Broken Wine Bottle |
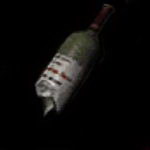
Description: "Bottle of white wine from the refrigerator. Now that it's broken, it's even more dangerous as a weapon." Although an improvement from its regular variant due to its sharp glass edges, the Broken Wine Bottle still lacks power and is not easy to use. Its only attack is a forward thrust, which is slower but more powerful than its unbroken variant. After finding the Wine Bottle in Room 302's fridge, Henry must use it until it breaks to turn it into the Broken Wine Bottle. Or you can keep smacking the large snake-like tube found past the subway turnstiles. But again, it's not quite a weapon worth using. |
Steel Pipe |
Description: "3-foot-long sewer pipe. Not very powerful, but fairly easy to use." A traditional Steel Pipe, faithful to the series. A good step up from the Wine Bottle before even entering the field, the Steel Pipe offers moderate range low to moderate power. It's probably most effective for knocking down Hummers but can handle Sniffers and Twin Victims fairly well too. The Steel Pipe is normally swung over the shoulder by tapping X, while repeated presses during the same combo will make Henry perform an overhead downward swing the third time. It also contains a 360 degree swing like a baseball bat when charged up that offers a good amount of power and may knock some enemies down. The Steel Pipe is found hanging from 302's washroom hole near the beginning of the game and will carry you to the Building World where you'll finally find several better options. |
Stun Gun |
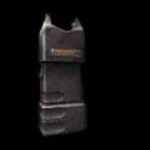
Description: "High-voltage stun device. Fairly short- ranged, due to its need for direct contact." The Stun Gun is somewhat of a secret weapon and is unlikely to be found by the player in a first attempt, or even at all without knowing its location. Unlike Silent Hill 3, it does not require batteries or ammunition, making it all the more useful. While a little slow to handle, it offers a lot of power and is capable of knocking over most enemies in one zap. The Stun Gun can be found on the stand in the initial 4 o'clock cell on the second floor of the Water Prison World, inaccessible from its door. Therefore the player must arrange the cells and jump down from a hole above, then exit by jumping down again. On the first trip, just turn the 3F cells once right and jump down from the 3F 4 o'clock cell, while it will still be in the now 7 o'clock cell on the return trip if left. |
Aluminium Bat |
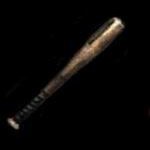
Description: "Aluminum alloy bat. Reasonably powerful and easy to use as a weapon." An ideal weapon for smashing baddies, the Aluminum Bat offers moderate power and a very powerful charge up swing to replace the Steel Pipe. It does however lack a bit of range since it's fairly short. It contains the same move set as the Steel Pipe with overshoulder swings plus an overhead swing as the third part of the combo, and the same 360 degree swing, but this one will do a lot of damage. The Aluminum Bat is found on the floor in Albert's Sporting Goods Store, Building World level B5. |
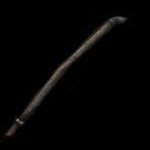
Spade |
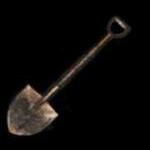
Description: "Ordinary spade from a construction site. It looks like it would be an impressive weapon." The Spade is a durable digging shovel and one of the best weapons in the game, offering a shade higher than moderate power although fairly slow to swing. Its only normal attack is an overhead downward swing, while its charge up attack is a forward thrust with great range of about five feet and high power. Henry also uses the Spade to shove into downed enemies, which maybe looks cool but adds a little extra time when a stomp is enough anyway. He also runs like a girl while holding the weapon, just saying. The Spade is located lying against the wall at the end of the hallway through the north doors of the east elevator's top floor (B8) in the Building World, which is a bit out of the way and thus missable, but likely worth the trip. It is perhaps the best single weapon for the final boss. |
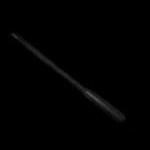
Rusty Axe |
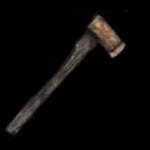
Description: "One-handed axe. A little short, but powerful and easy to handle." Quite frankly, by far the best and most versatile weapon in the game. The Rusty Axe is lightweight and quick, delivers moderate power and one hell of a charge up attack. The Axe's standard attack is a simple overshoulder swing, which Henry can perform rather quickly over and over. But what makes the Rusty Axe special is its charge up attack, giving it the longest range of any weapon. With this attack which also charges up quickly, Henry takes a few steps forward before unleashing a downward swing with a lot of force. The charge up attack gives Henry about six feet in range and thus you can regularly attack from a safe distance while it'll often knock enemies down to boot. The Rusty Axe can be found on the circular table by the bar in Bar Southfield in the Building World, level B15. Cherish it because it will do you well and is a great candidate for One Weapon Mode. |
Bug Spray |
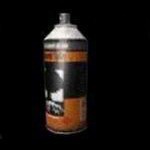
Description: "Aerosol insecticide. Effective against certain enemies." A special can of spray that instantly kills Hummers when sprayed. While effective for these creatures, it is essentially useless on all other enemies. It can briefly blind and stun them when sprayed but is not capable of damaging them. Spray in the direction of Hummers, particularly multiple for best results and they'll fall after a squeal. But really, standing on the spot with lengthy sprays is hardly any more effective than just batting them down with the Steel Pipe or anything else, making it perhaps not worth the inventory slot. The Bug Spray is found on the living room floor in room 203, Apartment World 2F. |
Paper-Cutting Knife |
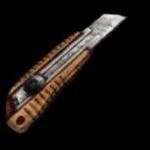
Description: "Originally made for cutting paper. It's hard to use as a weapon." This little bugger is one blindingly quick weapon. It does lack in power and will take longer to down enemies, but every hit will stun them anyway and its speed can be abused. Perhaps it's a better candidate for one on one combat where you won't be teamed up on. Its standard attack is a thrust, but the great thing about this Knife is that its special attack charges up in a flash, allowing you to quickly follow two normal swings with a charge up attack and keep on going. The Paper-Cutting Knife can be found on a desk in the Office, Hospital World 1F. Consider trying it out in One Weapon Mode if you want a good challenge. |
Torch |
Description: "Equipable item. The tip can be lit on fire to light up dark areas. Soak the torch in oil to make it last even longer." The Torch primarily exists to be lit and used as a light source during the Forest World return trip, but it can also be used as a weapon. Once the Torch is found, examine any fixed torch ("Holy Flame") to light it. Normally the fire stays lit for about 30 seconds, but if soaked in the oil found in the blue container under your laundry room hole in 302, it will stay lit for 3 minutes. As a weapon, it works like a pipe although it only has the one overshoulder swing and cannot be charged up either. Damage inflicted on enemies will be the same whether lit or not and the flame will go out if unequipped. So if an enemy is bothering you, consider beating it down with the Torch instead of switching to keep your fire going. That said, it is a weak weapon not meant for fighting. The Torch is found in the northwest corner of the cemetery at the end of the southwest passage, Forest World 2nd time, right at the beginning. Once the search quest has been completed here, this weapon is effectively rendered useless and should be dumped in your chest. |
Pickaxe of Despair |
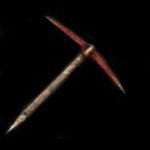
Description: "Ordinary pickaxe from a construction site. 'Despair' is written on the handle. Very powerful." The slowest weapon in the game but also the most powerful, making it very lethal if mastered but perhaps a little awkward to get comfortable with. Each standard overshoulder swing deals considerable damage and its charge up attack is absolutely deadly. With this special attack, Henry will spin his body 360 degrees while swinging the Pickaxe around, generally knocking down anything in its path. Give it some practice and see how you manage, and understand it can be a great weapon against the final boss, but it does have a steep learning curve. Just like the Spade it has a special stabbing attack instead of stomps when equipped, which is a bit of a nuisance since a regular stomp without it is always enough anyway. The Pickaxe of Despair is found lying in the ground inside the cave in the northwest passage of the Forest World 2nd time. Don't mistake it with the Pickaxe of Hope item found later in the game. |
Chainsaw |
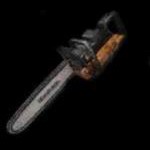
Description: "Originally made for cutting wood. As a weapon, it's a fearsome thing." The Chainsaw is an extra weapon which can only be acquired in A Brand-new Fear after completing the game once. It's a fun weapon to play with but deals disappointingly low damage, unlike Silent Hill 1 and 2. Although it is fairly versatile despite having to start it each time. Its standard attack is a slight downward arc and its charge up attack is a sideways arc which does a fair amount of damage. Henry will wave the weapon above his head if left idle for a moment, while it also features a stabbing finisher when stomping enemies. Once unlocked, the Chainsaw is found stabbed into the ground by a tree stump in the northeast pathway with Jasper's running car, Forest World. |
Golf Clubs |
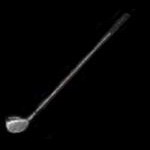
Description: "Golf club. Powerful and easy to use, but it looks like it could break easily." Throughout the game you will find several different golf clubs that can be used as weapons, although frankly you'll surely stop caring by a certain point when they keep on coming as you collect better gear. That said, golf clubs are fairly strong melee weapons that are great for the early game, but they can and will break easily after about a dozen swings. Once broken, they are useless and should be dumped in your item chest. There are 12 different clubs available in the game with slight variations in power, but they all use the same move set of an overshoulder swing followed by an overhead swing on the third combo, plus a charge up 360 swing of high power. The Driver and the low-numbered clubs are the strongest, but all clubs are fairly powerful. There's no point saving them so use them immediately. Let them break and move on to the next one or switch back to your regular weapon. Once you hit the Building World you'll find weapons better than any club and so there's not much reason to bother with them anymore. Read more about each club below. |
Driver Also known as 1-Wood, which actually has metal head in modern times, used for hitting long shots from a tee. It is one of the strongest clubs and is found in the Building World 2nd time, specifically in the same B1 hallway you begin the first trip in, but you'll have to go a bit out of your way to return there. 3-Wood A club used for making long shots. Woods originally had wooden heads, but ironically metal "woods" are now standard. Found on the ground in Albert's Sporting Goods on B5, Building World 2nd time (exactly where the 5-Iron is found). One of the strongest clubs available. 3-Iron Narrow metal head club. Carried by a Gum Head in the north lot on B10 of the Building World 2nd time. You must kill the monster to acquire it. One of the strongest clubs available. 4-Iron Narrow metal head club. Found on the ground in the broken display glass room in the Hospital World's 2F wing. One of the strongest clubs available. 5-Iron Narrow metal head club. Found on the ground in Albert's Sporting Goods, Building World level B5. 6-Iron Narrow metal head club. Found on the platform at the end of the southeast passage in the Forest World. 7-Iron Narrow metal head club. Carried by a Gum Head in the north lot on B10 of the Building World 2nd time. You must kill the monster to acquire it.. 8-Iron Narrow metal head club. Carried by a Gum Head in the north lot on B10 of the Building World 2nd time. You must kill the monster to acquire it. 9-Iron Narrow metal head club. Found on a far bench in the open subway train on the King Street Line platform, Subway World B4. Pitching Wedge A short iron with a large degree of loft, used for hitting high but short shots onto the green. Carried by a Gum Head by the door at the south of the B12 path, Building World. You must kill the monster to acquire it. Sand Wedge The shortest iron with the most loft, used for playing from sand bunkers (also called sand iron). Carried by a Gum Head in the north lot on B10 of the Building World 2nd time. You must kill the monster to acquire it. Putter A club specifically designed for putting on the green, generally at slow speeds and close distances. Found lying against the shelf in the northeast bedroom of room 207, Apartment World 2F. Broken Clubs Description: "It's broken and useless as a weapon." Derived from any club after about a dozen whacks. When broken, the club is completely useless and can't be used, so dump it in your item chest. |
FIREARMS
Silent Hill 4 takes a new approach of focusing more on melee weapons, leaving you with only two handguns as firearms. Further, ammo is more limited than ever before and each clip takes up a full inventory slot, making it impractical to carry a lot of ammo around. That said, it's perhaps best used as a backup weapon with just a clip or two, say for when facing multiple tough enemies. To use firearms, equip them and hold R2 to aim and X to fire at your target. Highlight the gun itself or another clip of ammo and hit Square to reload. |
Pistol |
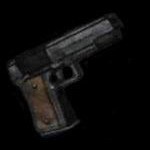
Description: "Easy-to-use handgun, but not much stopping power." What looks like an M1911, the Pistol is a great weapon of moderate power and medium range but its ammo is too limited to allow consistent or heavy use through the game. Therefore it's better suited as alternate weapon for special situations when melee weapons might not be as effective. Its clip capacity and bullets found in each pickup differs per difficulty level (12/10/8 for Easy/Normal/Hard respectively). The Pistol is an unmissable weapon that must be acquired early in the game to advance. It is found on the floor after straightening the short wall cabinet in Room 302, after returning from the Subway World when Cynthia slips into the ladies' room. |
Richard's Revolver |
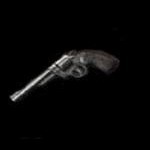
Description: "Holds a maximum of six bullets. Easy to use, with moderate stopping power." Richard's Revolver is another handgun but offers a lot more power than the Pistol. It also only holds 6 bullets per clip and ammo is found in much lower frequency with only a handful in the game. Therefore the Revolver is to be used more on special occasions for tough enemies and can often down them in one hit. With such a strong preference to melee weapons in this game, it is not quite imperative to use it anywhere specifically, so you're free use it how and wherever you like, but consider saving it for the more dangerous enemies. Richard's Revolver is found in the living room chair of room 207 (Richard's apartment), Apartment World 2F. |
Eileen-Only Weapons
While escorting Eileen through the latter half of the game from the Hospital World on, you have the choice of enlisting her into combat with several different weapons found. Each Eileen weapon does cost you an inventory slot and it is never mandatory that you make her fight, but you'd be surprised how helpful she can be in certain situations, even while using each weapon one-handed due to the cast on her other arm. Do understand that Eileen can be a bit over aggressive at times and slow you down by beating enemies that aren't a threat to either of you anymore. Consider unequipping her weapon in these moments to get her to stop, or only equip her when you want her to fight. Once an Eileen weapon is found, equip it with Square while close to Eileen and she'll begin using it. You must be near her to unequip it, meaning you cannot ever unequip if alone in your apartment or elsewhere. So consider unequipping her weapon when returning to your apartment in case you want to make some inventory changes. |
Eileen's Bag |
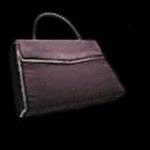
Description: "Eileen's handbag. Looks like it could cause a little bit of damage." The first Eileen weapon found even before retrieving Eileen. While it does inflict some damage and can be a tad helpful, it may not be worth the inventory slot. I mean, how much damage could a handbag possibly do? Eileen's handbag attack is a simple swing and perhaps only really useful for knocking down Hummers, which Eileen does quite well. Eileen's Bag is found on the floor by the stairwell in the Hospital World's Lobby. |
Riding Crop |
Description: "Light and easy to use with good reach. It looks like it would be very painful." Now this is where Eileen's weapons start getting good. The Riding Crop is a whip used for horseback riding or just plain punishment (oh Henry, you naughty boy). Sadly Eileen won't give in to Henry's erotic desires but as a weapon its range and power and quite solid so consider giving it a try. The Riding Crop is found on the strange chair in the blocked off hallway between the staircases to the Lynch Street Line platform, Subway World 2nd time B2. |
Chain |
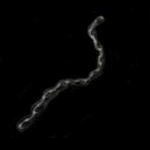
Description: "Light and easy to use. One snap could cause a lot of damage." Eileen's Chain is really a fantastic weapon that delivers almost as much damage as some of Henry's better tools. Since it's a chain, it's very versatile and easy for Eileen to use with its snapping action that inflicts a good amount of damage. You'll also hear Eileen dragging it behind her whenever equipped, which may be somewhat annoying but also perhaps gives you an idea of how close she is to you when waiting for her. The Chain is found on the jungle gym along the east wall of the Wish House compound, Forest World 2nd time. |
Nightstick |
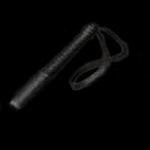
Description: "Lead-weighted, leather nightstick. Does not require much force to cause damage. Looks extremely painful." The Nightstick is a short and stout club usually used by policeman, or those who enjoy a bit of S&M. I mean, really, most of Eileen's weapons can be considered as kinky, in case you didn't notice. Oh Eileen, you naughty, naughty girl... you've been bad and must be punished. The Nightstick is the most powerful of all Eileen's weapons and can deliver a beatdown, but its range is a bit shorter than the Chain and Riding Crop and so it's not necessarily better in all situations. The Nightstick is somewhat hidden and is located on the ground in the 3F surveillance room in the Water Prison World 2nd time, which is otherwise unnecessary to visit again. |
Submachine Gun |
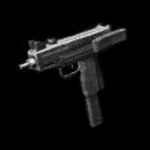
Description: "Small-sized, one-handed machine gun. Perfect for Eileen." This is an extra weapon for Eileen which must first be unlocked by completing the game with a ranking of at least 9/10 (90/100), which is rather simple to do in Silent Hill 4. The Submachine Gun is easily the best of all Eileen's weapons and can make a mockery of enemies despite Eileen not being very aggressive with it. And why not get an injured, cut and bruised, limping, temporarily one-eyed, one-arm-in-a-cast, scared woman in high heels and a backless dress to do your dirty work? There is a side effect though where Eileen's visual status will worsen the more she uses it, although it doesn't appear to have much of an effect on her in the final fight beyond that. So don't hesitate to use it in a few locations to help you, but keep her on a short leash by unequipping her toy whenever she won't stop playing around. Once unlocked, the Submachine Gun is found on the kitchen island counter in room 102, Apartment World 1F. Note that it is not available in One Weapon Mode but is in All Weapons Mode. |
| by Andrew Haffenden aka Conquerer (Silent Hill 4: The Room FAQ/Walkthrough) |