Walkthrough
Welcome to the complete walkthrough guide for Silent Hill 4: The Room (2004, PS2, Xbox, PC). This guide provides a comprehensive walkthrough with all item locations, detailed puzzle solutions, and boss strategies. It also includes complete maps with all items and monsters marked for easy reference.
Recommendations Before You Start
As always I recommend you change the default movement to run rather than walk. This way you won't need to hold Circle to run and if you ever do wish to walk, you can simply hold Circle. No longer called Walk/Run Control, this option has been renamed to "Default Control" in one of the Options tabs. Change it from Walk to Run.
While the default Noise Effect adds a bit of grain on the screen to simulate an old horror film, perhaps the game looks a little more crisp with it off, although its graphical style includes somewhat of a ghosting effect that muddies up the graphics anyway. So perhaps it's more up to what's your style.
Otherwise, since this is a horror game I recommend playing at nighttime with the lights off and the volume cranked to fully immerse you in its finely-crafted atmosphere. A good surround sound system or headphones in particular will especially help bring the world alive.
Perhaps this specific game is a bit different with more of a brighter art style rather than usual dark horror, but these conditions can still help bring out the atmosphere and provide the most rewarding experience.
Note: This walkthrough was written while playing on Normal difficulty. Therefore enemy numbers and locations may slightly vary on other difficulties. All puzzles and bosses will be covered for all difficulties.
Color legend
Chocolate Milk – items
Wine Bottle – weapons
Pistol Bullets – supplies
First Letter – memos
Portal – Portals connecting Room 302 and various Worlds
Room 302
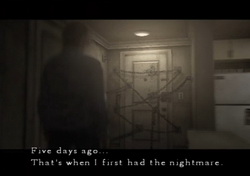
"Five days ago... That's when I first had the nightmare."
Bloody and Rusty Apartment
 Henry has been locked in his apartment for five days and has been having strange nightmares. Time to put an end to this. Exit the rusty, bloody bedroom, and don't mind the scream of excruciating pain.
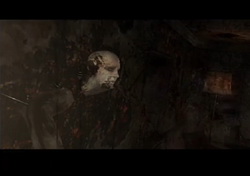
Head down the hall towards the blaring TV static. Feel free to check out a few things here but the only real thing of note is the creepy face on the far wall. Head towards it and you'll automatically focus and comment on it. You must do this to advance.
When ready, turn around and head back to the hall. The opening credits will play.
Bedroom
So that was another dream, eh? Either examine the phone yourself or try to walk away and Henry will try to make a call. It doesn't work... but then it does... and the cord's cut... Things are off to a nice start here.
If you take a look out the window, Henry will notice a woman standing at the entrance to the subway, who will eventually make her way down if you watch long enough. Otherwise, feel free to spy on your neighbours across the building which you'll be able to do any time you're home. There's also a phone number on a billboard you can call, since the phone is somehow working despite the cord. Leave the room when done.
Front Door
 Find your front door for a cutscene. Don't count on getting out of here any time soon. Henry checks the front door peephole to see his clumsy neighbour Eileen picking up her dropped groceries. You can regularly witness scenes like this when checking the peephole while home.
Check the foot of the door for the First Letter (1/52) memo. You'll find a ton more of these under your door over the course of the game.
Kitchen
Open the fridge to find a 1 Wine Bottle as your first weapon. If it breaks, it'll turn into the more powerful 2 Broken Wine Bottle, but both are poor weapons. Beside it is a bottle of Chocolate Milk, which is not a health item and instead will become relevant later. Leave it for now.
Living Room
Head into the living room and Henry will notice a large chest. This is used to store and retrieve items. Since you have limited inventory space, you'll need to regularly dump whatever you don't absolutely need in here.
After checking the chest, or looking out the nearby window if you didn't in the bedroom, a crash will be heard from the bathroom area, but first let's continue our living room tour.
Find the Book Scrap (2/52) stuck behind the far bookshelf and locate the notebook on the small table, which is the only Save Point in the game. Whenever you wish to save, you must return to your apartment and do so here.
The laundry room by the front door can be investigated but there's nothing of note in there. So make your way back down the hall and into the washroom on the right side.
Washroom
Inside is a hole in the wall of about two feet in diameter. It appears that Andy Dufresne was locked up in Henry's apartment but forgot to cover up his hole with Rita Hayworth this time.
Grab the 3 Steel Pipe that hangs from the top, serving as a weapon. I suggest going with this and dumping the Wine Bottle if you picked it up from the fridge. Enter the hole and pull yourself to redemption towards the light at the end.
| 02. Subway World |