Outside Room 302
Welcome to the thirteenth chapter of the complete walkthrough guide for Silent Hill 4: The Room (2004, PS2, Xbox, PC), covering the apartment building outside Room 302 and finale. This guide provides a comprehensive walkthrough with all item locations, detailed puzzle solutions, and boss strategies. It also includes complete maps with all items and monsters marked for easy reference.
Color legend
Chocolate Milk – items
Wine Bottle – weapons
Pistol Bullets – supplies
First Letter – memos
Portal – Portals connecting Room 302 and various Worlds
Contents
- Complete Maps
- Walkthrough
Complete maps |
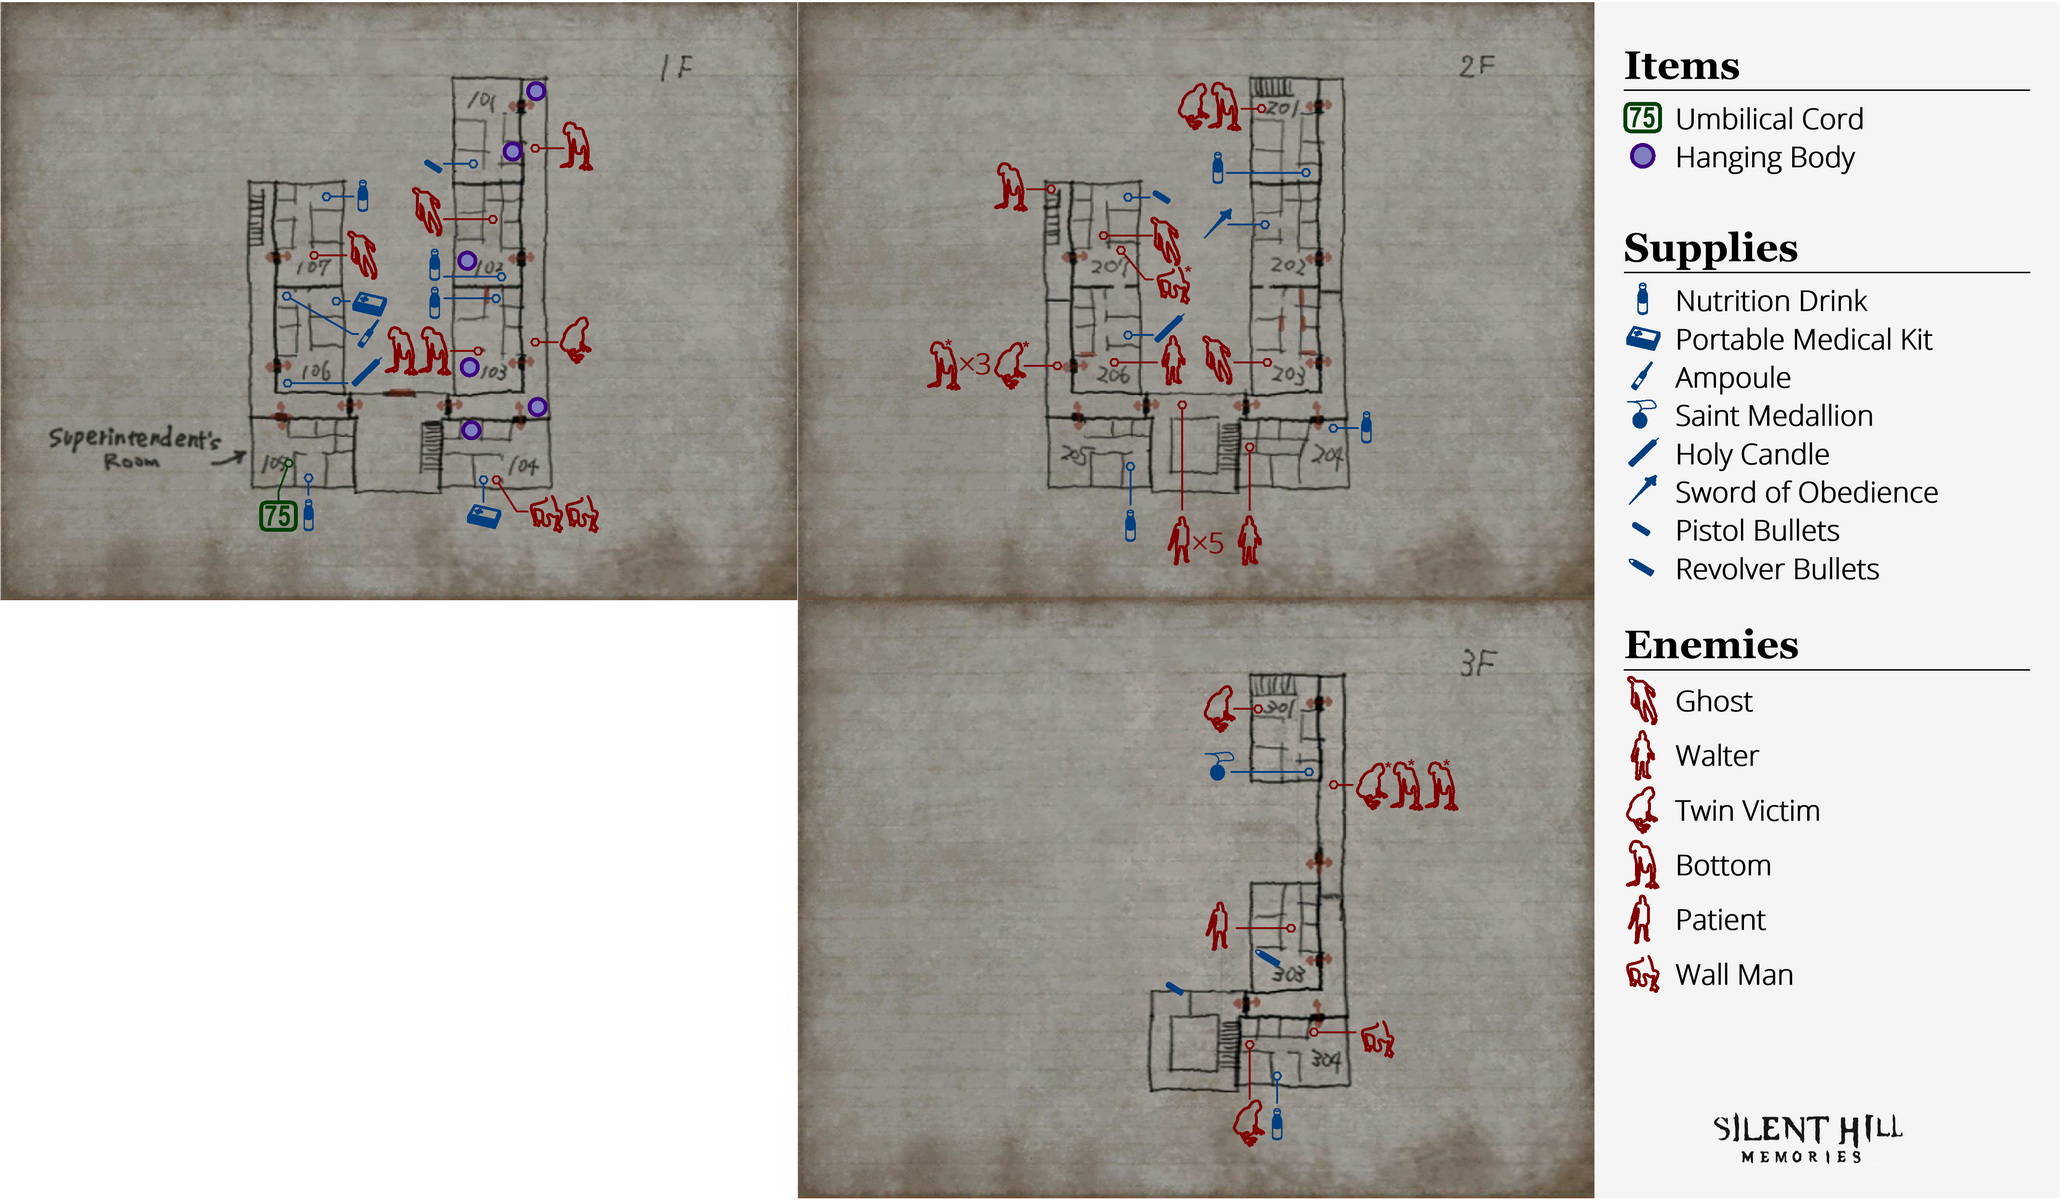
|
Walkthrough
"Whoever lives here after me... You'll be the 21st, the last of the sacrifices. I leave it up to you..."
Third Floor North
Ah, freedom! Well... Not really. Unfortunately the real world appears to be just as bad as the otherworld, if not worse. Eileen will rejoin you after the cutscene and it's time to roll. Remember your goal is the super's apartment.
Note on Portals and Room 302:
Just so you know, from now to the end of the game there won't be any Portals on the wall to take you back to your apartment, since this is the real world now. In order to get back to your apartment, you'll have to return to this floor and physically enter Room 302, the same place you exited in the cutscene. And don't worry about the Apartment Keys in your chest, you won't need them.
Bars block the hallway to the south, so head the other way and enter 301. Take out the Twin Victim in the living room since you may soon have two more guests join from below – 301 is connected to 201 via stairs in the living room.
First will come another Twin Victim, followed by a new cousin enemy called a Bottom. Note that if you're quick you may encounter them down in 201 instead. Before taking the stairs though, check the second circle cage in 301's short hall to find a Saint Medallion. Then descend the stairs to 201.
Second Floor East Wing
Beat down anything still here if it didn't come up earlier. Then find a Nutrition Drink in the southeast circle cage. Otherwise there are some notes about a ritual on the fences but nothing else here. Exit to the 2F hall.
Head south towards 202 where you may notice Walter on the other side of the bars blocking the hall. He'll aim his gun and shoot once you reach the door, but you can avoid getting shot by waiting for Eileen just past the trash can in the hall, then rush through the door with her.
A Sword of Obedience sits on the floor in the northwest room of 202, the last of five in the entire game. Pass through the living room hole to 203 when ready.
In 203 you'll only find Cynthia's Ghost unless she was eliminated. Quickly exit from the front door. Now on the other side of the 2F bars, there's a Nutrition Drink on the kitchen counter of room 204, but Walter also waits behind a gate in its hall, so don't go past the kitchen. Now enter the stairwell to the west and brace yourself.
Second Floor Stairwell
There are a total of five Patients in this stairwell so things can get crazy. Eileen can help you beat them down if she's got a weapon, otherwise you can try to run your way past if you're going straight for the west wing (just slip through the doors if you're about to get hit, then return if Eileen isn't with you).
If you're up for an optional trip to the other side of the 3F bars for some items, take a left and head up there first. There's Pistol Bullets on the floor at the top if interested.
Third Floor South
Room 304 contains a Nutrition Drink on the bed in the only open room in the apartment, while a Twin Victim and Wall Man wait in the unit itself. In 303 you can find Revolver Bullets on the living room coffee table, but beware of the Patient that may surprise you from the side hall.
A Brand-New Fear Item: Nurse's Uniform
You must then clear the game with this item in your inventory while receiving the Escape or Mother ending to actually unlock the uniform so it can be worn by Eileen in your next A Brand-new Fear run (it only replaces the purple party dress). Otherwise, you'll have to find the uniform here again and receive either of these two endings to unlock it in a later run. |
 If you've already cleared the game with the Escape or Mother ending, the
 Head back to the stairwell and enter the 2F west wing with Eileen.
Second Floor West Wing
Inside room 205 is a Nutrition Drink in the southeast room if interested. Bars block the north part of the west wing around the corner, forcing you to enter room 206, where you'll meet Walter once again.
Instead of running around like a little school girl, why not beat Walter down? Just take your Axe and give him your worst. Charge up attacks will serve you well. He won't die but he'll lie on the ground so you can leave the room without worry. Otherwise he can get between you and Eileen here and become an issue.
In between the bunk beds in the east room of 206 is a Holy Candle. Move on through the hole in the wall in the northeast room to arrive in 207. Now in Richard's apartment, you'll meet his Ghost if you hang around for too long, if he's still active. There are also Pistol Bullets in the northeast room, while Richard's Revolver will still be in his living room chair if you didn't claim it last time. Exit from 207's front door.
A Bottom welcomes you from a stairway to the north. Quickly run and beat him up while he's still pointing, then descend to the first floor.
First Floor West Wing
Hearing voices throughout this floor, you can find a Nutrition Drink in 107, as well as DeSalvo's Ghost if still active. 106 contains a Holy Candle on the kitchen counter, a Portable Medical Kit in the northeast bedroom and an Ampoule in the washroom beside it.
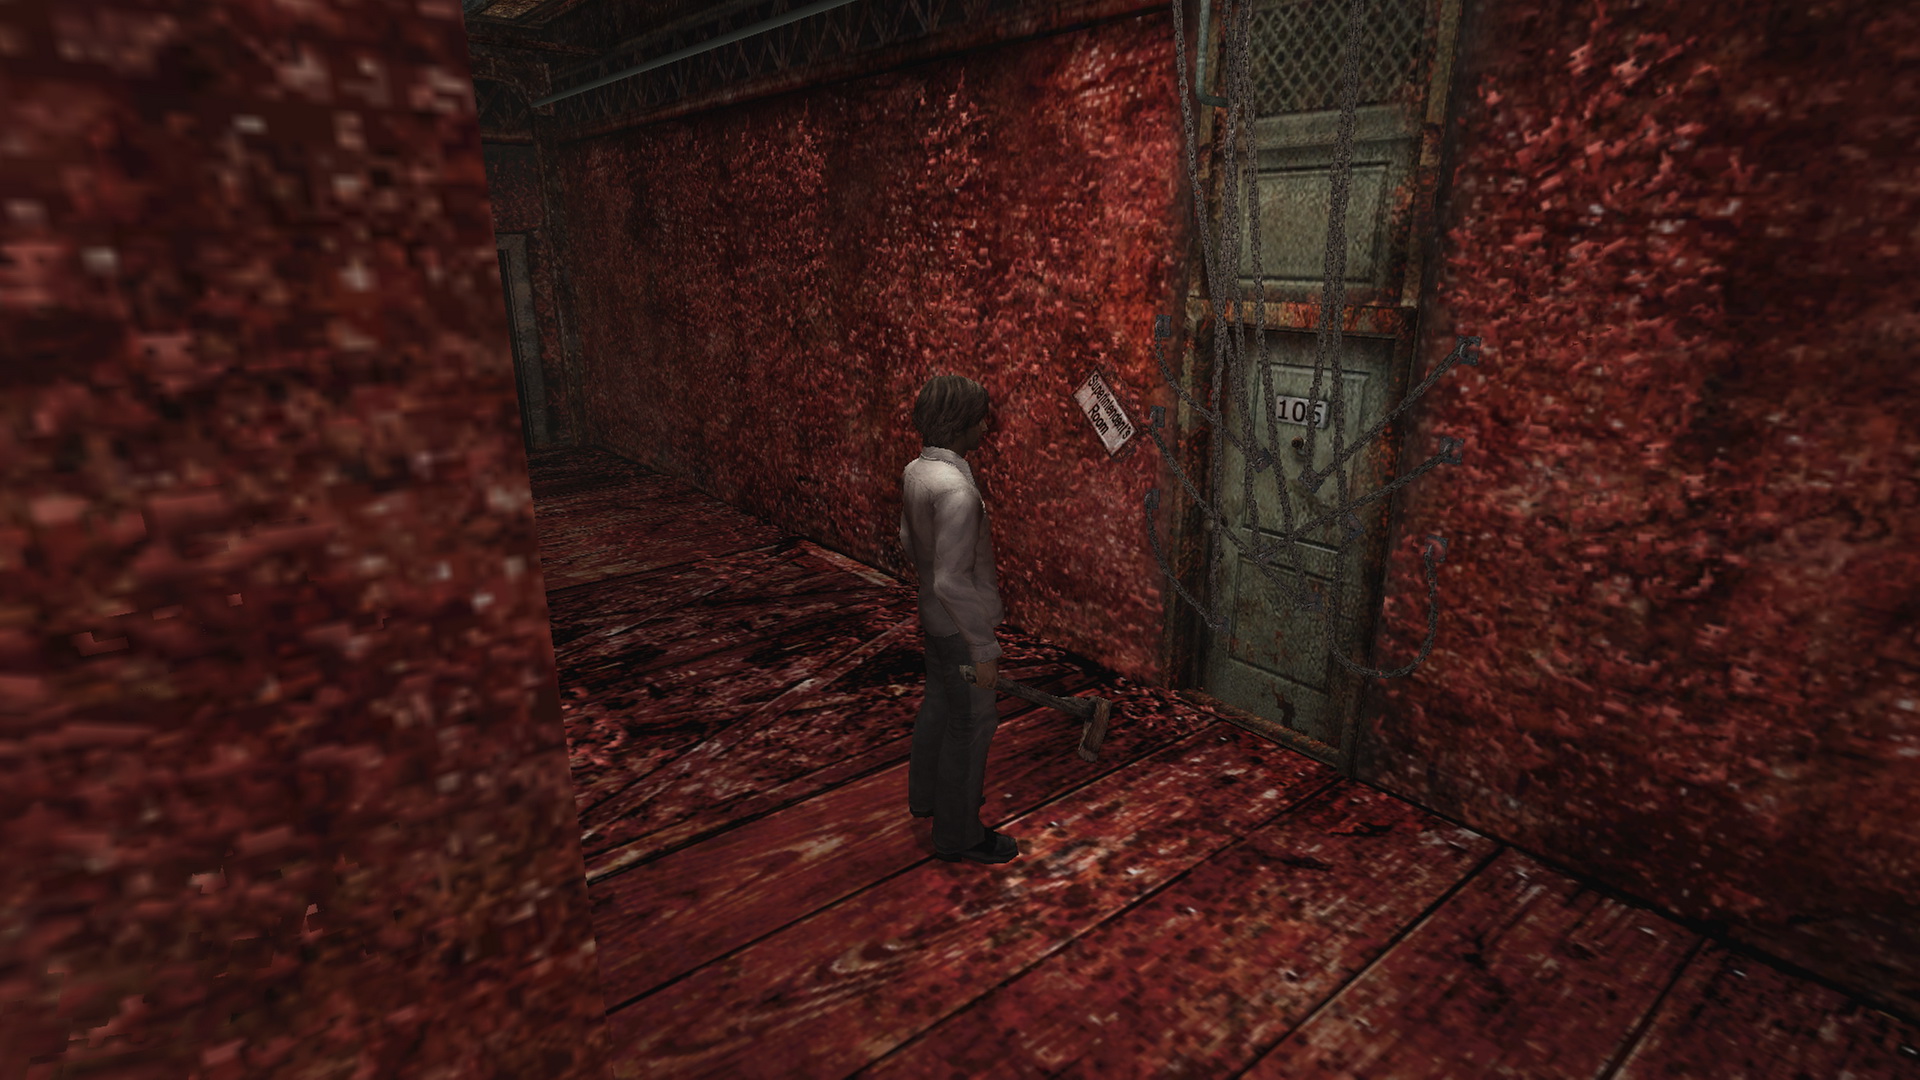
Back out in the hall you'll notice that entering room 105 won't be so simple.
Puzzle: Removing Room 105's Chains (First Floor)
|
Enter the lobby.
First Floor Lobby
You may notice a sketchbook in the middle of the lobby floor. Eileen will walk towards it and it'll override any notion for her to follow you for the next bit. So let her be for now and proceed to the east wing without her.
First Floor East Wing: Removing 105's Chains
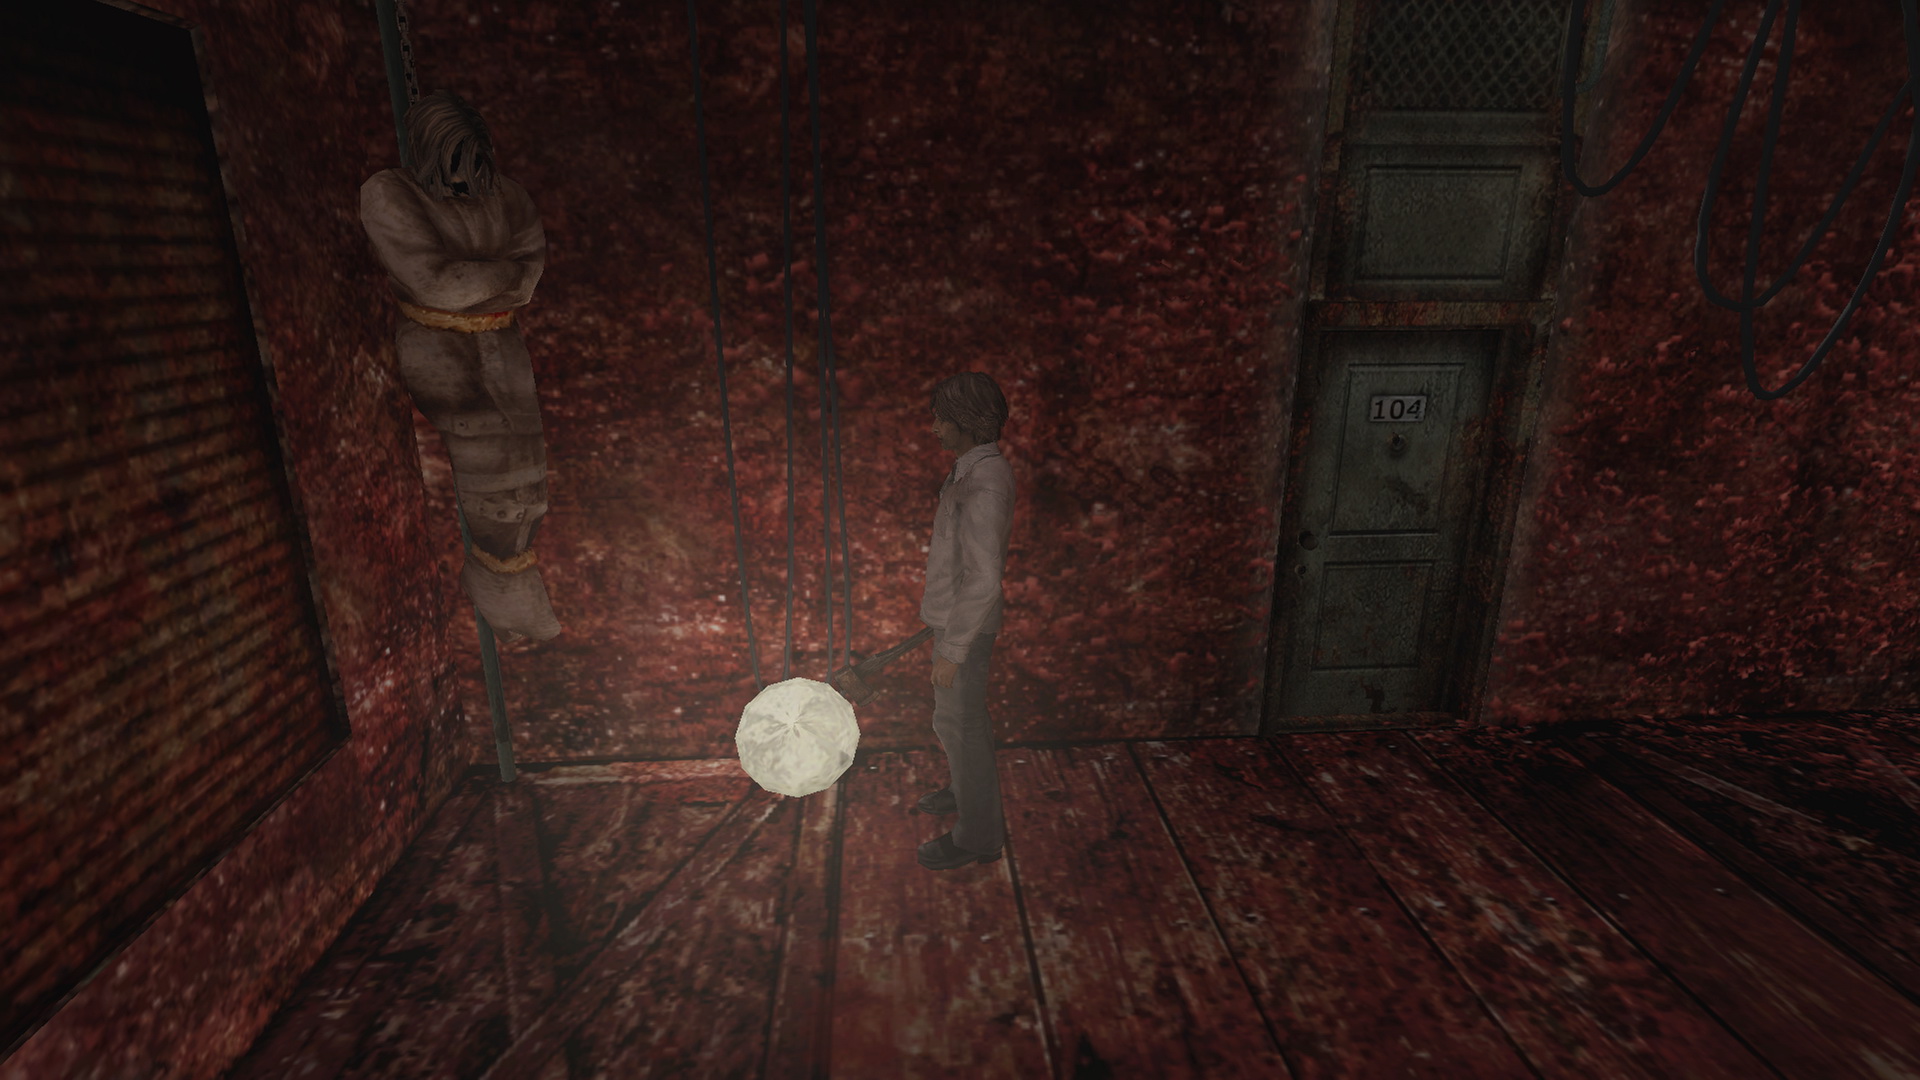 Just ahead in the hallway corner is a hanging body of Walter wrapped in chains in the shade of greyscale. If you examine it, you'll the voice of an angry older man and the body will disappear. Each time you find one of these bodies and make it disappear by examining it, one chain will also disappear from 105's door. So that's one down, five to go. Watch out for the Twin Victim just around the corner while tending to the hanging body.
Inside 104, there's two Giant Wall Men overlooking a Portable Medical Kit near the living room. You can actually approach cautiously and just reach it without getting hit sometimes, but still be careful. You'll also find another hanging Walter body in the northwest cage in the narrow hall of the unit. Examine it and it'll disappear to more angry voices.
Inside 103 are two Bottoms hanging about, along with a Nutrition Drink at the north end of the unit's hallway and a hanging Walter in the living room. If you don't want to fight, just go examine the body and quickly leave once it fades away.
Ignore the pointing Bottom down the hall for now and enter 102. Find the Nutrition Drink on the kitchen counter and the hanging body in the living room. There's also a Ghost in the room, but a Saint Medallion will keep it at bay long enough to do the deed here.
On your way to 101 and before the Bottom is a pack of easy-to-miss Pistol Bullets by the right boxes in the hall. Run past the Bottom to find another hanging Walter in the north corner. Once it disappears, enter 101 to find the last one.
Back in the room with the model guns, find the Pistol Bullets in the southwest room if interested, then the hanging body in one of the two cages on the east side. Once it fades away and you've found all six, return to Eileen in the lobby.
First Floor: Getting the Umbilical Cord
 After hearing Eileen's sympathy for the little boy in the cutscene (she may cry out and talk like a child if badly possessed), return to the previous hall to find all the chains gone from 105, assuming you found all six hanging bodies in the east wing. Enter the apartment.
Check the back room first to find yet another Nutrition Drink. In the living room, you'll notice a camera angle change by the east wall, revealing an orange box on the shelf. The mother's flesh... Examine it for a cutscene.
Note on Eileen's condition:
You may be aware of a Holy Candle trick whereby you can place one at Eileen's feet and watch her blood flow clear up. This works but only temporarily and in all my extensive testing it does not actually carry over to the final boss fight to slow her down, despite so many claims that it does. Go ahead and try it if you must, but in all my experience it doesn't actually do anything but trick your mind.
In the cutscene, which will be different depending on Eileen's possession level (like the lobby scene too), she takes off while Henry claims the 75 Umbilical Cord from the orange box. Leave the room.
Returning to 302
Back in the hall, Henry has a strange vision, as if guided back to 302. After, you'll also hear a bell tolling, which Joseph mentioned in his laundry room letter as the mark of the ritual beginning... Time to return to 302. There is a newly-placed sketch on the floor by 105 if interested before taking off.
Get started by taking the north stairs in this west wing up to 2F. Take a look through the bars up there for a preview of what's to come... Good luck with that.
Enter 207 where you may now notice a Wall Man. Stay clear and pass through the hole in the living room to 206, then exit from there to meet three Bottoms and one Twin Victim in the hall. I recommend just running straight around the corner and through the double doors to the stairwell. They will run after and try to jump at you but just keep moving.
If the Patients are still in the stairwell, quickly run through the other doors to the east wing. Pass through the hole in 203's back room to reach 202, then exit to the hall from there. Now enter 201, head up the living room stairs to 301 and exit to the corridor.
Henry will meet more friends up on 3F before 302, but you can just sprint past them if you wish. Enter 302 for the final time.
Room 302Back home, Walter is now missing from the back room. Examine the circular depression under where he was and Henry will realize he can jump down into it. This will lead you to the final boss, so make sure you've got everything you need before advancing. Head back to the item chest and prepare. Get rid of anything that isn't a weapon, health, or the Umbilical Cord which you'll need. That means Holy Candles, Saint Medallions, Swords of Obedience, Eileen weapons, etc. They're useless for the next part so dump them. Ideally, you'll want to bring up to 7 items and have 3 inventory slots clear, which you'll understand shortly. Having a full inventory is an option but it'll slow you down a lot when time is crucial if going for a better ending. You must bring the Umbilical Cord, taking up one slot. Otherwise, I recommend either the Rusty Axe or Spade as a weapon and five of your best health items, if you have that many. It's not that you'll necessary need that many, just you might as well fill up in case. Be sure not to heal yet if hurt; you'll soon see why. The Rusty Axe is probably the best overall weapon in the game and is great for this fight, but the Spade can work nearly as well (charge up meter and attack are slightly faster, but slightly weaker). The Pistol and several clips are not worth it, and the Revolver isn't too bad but its limited ammo takes up valuable space and it's not as good as the best melee weapons. When you're ready, make sure you've cleared any remaining hauntings if you're going for a better ending, then save your game. Now jump down the circular depression in the hidden room where Walter was. |
Below Room 302
After an odd cutscene you'll be alone in a red-lit room with a large hole in the center and some artwork on the walls. While encouraging Henry to enter the fetal position, this room also fully-recharges your health if not already full. Jump down the hole to the final arena.
Final Boss: The Final Sacraments - Man With the Coat
Eileen's MechanicsFirst you'll see Eileen standing on her own pathway that leads to... literally a bloodbath, and a dangerous spinning device. Possessed by Walter, she'll slowly walk towards it over the fight. Her speed is dictated by how much damage she took in the game up until now, including physical damage by enemies and time spent alone, especially in areas with enemies. During the fight you'll see flashes of her as she walks down the path and into the bloodbath. Once you hear her scream after fully submerging, she's gone for good. The more damaged she is, the more blood flow will appear over her body, the faster she'll move, and the more likely she'll die. Depending on how bad she is, you may not be able to save her at all. So if she dies early... you probably never had a shot. Stay on top of her condition next time. While some may suggest a Holy Candle placed at her feet before she leaves you, in all my extensive testing I've found it to have no carry over whatsoever. Instead you must safely escort her the old-fashioned way. Phase One: Umbilical Cord and SpearsAs for Walter, he begins the battle as a dark shadow and cannot be harmed, while he'll harass and attack you if you let him. There's also eight stone blocks with spears in them around the arena, but they're locked in place as is. So you'll need to do something to effectively start the battle. Joseph's August 5 Red Diary from Room 302 of the Past said the following:
Joseph's Letter from the laundry room also confirmed the bottom statement, which we can deduce to be the Umbilical Cord that you now hold.
In a short cutscene, the camera angle hints at the spears on the stones, which all unlock after using the Umbilical Cord. You can probably guess that you need to stab them into the giant Conjurer as the next order of business. You should also now have four free inventory slots if you entered the fight with three, allowing you to grab all four on one side, stab them all in and do the same on the other side. So get started by grabbing each 76 Spear of the Holy Mother on the left side of the arena and then run back to the Conjurer. Stab each Spear of the Holy Mother into his neck, noticing that each one drops Shadow Walter to the ground in pain. After the fourth, head to the other side to collect the other four and stab them into the Conjurer. Just watch out for Walter's pipe swings and bullets as you make your way around, and note that he'll move more quickly once a few spears have been stabbed in, including quickly sliding over the arena, but he can't hit you if you're already grabbing a Spear. After stabbing in all eight spears, you'll hear a distinct note and this time when Walter stands, his shadow figure will be no more. He can now be attacked. Have a charge up swing ready to go as soon as he stands. Phase Two: Defeating WalterNow the true battle begins. Grab your trusty weapon, preferably the Rusty Axe or Spade, and start delivering charge up swings on constant repeat. You can also perform regular swings as you charge up, but it's more efficient to go purely for the ultra-powerful charge up attacks, specifically while staying out of Walter's immediate radius. With the Rusty Axe, perform your charge up attack from a few feet away and immediately take a couple steps back to clear Walter's range so he doesn't bodyslam you. Walter will regularly step back and raise his pistol to fire after every attack you land, unless he's at an edge. Right after he steps back as you're charging, now move up closer so your attack will connect when ready. Most of the time you'll be able to deliver another charge up attack just before he fires. Note that you'll be invincible while performing the charge up attack and so his shot won't matter, but sometimes he'll shoot you just a tad before you're fully charged up. This is just something you'll have to deal with, although you can try dodging left or right (R2 + Circle + left/right) with the right timing. Either way, getting shot a few times shouldn't be a huge factor. If Walter is up against an edge or sometimes regardless, he'll instead try to swing his pipe at you if close by. This is great because it avoids a potential shot and you should be able to move back to dodge his swings before unleashing another charge up attack and repeating. If you can, try to stay in that range where he initiates a pipe swing as you're just clear of him. Just repeat and keep him in the corner. Otherwise, keep moving up on him if he takes a step back. With the Spade, your charge up attack has a shorter range by about a foot, but still fairly extended. Henry will also stand in place and thrust forward rather than getting too close to Walter. This means that if you can back Walter into a corner and he has nowhere to step back to, you can find the sweet spot and just unleash charge ups back to back until the end of the fight without him hitting you. If close enough, he'll keep trying to perform a pipe swing rather than shoot, but find that balance where his swing is engaged but not within range to land and just keep staying in that spot as you attack him. If you do get shot with either method, which is frankly just part of the fight, just keep on charging and try to initiate your attack before the next bullet hits. Even if he gets 2-3 shots off at you, keep charging until you can attack. In many cases you'll find you can lock into your charge up attack just as he's about to shoot, which is perfect. Be careful to never get too close to Walter or he'll perform a cringeworthy body spin and throw you to the ground. As ridiculous as it is though, it is always 100% avoidable. As mentioned, if using the Rusty Axe just take a step or two back to clear his body spin range, but keeping close enough so he swings his pipe can be helpful, as long as you can still avoid it (but again, not a huge deal if it lands). Note that the Pickaxe of Despair can be another effective weapon here, but it's much slower and has a higher learning curve to master. It also takes a long time to charge up, but even its regular swings are very powerful and will serve you well while charging up for an ultra attack. Sometimes if you take too long or step too far away from Walter, he'll either take a step back to just escape your range or may run away to another spot entirely. In these cases, bail immediately cause he'll be too far away to hit and will probably shoot you. Run right up to him and try your setup again, understanding you make take a bullet or two. You can try to go at him from behind to get a bit of a drop on him though. From here it's just a matter of repeating these strategies until the end, hopefully before anything happens to Eileen. Walter's attacks: It may take some practice to get into the rhythm, but eventually this fight should feel very straightforward and almost simple. It's really just a matter of performing charge up attacks on repeat while baiting his pipe swing to whiff on you or engaging your attacks just before he shoots. Keep at it and Walter will eventually fall with a distinct death note. A few more seconds will pass where Eileen can still actually die and then a cutscene will play. If Eileen dies and your execution wasn't great, consider loading your game to try again if you wish – the time difference between great, good and especially poor execution can be massive. But if she's dying too quickly, you just might not have any chance to save her in this run due to her condition, even if you're perfect. Be sure to take better care of her next time and try again. |
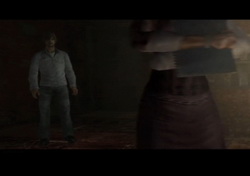
 Walter welcomes you to the party down below. There's a lot going on down here so let's explain a few things.
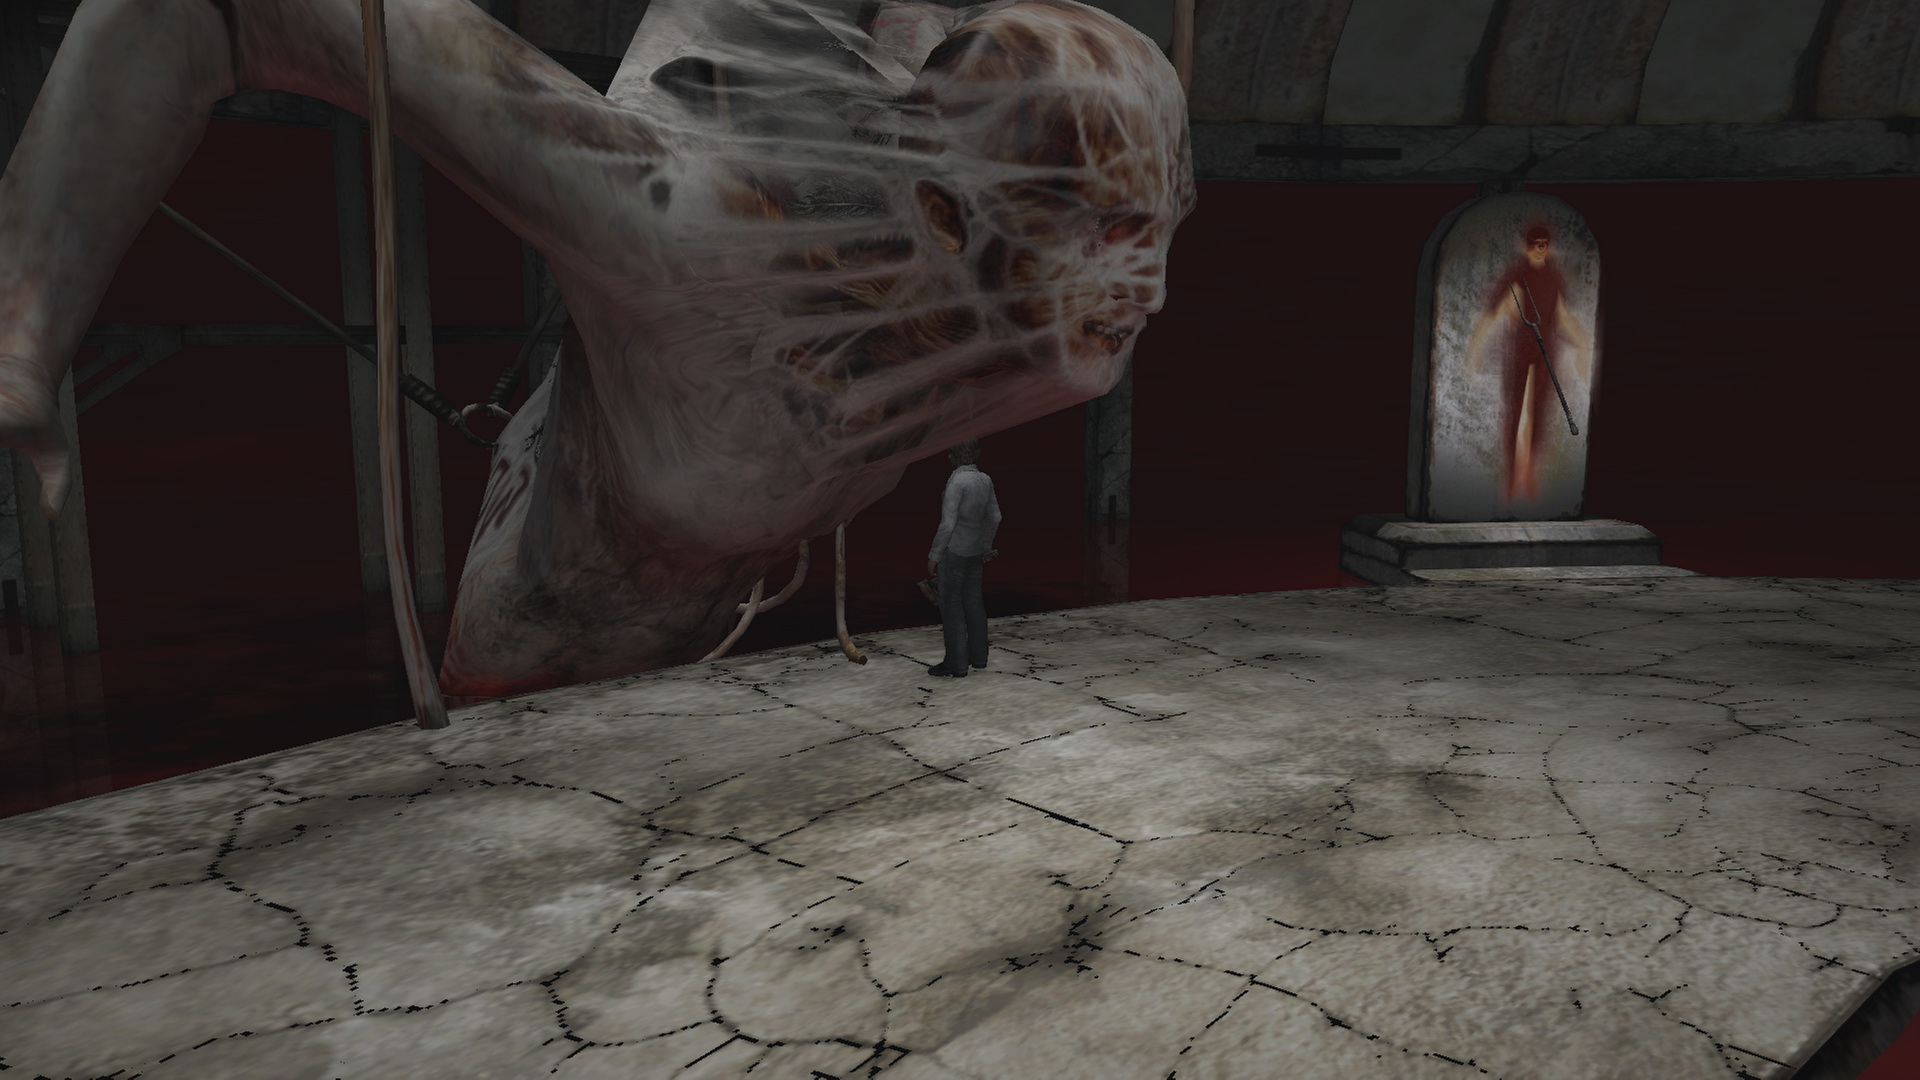
The End
After defeating Walter, congratulations on completing Silent Hill 4: The Room. Enjoy the following scenes and your ending, as well as another nice credits song and your ranking results. Note that there are three more endings to receive, which can all be read about in the Endings section.
Also take a look at the Unlockables and Secrets section for any extra items and secrets in subsequent playthroughs. Feel free to use the Speed Walkthrough to get a better grip on streamlining your run.
If interested in improving your ranking, visit the 10-Star Ranking Guide section, which will also guide you to a perfect score. It's perhaps a bit easier this time than the last games since it gives you a couple freebies, so consider giving it a shot. Although the perfect 10.2-star ranking is an even greater challenge. Read more about it there.
| 12. Room 302 of the Past |