Building World
Welcome to the fifth chapter of the complete walkthrough guide for Silent Hill 4: The Room (2004, PS2, Xbox, PC), covering Building World. This guide provides a comprehensive walkthrough with all item locations, detailed puzzle solutions, and boss strategies. It also includes complete maps with all items and monsters marked for easy reference.
Color legend
Chocolate Milk – items
Wine Bottle – weapons
Pistol Bullets – supplies
First Letter – memos
Portal – Portals connecting Room 302 and various Worlds
Contents
- Complete Maps
- Walkthrough
- Opening Hallways and Rooftops
- B3: Birthday Cake Room
- Stairwell
- B5: Sporting Goods Store
- B7: Pet Shop
- B5 to B8: Stairway and Rooftop
- B8: Optional Trip for the Spade and a Sword of Obedience
- B12: Connecting Pathways and Shower Room
- B12 to B15: Stairwell to Stairwell
- B15: Bar Southfield
- Massive Stairwell
Complete maps |
|
Walkthrough
"But if you're here too... then there must be something wrong with the whole apartment building..."
Opening Hallways and Rooftops
Note the Portal on the wall behind Henry and try to stay dry in this rackety and maniacal environment. Don't mind the upside down stairs and door either.
Make your way around the far corner and down the nearby stairs to meet a new enemy called a Gum Head. Bash it with your pipe or just continue down the other stairs to the left for a cutscene.
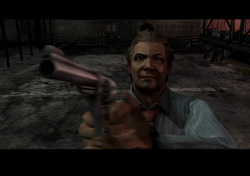 Meet Richard. This guy sure knows how to make an entrance! Once he leaves, two Gum Heads will drop down, one of them blocking the next door. Beat them down if you wish or just shove past and through the door. If you do hang around to take in the scenery for a bit, you may notice you're on the roof of Hotel South Ashfield, which is visible from your apartment window.
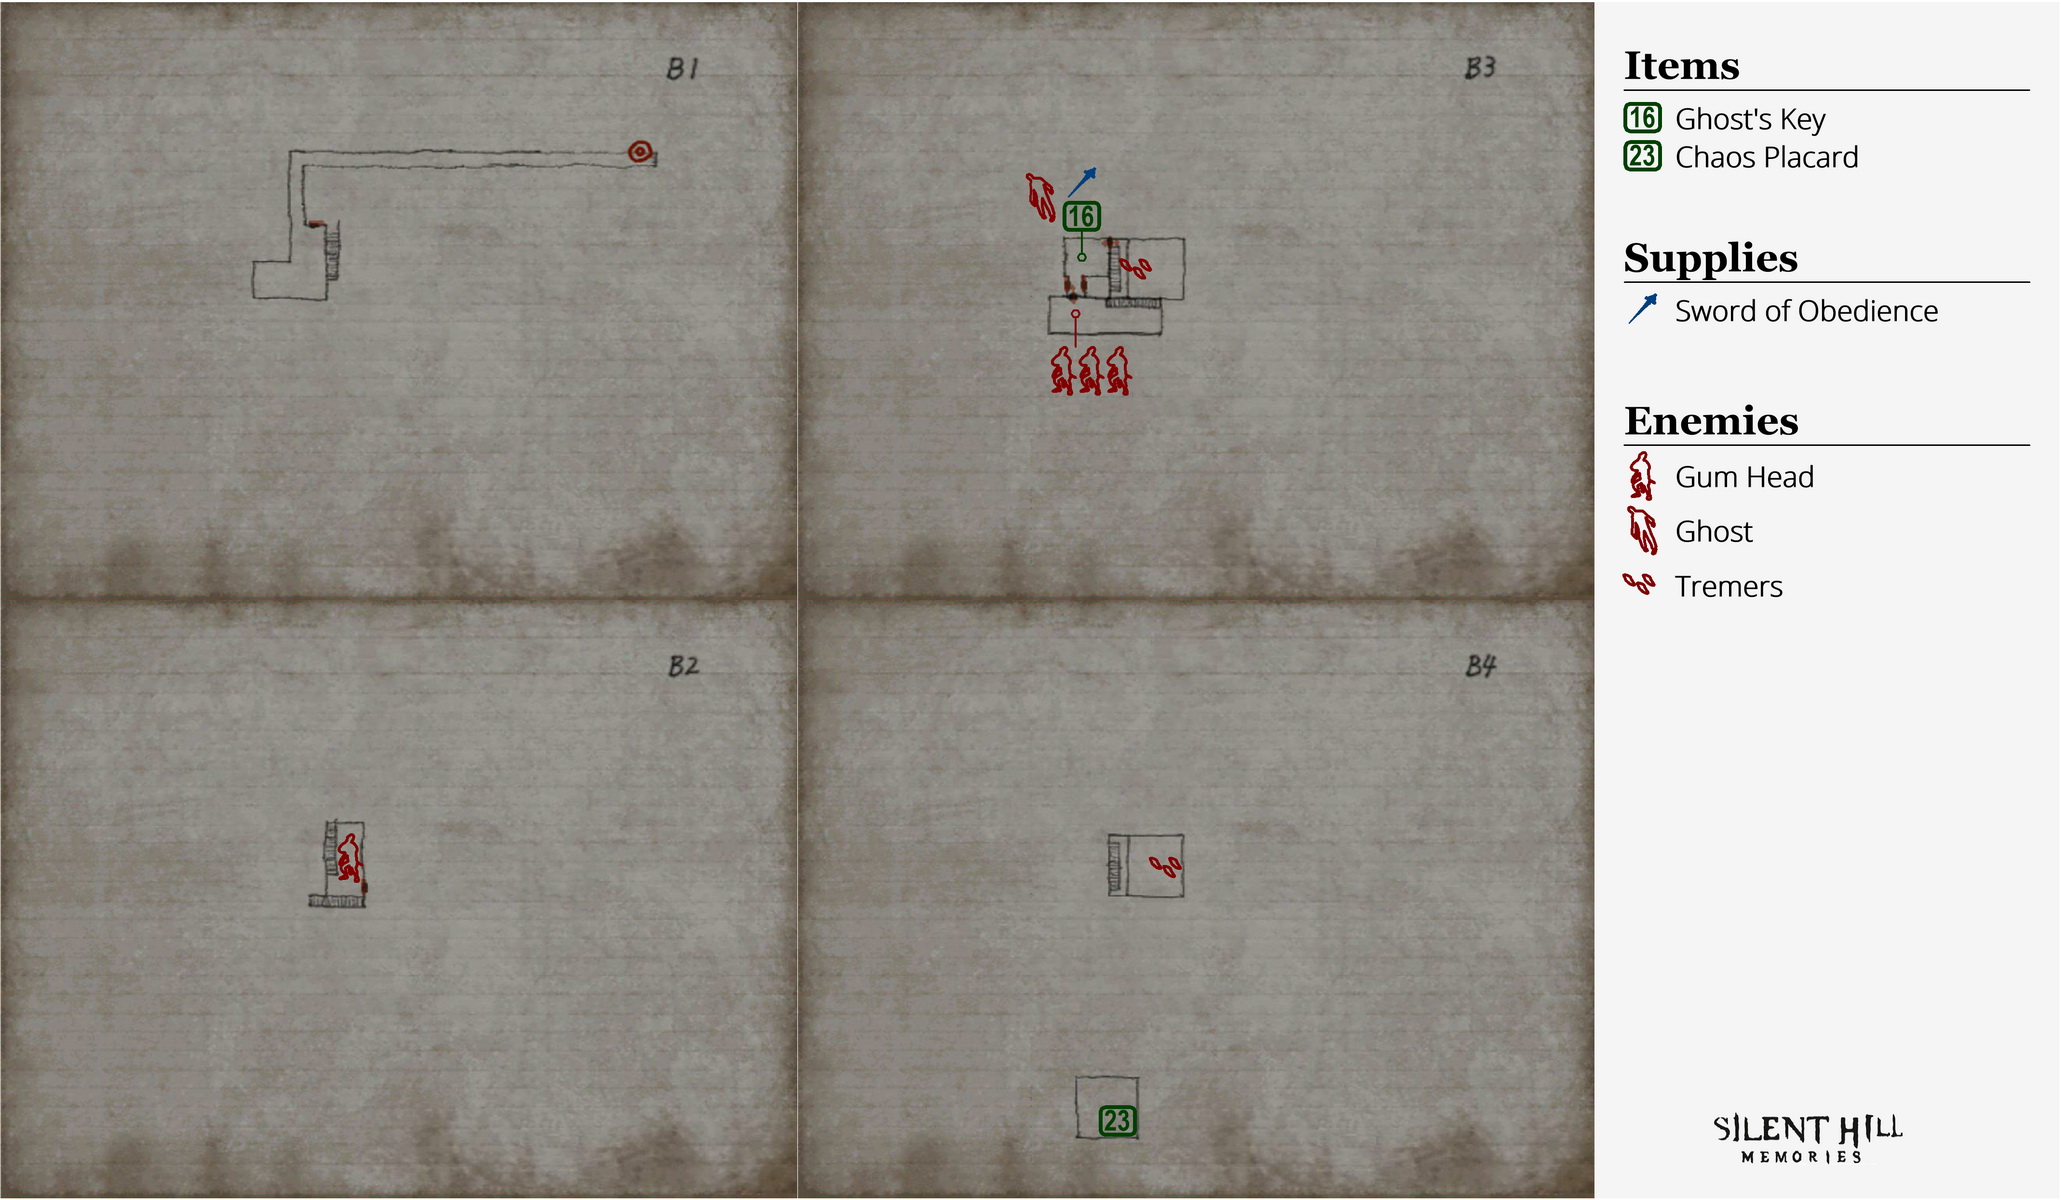
B3: Birthday Cake Room
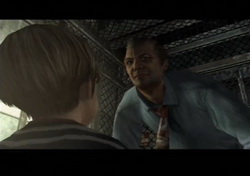
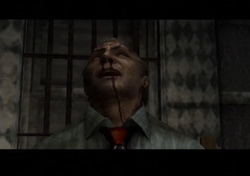
Hearing an odd sound, move down the hall to discover a Ghost pinned down by a sword in the main room. Examine it to discover something in its hand, then take the 16 Ghost's Key.
After taking the key, you can also take the Sword of Obedience keeping the Ghost pinned to the ground, but understand that he'll get up if you do and chase you around this world, and so leaving it is also an option. Read the following note for more info.
Note on Swords of Obedience:
These swords are used to stab downed Ghosts and keep them out of commission and unseen elsewhere for the rest of the game, or until removed by the player. To use one, you must first beat down a Ghost multiple times until it doesn't immediately get back up (or use Holy Candles or Silver Bullets). Then approach and use the sword to stab it in. To be frank, this Ghost isn't much of an issue to deal with if you remove it, and perhaps it can be put to better use on a stronger one later on. More will be found in due time, however.
After making your decision on the sword, use the Ghost's Key to pass through the door to the right.
Stairwell
Here you'll meet Red Tremers on the close fence, but they're nothing new beyond the colour. Pass by them and circle around and down the large stairwell in a clockwise fashion, passing any falling Tremers. Find and pass through the southwest door at the bottom. Note that if you took the sword from the Ghost above, it may appear here and follow you elsewhere.
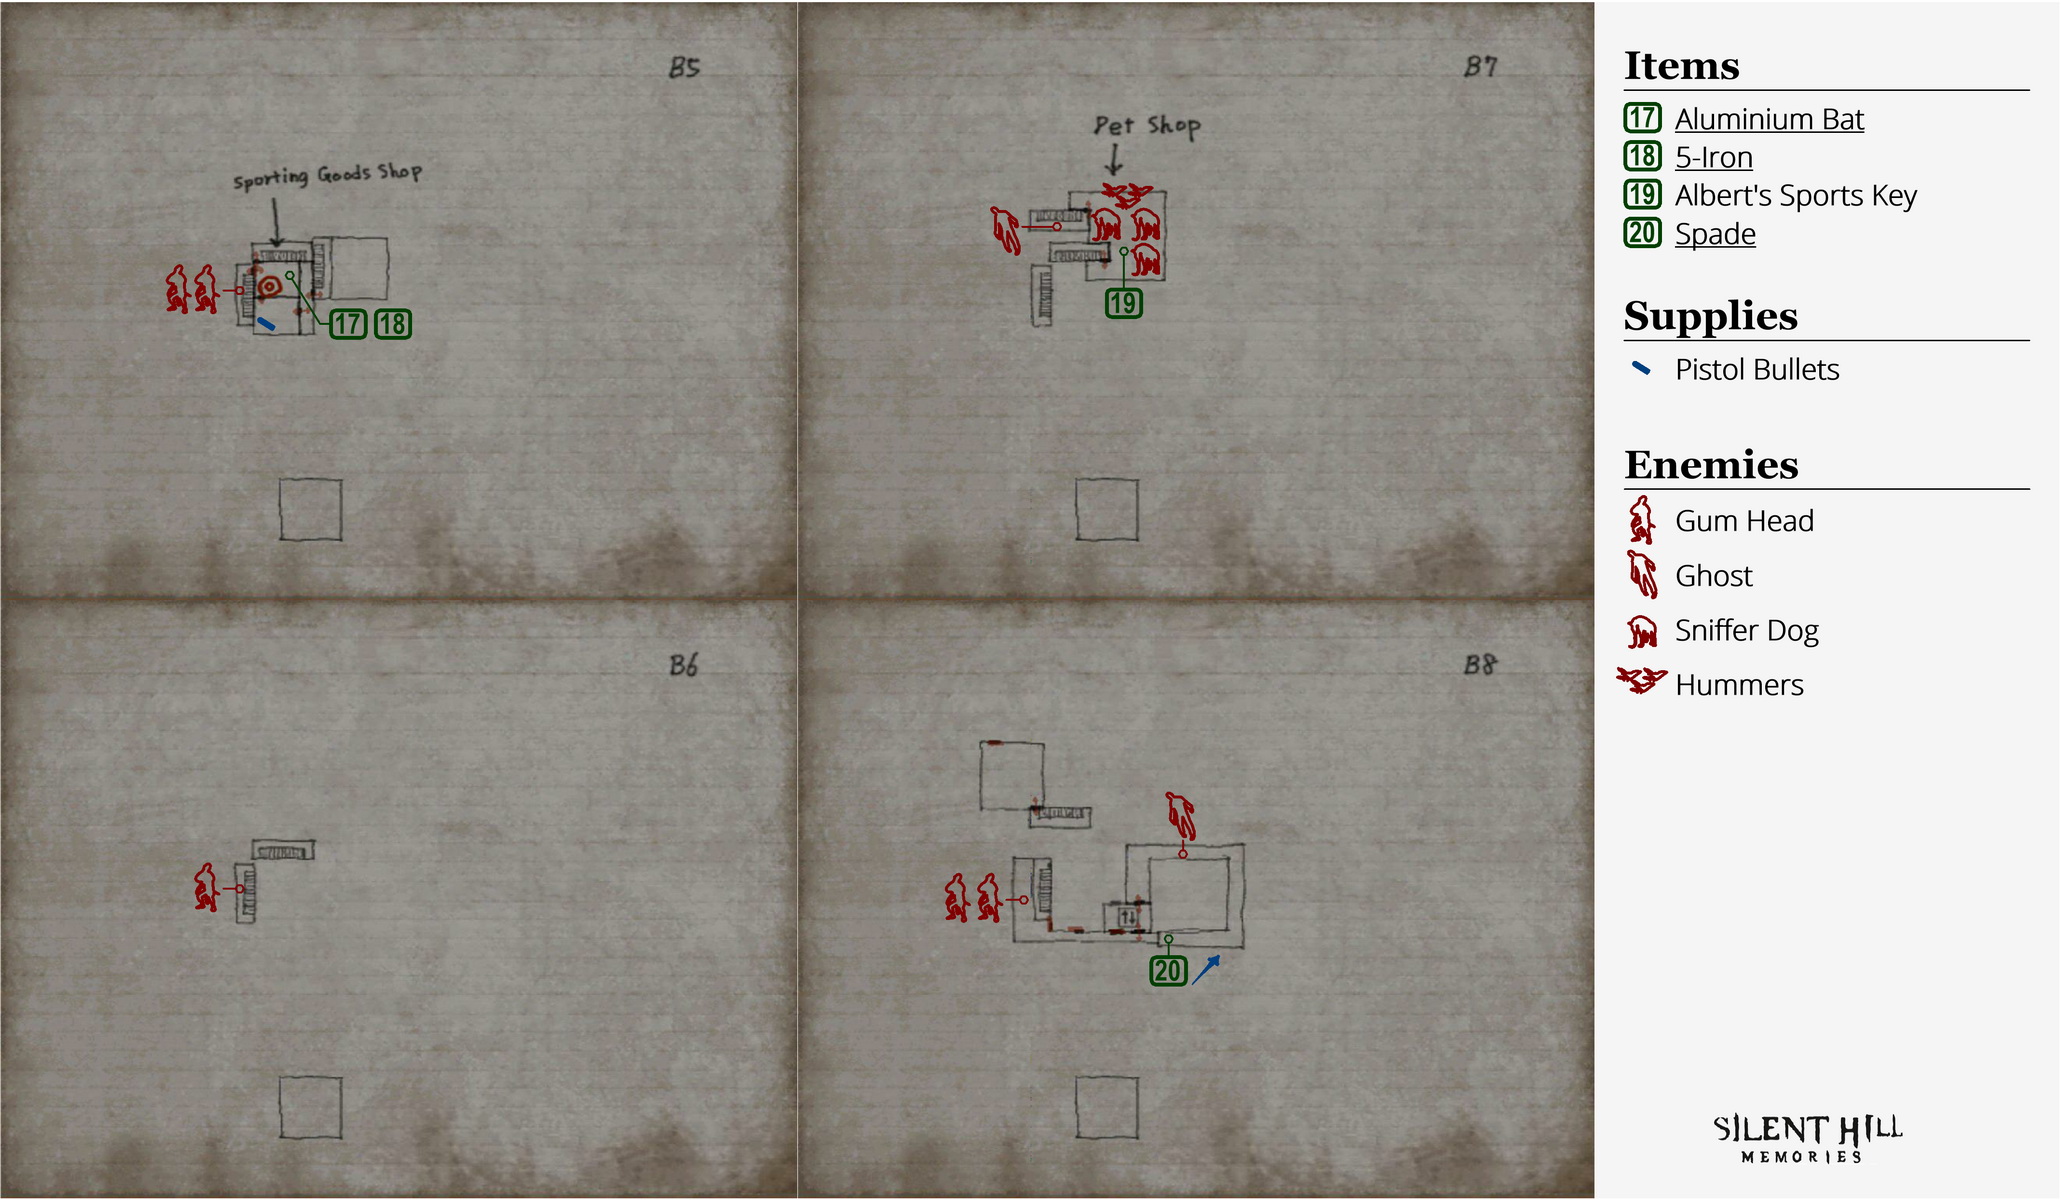
B5: Sporting Goods Store
Pass through the other door in the small hall to a reeky-looking storage room. Find the Pistol Bullets on the far shelf and proceed through the other door to a sporting goods store.
Inside the store you'll find a 17 5-Iron golf club to the right and more importantly an 18 Aluminium Bat beside the volleyball basket. Consider switching to the bat immediately. Also in the room is a Portal by the door you came in from.
Room 302If you return home, you may hear a knock at your door. Check the peephole for a cryptic message. Feel free to check on Eileen, and make sure to dump anything you don't need before returning. |
The west door in the store is locked, so head through the north door beside it. Take the red-coloured stairway down to B7 and go through the green door down there.
B7: Pet Shop
Down the middle aisle of this pet shop are two Sniffer Dogs as well as another one to the west – they don't look like great pets, so bash their heads in with your new Aluminum Bat. Alternatively you can just walk quietly in here and potentially avoid them, which is probably the best method.
At the far end of the middle aisle by some cat food is 19 Albert's Sports Key. In the northwest of the shop are several Hummers on the wall, along with an unlocked door there.
If you go through the northwest door and enter the room at the bottom of the staircase, you'll only find a rusted clock door that won't open. You just might also happen to notice that the room is inverted... There's nothing to do here anyway. When done in the pet shop, return up to the sporting goods store from the south staircase.
From the sporting goods store, pass through the west door with Albert's Sports Key you got from the pet shop.
B5 to B8: Stairway and Rooftop
Hearing more Gum Heads on the stairway, a couple will drop where you entered from after you advance, plus another will block the stairs ahead. Bash the one on the stairs and just run away from the others as you make your way down.
You may start to notice a new variant of Gum Heads (New Types), which are also capable of stealing some of your weapons like golf clubs or the Steel Pipe... Be careful around them and beat them down if they steal anything to get it back, and beware that it's easy to miss a theft entirely.
At the bottom, two more Gum Heads will jump down and join the party. Just continue to the right and around the corner past the jammed door.
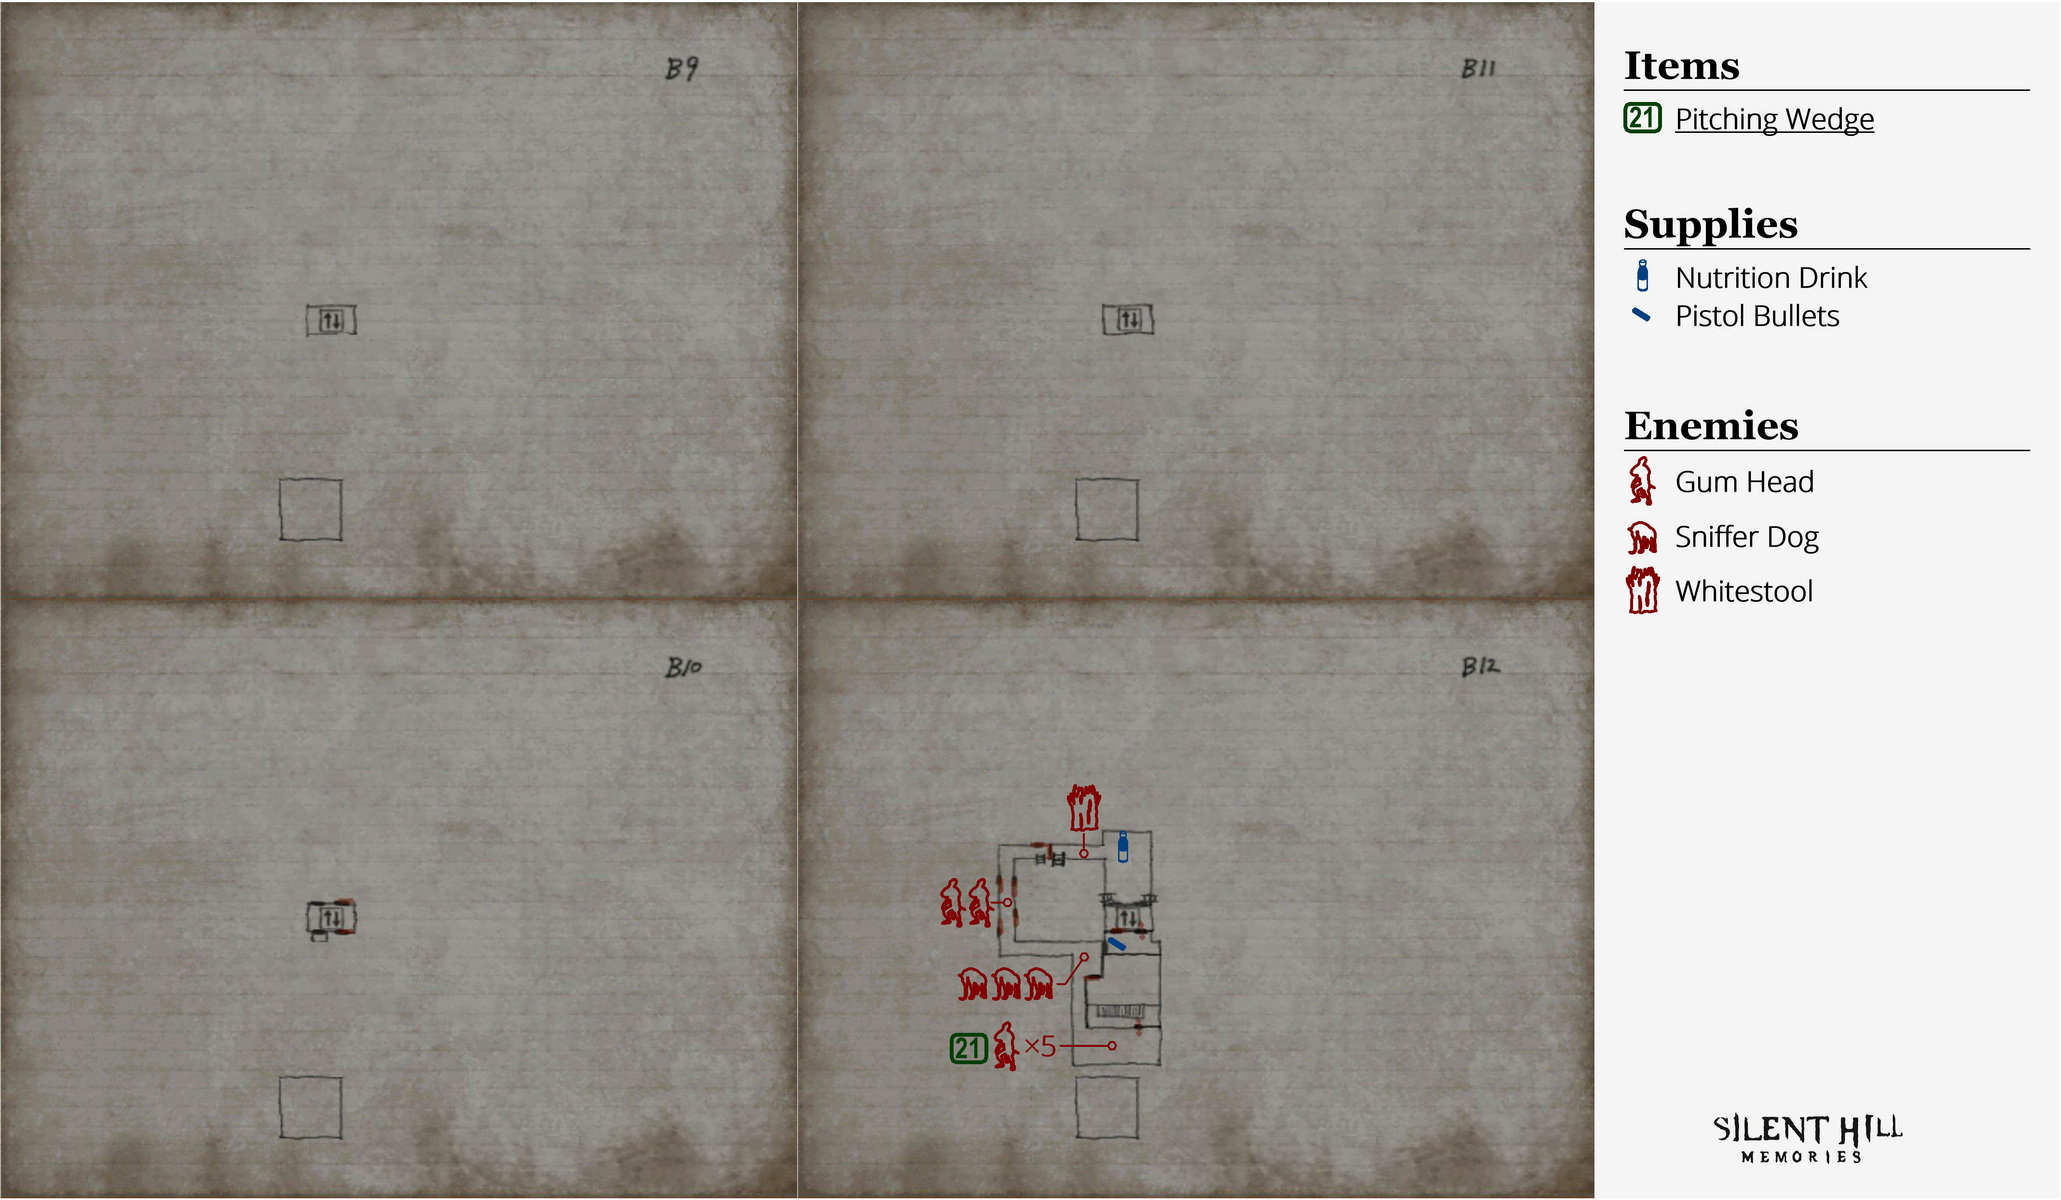
 Follow the narrow walkway past another sealed door and enter the second elevator, since the first one is on another floor and can't be called. Enjoy the cutscene as you descend to B12.
B8: Optional Trip for the Spade and a Sword of Obedience
Although the elevator just took you down to the bottom floor of B12, there is a very effective weapon and a helpful item through the other elevator doors back on B8. Examine the elevator panel and press the top button to head back up if interested.
Exit the elevator through the north doors and follow the twisting pathway past the Ghost if it's there to find a Sword of Obedience on the floor at the end, plus the 20 Spade lying against the wall. The Spade is one of the best weapons in the game, although perhaps the best weapon of them all awaits you by the end of this world.
Head back to the elevator and press the bottom button to head back down to B12 where you ended up after the cutscene. The middle button works but you won't be able to open either doors on that floor.
B12: Connecting Pathways and Shower Room
Move through the south elevator doors on B12 and grab the Pistol Bullets by the fence. You'll shortly be on the other side so take a look at the enemies that await you. Re-enter the elevator and descend the ladder on the other side.
On the left side of the pillars in this shower room is a Nutrition Drink. Left in the short hall are Whitestools blocking the way. Eliminate them one by one and head up the ladder past them.
Follow the path past two Gum Heads and three Sniffer Dogs to find the other side of the fence. You may notice that one of the Gum Heads is carrying a golf club, which is a 5-IRON that can be obtained by beating it down.
Take a right at the fence to the next area to meet four more Gum Heads. The one blocking the next door has a 21 Pitching Wedge, which you can pry out of its cold dead hands, or just shove past it and through the door.
B12 to B15: Stairwell to Stairwell
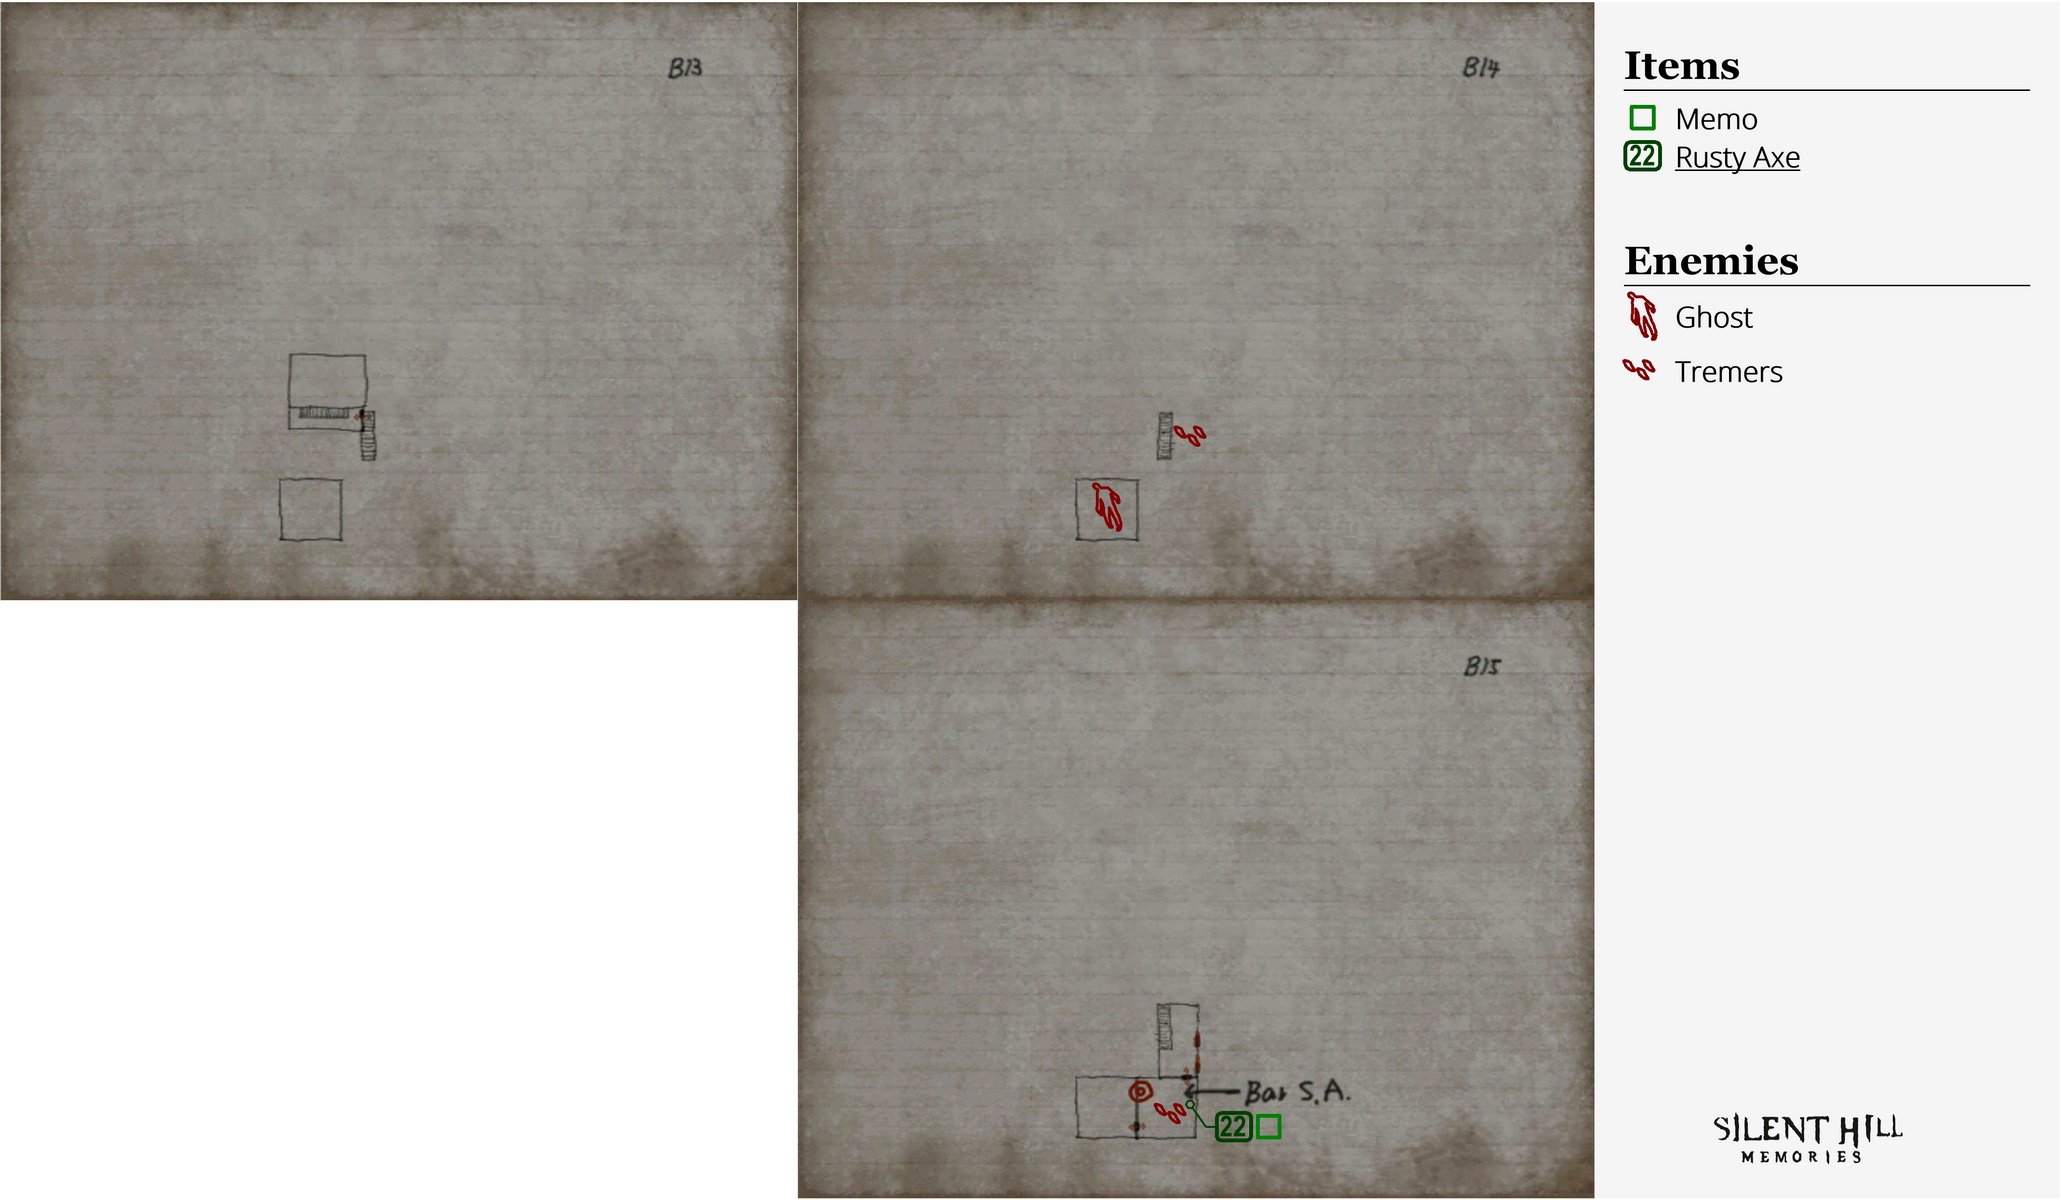
Now in a large empty stairwell with a huge fan above it, take the stairs down and proceed through the next door in the southeast.
Follow this side staircase past any Tremers down to the bottom floor of B15. Go through the green door by the trash can at the very end.
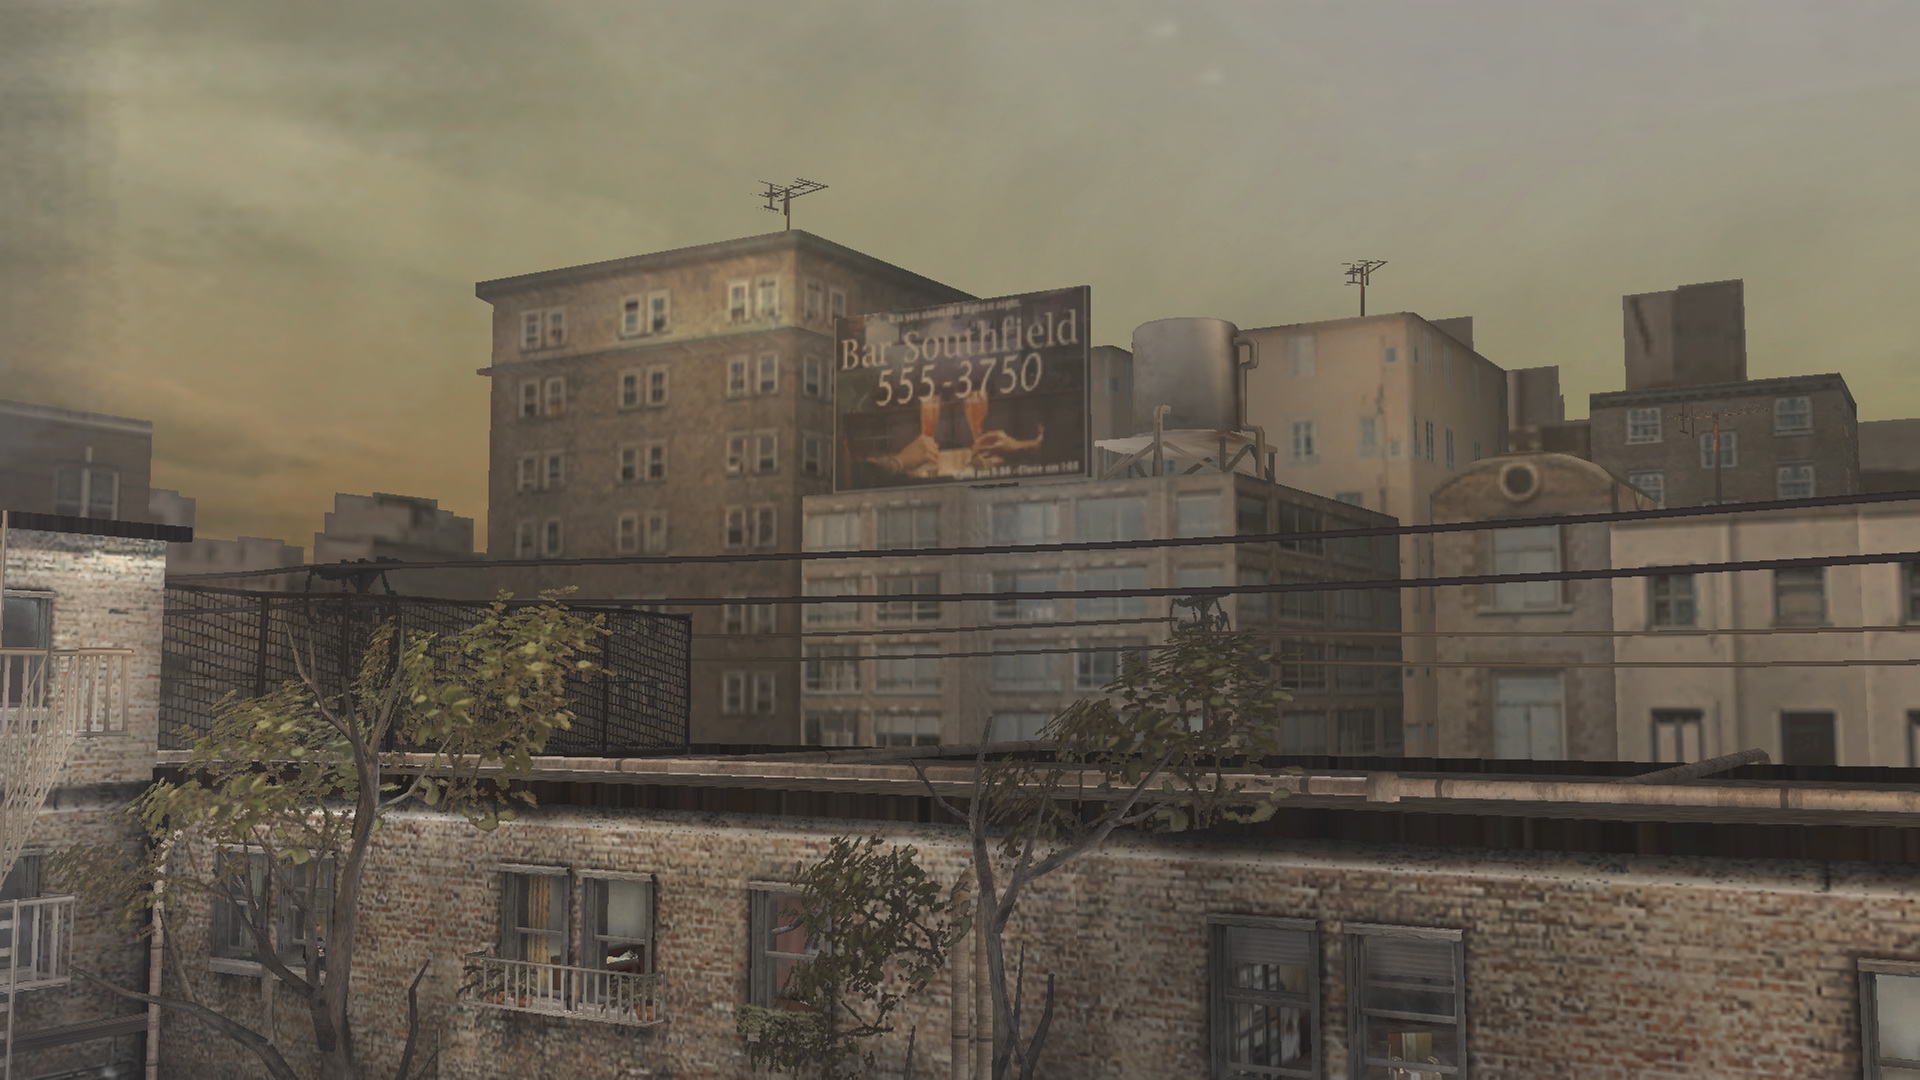
B15: Bar Southfield
Ignore the Tremers on the walls and set your eyes ahead on the small, circular table. Take the awesome 22 Rusty Axe, which can easily be described as the best weapon in the game. It's small, light, powerful, and has the most useful and unique charge up attack. Let it be your primary weapon for the rest of the game. Trust me. It is the holy grail. The Spade is pretty great too, by the way.
Deeper into the room you'll find a door locked by a keypad, but check the bar for the Bartender's Memo (16/52), setting up a brief puzzle.
Puzzle: Bar Southfield Keypad (Bar Southfield, B15)
|
Find the nearby Portal by the billiard table and return to 302.
Room 302
There you go. You may witness the super walk by your front door if you check but not much is happening here anyway. Enter your washroom and return to the Building World. |
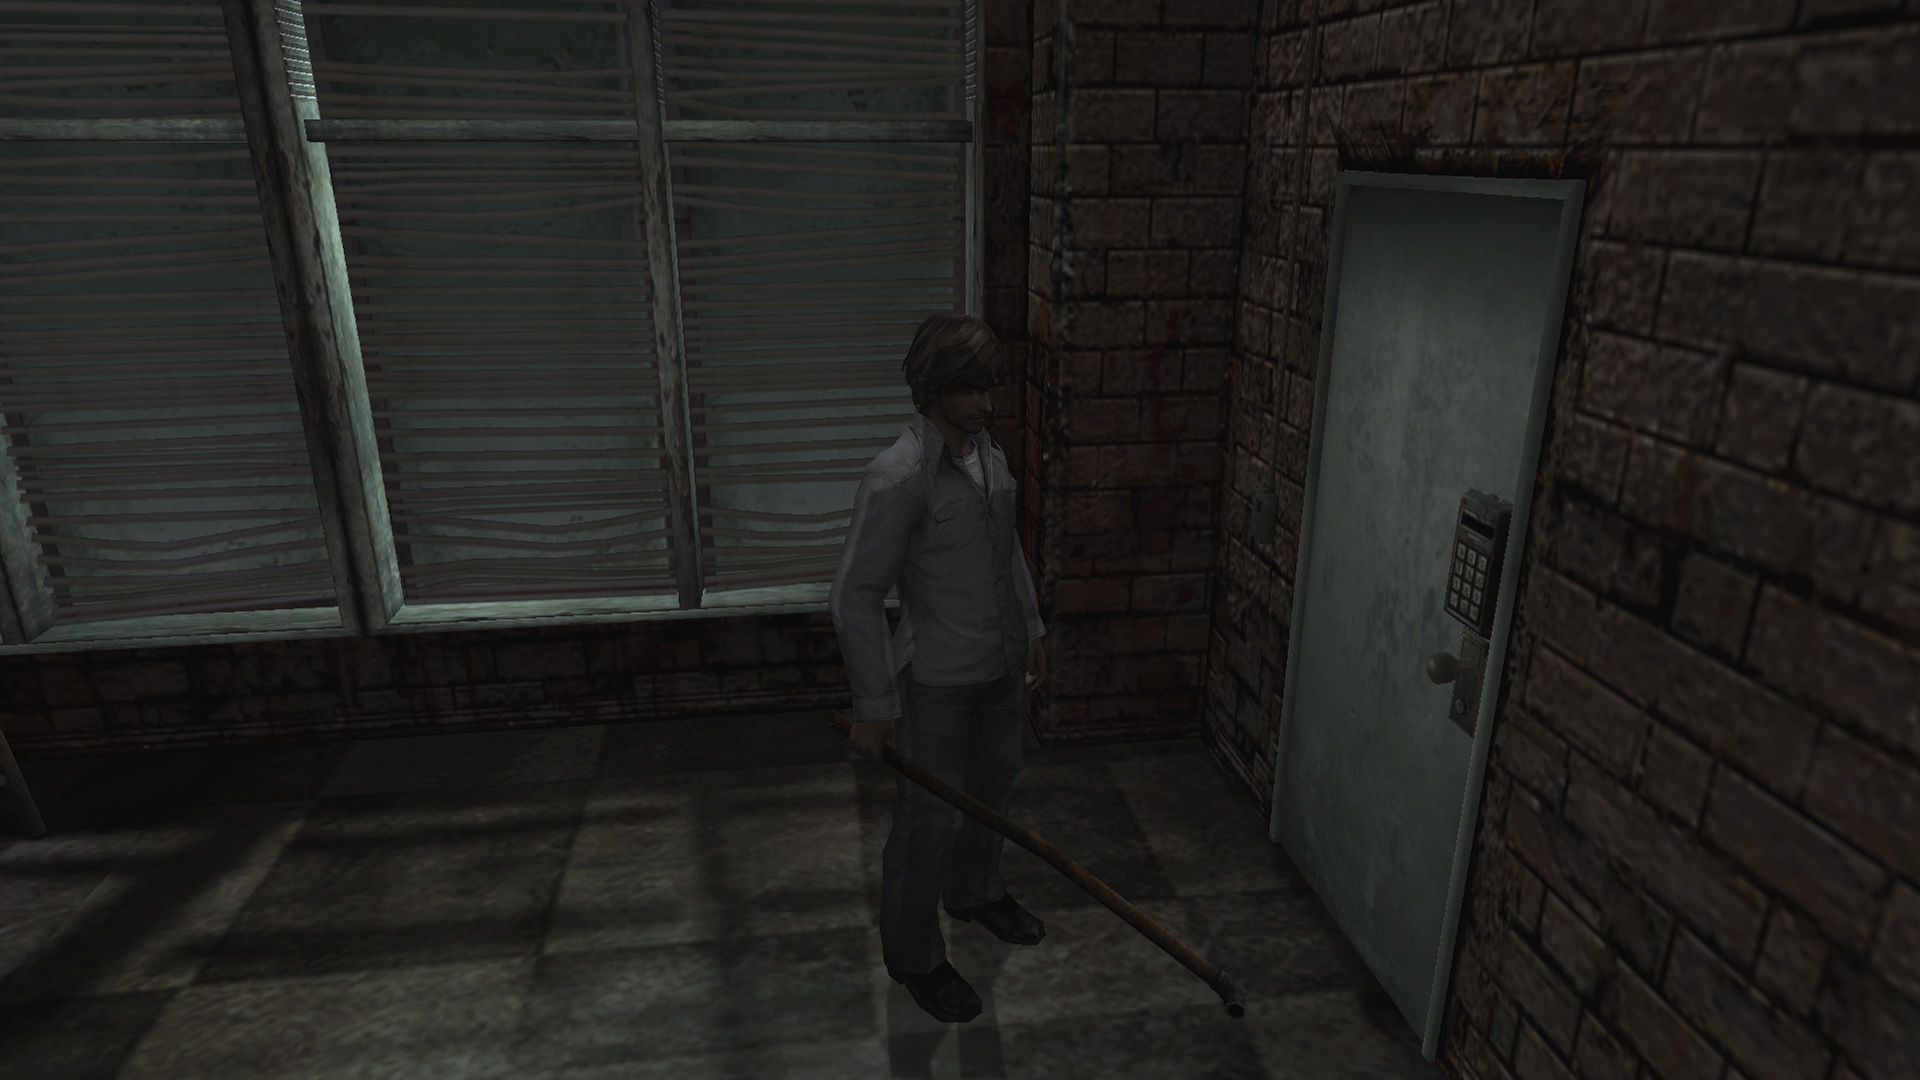
Check the keypad and enter the code 3750 to pass through.
Massive Stairwell
Step ahead for Henry to hear an echoing scream at the top of what looks like a huge stairwell. Great... and you're going to be chased by Ghosts the whole way too, have fun. For the record, you can't go down since there's a chunk of stairs missing by the door.
 Start your lengthy ascent and just don't stop for anything. Ghosts will chase after you but there's no real point in engaging. You can use a Saint Medallion to prevent their damaging effect if necessary, but it shouldn't be much of an issue.
At the top of the enduring stairway, Henry notices the door is to room 207 from his apartment building. Take the 23 Chaos Placard on the door and proceed inside for a cutscene.
Room 302Exit your bedroom to hear another transmission coming from your living room radio. You might be able to hear a travel commercial for Silent Hill after it if you turn the radio on again. If you look out the window from either your living room or bedroom, Henry will notice a man in room 207 pointing at 303... That's Eileen's room. Is she next? If you check on Eileen, it looks like she's getting ready for her party, now wearing a backless purple dress. Looks like you just missed the best part of her slipping it on eh, ya dirty perv. You know the drill by now – dump the placard and anything else, consider saving and then check the washroom to find the hole is even larger. Before hopping in, examine the toilet for a brief reference to Silent Hill 2. Shame Henry isn't a real man like James though. Anyway, jump in the Portal and see where you end up now. |
| 04. Water Prison World | 06. Apartment World |