Water Prison World 2nd Time
Welcome to the tenth chapter of the complete walkthrough guide for Silent Hill 4: The Room (2004, PS2, Xbox, PC), covering the second visit to Water Prison World. This guide provides a comprehensive walkthrough with all item locations, detailed puzzle solutions, and boss strategies. It also includes complete maps with all items and monsters marked for easy reference.
Color legend
Chocolate Milk – items
Wine Bottle – weapons
Pistol Bullets – supplies
First Letter – memos
Portal – Portals connecting Room 302 and various Worlds
Contents
- Complete Maps
- Walkthrough
- Roof
- Exterior Walkway
- Third Floor Cellblock
- Inner Basement
- Interior Basement Stairway: Unlocking the 1F Door
- First Floor Portal Room
- Retrieving Eileen
- Second Floor Cellblock
- First Floor Cellblock
- Interior Basement Stairway: Facing "The Fat One"
- B2: Escaping the Water Prison with Eileen
- Below Water Prison World
Complete maps |
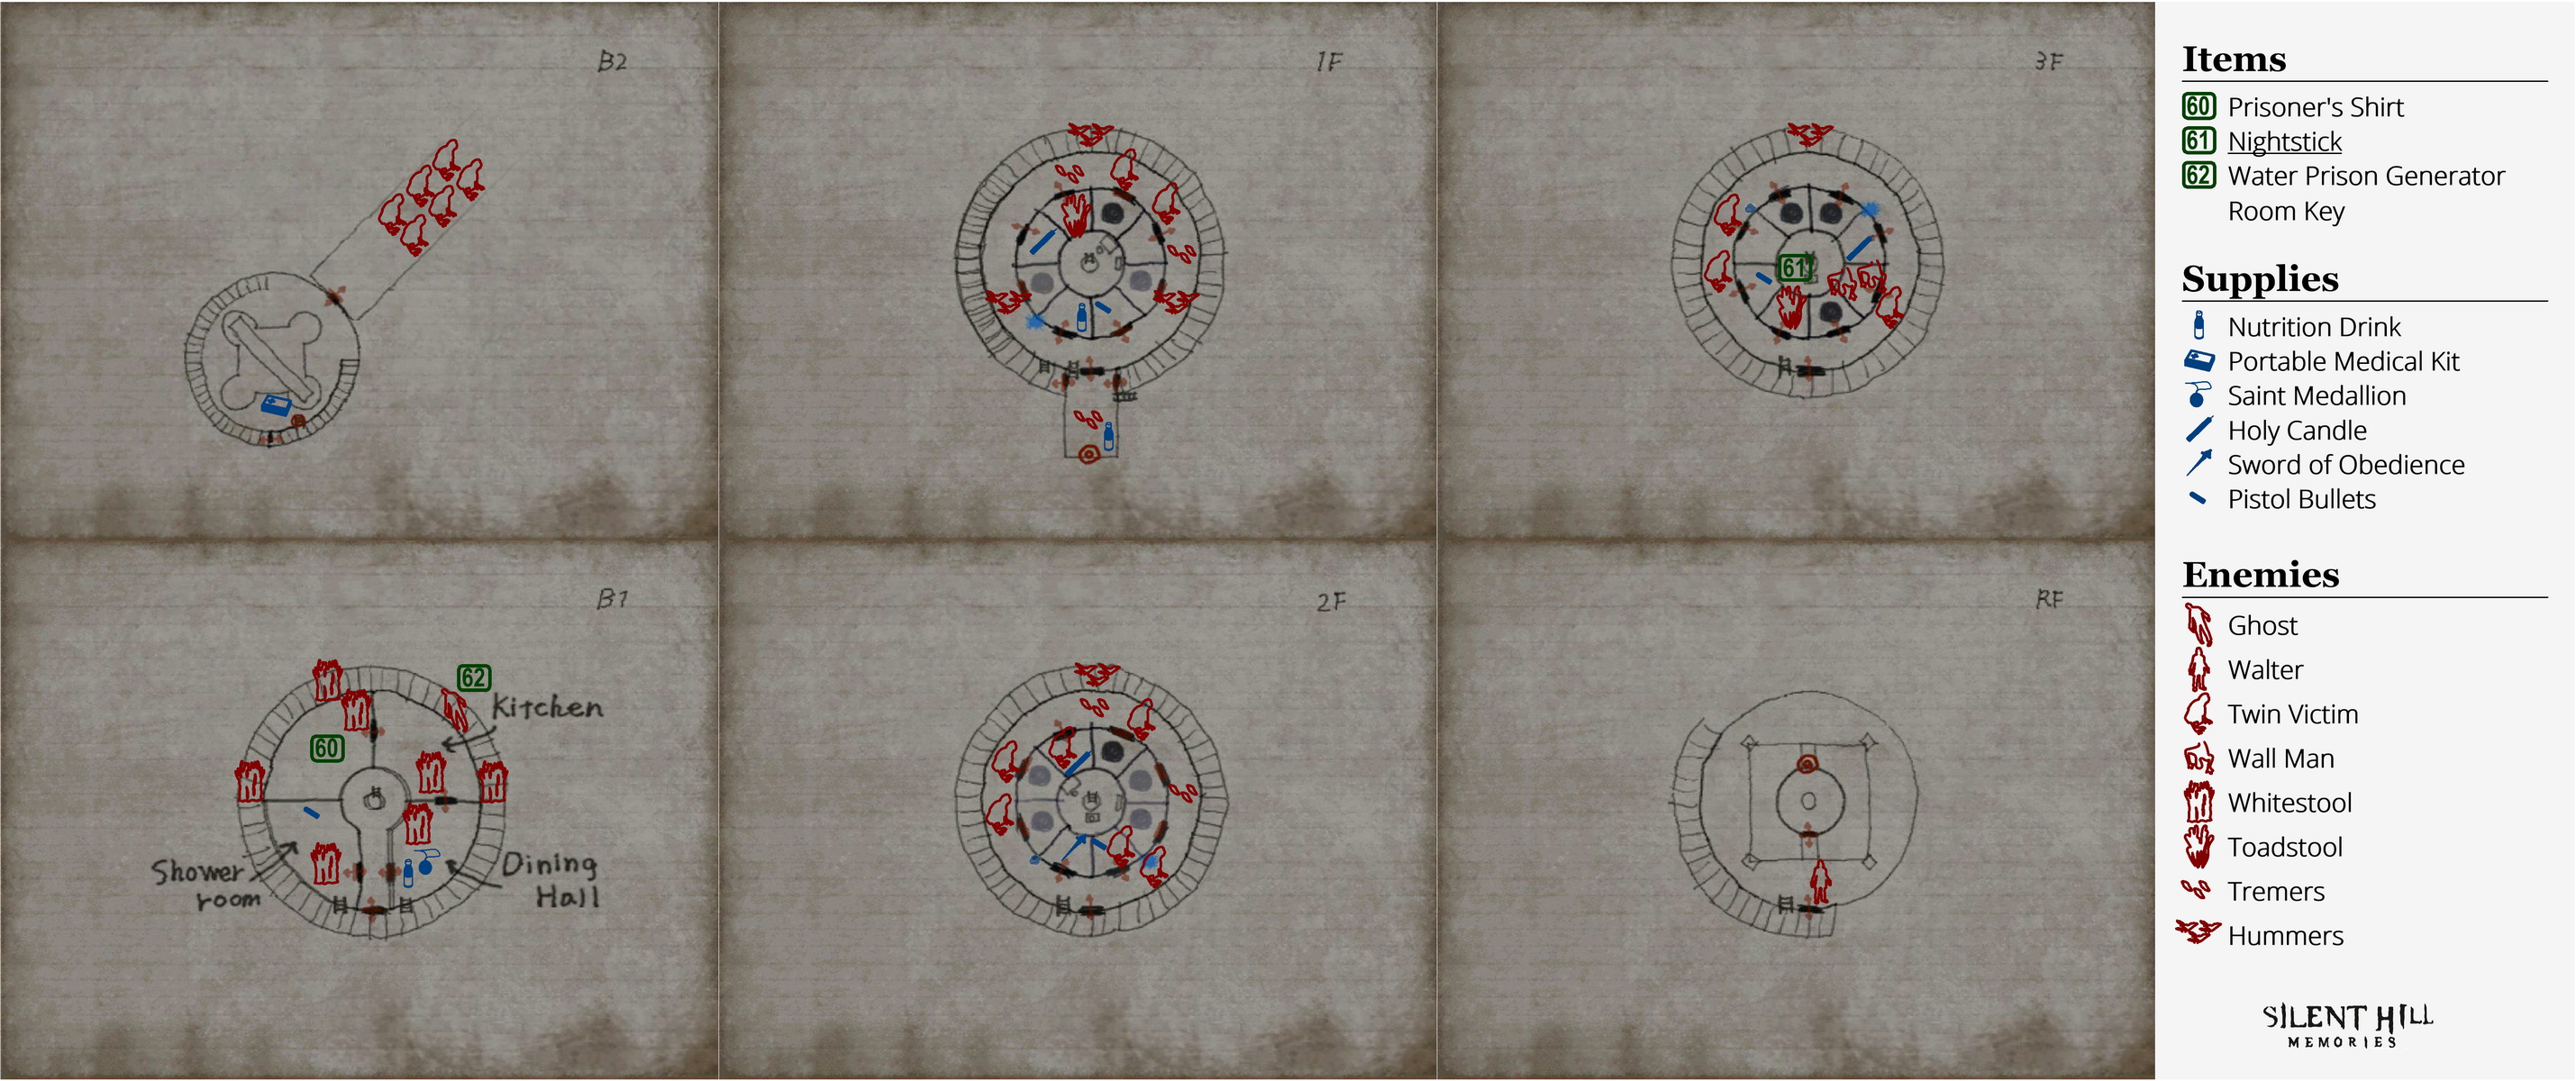
|
Walkthrough
"That guy, the fat one, took the basement key. Next time I'll stick this triangle sword into that pig and take the key."
Roof
Note the Portal on the wall and exit on the other side after unlocking the door. Out here, Walter has his gun trained on you at the bottom of the screen, so quickly run past him before you're shot at. The gate to the outside walkway is just past him, so wait a brief moment for Eileen and pass through.
Exterior Walkway
Eileen can't take the ladders but you can and she'll just run to catch up, so don't feel compelled to escort her. Consider unequipping her weapon though so she doesn't try to engage any Hummers. Head down the ladder, wait for Eileen and enter the third floor cellblock.
Note that if you just stand by the ladder or door on 3F, Walter won't enter the area yet, but he will if you move a bit away. So wait patiently for Eileen. Even if he does come, he probably won't be a factor.
Third Floor Cellblock
To Henry's right is a Twin Victim pointing fingers, as well as two more in the corridor. Consider beating them down with Eileen. Checking the cells, Toadstools guard a Nutrition Drink on the bed in the 7 o'clock cell, Pistol Bullets are on the stand in the 8 o'clock cell, and there's a Holy Candle in the 2 o'clock cell on the other side.
Note on cell navigation:
Just like the first time, I'll refer to cell locations by their position on your map relative to a clock face as shown below.

Now you can proceed down to the 2F and 1F cellblocks with Eileen, but eventually you'll find the door to the basement in the small Portal room on 1F is locked. So you'll have to use the same trick as before to reach the basement – jump down the cell holes.
That means leaving Eileen for a bit. Just make sure you leave her in the cell you jump down from so she's away from any enemies. Remembering before, the 1 o'clock cell on each floor contains a hole (with the bloody bed as well) so enter that cell on 3F and jump all the way down to the basement.
Inner Basement
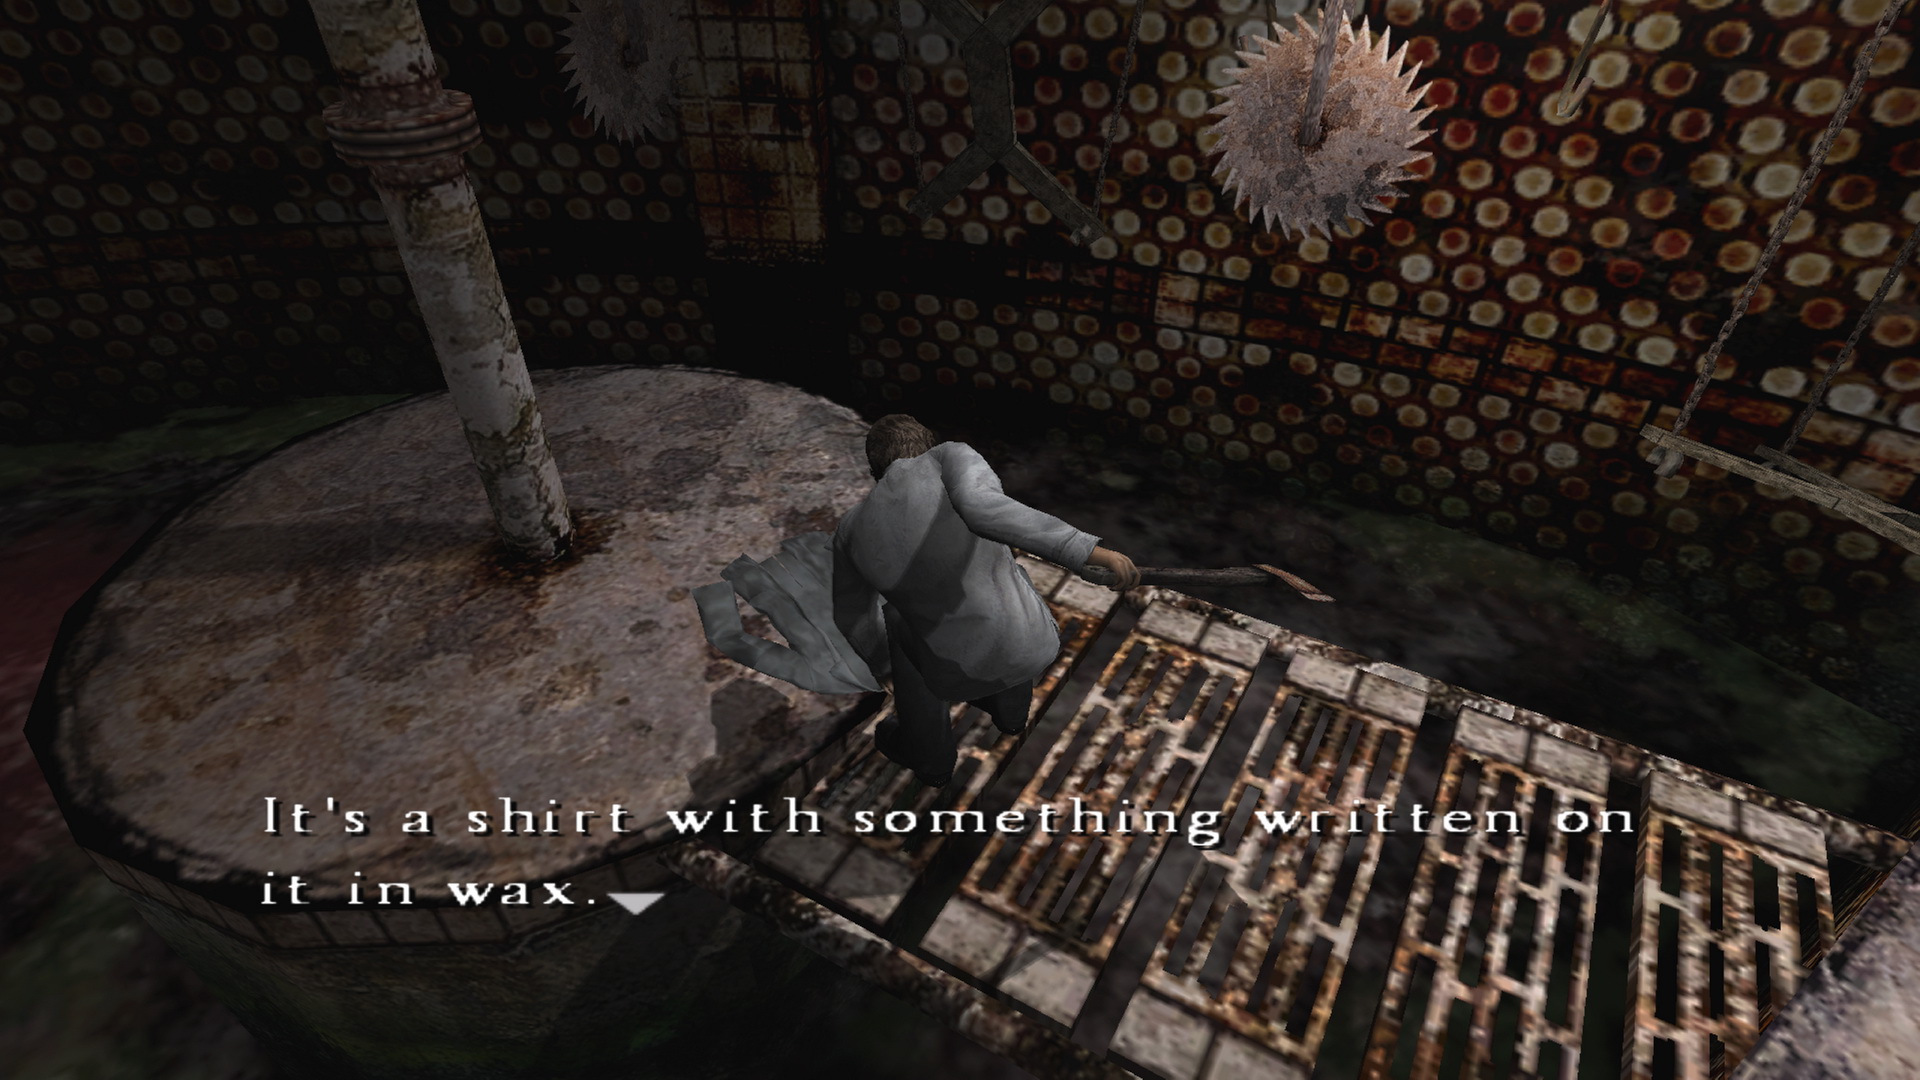 Once you land in the kitchen on B1, turn around and go through the double doors. Walk over the small bridge to find a 60 Prisoner's Shirt on the floor, with something written on it in wax. Henry comments, "Maybe if you soak it in some kind of colored liquid..." in its description. Remember anything in your apartment?
Now pass back through to the dining hall on the other side. Clear the path of Whitestools and grab the Nutrition Drink on the table. Also note there's an easy-to-miss Saint Medallion on the bench near where the Whitestools were (you'll need to change the angle with L2 to see it). Then exit to the hall after unlocking the double doors there.
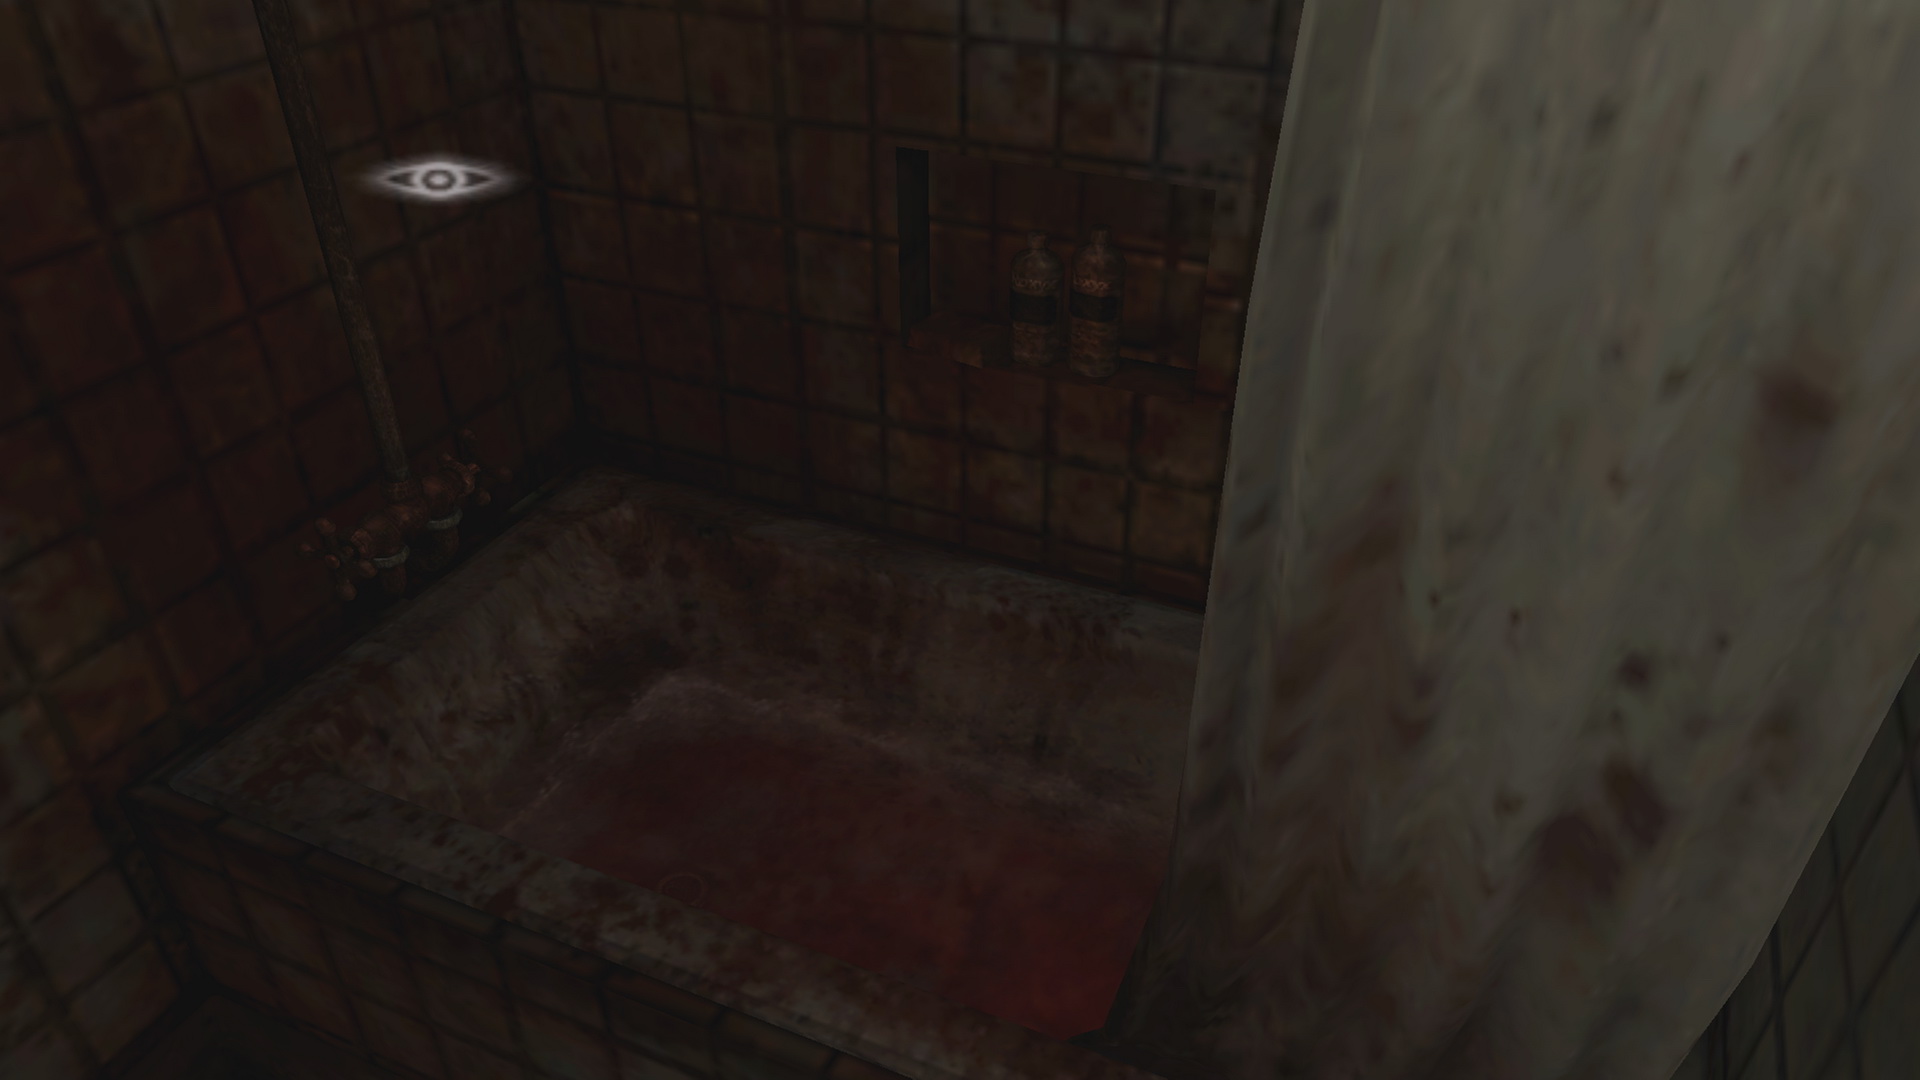
In the shower room across the hall you'll find Pistol Bullets past some Whitestools. More Whitestools block the ladder to the surveillance room. While you don't need to (and can't) turn the cells anymore, you can find a 61 Nightstick weapon for Eileen on the 3F floor up there. Exit to the hall.
Interior Basement Stairway: Unlocking the 1F Door
Instead of heading down to B2 just yet where the generator room is locked anyway, let's unlock the door to the 1F Portal room, clear some inventory space and find some coloured liquid in our apartment, and then retrieve Eileen. So head up the nearby ladder, unlock the door and pass through.
First Floor Portal Room
Grab the Nutrition Drink left of the Portal on the wall. Remembering the Prisoner's Shirt you just picked up, return to your apartment through the Portal.
Room 302
Now you know where the basement key is, while a search is warranted on the second floor to find a Sword of Obedience. That exact Sword is not required but you absolutely will need to use one shortly. You also need to read this shirt memo to advance or you will not find "the fat one" as mentioned. Before heading back, check under your front door for the Red Diary - July 28 (40/52) and dump any unneeded items in the chest. Return through the laundry room. |
Retrieving Eileen
Remember that you don't want to keep Eileen alone for too long, so let's go retrieve her before we do anything else. She should be in the 1 o'clock cell on 3F if you left her there earlier. Otherwise, find her red arrow on the map and retrieve her. If you'd rather do your searching alone and then retrieve Eileen later, go ahead but understand that minimizing her time alone is in her best interest.
Now head to the second floor. Descend the ladder and wait for her to run around the exterior, then enter the cellblock.
Second Floor Cellblock
Four Twin Victims await around the cellblock so consider taking them out to start off. Don't worry about the Tremers on the walls here and elsewhere. You'll find the drinks with "black things" (black powder) in the 7 o'clock cell. Check the bed to find a Sword of Obedience under it. You actually don't need this exact sword which is just one of five in the game, but you will need to use one shortly.
Otherwise, a Twin Victim guards Pistol Bullets in the 5 o'clock cell and another one guards a Holy Candle in the 11 o'clock cell if interested.
Make sure Eileen is with you and take the outside ladders down to the first floor. Wait for her to run around the exterior and proceed inside the 1F Portal room. If Walter does come around, you can just climb back up the first ladder and wait on the small platform to avoid confrontation.
From the Portal room, the first floor cellblock is an optional trip with a few items to collect while facing a few enemies. Otherwise, skip ahead to the basement stairway.
First Floor Cellblock
Here you'll face a combo of Twin Victims and Hummers. A pack of Pistol Bullets awaits in the 5 o'clock cell, a Holy Candle in the 10 o'clock cell, and a Nutrition Drink in the 7 o'clock cell.
Return to the Portal room and make sure you have the Pistol, a Silver Bullet, and a Sword of Obedience before proceeding to the basement stairway with Eileen.
Interior Basement Stairway: Facing "The Fat One"
If you've already read what was on the Prisoner's Shirt, a cutscene will play here of "the fat one" who stole the basement key – it's Andrew DeSalvo, Victim 18. You'll have to face him to get his key. First you'll need to beat down some Whitestools blocking the path in a few spots to reach him. Then prepare for a mandatory fight.
Ghost Victim 18: Andrew DeSalvo (Mandatory Mini-Boss)
So may sure you have all these things and the Silver Bullet loaded before you face him. If you don't have a Silver Bullet, you can still take him down but it'll require extra work. In that case a Saint Medallion will help slow him down and preserve your health. With the right equipment, target him and make sure he's in your sights, then pump that Silver Bullet into his belly and he'll drop to the floor. Run up and stab in a Sword of Obedience to claim the 62 Water Prison Generator Room Key. Exercise caution while using the Silver Bullet, since it may not do anything if you shoot while he's in some sort of animation like standing up. Wait for him to approach you and then fire. If you don't have any silver ammo, the next best method is probably to use Holy Candles. It may take two of them but they are quite effective (there's three found in this world; one on each floor mentioned above). Either placing a candle one at a time or both down together, try to keep Andrew stay in one spot hovering over them and he should drop after the candles work their magic. Otherwise, turn to your Rusty Axe or Spade, particularly their charge up attacks. Keep on beating him down and trying to use a Sword. It will take multiple downs to eventually stab it in so just hang in there. Make sure to grab the key after finally pinning him. By the way, should you want more of an open area to fight him rather than the tight stairway, you can continue down to basement 2 and find him there, but I highly recommend staying here since he'll waste so much time in areas you cannot reach down there and it can be a real pain. Lastly, should you take the sword back? Honestly, while he's a dangerous Ghost he doesn't appear anywhere else except the following basement room and one optional room in the final world. So I'd say go for it if you'd like to use it on someone else. |
 To retrieve the basement key from Victim 18, you will need to use a Sword of Obedience here. Read above if you didn't get the one on the second floor, while you may still have one from the end of the subway or earlier. The best way to take him down is with a Silver Bullet, used in the Pistol. DeSalvo is the only Ghost you have to fight and he's a real annoying one, making him the best candidate to use a Silver Bullet on.
Now with the key, follow the rest of the path past any more Whitestools and proceed into the B2 waterwheel room.
B2: Escaping the Water Prison with Eileen
Head down the stairs and note the Portal on the other side of the waterwheel, as well as a Portable Medical Kit on the ground near it. Find the door near the end of the stairs you came down and pass through it with the Water Prison Generator Room Key.
Take a step forward and try not to wet your pants. Quite the sight, eh? These six Twin Victims won't start approaching until you move closer, and you can bring them in smaller groups one or two at a time if you move bit by bit then retreat. You also have a choice of heading back and ditching Eileen in the big room if you want to avoid her taking damage, but she can help you beat them down too, especially with the Chain or Nightstick.
Either way, fire away with the Pistol or bash some heads in with the Rusty Axe or whatever else you've got. Be sure to stomp any enemy that falls asap, including those Eileen knocks over. Then pass through the now normal-sized end door with Eileen.
Below Water Prison World
Navigate down the same old spiral staircase, this time finding a kinky mannequin hanging upside-down along the way if you're taking in the sights. Find the Portal near halfway, empty any items you don't need and head through the door at the bottom with Eileen.
| 09. Forest World 2nd Time | 11. Building World 2nd Time |