Water Prison World
Welcome to the fourth chapter of the complete walkthrough guide for Silent Hill 4: The Room (2004, PS2, Xbox, PC), covering Water Prison World. This guide provides a comprehensive walkthrough with all item locations, detailed puzzle solutions, and boss strategies. It also includes complete maps with all items and monsters marked for easy reference.
Color legend
Chocolate Milk – items
Wine Bottle – weapons
Pistol Bullets – supplies
First Letter – memos
Portal – Portals connecting Room 302 and various Worlds
Contents
- Complete Maps
- Walkthrough
- First Floor Cellblock
- First Floor Portal Room
- Interior Basement Stairway
- B2 Waterwheel Room
- Exterior Walkway
- Second Floor Cellblock
- Roof: Opening the Sluice Gate
- Third Floor Cellblock
- Jumping Down to B1
- Inner Basement
- Inner Surveillance Room
- Optional Trip for the Stun Gun
- Jumping Down to the Kitchen
- Kitchen
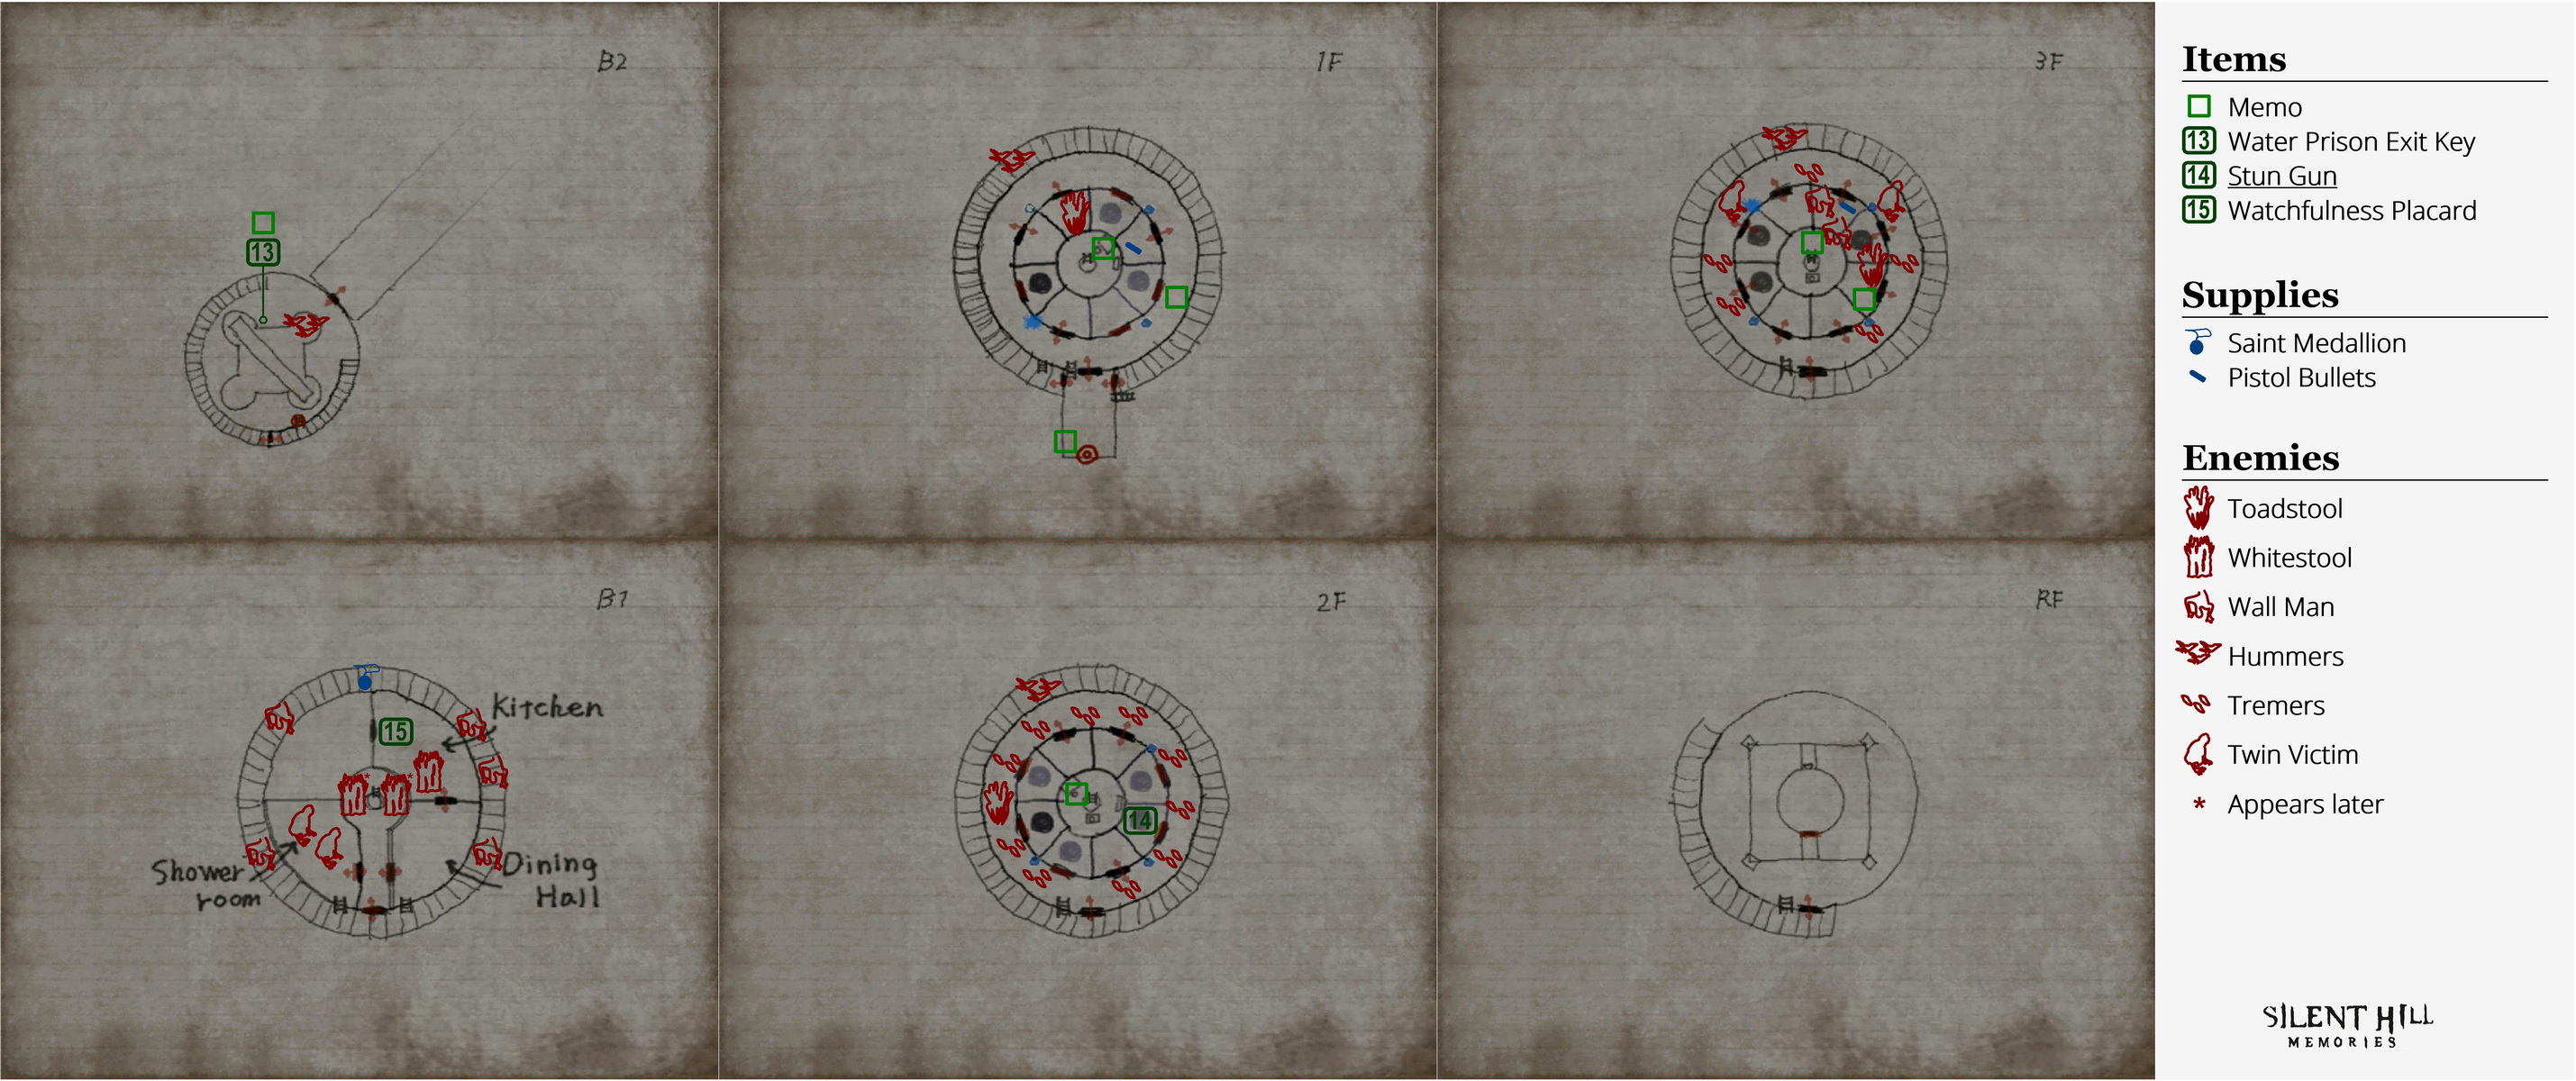
Complete maps |
|
Walkthrough
"With no food and never showering themselves, they turn into smelly little grey lumps in there."
First Floor Cellblock
 Henry awakens in a prison, wondering just what the hell he did last night. Follow the curved path to find the small Exploration Memo (6/52) on the ground and a shouting man in a cell past that. You can't help him from here but go ahead and listen to what he says. He'll drop a name that may be familiar if you played Silent Hill 2...
Note on cell navigation:
This and every floor of the prison has eight cells in a circular cellblock. I'll refer to cells by their position on your map, relative to a clock face as shown below.
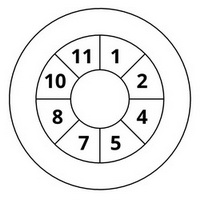
A pack of Pistol Bullets awaits in the 2 o'clock cell along with a note on the wall (you'll find more of these which aren't really important). New passive enemies called Toadstools occupy the 11 o'clock cell, but nothing else is in there or elsewhere here. Exit through the south double doors.
First Floor Portal Room
On the wall ahead is a Portal with a Guard's Diary (7/52) posted beside it. A new memo awaits you at home.
Room 302Check your front door for the Red Diary - April 4 (8/52). Reading the memo will provide you with the confirmation of the Silent Hill 2 character who previously only existed on paper. Empty any unnecessary items and head back to the prison. |
Back in the Portal room, the east door is locked so pass through the west door.
Interior Basement Stairway
If you follow the path ahead it'll slowly descend past several Wall Men on the way. Instead, you can use the ladders here which bypass the Wall Men and let you reach the same places anyway, while saving you some time.
Take the first ladder down to B1 to find locked double doors nearby, but skip the next ladder and start walking down to B2 to find an item – don't worry, there's no Wall Men this far down.
At the north point between B1 and B2 you'll find a Saint Medallion on the floor, which is small and may be hard to see. Continue down the path and through the door at the end.
Note on Saint Medallions:
These medallions are anti-spirit items that suppress the effect of Ghosts. When equipped, Ghosts will move more slowly, attack less frequently, and all damage from just being near them will be prevented. However, as you use medallions they'll slowly degrade and eventually break. But don't fear, you'll find several more over the game if you have a keen eye and they're meant to be used as you please, rather than needed for specific circumstances.
B2 Waterwheel Room
Head down the steps to the main ground where you'll discover several Hummers on the inner walls of the waterwheel hull. Time for some batting practice.
On the southeast outer wall in the area is a Portal, while the northeast door is unlocked and leads to a generator room which will provide you with an extreme sensation if you head deep down the hall...
Back in the main room, find the sign at the northwest of the inner low wall to get the 13 Water Prison Exit Key hanging on it. Examine the sign after for Henry to copy over the Waterwheel Room Plate Message (9/52) to his scrapbook. The memo instructs you to open the sluice gate on the roof to turn on the lights on the third floor, so remember that for later.
With a new key in hand, exit back to the stairs and use the ladders to ascend back up to the Portal room on the first floor, then exit from the east door with the Water Prison Exit Key.
Exterior Walkway
If you follow the path straight ahead it'll slowly ascend to the second, third, and roof floors of the prison. But doing so will awaken a bunch of Hummers along the walls, while using the ladders instead will save you a lot of walking and interaction. So take the two short ladders up to the second floor and enter the cellblock through the double doors.
Second Floor Cellblock
With more Toadstools here, you'll also find more new enemies called Blue Tremers on the walls and some on the floor. These enemies are passive and fun to squash, but they can also slightly harm you if you walk into them. Swinging at them will knock them off walls, but you don't even need a weapon to kill them while on the floor as Henry can stomp them. Enjoy the experience.
The only thing relatively interesting on this floor is a diary in the 11 o'clock cell, although Henry won't put it in his scrapbook. Head back outside and ascend the next ladder.
You can explore the third floor now but the cells will be a bit dark, and you may remember a memo that said to open the sluice gate on the roof to turn on the lights, so head up the ladder again and pass through the large gate to the roof.
Roof: Opening the Sluice Gate
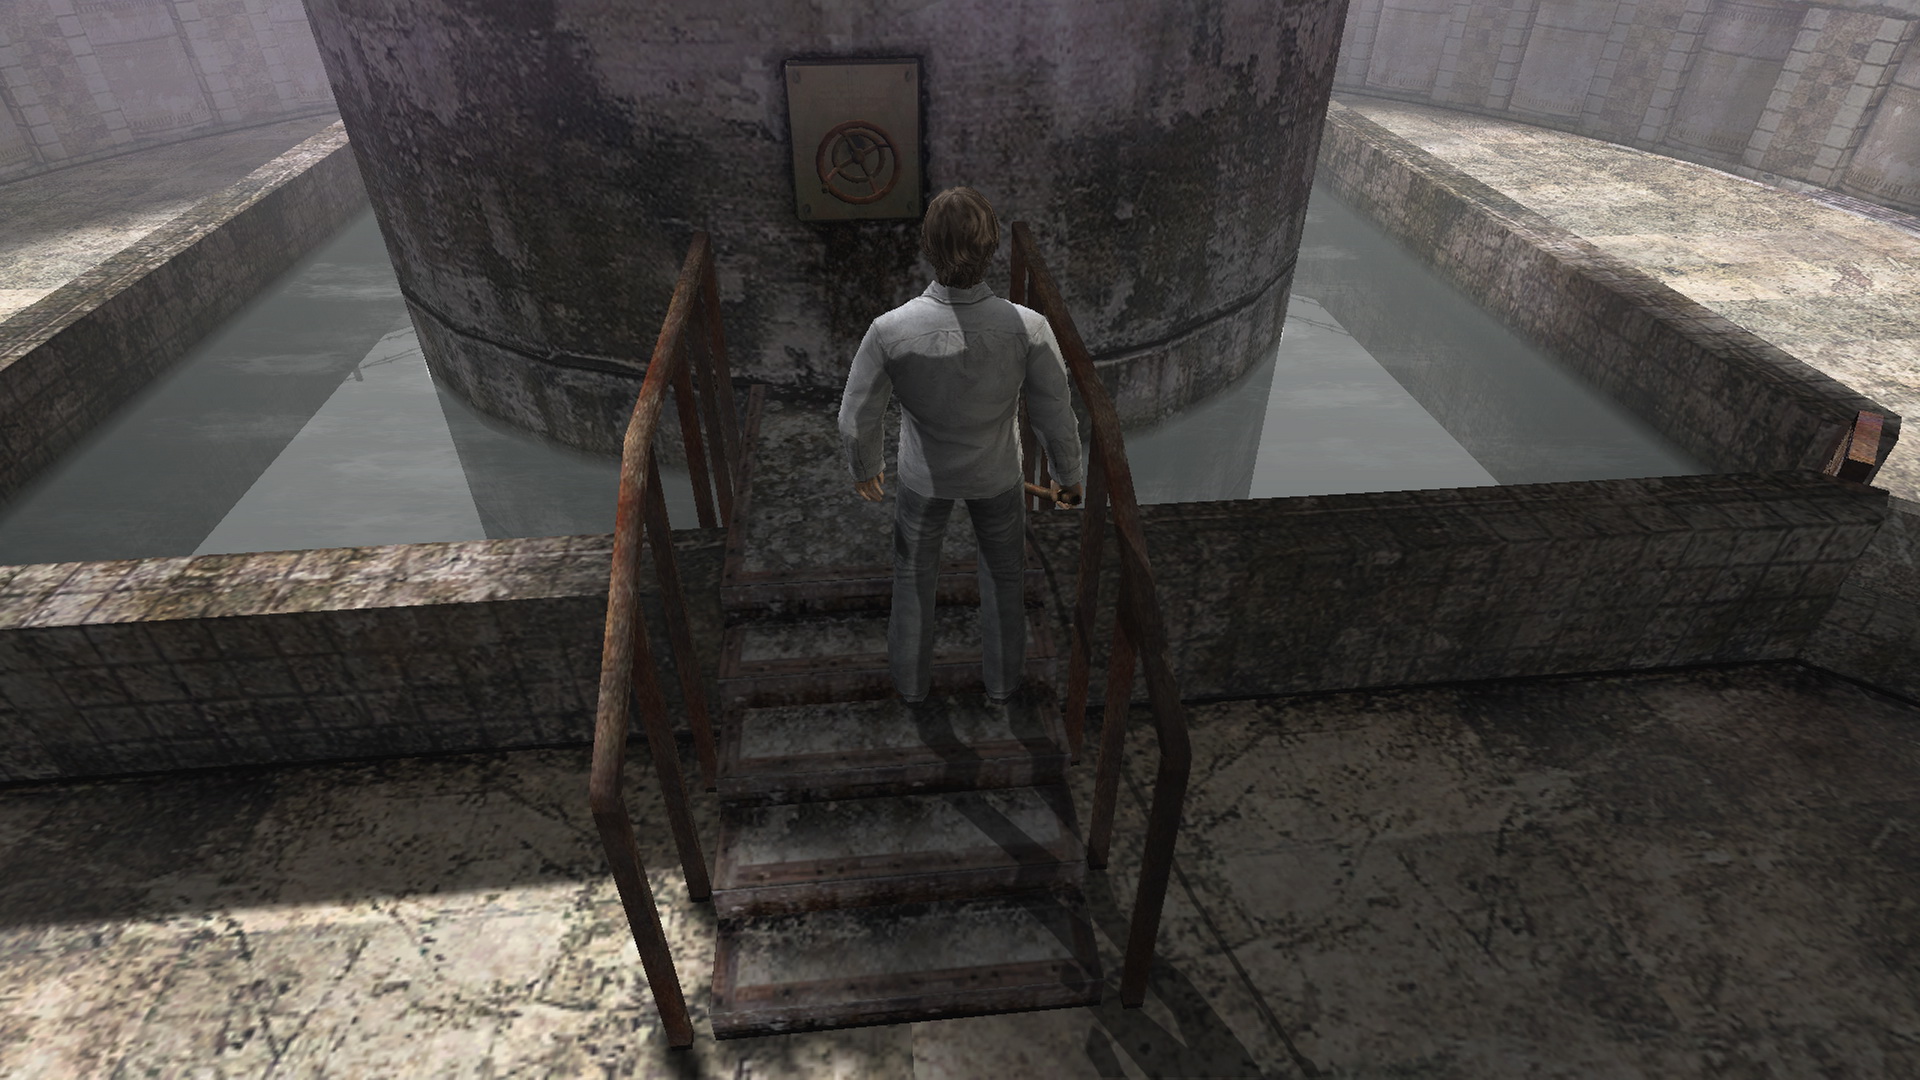 Just ahead is a door that won't open, but on the other side of the large water tank is the sluice valve. Crank it open. Now leave the roof and enter the third floor cellblock below.
Third Floor Cellblock
Now with the cell floodlights on and water slowly leaking into the hall, the 7 o'clock cell contains a note in the left corner that gives you a hint of light and water for the upcoming surveillance room puzzle, which you've already solved half of by opening the sluice gate.
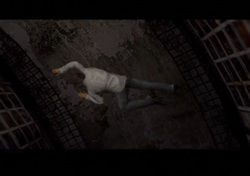
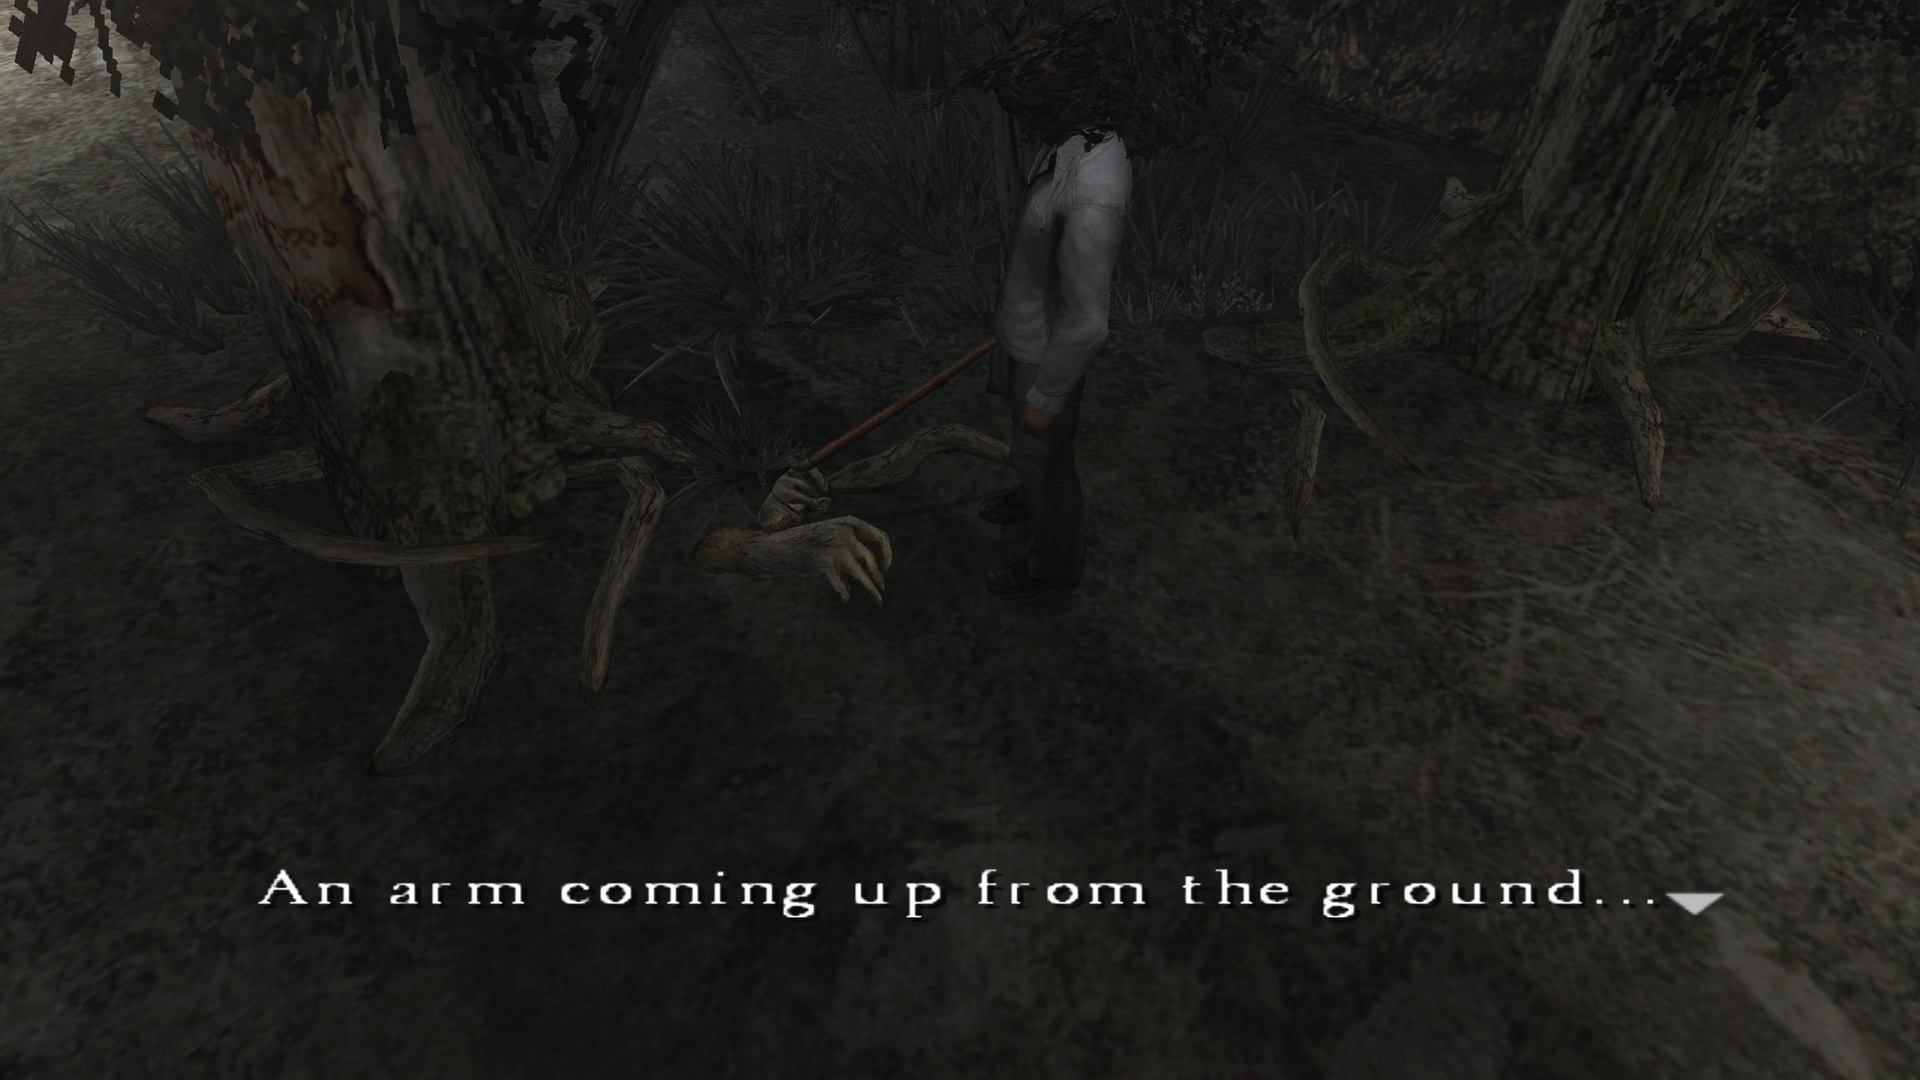
Continuing west, there's a gaping hole and some blood leaking down in the 8 o'clock cell. There's more to see here so don't jump down yet. Farther down the hall is a new, disturbing enemy called the Twin Victim, which is even pointing at you... Bash it to death before it comes to beat you up.
Inside the 10 o'clock cell is another hole, plus blood in the shape of a body covering the bed. A pack of Pistol Bullets waits in the 1 o'clock cell but is guarded by an aggressive Wall Man, with another in the other corner. If you want the ammo, wait for an attack break, then run in and bash it a few times and grab it.
Near the 2 o'clock cell is another eerie Twin Victim, and in the cell there is another strange hole. In the 4 o'clock cell is a family of Toadstools and a Prison Diary (10/52) on the left stand.
Jumping Down to B1
When you're done in this cellblock, return to the 8 o'clock cell and jump down the hole. You'll arrive in a cell on 2F with another hole and a jammed door. Jump down to another cell with a hole on 1F where you can jump down to the basement below.
If you jump down a different hole, it will either right away or ultimately lead to an already unlocked cell on a lower floor, which isn't what you want. If you did though, just return to 3F and jump down the 8 o'clock holes all the way to the inner basement.
Inner Basement
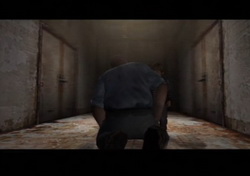
You'll land in a shower room on B1 with two Twin Victims waiting for hot water. Beat them or just pass through the double doors, unlocking them first.
The east doors won't open, so head up the north ladder in the circular area.
Inner Surveillance Room
In this circular room you can find the 1F Surveillance Room Report (11/52) on the desk. The memo explains some useful information on the cells and rotating them. You'll also find peepholes that look over each of the cells on the first floor here.
Continue up the ladder to an identical room and grab the 2F Surveillance Room Report (12/52) on the left desk, which contains more information on turning the cells. Also in the room is a valve to turn the cells. Don't do anything with it just yet, and move up the ladder to 3F.
Ahead of Henry on the wall is the Secret Number Memo (13/52), which contains the code for the kitchen back door on B1 which we haven't found yet. Another handle to turn the cells is found up here.
It's time to solve a puzzle, but before you do that, consider whether you want the Stun Gun as described below. While a pretty good weapon, it's not hugely important so just skip ahead to the puzzle if uninterested.
Optional Trip for the Stun Gun
With no actual hint to find it, there is a Stun Gun hidden in a cell on the second floor that is only reachable by turning the cells from this surveillance room. Although it can't be seen from the peephole, it is located in the initial 4 o'clock cell before turning them around, which cannot be opened from the outside. Therefore you'll have to align a cell with a hole on 3F above it and jump down from there to claim it.
Before we go any further, is this worth the hassle? Well, it's actually a quality weapon that knocks down enemies in one hit, so perhaps it may be. To do this right, just turn the 3F valve once to the right, which will put a cell with a hole in the 4 o'clock position on 3F right above it, if you haven't moved anything else.
After moving the cells, return to the third floor cellblock, enter the 4 o'clock cell and jump down to the same cell on the second floor. Grab the 14 Stun Gun on the stand. Now jump down again to a first floor cell with another hole and again to the basement.
You'll land in the dining hall while the secret number keypad door can be found in the kitchen next door, but you won't be able to enter the code without light down here. Therefore you must still solve the puzzle in the surveillance room.
Leave through the other doors in the dining hall after unlocking them and ascend the ladder back to the surveillance room. Remember that since you turned the 3F valve once right, you now need to turn it right once more rather than twice in the following puzzle.
Puzzle: Revolving Prison Cells (2F/3F Surveillance Room)
The solution is the same for each difficulty every time, although the two memos will be different and very unhelpful on Hard – but in that case, just read the Easy/Normal memos below which still apply. Easy/Normal
Hard Difficulty
As explained, you must first open the sluice valve on the roof to get this whole process started. Then you want to locate the cell with the blood-stained bed on each floor using the peepholes and align them all in the same spot using the valves in the 2F and 3F inner surveillance rooms. The 1F cells can't be rotated since there is no valve there, so you'll need to align the 2F and 3F bloody bed cells with the one on 1F, which is always in the 1 o'clock position. Confirm yourself with the peephole. On 2F the blood-stained bed starts in the 7 o'clock position, four spots away from the 1 o'clock cell. Doesn't matter which way you turn it, left or right, just as long as you turn it the same way four times (Henry will turn it a few times in the cutscene but you need to do that four times). Confirm via the 1 o'clock peephole that the blood-stained bed is in the right spot. Good, now move on to 3F. Up top the blood-stained bed starts in the 10 o'clock cell, two over from 1 o'clock. Turn the valve up here twice right to align the bloody bed. After turning it once, you'll see a cutscene of the man on 1F being freed from his cell (unless you already did so if you moved the 3F cells for the Stun Gun) but you must turn it again to complete your task. Confirm via the 1 o'clock peephole that the bloody bed is there. In short, the solution to this puzzle is always the following:
So what exactly does that do? Opening the sluice gate on the roof allows the water to flow over the B2 waterwheel, generate power and activate the 3F floodlights. Aligning the bloody bed cells allows that light from 3F to shine through the 1 o'clock cells to the B1 kitchen in the 12 to 3 o'clock position so that the keypad there can be used to advance. Note that the position the water falls on the waterwheel also changes from the starting to finishing position (and the direction the wheel spins), while the waterwheel and lights turn off in other positions. The above solution is the only result that will allow you to advance. |

With the cells now in place, your next destination is the B1 kitchen. If you got the Stun Gun and landed in the dining hall, you already have access via the east door in the B1 hall, which you would've unlocked on your way out.
If so, head right there and skip ahead to the kitchen segment. Otherwise, you'll need to jump down from above.
Jumping Down to the Kitchen
 Begin by descending the ladders and you'll witness a cutscene where you're formally introduced to Andrew DeSalvo. Whitestools, the cousin enemy to Toadstools, will start to form around the ladder after the cutscene, so quickly escape and exit from the south double doors.
Use the ladder to Henry's right to access 1F and pass through the small Portal room, then enter the 3F cellblock and find the 1 o'clock cell.
If the bed in here is not stained with blood, you haven't aligned it correctly. Go back to the surveillance room and adjust it. When ready, jump down the three holes all the way to the B1 kitchen.
Kitchen
Be careful of the Whitestools in front of you, which you can ignore. Turn around and examine the double doors for the 15 Watchfulness Placard.
Examine the keypad on the door and enter the code from the Secret Number Memo that was originally in the 3F surveillance room. The code is 0302, the same number as your apartment... If it's too dark for you to see, you haven't aligned the cells properly to allow light from 3F to travel through the holes.
Upon entering the code, Henry will go through the door and a cutscene will play.
Room 302Enjoy the sunset from your bedroom window and exit the room. Hearing a tap blasting away, check your washroom for an amazing sight in the bathtub, which you cannot get rid of. The hole is also getting larger with strange sounds coming from it, but don't enter just yet. Head to your front door where you may hear muffled voices. Check the peephole for a cutscene and get the Red Diary - July 23 (14/52) after, along with the Superintendent's Memo (15/52) that was just slipped under your door, which is covered in blood and can't be read anyway. Feel free to satisfy your pervy desires by checking on Eileen, and you may hear an unimportant news report on your radio if you turn it on. Put the recent placard in the item chest with anything else you don't need, save your game if you wish and enter the bigger hole in your washroom. |
| 03. Forest World | 05. Building World |