Bosses
Ghost Mini-Bosses
Ghost Victim 16: Cynthia Velasquez (Optional Mini-Boss)
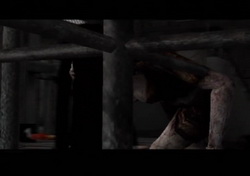 Victim 16 is the first of the game's more powerful Ghosts. You have no obligation to fight her but she will hound you through the subway and a few later locations otherwise.
In particular, she can block your way in a narrow train near the end of the subway and threaten your life. She also has a special ability where she can tangle you in her long hair, preventing you from escaping her reach unless you break free with an attack. She abuses this ability, which makes her one of the most dangerous Ghosts in the game.
If you wish to fight her, the easiest way is to use a Silver Bullet loaded into your Handgun. The first one of those is found in the next hallway (read ahead). There's only two of them found normally in the game and quite frankly she's probably the second best candidate to use one on, so go ahead and pump her with silver. Just ensure you have a Sword of Obedience in your inventory to stab her right after she drops.
Otherwise a Holy Candle is the next best method. Drop it right in front of her and try to keep her hovering above it. The candle will generally neutralize her tangling hair but it will also drop her after enough time, usually with just one candle (Cynthia is the weakest of the New Type Ghosts with this method). Once she drops, stab her with a Sword of Obedience.
If fighting her by regular means, use the Rusty Axe and unleash charge up attacks on repeat. You'll need to knock her down several times before you can stab her with a sword, and you'll notice her squirm away on her stomach after being downed fairly frequently. Try to keep up with her and do not relent. Once she finally remains down, stab her with a sword and move on.
Ghost Victim 17: Jasper Gein (Optional Mini-Boss)
 Quite frankly, despite his intimidating appearance, Jasper doesn't really stand out as being overly difficult to deal with as one of the more powerful Ghosts in the game.
That said, he does have an insanely damaging area of effect attack which can take huge chunks out of your health if you hang around him for long enough. And he does have a weapon and will smack you if close, but he'll only really follow you through this portion of the forest plus a few sections later and can be easily outrun.
Therefore I recommend ignoring him and proceeding, but you're always free to beat him down and stab him with a Sword of Obedience if he's a nuisance. The easiest way as always is a Silver Bullet, but if you used one on Cynthia already I highly recommend you do not use your second one (found in the southeast passage of the forest) on Jasper. This is because the next Victim in the next world is a nightmare and you'll want to save it for him.
If you want to beat Jasper down, just turn to the Rusty Axe and its charge up attacks, performing regular swings as you charge up. As always you'll have to knock him down many times before you can stab in a sword. Keep plugging away until his fire fades, at which point you can stab him. To give yourself an easier time while preventing damage, especially with his dangerous area of effect damage, find and equip the Saint Medallion that's in this lot.
Holy Candles can help with Jasper as well, but I've found him to be the strongest at repelling them and even two candles may not be enough to down him. They can help you keep him on the spot to attack, but he'll probably float away anyway once hit. This makes him better suited for attacking while using a Saint Medallion for your own protection (and to slow him down).
Ghost Victim 18: Andrew DeSalvo (Mandatory Mini-Boss)
 To retrieve the basement key from Victim 18, you will need to use a Sword of Obedience here. The best way to take him down is with a Silver Bullet, used in the Pistol. DeSalvo is the only Ghost you have to fight and he's a real annoying one, making him the best candidate to use a Silver Bullet on.
So may sure you have all these things and the Silver Bullet loaded before you face him. If you don't have a Silver Bullet, you can still take him down but it'll require extra work. In that case a Saint Medallion will help slow him down and preserve your health.
With the right equipment, target him and make sure he's in your sights, then pump that Silver Bullet into his belly and he'll drop to the floor. Run up and stab in a Sword of Obedience to claim the Water Prison Generator Room Key.
Exercise caution while using the Silver Bullet, since it may not do anything if you shoot while he's in some sort of animation like standing up. Wait for him to approach you and then fire.
If you don't have any silver ammo, the next best method is probably to use Holy Candles. It may take two of them but they are quite effective (there's three found in this world; one on each floor mentioned above). Either placing a candle one at a time or both down together, try to keep Andrew stay in one spot hovering over them and he should drop after the candles work their magic.
Otherwise, turn to your Rusty Axe or Spade, particularly their charge up attacks. Keep on beating him down and trying to use a Sword. It will take multiple downs to eventually stab it in so just hang in there. Make sure to grab the key after finally pinning him.
By the way, should you want more of an open area to fight him rather than the tight stairway, you can continue down to basement 2 and find him there, but I highly recommend staying here since he'll waste so much time in areas you cannot reach down there and it can be a real pain.
Lastly, should you take the sword back? Honestly, while he's a dangerous Ghost he doesn't appear anywhere else except the following basement room and one optional room in the final world. So I'd say go for it if you'd like to use it on someone else.
Ghost Victim 19: Richard Braintree (Optional Mini-Boss)
 Richard is the most unique Ghost in the game. Not only does he walk on his own two feet, he has a teleporting ability that doesn't keep him in the same spot for long. This makes him a bit unpredictable to fight.
So is he worth fighting? Well, he's not too prolific even in this world, only appearing in a few spots. But he will return in a late staircase and can pose quite a threat there. So if you do have a Silver Bullet remaining, now is the time to use it. If not it's no big deal and you can just ignore him, but feel free to attack him with normal methods if you want to eliminate him.
To do so, use your trusty Rusty Axe and unleash charge up attacks on repeat. Note that Richard's teleporting more or less becomes a nonfactor since Henry's charge up attack will always lock onto Richard even if he changes locations in the middle of the swing. Use that to your advantage and beat him down until he doesn't get up anymore, then stab in your Sword of Obedience.
Note that Holy Candles will affect him significantly by freezing and damaging him during his stuttery attacks, if in their radius. Already a very unique Ghost though, Richard may bail out and not return (until the later staircase) if you use just one Holy Candle (or sometimes may bail like this during regular fighting if you're not relentless), but two placed together at his feet will drop him no problem before that happens, allowing him to be stabbed.
Bosses
Boss 1: The One Truth - Giant Wall Men (Building World)
 This boss fight also serves as a bit of a puzzle where you must first uncover something before you can make any progress. Check the door on the other side, which is locked and has this inscription:
"To reach the deepest part, you must defeat the One Truth.
Do so and this door will open."
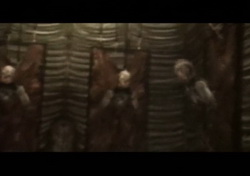
To explain, there are 12 large Wall Men in this room. 11 of them will flinch normally when hit. But one of them when hit will cause every single Wall Man here to flinch, including itself. This is the master Wall Man or "the One Truth". Your goal is to find and destroy it.
What you'll want to do is give each Wall Man a swing or a bullet one at a time and move on to the next one if the others don't react. Run over and quickly swing, or wait down below for one to drop down and smack it, then move on if they're not the right one.
Perhaps the hard part is avoiding damage while running to the next one if it's ready for you, but you can also wait for them to rise again while tending to the one closest to you to make sure it doesn't hit you. Or you can also use the Pistol to shoot each Wall Man more quickly, but perhaps the targeting system can be finicky and frustrating.
Continue clockwise or counter-clockwise one by one, not skipping any, until you uncover the one Wall Man that causes them all to flinch when hit. Once found, continue to bash it over and over while it's down below and within range. Note that Eileen can also chip in if she has a weapon, although she's not very aggressive.
Perhaps it's best to go for regular swings back to back with the Rusty Axe since its charge up swing takes a while to land and the Wall Men may take that time to slide back up. Whenever they do slip away though, ready a charge up attack for them as soon as they return. Repeat until all 12 Wall Men are motionless.
Giant Wall Men's Attacks:
The Giant Wall Men have two different types of attacks. One is the simple arm swing which will inflict quite a bit of damage and throw you to the ground. You will see this one most often, especially when moving to the next one. The other is a headbutt, which is hard to avoid and can happen whenever you're fighting a Wall Man one on one, usually right after they slide down. Just keep on bashing away and use the Portable Medical Kit you picked up outside if you need to.
Once all the Wall Men hang lifelessly, the other door will unlock.
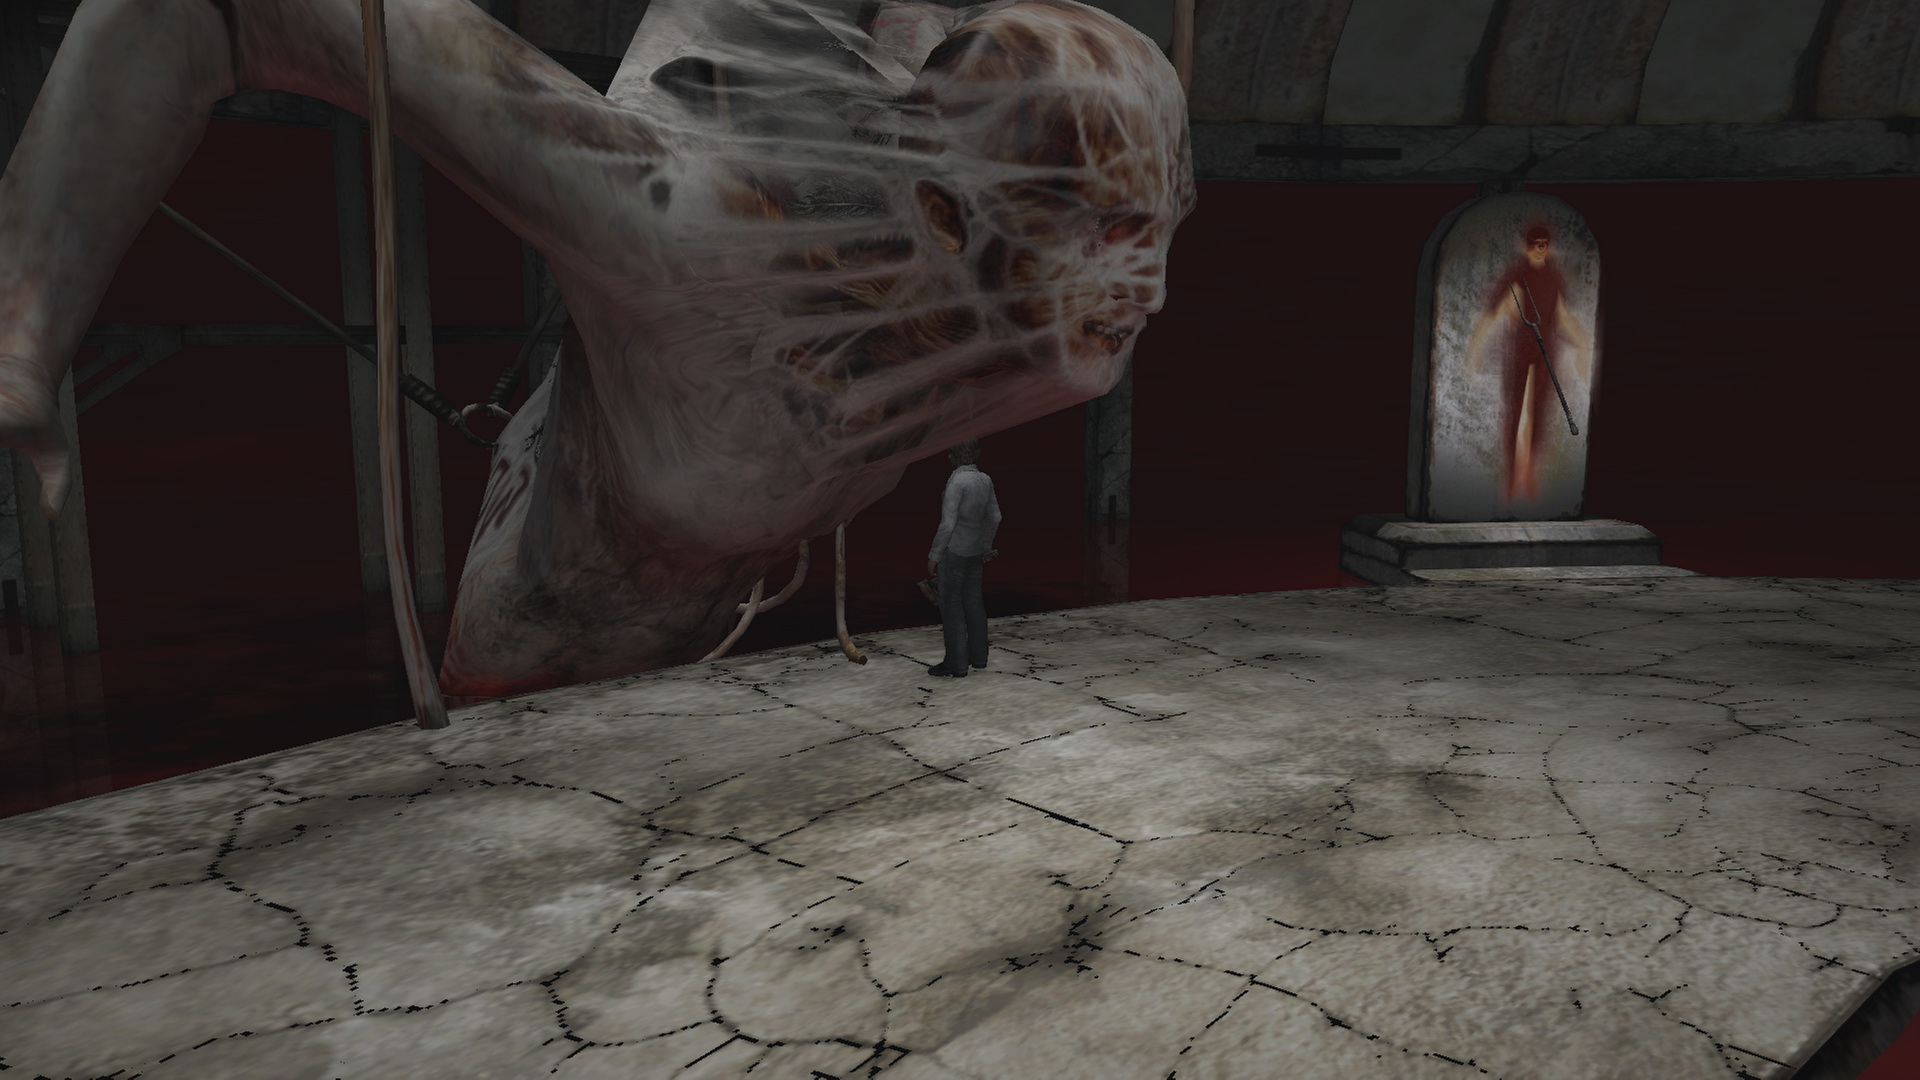
Final Boss: The Final Sacraments - Man With the Coat
 Walter welcomes you to the party down below. There's a lot going on down here so let's explain a few things.
Eileen's Mechanics
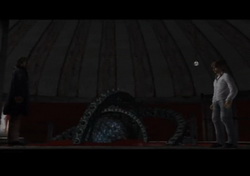
First you'll see Eileen standing on her own pathway that leads to... literally a bloodbath, and a dangerous spinning device.
Possessed by Walter, she'll slowly walk towards it over the fight. Her speed is dictated by how much damage she took in the game up until now, including physical damage by enemies and time spent alone, especially in areas with enemies. During the fight you'll see flashes of her as she walks down the path and into the bloodbath. Once you hear her scream after fully submerging, she's gone for good.
The more damaged she is, the more blood flow will appear over her body, the faster she'll move, and the more likely she'll die. Depending on how bad she is, you may not be able to save her at all. So if she dies early... you probably never had a shot. Stay on top of her condition next time. While some may suggest a Holy Candle placed at her feet before she leaves you, in all my extensive testing I've found it to have no carry over whatsoever. Instead you must safely escort her the old-fashioned way.
Phase One: Umbilical Cord and Spears
As for Walter, he begins the battle as a dark shadow and cannot be harmed, while he'll harass and attack you if you let him. There's also eight stone blocks with spears in them around the arena, but they're locked in place as is. So you'll need to do something to effectively start the battle.
Joseph's August 5 Red Diary from Room 302 of the Past said the following:
"The Crimson Tome 'Bury part of the Conjurer's mother's flesh within the true body of the Conjurer.' Part of the flesh=super's room?"
Joseph's Letter from the laundry room also confirmed the bottom statement, which we can deduce to be the Umbilical Cord that you now hold.
 The "true body of the Conjurer" is the huge creature in this arena (Walter's true form). Therefore, you must bury the Umbilical Card within the Conjurer's body. Check your inventory and use the UMBILICAL CORD while standing right under the massive head. If it doesn't work, make a small adjustment and try again.
In a short cutscene, the camera angle hints at the spears on the stones, which all unlock after using the Umbilical Cord. You can probably guess that you need to stab them into the giant Conjurer as the next order of business. You should also now have four free inventory slots if you entered the fight with three, allowing you to grab all four on one side, stab them all in and do the same on the other side.
So get started by grabbing each Spear of the Holy Mother on the left side of the arena and then run back to the Conjurer. Stab each Spear of the Holy Mother into his neck, noticing that each one drops Shadow Walter to the ground in pain. After the fourth, head to the other side to collect the other four and stab them into the Conjurer.
Just watch out for Walter's pipe swings and bullets as you make your way around, and note that he'll move more quickly once a few spears have been stabbed in, including quickly sliding over the arena, but he can't hit you if you're already grabbing a Spear.
After stabbing in all eight spears, you'll hear a distinct note and this time when Walter stands, his shadow figure will be no more. He can now be attacked. Have a charge up swing ready to go as soon as he stands.
Phase Two: Defeating Walter
Now the true battle begins. Grab your trusty weapon, preferably the Rusty Axe or Spade, and start delivering charge up swings on constant repeat. You can also perform regular swings as you charge up, but it's more efficient to go purely for the ultra-powerful charge up attacks, specifically while staying out of Walter's immediate radius.
With the Rusty Axe, perform your charge up attack from a few feet away and immediately take a couple steps back to clear Walter's range so he doesn't bodyslam you. Walter will regularly step back and raise his pistol to fire after every attack you land, unless he's at an edge. Right after he steps back as you're charging, now move up closer so your attack will connect when ready. Most of the time you'll be able to deliver another charge up attack just before he fires.
Note that you'll be invincible while performing the charge up attack and so his shot won't matter, but sometimes he'll shoot you just a tad before you're fully charged up. This is just something you'll have to deal with, although you can try dodging left or right (R2 + Circle + left/right) with the right timing. Either way, getting shot a few times shouldn't be a huge factor.
If Walter is up against an edge or sometimes regardless, he'll instead try to swing his pipe at you if close by. This is great because it avoids a potential shot and you should be able to move back to dodge his swings before unleashing another charge up attack and repeating. If you can, try to stay in that range where he initiates a pipe swing as you're just clear of him. Just repeat and keep him in the corner. Otherwise, keep moving up on him if he takes a step back.
With the Spade, your charge up attack has a shorter range by about a foot, but still fairly extended. Henry will also stand in place and thrust forward rather than getting too close to Walter. This means that if you can back Walter into a corner and he has nowhere to step back to, you can find the sweet spot and just unleash charge ups back to back until the end of the fight without him hitting you. If close enough, he'll keep trying to perform a pipe swing rather than shoot, but find that balance where his swing is engaged but not within range to land and just keep staying in that spot as you attack him.
If you do get shot with either method, which is frankly just part of the fight, just keep on charging and try to initiate your attack before the next bullet hits. Even if he gets 2-3 shots off at you, keep charging until you can attack. In many cases you'll find you can lock into your charge up attack just as he's about to shoot, which is perfect.
Be careful to never get too close to Walter or he'll perform a cringeworthy body spin and throw you to the ground. As ridiculous as it is though, it is always 100% avoidable. As mentioned, if using the Rusty Axe just take a step or two back to clear his body spin range, but keeping close enough so he swings his pipe can be helpful, as long as you can still avoid it (but again, not a huge deal if it lands).
Note that the Pickaxe of Despair can be another effective weapon here, but it's much slower and has a higher learning curve to master. It also takes a long time to charge up, but even its regular swings are very powerful and will serve you well while charging up for an ultra attack.
Sometimes if you take too long or step too far away from Walter, he'll either take a step back to just escape your range or may run away to another spot entirely. In these cases, bail immediately cause he'll be too far away to hit and will probably shoot you. Run right up to him and try your setup again, understanding you make take a bullet or two. You can try to go at him from behind to get a bit of a drop on him though.
From here it's just a matter of repeating these strategies until the end, hopefully before anything happens to Eileen.
Walter's attacks:
Walter's most basic attack is a shot from his pistol, either from close, medium or long range, although the farther you are the more unlikely it is to land, while you can also zigzag or run to his sides to avoid it. With his pipe, Walter has a simple swing and a charge up swing, both mostly from close range.
Walter's final attack has got to be one of the most ridiculous I've seen, at least in this series. It is complete nonsense where he will spin his body which will throw Henry to the ground and do a fair bit of damage if within range. Thing is, if you're attacked this way it's cause you're too close. You can always avoid it by keeping a certain distance about a full person away from him. Beware that he will also try this attack on the go, so just avoid him if he runs at you.
It may take some practice to get into the rhythm, but eventually this fight should feel very straightforward and almost simple. It's really just a matter of performing charge up attacks on repeat while baiting his pipe swing to whiff on you or engaging your attacks just before he shoots. Keep at it and Walter will eventually fall with a distinct death note.
A few more seconds will pass where Eileen can still actually die and then a cutscene will play. If Eileen dies and your execution wasn't great, consider loading your game to try again if you wish – the time difference between great, good and especially poor execution can be massive. But if she's dying too quickly, you just might not have any chance to save her in this run due to her condition, even if you're perfect. Be sure to take better care of her next time and try again.
by Andrew Haffenden aka Conquerer (Silent Hill 4: The Room FAQ/Walkthrough) |