Item List
Letter from Silent Heaven
Photo of Mary |
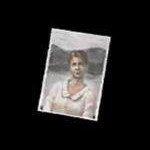
Location: Held from the beginning of the game.
Description: "A photo from when she was still healthy."
Purpose: If examined, may change the outcome of the ending received at the end of the game.
|
Letter from Mary |
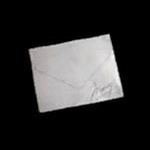
Location: Held from the beginning of the game.
Description: "That's definitely Mary's name in her own handwriting on the front of the envelope."
Examine:
"There's nothing written on the stationary." (after Eddie boss fight)
"There is nothing in the envelope." (after viewing videotape)
Purpose: If examined, may change the outcome of the ending received at the end of the game.
|
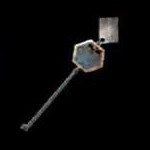
Radio |
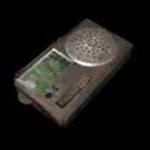
Location: Inside the construction site at the north end of Vachss Road, East South Vale.
Description: "Small portable radio. Emits static when monsters are nearby."
Purpose: Emits static to warn of nearby enemies. Volume can be adjusted or turned on and off.
|
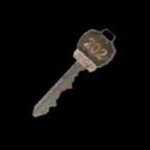
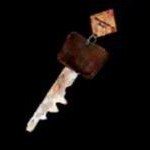
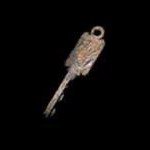
Apartment Gate Key |
Location: On the ground right by the corpse at the north end of Martin Street, East South Vale.
Description: "Old-looking key that I found in town."
Purpose: Unlocks the front gate of Wood Side Apartments on Katz Street, East South Vale.
|
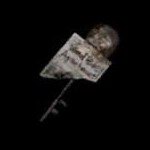
Flashlight |
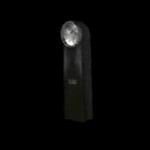
Location: On the fashion dummy wearing Mary's clothes in room 205, Wood Side Apartments 2F.
Description:
"One-touch ON/OFF power switch. Currently in breast pocket."
"Is this thing out of batteries? It won't light up when I press the switch." (when battery dies)
"Is this thing broken? Pressing the switch doesn't do anything." (after viewing videotape)
Purpose: Illuminates your path and allows you to pick up items and read your map in dark areas.
|
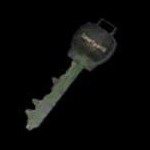
Key to Room 202 |
Location: On the bookshelf in room 208, Wood Side Apartments 2F, after acquiring the Handgun and trying to reach the key on 3F.
Description: "'202' is written on the top of the key. Got it in room 208."
Purpose: Unlocks room 202, Wood Side Apartments 2F.
|
Clock Key |
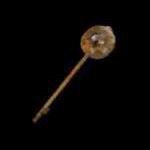
Location: Inside the hole in the wall in the open bedroom of room 202, Wood Side Apartments 2F.
Description: "There's a small clock at the end of the key. It was in a hole in the wall in room 202."
Examine: "Now that I think of it, there was a big clock in room 208..." (after examining clock)
Purpose: Unlocks the face of the clock in room 208, Wood Side Apartments 2F.
|
Courtyard Key |
Location: In the closet where James hides in room 307, Wood Side Apartments 3F.
Description: "Key to door which leads from the westside stairway hall to the courtyard."
Examine: "It says 'courtyard'."
Purpose: Unlocks the courtyard door in the west lobby, Wood Side Apartments 1F.
|
Fire Escape Key |
Location: On the floor on the east side of the bars in the Wood Side Apartments 3F corridor.
Description: "Key to door leading from hallway to fire escape. Found in 3rd floor hall."
Examine: "The tag attached to it says 'fire escape'. I got my hand stepped on the first time I tried to get this. I wonder what happened to that kid...?"
Purpose: Unlocks the fire escape door at the west end of the Wood Side Apartments 2F corridor.
|
Canned Juice |
Location: Sitting in front of the door to room 107, Wood Side Apartments 1F.
Description: "Six-pack of canned juice. It was in the hallway on the 1st floor."
Purpose: Knocks the stuck garbage out of the garbage chute on 2F, Wood Side Apartments.
|
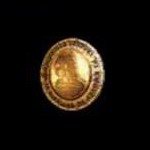
Coin [Old Man] |

Location: At the bottom of the garbage chute in front of Wood Side Apartments, after knocking the garbage loose from 2F.
Description: "Large coin imprinted with the face of an old person. Took it out of the trash shoot exit."
Examine:
"It looks like an old man."
"The reverse side shows a gravestone." (Extra Riddle Level)
Purpose: One of the three coins needed to solve the old coin puzzle in room 105, Blue Creek Apartments 1F.
|
Coin [Snake] |
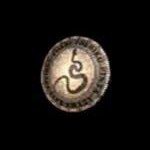
Location: In the baby carriage in the drained courtyard pool of Wood Side Apartments.
Description: "Large coin imprinted with a snake. I found it in that pool with no water."
Examine: "The reverse side of the coin is a crescent moon." (Extra Riddle Level)
Purpose: One of the three coins needed to solve the old coin puzzle in room 105, Blue Creek Apartments 1F.
|
Angela's Knife |
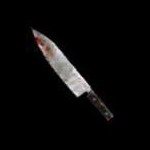
Location: Acquired from Angela in the mirror room in room 109, Blue Creek Apartments 1F.
Description: "Knife from Angela. I don't plan on using this as a weapon."
Examine: "The blade is stained with something red."
Purpose: If examined, may change the outcome of the ending received at the end of the game.
|
Coin [Prisoner] |
Location: On the nightstand in the mirror room in room 109, Blue Creek Apartments 1F.
Description: "Large coin imprinted with image of a prisoner. Found it in the west apartment building."
Examine:
"This prisoner looks like a woman."
"The reverse side shows an egg." (Extra Riddle Level)
Purpose: One of the three coins needed to solve the Old Coin Puzzle in Room 105 1F Blue Creek Apartments.
|
Lyne House Key |
Location: Inside the secretarial desk in room 105, Blue Creek Apartments 1F, after solving the old coin puzzle.
Description: "It was in the coin puzzle desk. The tag on it says 'Lyne'."
Examine: "This must be the key mentioned in that note. The one that says it was 'left with Uncle David'." (after reading "Dear Tim" note on room 209's door)
Purpose: Unlocks room 209, Blue Creek Apartments 2F.
|
Apartment Stairway Key |
Location: On the bed in the open bedroom of room 208 after crossing over from 209, Blue Creek Apartments 2F.
Description: "Key to door that leads from the westside apartment hall to the stairway."
Examine: "It says 'North stairway'."
Purpose: Unlocks the north stairwell on 2F of Blue Creek Apartments.
|
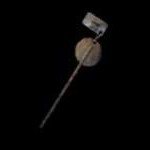
"Purple Bull" Key |
Location: Beside the typewriter on the desk in the Document Room, Brookhaven Hospital 1F.
Description: "A bull is drawn on it in purple. It was on the desk in the document room."
Purpose: One of the two keys needed to solve the "Louise" puzzle in room S14, Brookhaven Hospital 3F.
|
Bent Needle |
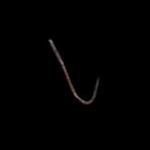
Location: Stuck in the teddy bear in the Women's Locker Room, Brookhaven Hospital 2F.
Description: "Rusty, bent needle. It was stuck in the animal in the locker room."
Purpose: One of the two items needed to get the key in the drain in the Shower Room, Brookhaven Hospital 3F.
|
Examination Room Key |
Location: In the bloody lab coat pocket in the Men's Locker Room, Brookhaven Hospital 2F.
Description: "'Examination room' is written on the tag. Found it in the pocket of the white lab jacket in the men's locker room."
Purpose: Unlocks the Examination Room, Brookhaven Hospital 1F.
|
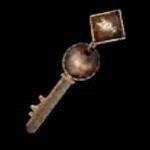
"Lapis Eye" Key |
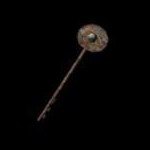
Location: In the nightstand drawer in room M2, Brookhaven Hospital 2F.
Description: "An eye is carved into the top of the key. The iris part is made of a lapis lazuli."
Purpose: One of the two keys needed to solve the "Louise" puzzle in room S14, Brookhaven Hospital 3F.
|
Roof Key |
Location: On the nightstand in room S3, Brookhaven Hospital 3F.
Description: "Key to roof of office wing. Got it in the 3rd floor hospital room where Maria is resting."
Purpose: Unlocks the door to the roof, Brookhaven Hospital.
|
Piece of Hair |

Location: Inside the "Louise" box in room S14, Brookhaven Hospital 3F.
Description: "Long brown hair. It was in that 'box.'
Purpose: One of the two items needed to get the key in the drain of the Shower Room, Brookhaven Hospital 3F.
|
Elevator Key |
Location: In the shower drain in the Shower Room, Brookhaven Hospital 3F (Bent Needle and Piece of Hair required).
Description: "'Patient wing elevator' is written on the tag. It was stuck in the bath pipe."
Purpose: Unlocks the cover to call the patient wing elevator from 3F or 2F, Brookhaven Hospital.
|
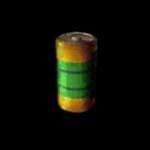
Dry Cell Battery |
Location: On the ledge above the reaching arms in room M6, Nightmare Hospital 2F.
Description: "Got it in the hospital room. Just an ordinary dry cell battery."
Examine: "It looks like it's the same type of battery as the flashlight."
Purpose: Replaces the old battery for the Flashlight when it dies under the Historical Society.
|
Basement Storeroom Key |
Location: On the ledge above the reaching arms in room M6, Nightmare Hospital 2F.
Description: "It was inside the wall with that strange painting. It's the key to the hospital basement's storeroom."
Purpose: Unlocks the basement Storeroom, Nightmare Hospital.
|
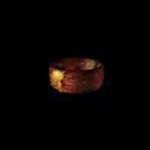
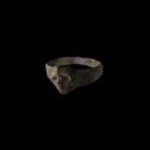
Copper Ring |
Location: In the center of the floor down the ladder, after moving the shelf in the basement Storeroom, Nightmare Hospital.
Description: "I found in the basement of the hospital. It's engraved with a picture of a spider."
Purpose: One of two rings needed to open the patient wing stairwell, Nightmare Hospital 3F.
|
Lead Ring |
Location: Inside the fallen refrigerator in the Day Room, Nightmare Hospital 2F (Maria needed to acquire).
Description: "Ring from the refrigerator. It's engraved with a disgusting, bloated face."
Purpose: One of two rings needed to open the patient wing stairwell, Nightmare Hospital 3F.
|
Hospital Lobby Key |
Location: On the desk in the Director's Room, Nightmare Hospital 1F.
Description: "Found in the Director's office. Key to hospital's front lobby."
Purpose: Unlocks the lobby doors, Nightmare Hospital 1F.
|
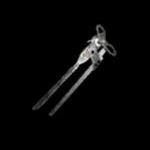
Wrench |
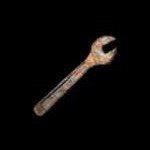
Location: On the porch of the second house north of Gonzale's Mexican Restaurant on Lindsey Street, Dark South Vale.
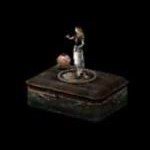
Description: "I found this on the Lindsey street. It's a tool used for turning nuts and bolts."
Purpose: Unscrews the bolts on the tin box behind the praying woman statue in Rosewater Park, Dark South Vale.
|
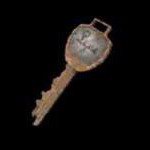
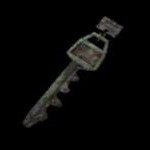
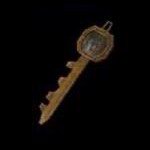
Old Bronze Key |
Location: Inside the buried tin box behind the praying woman statue in Rosewater Park, Dark South Vale (Wrench required to open).
Description: "Antique-looking bronze key. It was hidden behind one of those statues lined up in the park."
Purpose: Unlocks the Silent Hill Historical Society in Dark South Vale.
|
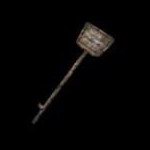
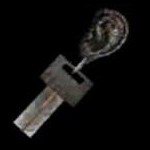
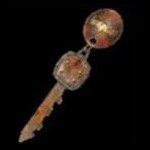
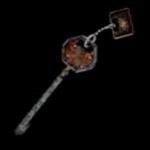
Spiral-Writing Key |

Location: On the ground in the trap door room in the sewers area beneath the Silent Hill Historical Society.
Description: "Key with slim, 3-inch long cylinder attached. The cylinder is engraved with spiral writing."
Examine: "It says: ''Tis doubt which leadeth thee to Purgatory.'"
Purpose: Unlocks the gate on the ground past the trap door room in the sewers area, underneath the Historical Society.
|
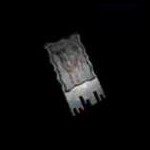
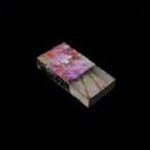
Tablet of "Gluttonous Pig" |
Location: On the table at the back of the Cafeteria, Toluca Prison 1F.
Description: "Metal tablet with 'Gluttonous Pig' drawn on one side. Found it in the dining room."
Purpose: One of the three tablets needed to insert into the scaffold in the courtyard of Toluca Prison.
|
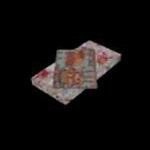
Tablet of "The Seductress" |
Location: On the floor in the northeast shower in the shower room, Toluca Prison 1F.
Description: "Metal tablet with 'Seductress' drawn on one side. Found it in the shower room."
Purpose: One of the three tablets needed to insert into the scaffold in the courtyard of Toluca Prison.
|
Wax Doll |

Location: On the bed in the second cell from the east in the south cellblock, Toluca Prison 1F.
Description: "Doll carved from wax. It was lying in the cell."
Purpose: One of the three items needed to create a handle for the floor hatch in the civilian corridor, Toluca Prison 1F.
|
Tablet of "The Oppressor" |
Location: On the bed in the seventh cell from the east in the north cellblock, Toluca Prison 1F.
Description: "Metal tablet with 'The Oppressor' drawn on one side. Found it in the cell."
Purpose: One of the three tablets needed to insert into the scaffold in the courtyard of Toluca Prison.
|
Horseshoe |

Location: Hanging on the handle of the entrance door in the courtyard of Toluca Prison, after inserting the three tablets.
Description: "Metal horseshoe. It was hanging in the door of the square."
Purpose: One of the three items needed to create a handle for the floor hatch in the civilian corridor, Toluca Prison 1F.
|
Lighter |
Location: On the counter of the civilian side of the intact visiting room in the northwest corridor, Toluca Prison 1F.
Description: "Metal lighter. Looks like its flame is stronger than normal lighters."
Purpose: One of the three items needed to create a handle for the floor hatch in the civilian corridor, Toluca Prison 1F.
|
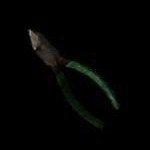
Wire Cutter |
Location: In the fuse box in the rotating cube room, after speaking to Maria, Labyrinth.
Description: "Tool for cutting wires or electric cables."
Purpose: Cuts the wires blocking the doorway across from the entrance of the Labyrinth.
|
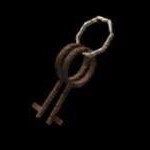
Key of the Persecuted |
Location: On the ground where the wrongfully hanged man was in the | corpse room, after pulling the correct noose in the noose room, Labyrinth.
Description: "Key left by prisoner who was wrongly executed."
Purpose: Unlocks the handcuffs locking the valve to the gate in the Labyrinth.
|
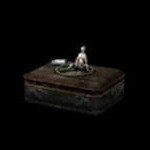
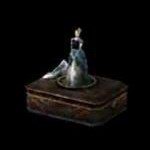
"Little Mermaid" Music Box |
Location: On the edge of the west water fountain in the back entrance courtyard of the Lake View Hotel.
Description: "Music box with figure from the fairy tale, 'The Little Mermaid', attached. Found at the garden fountain."
Purpose: One of the three music boxes needed to solve the music box puzzle in the Lobby, Lake View Hotel 1F.
|
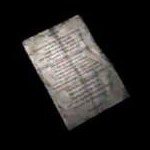
Laura's Letter |
Location: Acquired from Laura in the Lake Shore Restaurant, Lake View Hotel 1F.
Description: "Letter supposedly given to Laura by Mary."
Purpose: More information regarding Mary.
|
"Fish" Key |
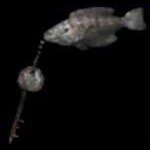
Location: On the plate on the set table in the Lake Shore Restaurant, Lake View Hotel 1F.
Description: "Key with fish-shaped key holder. It was on top of the restaurant table."
Purpose: Unlocks the briefcase in the Cloakroom, Lake View Hotel 2F.
|
Key to Hotel Room 312 |

Location: In one of the key boxes behind the Reception desk, Lake View Hotel 1F.
Description: "Key to room number 312 in the hotel. It was lying behind the counter of the lobby reception desk."
Examine: "Room 312 is the room Mary and I stayed in three years ago."
Purpose: Unlocks room 312, Lake View Hotel 3F.
|
Thinner |
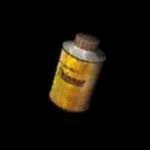
Location: On the floor in the open elevator on B1F, Lake View Hotel.
Description: "Small can filled with thinner. It was lying inside the elevator."
Purpose: Erases the black ink from the photo in room 202, Lake View Hotel 2F.
|
Key to Hotel Room 204 |
Location: Inside the briefcase in the Cloakroom, Lake View Hotel 2F.
Description: "Key to room number 204. Took it from the bag inside the cloakroom."
Purpose: Unlocks room 204, Lake View Hotel 2F.
|
Employee Elevator Key |

Location: On the desk in room 204, Lake View Hotel 2F.
Description: "The tag on it says: 'Employee elevator.' Found it in room 204."
Purpose: Unlocks the Employee Elevator Room in the eastern 2F corridor, Lake View Hotel.
|
"Cinderella" Music Box |
Location: Inside the locked suitcase in room 202, Lake View Hotel 2F.
Description: "Music box with figure from the fairy tale, "Cinderella", attached. Found inside trunk in room 202."
Purpose: One of the three music boxes needed to solve the music box puzzle in the Lobby, Lake View Hotel 1F.
|
"Snow White" Music Box |
Location: On the shelf in the Pantry, Lake View Hotel 1F.
Description: "Music box with 'Snow White' drawn on it. Found in pantry."
Purpose: One of the three music boxes needed to solve the Music Box Puzzle in the Lobby, Lake View Hotel 1F.
|
Videotape |
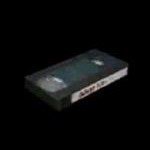
Location: Inside the open safe in the Office, Lake View Hotel 1F.
Description: "Videotape I forgot at the hotel three years ago."
Examine: "'Silent Hill' is written on the label in my handwriting. This is definitely the videotape I recorded back then."
Purpose: Insert into the VCR in room 312, Lake View Hotel 3F.
|
Can Opener |
Location: In the open safe in the Office, Lake View Hotel 1F.
Description: "Tool for opening cans."
Purpose: Opens the unmarked can on the counter in the basement Kitchen, Lake View Hotel.
|
Light Bulb |
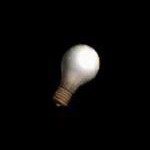
Location: Inside the can on the counter of the basement Kitchen, Lake View Hotel.
Description: "Found inside can in kitchen of bar. Normal light bulb."
Purpose: Inserts into the lamp on the counter of the "Venus Tears" Bar, allowing James to see and unlock the door, Lake View Hotel B1F.
|
Bar Key |
Location: Hanging from the boiler in the Boiler Room, Lake View Hotel B1F.
Description: Key to door which goes from hotel's underground bar to hallway. Found it in boiler room.
Purpose: Unlocks the "Venus Tears" bar door from the inside, Lake View Hotel B1F.
|
Hotel Stairway Key |
Location: On the large music box turntable after solving the music box puzzle in the Lobby, Lake View Hotel 1F.
Description: "Key to door from stairway to 3rd floor hall. It was hidden inside the big music box in the lobby."
Purpose: Unlocks the gate blocking the 3F corridor from the stairs, Lake View Hotel.
|
Rust-Colored Egg |
Location: Held by one of the Pyramid Heads after the Pyramid Head Duo in the Lobby, Nightmare Hotel 1F.
Description: "It's about the size of a quail's egg. Pyramid Head was holding it."
Purpose: Unlocks one of the Lobby exit doors once both eggs are inserted after the Pyramid Head Duo boss fight, Nightmare Hotel 1F.
|
Scarlet Egg |
Location: Held by one of the Pyramid Heads after the Pyramid Head Duo in the Lobby, Nightmare Hotel 1F.
Description: "About the size of a quail's egg. Pyramid Head was holding it."
Purpose: Unlocks one of the Lobby exit doors once both eggs are inserted after the Pyramid Head Duo boss fight, Nightmare Hotel 1F.
|
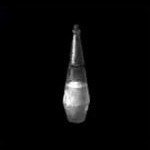
White Chrism |
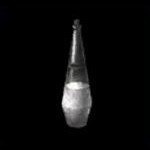
Location: On the kitchenette counter of room 105, Blue Creek Apartments 1F.
Description: "Glass bottle containing milky white anointing oil."
Available: Only in a New Game Plus.
Purpose:One of the four items required in your inventory at the end of the game to receive the Rebirth ending.
|
Book: "Lost Memories" |
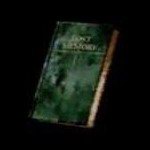
Location: In the newspaper stand at the Texxon Gas Station in West South Vale.
Description: "A book about the history and legends of this town and the surrounding area."
Available: Only in a New Game Plus.
Purpose: One of the four items required in your inventory at the end of the game to receive the Rebirth ending.
|
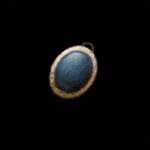
Obsidian Goblet |
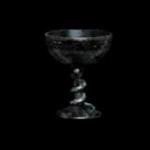
Location: Inside the smashed display case in the second exhibition room in the Silent Hill Historical Society.
Description: "Ancient-looking goblet carved from pure obsidian. Found it in the old museum."
Examine: "A snake is carved into its stem."
Available: Only in a New Game Plus.
Purpose: One of the four items required in your inventory at the end of the game to receive the Rebirth ending.
|
Book: "Crimson Ceremony" |
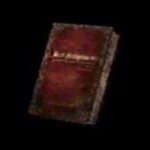
Location: On the shelf behind the headphones on the desk in the Reading Room, Nightmare Hotel 2F.
Description: "About some ancient god. Author unknown."
Available: Only in a New Game Plus.
Purpose:One of the four items required in your inventory at the end of the game to receive the Rebirth ending.
|
Blue Gem |
Location: On the ground along the back wall of the rest stop washroom at the beginning of the game.
Description: "Maybe I could use it somewhere..."
Available: Greatest Hits/Director's Cut version only, only in a New Game Plus after first completing both scenarios.
Purpose: Use in the following three locations to receive the UFO ending: Nightmare Hospital Garden, in front of the boat on the south Toluca Lake dock after fighting Eddie, and near the window in room 312 of Lake View Hotel before watching the videotape.
|
Dog Key |

Location: Inside the doghouse in the open lot directly across Nathan Avenue when exiting Rosewater Park, just west of Jack's Inn, West South Vale.
Description: "Found inside a dog house. No idea where to use it."
Available: Only in a New Game Plus after receiving all three regular endings or the Rebirth ending in the same file.
Purpose: Unlocks the 3F Observation Room of the Nightmare Hotel, after viewing the videotape.
|
Born from a Wish
White Board |
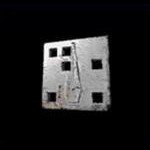
Location: On the floor of the northern balcony above the Entrance Hall, Baldwin Mansion 2F.
Description: "White metal board with square holes punched into it. Found in 2nd floor Entrance Hall."
Purpose: One of the three boards needed to solve the Gravestone Memorial puzzle.
|
Red Board |
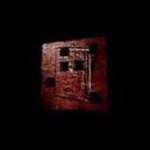
Location: On the ground by the gravestone at the top of the fireplace, Baldwin Mansion.
Description: "Red metal board with square holes punched into it. Found in mansion's 2nd floor garden."
Purpose: One of the three boards needed to solve the Gravestone Memorial puzzle.
|
Black Board |
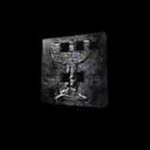
Location: On the ground by the gravestone at the top of the fireplace, Baldwin Mansion.
Description: "Black metal board with square holes punched into it. Found in mansion's 2nd floor garden."
Purpose: One of the three boards needed to solve the Gravestone Memorial puzzle.
|
Acacia Key |
Location: Stuck in the gravestone of Amy Baldwin at the top of the fireplace, Baldwin Mansion.
Description: "Engraved with an Acacia flower. Found embedded in stone slab."
Purpose: Unlocks the door on the south 2F balcony above the Entrance Hall, Baldwin Mansion.
|
Matches |
Location: On the nightstand in the Kid's Room, Baldwin Mansion 2F.
Description: "Only 2 or 3 matches are left. Found in Kid's Room."
Purpose: Lights the candle on the table in the attic, Baldwin Mansion.
|
Birthday Card |
Location: Under the chair in the Baldwin Mansion attic (must light the candle with Matches to pick up).
Description: "Birthday Card and Present from Amy (contents unknown)"
Purpose: Leave for Ernest in the Study, Baldwin Mansion 1F.
|
White Liquid |
Location: On the secretarial desk in room 105, Blue Creek Apartments 1F.
Description: "Small bottle filled with an unknown white liquid. The label reads 'I deny thee'."
Purpose: Leave for Ernest in the Study, Baldwin Mansion 1F.
|