How to Play Silent Hill 1 on PC
Released in 1999, Silent Hill for PS1 is the inaugural title in the series and continues to deliver an exceptional horror experience. However, playing it on modern systems presents a challenge as it was never ported to other platforms. Legally obtaining the original game is difficult; the only options are purchasing it through the still-active PS3 Store (with transfer capability to PSP or PSVita) or acquiring a second-hand disc and playing it on original hardware, neither of which is a cheap or easily accessible solution.
This comprehensive guide details how to play the original Silent Hill on modern computers. It includes instructions for achieving optimal quality settings, optional widescreen display, and 60 frames per second as well as presents solutions to the know emulation issues.
Contents
Requirements
Computer
Any decent modern PC running Windows 10/11 will do.
PS1 Emulator
DuckStation stands out as arguably the top PS1 emulator currently available. While this guide focuses on the Windows version, it's also accessible on Android, Linux, and MacOS. You can download and install the emulator, along with the VC++ Runtime required to run it, from the link provided below.
Note: RetroArch by Libretro, another popular cross-platform modern emulator, supports PS1 game emulation through its PSX/PSX HW cores. The DuckStation core is also available within RetroArch. However, setting up RetroArch can be less intuitive and more challenging compared to DuckStation due to its broader emulation capabilities. The Windows version can be downloaded from their official site or via Steam.
PS1 BIOS
Note: While widely available on sites dedicated to old console emulation and game preservation, PlayStation BIOS files are considered Sony's intellectual property. Their legality for download can vary by country.
NTS-J – Japan
NTS-U/C – USA/Canada
PAL-E – Europe
| File | BIOS | Date | Region | Model |
| ps-10j.bin | 1.0 | 1994-09-22 | NTSC-J | SCPH-1000 |
| ps-11j.bin | 1.1 | 1995-01-22 | NTSC-J | SCPH-3000 |
| ps-20e.bin | 2.0 | 1995-05-10 | PAL-E | SCPH-1002 |
| ps-21e.bin | 2.1 | 1995-07-17 | PAL-E | SCPH-1002 |
| ps-21j.bin | 2.1 | 1995-07-17 | NTSC-J | SCPH-3500 |
| ps-22a.bin | 2.2 | 1995-12-04 | NTS-U/C | SCPH-1001/SCPH-5003 |
| ps-22e.bin | 2.2 | 1995-12-04 | PAL-E | SCPH-1002 |
| ps-22j.bin | 2.2 | 1995-12-04 | NTSC-J | SCPH-5000 |
| ps-22j(v).bin | 2.2 | 1995-12-04 | NTSC-J | SCPH-5903 |
| ps-30j.bin | 3.0 | 1996-09-09 | NTSC-J | SCPH-5500 |
| ps-30a.bin | 3.0 | 1996-11-18 | NTS-U/C | SCPH-5501/SCPH-5503/SCPH-7003 |
| ps-30e.bin | 3.0 | 1997-01-06 | PAL-E | SCPH-5502/SCPH-5552 |
| ps-40j.bin | 4.0 | 1997-08-18 | NTSC-J | SCPH-7000/SCPH-7500/SCPH-9000 |
| ps-41a(w).bin | 4.1 | 1997-11-14 | Region free | SCPH-7000W |
| ps-41a.bin | 4.1 | 1997-12-16 | NTS-U/C | SCPH-7001/SCPH-7501/SCPH-7503/SCPH-9001/SCPH-9003/SCPH-9903 |
| ps-41e.bin | 4.1 | 1997-12-16 | PAL-E | SCPH-7002/SCPH-7502/SCPH-9002 |
| psone-43j.bin | 4.3 | 2000-03-11 | NTSC-J | SCPH-100 |
| psone-44a.bin | 4.4 | 2000-03-24 | NTS-U/C | SCPH-101 |
| psone-44e.bin | 4.4 | 2000-03-24 | PAL-E | SCPH-102 |
| psone-45a.bin | 4.5 | 2000-05-25 | NTS-U/C | SCPH-101 |
| psone-45e.bin | 4.5 | 2000-05-25 | PAL-E | SCPH-102 |
| psxonpsp660.bin | 4.5 | 2000-05-25 | Region free | SCPH-1000R (PSP/PSClassic) |
| scph-1000r.bin | 4.5 | 2000-05-25 | NTSC-J | SCPH-1000R (PSClassic) |
| ps2-50j.bin | 5.0 | 2000-10-27 | NTSC-J | SCPH-18000 (PS2) |
| ps1_rom.bin | 5.0 | 2003-06-23 | Region free | (PS3 v3.66-3.74) |
| ps1_rom.bin | 5.0 | 2003-06-23 | Region free | (PS3 v4.00-4.86) |
Sources: Reddit, Emulation General Wiki
While there are multiple BIOS files available, for the best experience with all emulators, the PSXONPSP660.BIN BIOS is recommended for the best compatibility and performance. Sony included this region-free PSX BIOS in PlayStation Portable (PSP) firmware 6.60, so PSX games could run on the handheld console. You can download the file from a trusted source below.
Alternatively, you can find a suitable BIOS image in the /r/ROMs Megathread. This community-maintained resource offers a wide selection of ROMs (digital copies of video game software) and related files for emulation. The ps-41a(w).zip (SCPH-7000W) is a good choice as it's a region-free BIOS, though any region-based BIOS will work if matched with a ROM file from the same region. The emulator is designed to automatically detect the BIOS corresponding to your game's region.
PlayStation BIOS Images on Myrient
Silent Hill Game File
Note: While widely available on sites dedicated to old console emulation and game preservation, PlayStation ROM images are considered the intellectual property of their respective owners. Their legality for download can vary by country, but since Silent Hill is a really old game and is not currently available for purchase (except PS3 Store), it shouldn't be a problem for you to download old Silent Hill titles from the Internet.
You can acquire a Silent Hill ROM image for a specific region directly from the /r/ROMs Megathread; direct links are provided in the table below.
| Version (Region) | Catalog # | Myrient | Internet Archive |
| Silent Hill (USA) | SLUS‑00707 | Download | Download |
| Silent Hill (EUR) | SLES‑01514 | Download | Download |
| Silent Hill (JPN) | SLPM‑86192 SCPS‑45380 |
Download | Download |
| Silent Hill (JPN) (Rev 1) | SLPM‑86192 | Download | Download |
| Silent Hill (JPN) (Rev 2) | SLPM‑86498 SLPM‑87029 |
Download | Download |
For detailed comparisons between game versions, refer to the Version Differences page. However, it's worth noting that the US final version is the least censored as well as most cheats and hacks are created for this version, so it is the most suitable one for emulation.
Initial Setup
- Extract the DuckStation archive anywhere on your computer. For example, you can place it in C:\Games\DuckStation.
- Create the bios folder inside the DuckStation folder and place selected bios files inside. Make sure the extension is lowercase – .bin instead of .BIN.
- Create the roms folder inside the DuckStation folder (or anywhere else you like). Place the Silent Hill image files inside.
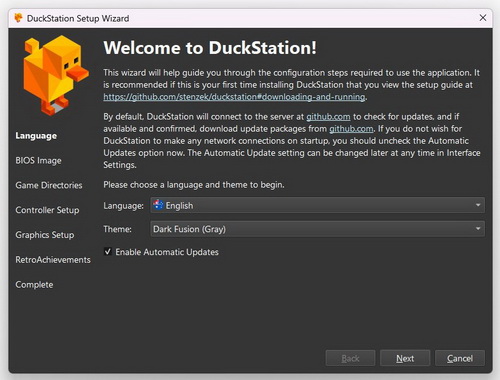
- Run duckstation-qt-x64-ReleaseLTCG.exe to launch the DuckStation Setup Wizard. If you have the Microsoft Defender SmartScreen notification, click on More Info and then Run anyway. You will start the DuckStation Setup Wizard.
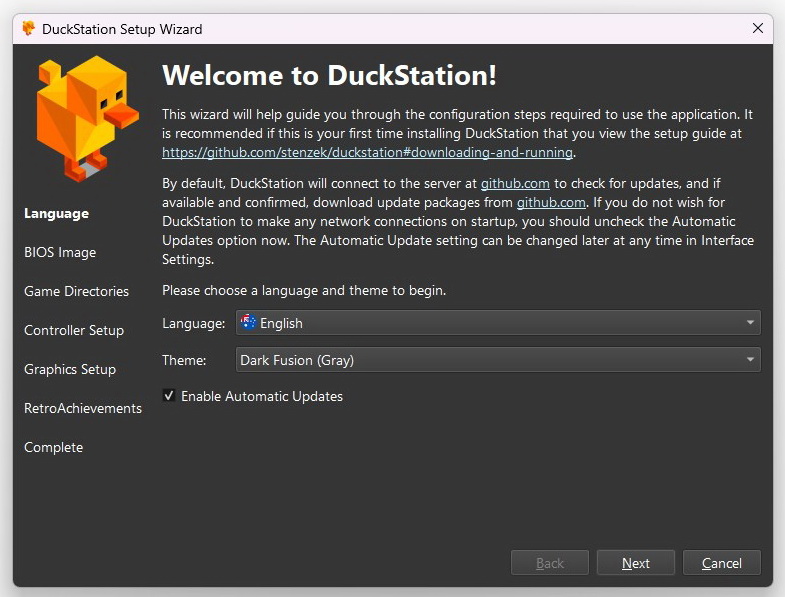
- Language. Select your language.
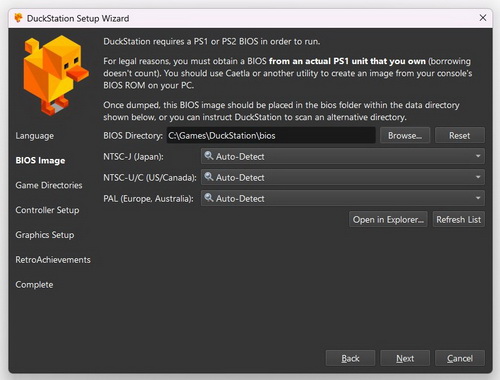
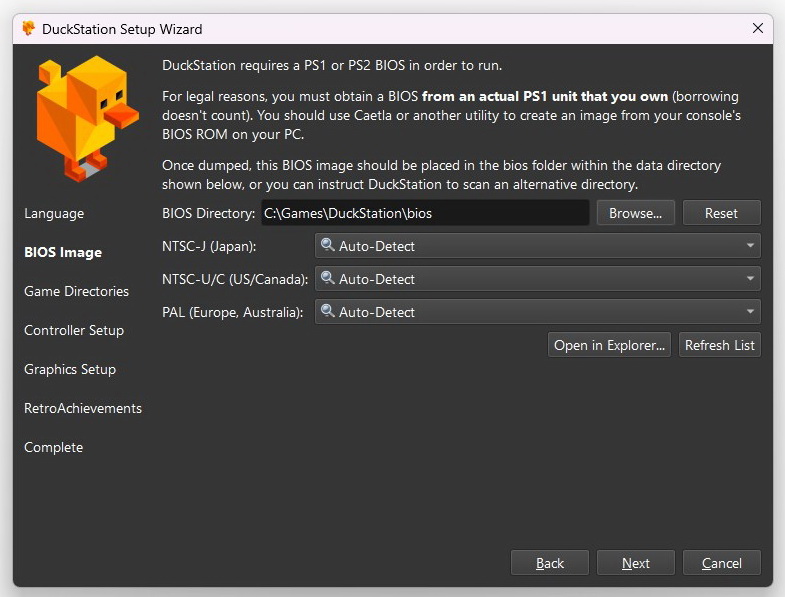
- BIOS Image. Select the BIOS Directory with the bios image files. You can leave the Auto-Detect option as the emulator is built to detect the BIOS that matches your game’s region.
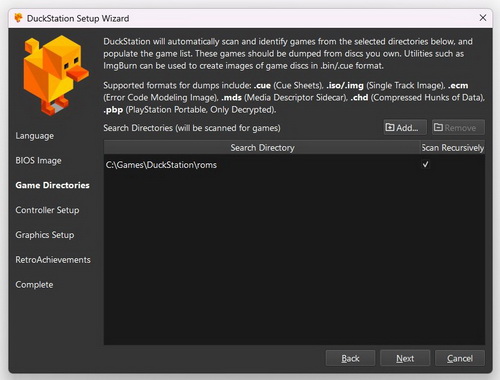
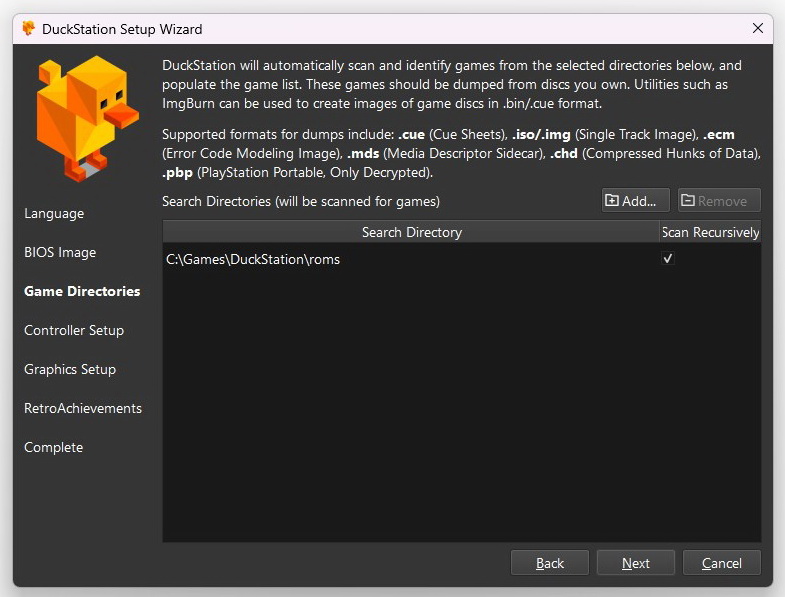
- Game Directories. Add the Game Directories where you will keep the ROMs. You can add multiple directories. Accept Scan Recursively for any subfolders.
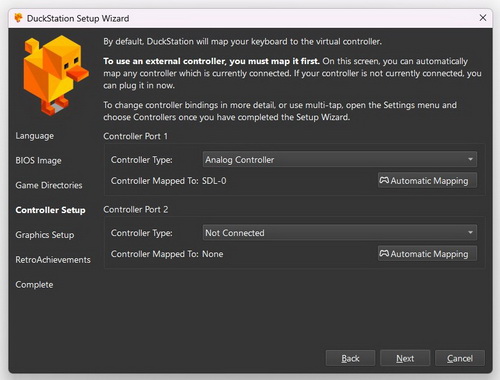
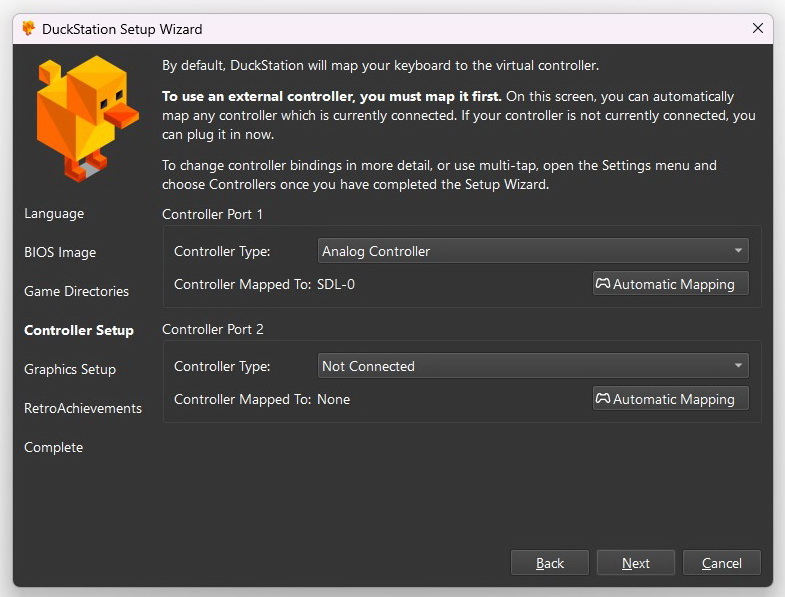
- Controller Setup. By default, DuckStation maps your keyboard to the virtual controller, but you can use an external controller if you have one. Connect it and select under the Automatic Mapping.
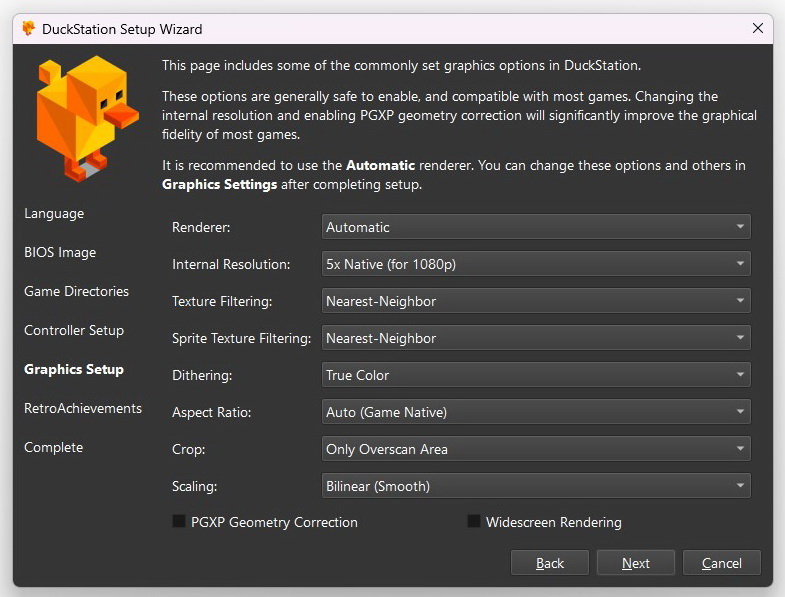
- Graphics Setup. These are global settings for all games, so the only option you are really recommended to change here now is Internal Resolution. Match it to your display or set it higher, keeping in mind that resolutions beyond 5x Native (for 1080p) offer diminishing returns. Other graphics settings can be fine-tuned for individual games later.

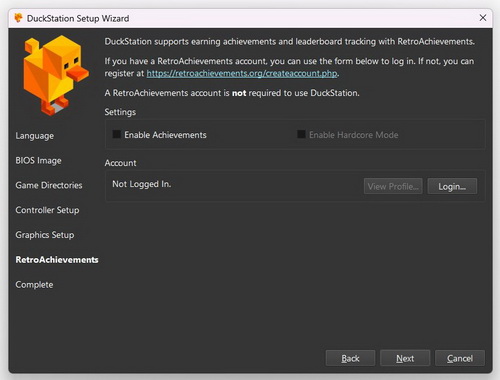
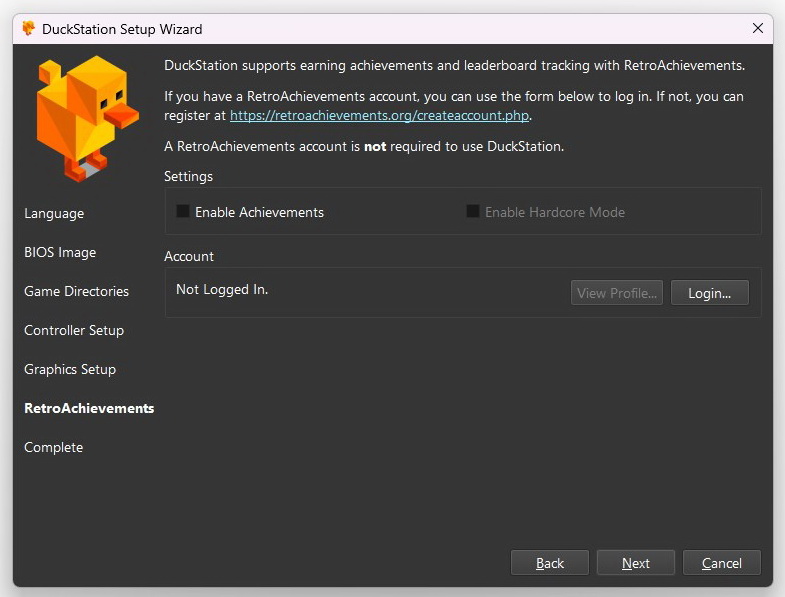
- RetroAchievements. Optional feature if you are into it. There are in fact 66 unofficial achievements created for the game. Enable and create your account if wanted.
- Complete the setup.
For quick access, create a shortcut to the DuckStation executable on your desktop or preferred location.
Game Settings
Now, you can run the game and adjust the game settings on the fly for further game-specific adjustments (these settings won't affect any other game you play with the emulator). Double-click a selected game image to start the game.
|

Go to Settings > Game Properties.
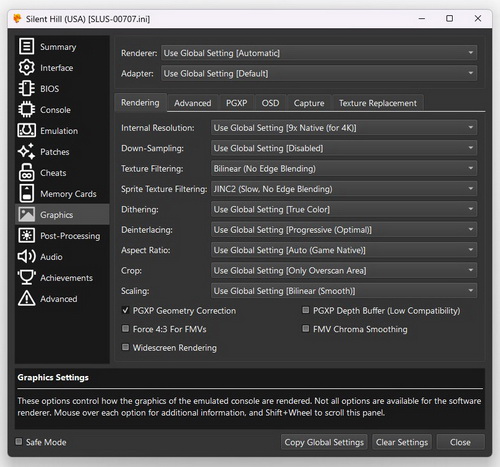
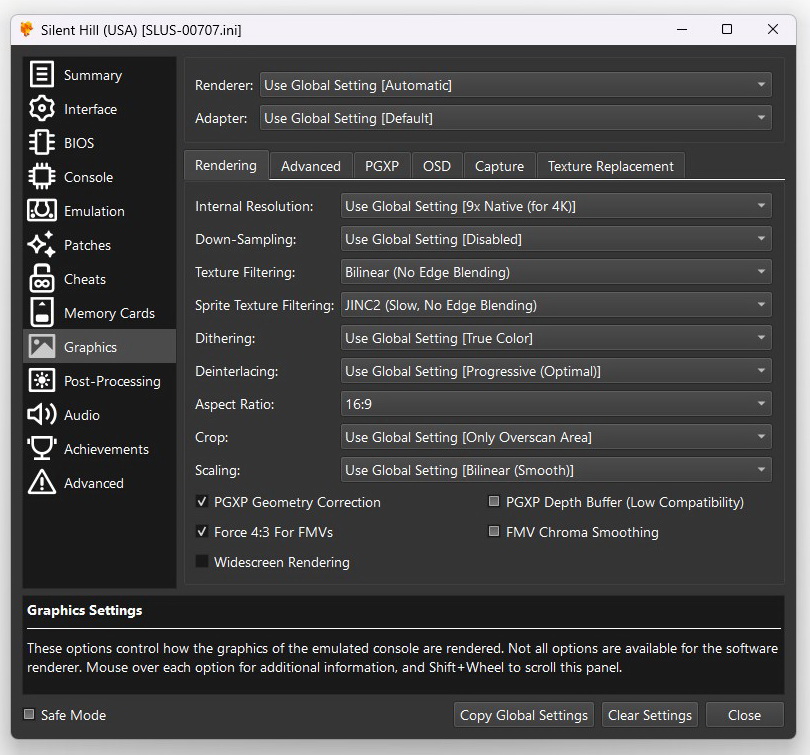
- Graphics > Rendering.
- Enable PGXP Geometry Correction. This greadly reduces "wobbly" polygons characteristic to PS1 games.
- Texture Filtering/Sprite Texture Filtering. Keep it Nearest-Neighbor for a more authentic pixelated look, or choose a smoothing option that suits you. Make sure to select the 'No Edge Blending' option; otherwise, the tree leaves and other objects will appear with white outlines. My recommendation would be Bilinear (No Edge Blending) for Texture Filtering and JINC2 (Slow, No Edge Blending) for Sprite Texture Filtering (affects text and maps) if you don't mind some funky transitions between locations/screens.
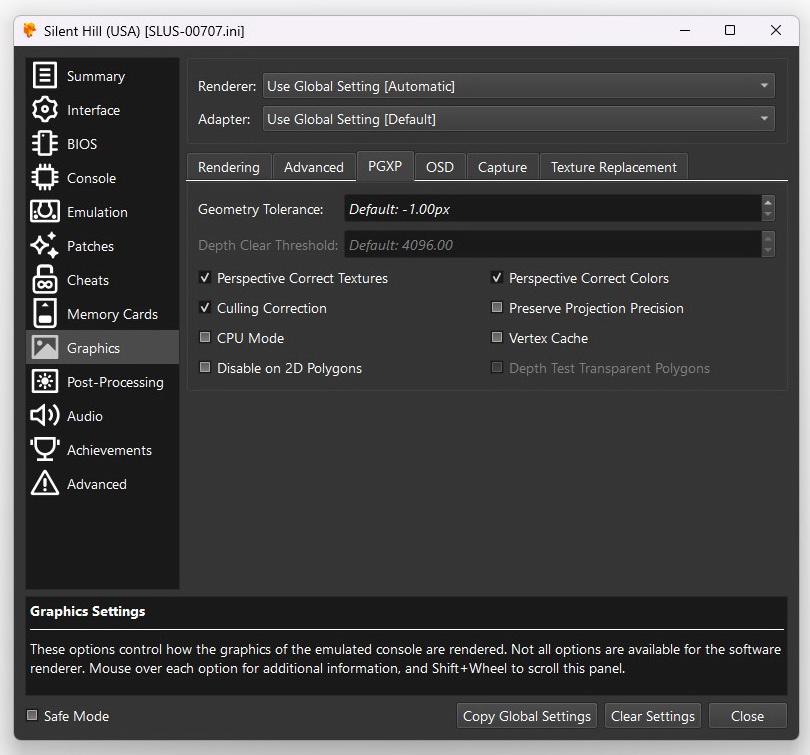
- Graphics > PGXP.
- Make sure you have the first three options enabled.
Note: Culling Correction does create a few critical freezes in the game, but you can easily disable it to get past. See known issues below for complete solution. This setting fixes the texture gaps for animated 3D models though with PGXP Geometry Correctionon, so it's best to keep it enabled for the best visuals.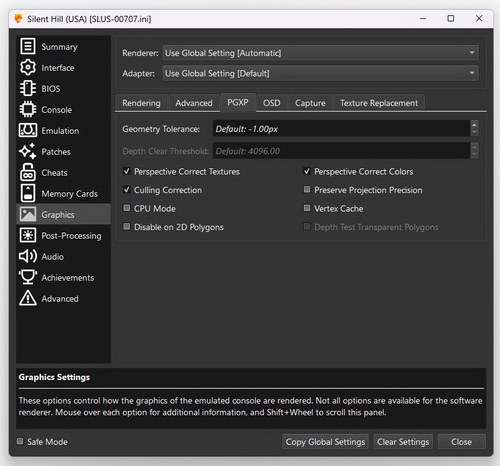
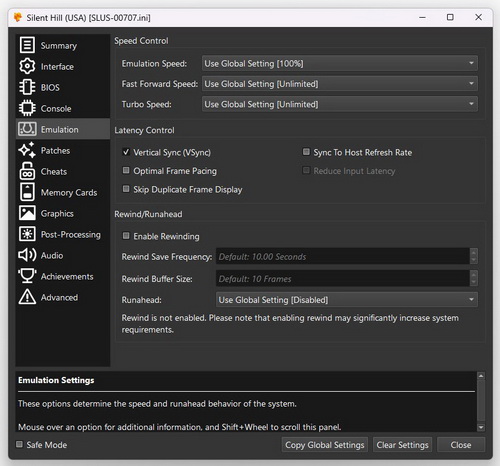
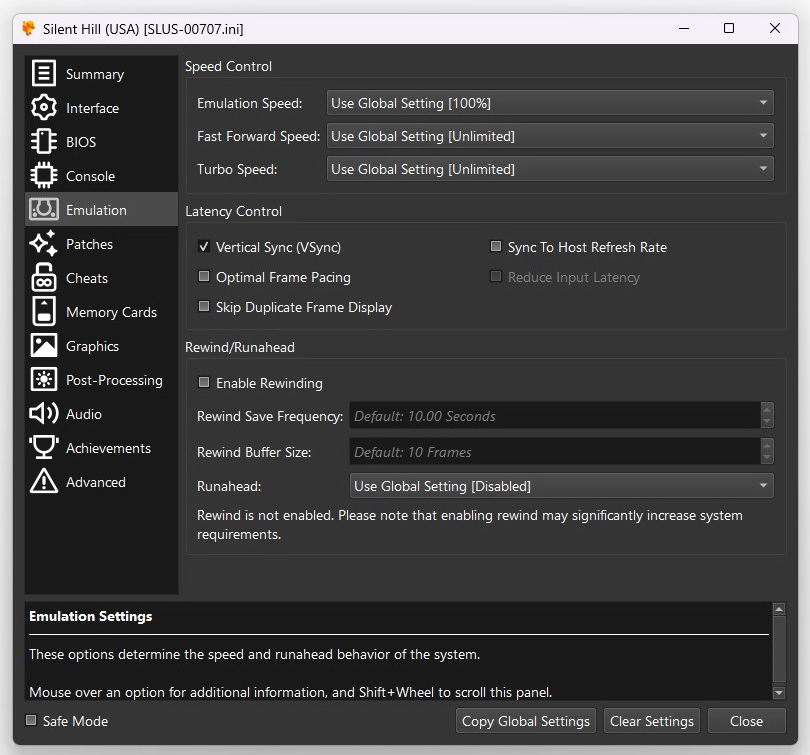
- Emulation. Enable Vertical Sync (VSync) or Optimal Frame Pacing for GSynch/FreeSync Displays if you experience screen tearing.
- Memory Cards. Select Separate Card Per Game (Title) for the second memory card if you need more space for the saves.
Widescreen Option
There are two ways to enable widescreen for Silent Hill, each with their pros and cons:
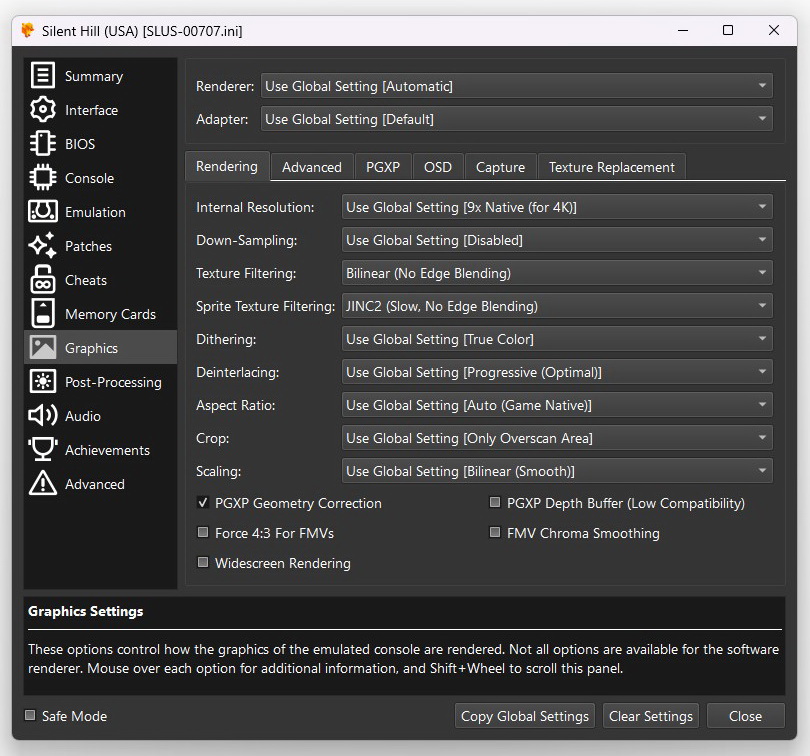
- Widescreen Rendering option.
Go to Graphics > Rendering, select your desired Aspect Ratio, and enable Widescreen Rendering at the bottom of the screen. Also, tick Force 4:3 For FMVs to fix stretched CGI movies.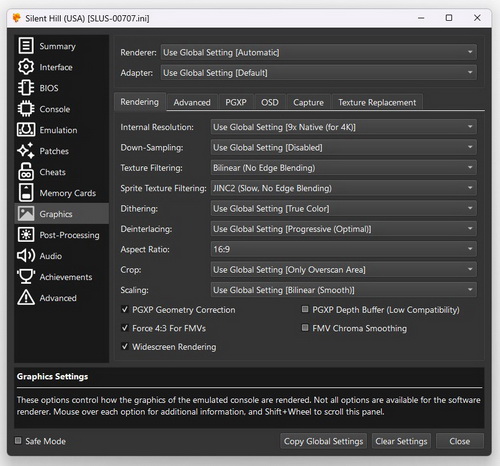
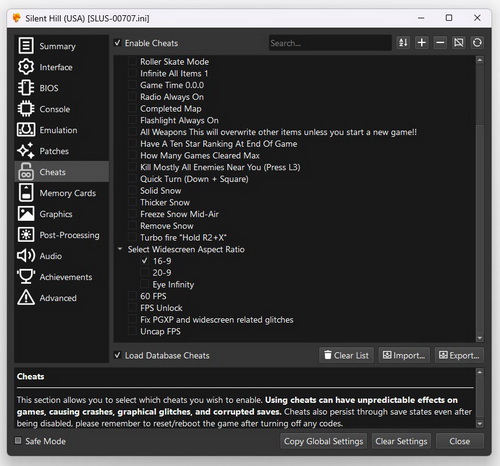
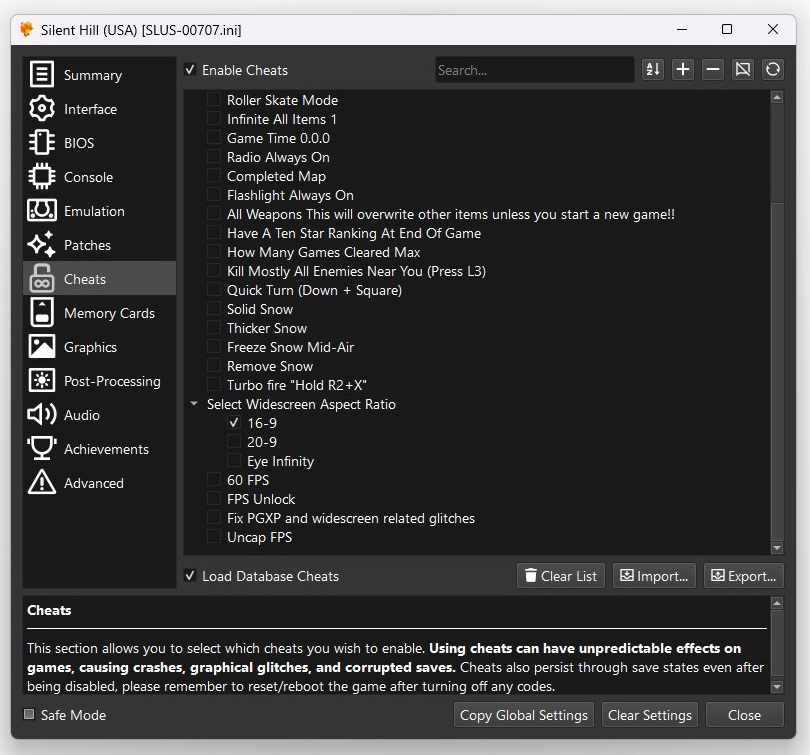
- Widescreen Aspect Ratio cheat.
Go to Graphics > Rendering, and select your desired Aspect Ratio. Tick Force 4:3 For FMVs to fix stretched CGI movies, but do not select the Widescreen Rendering.
Go to Cheats, enable them, and tick one of the Widescreen Aspect Ratio presets (16-9 for a typical widescreen display).

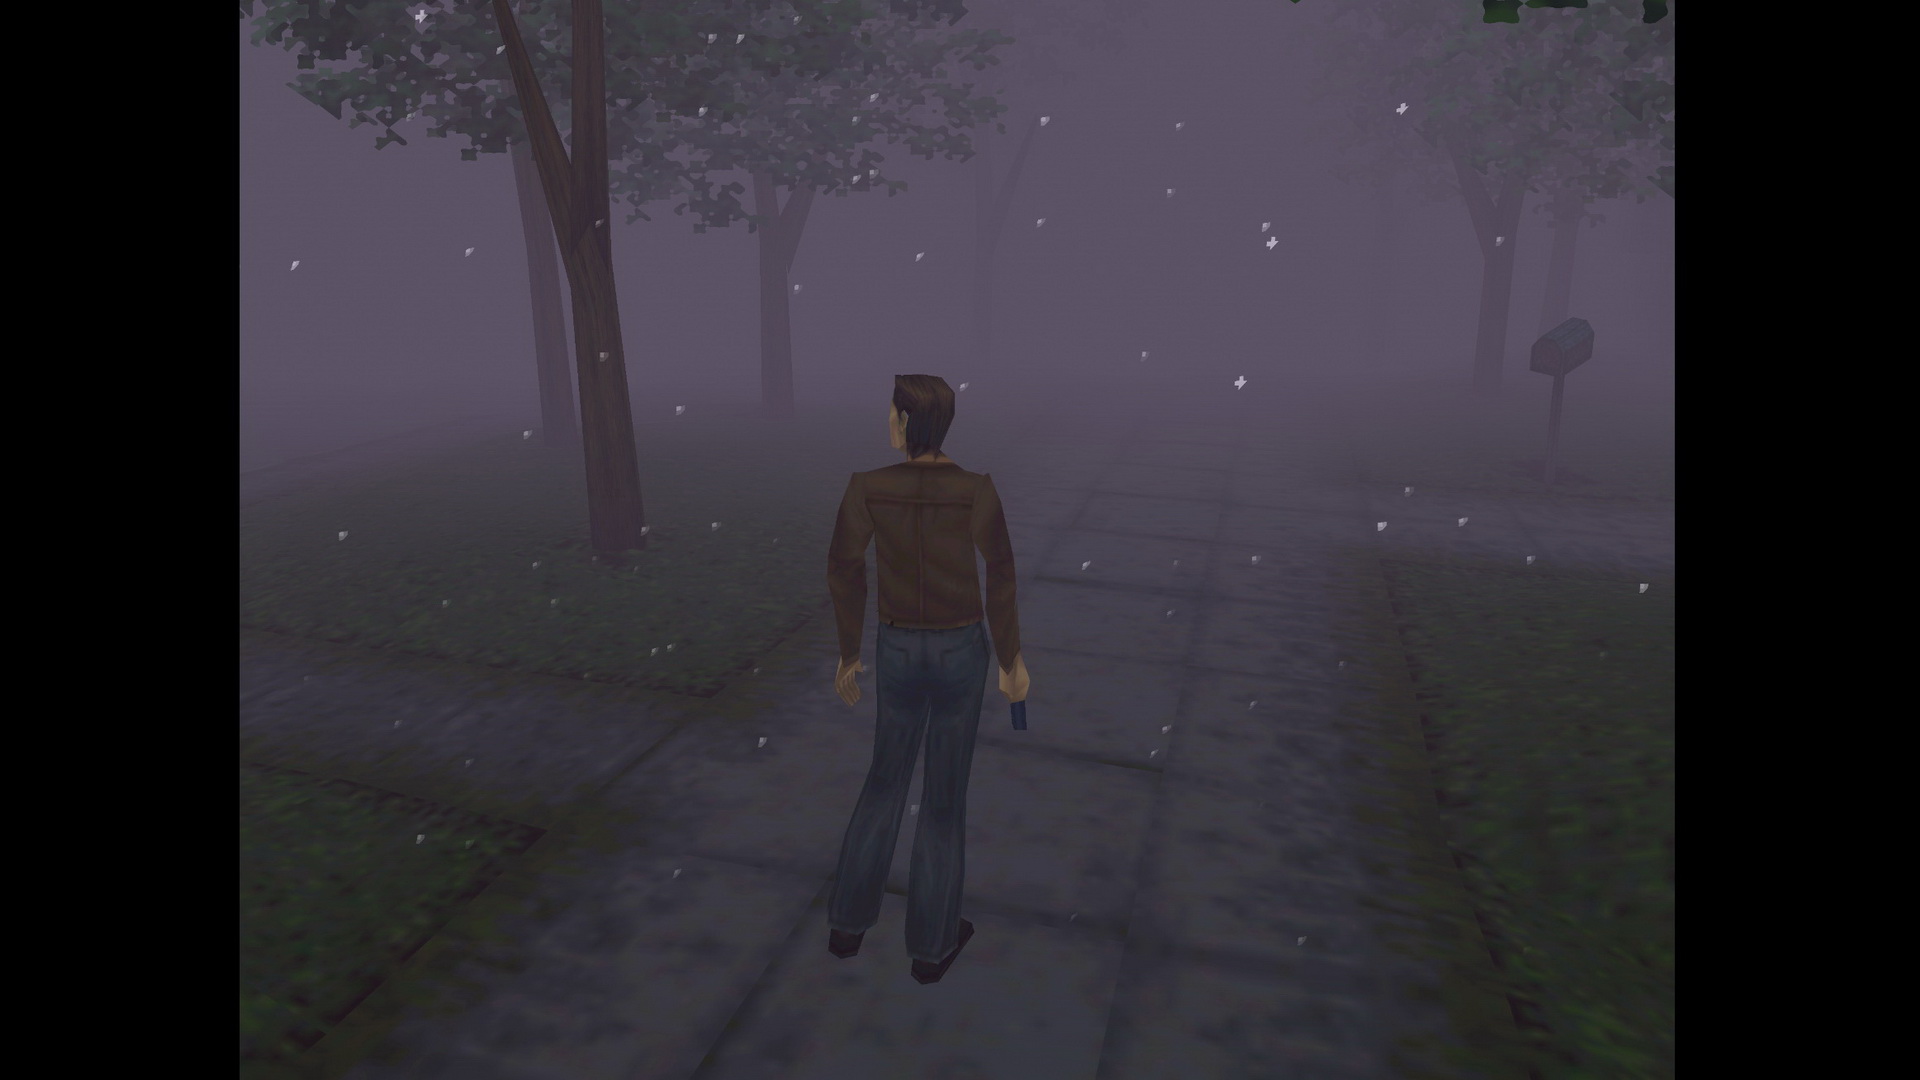
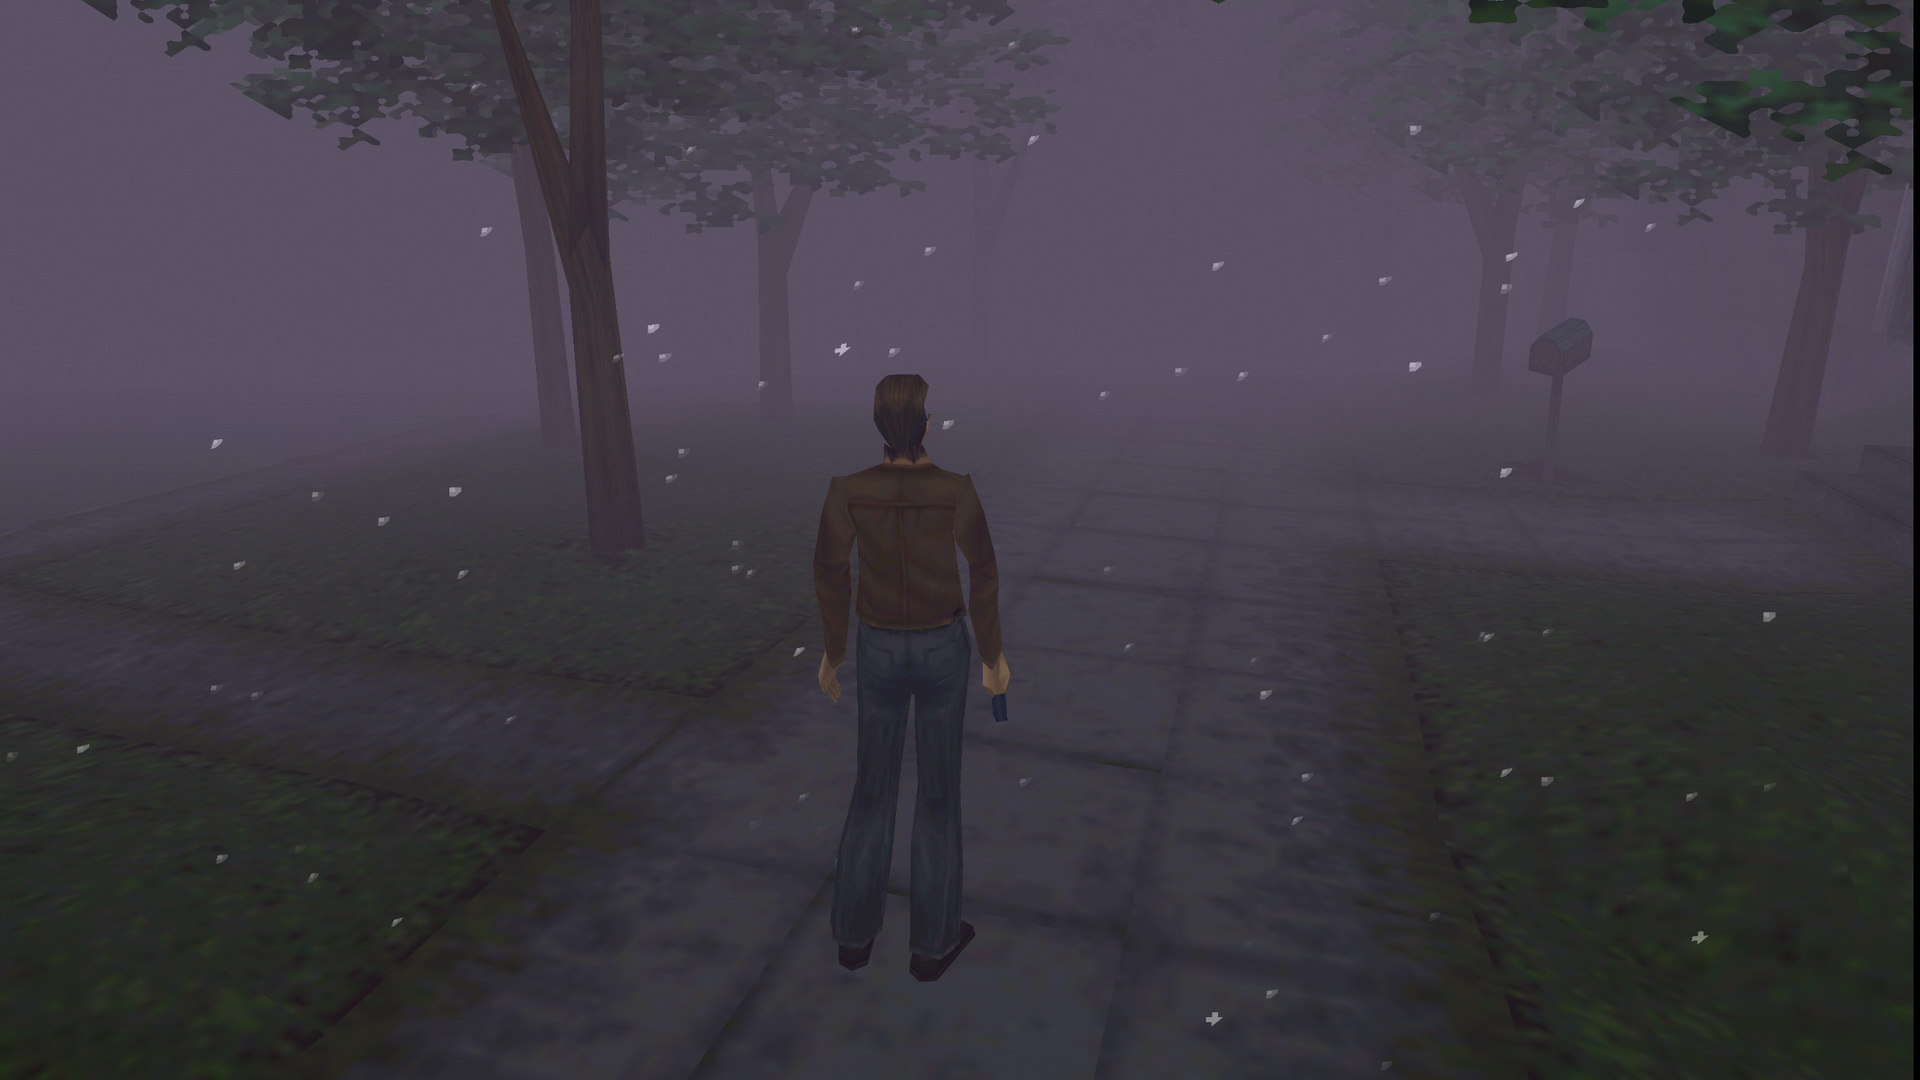
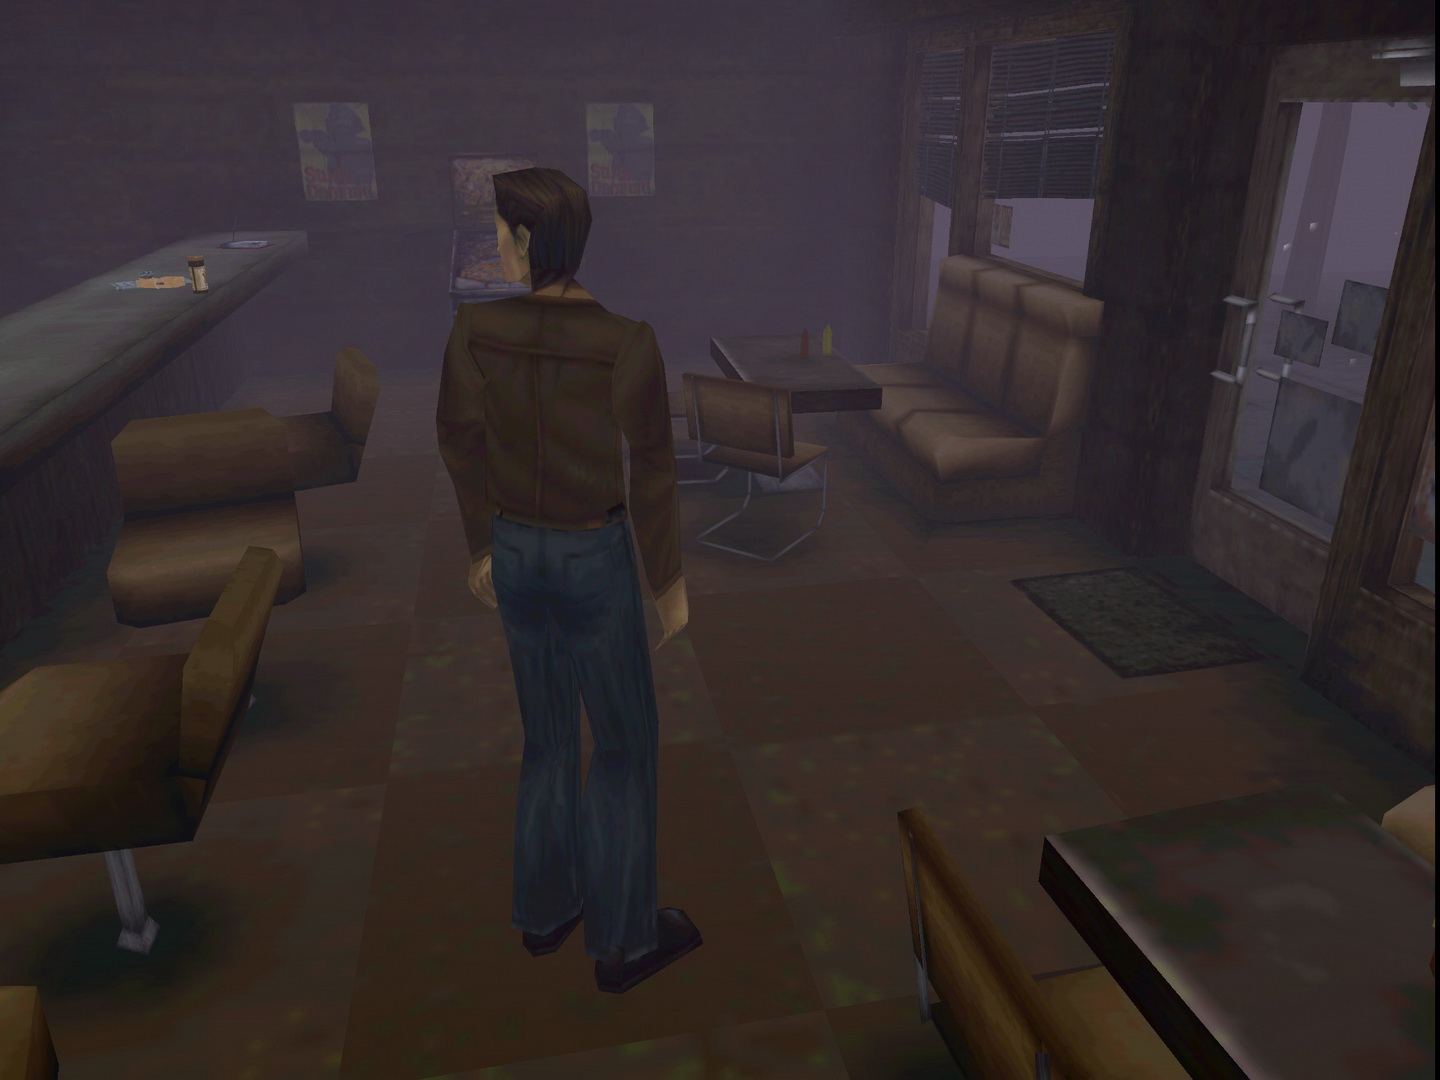
The two widescreen display options achieve their effect differently.
The first option expands the display horizontally, offering more versatility and support for non-standard resolutions like 16:10. However, this can result in some environmental clipping on the sides and the visibility of unmodeled elements in certain scenes, as the game was not originally designed for widescreen.
The second option crops the display, eliminating side clipping. Oddly, though, this method causes some noticable environmental clipping to appear at the front when outdoors, making it imperfect as well.
Here is a comparison between the native 4:3 display and these two widescreen options, allowing you to choose your preference:
 |
 |
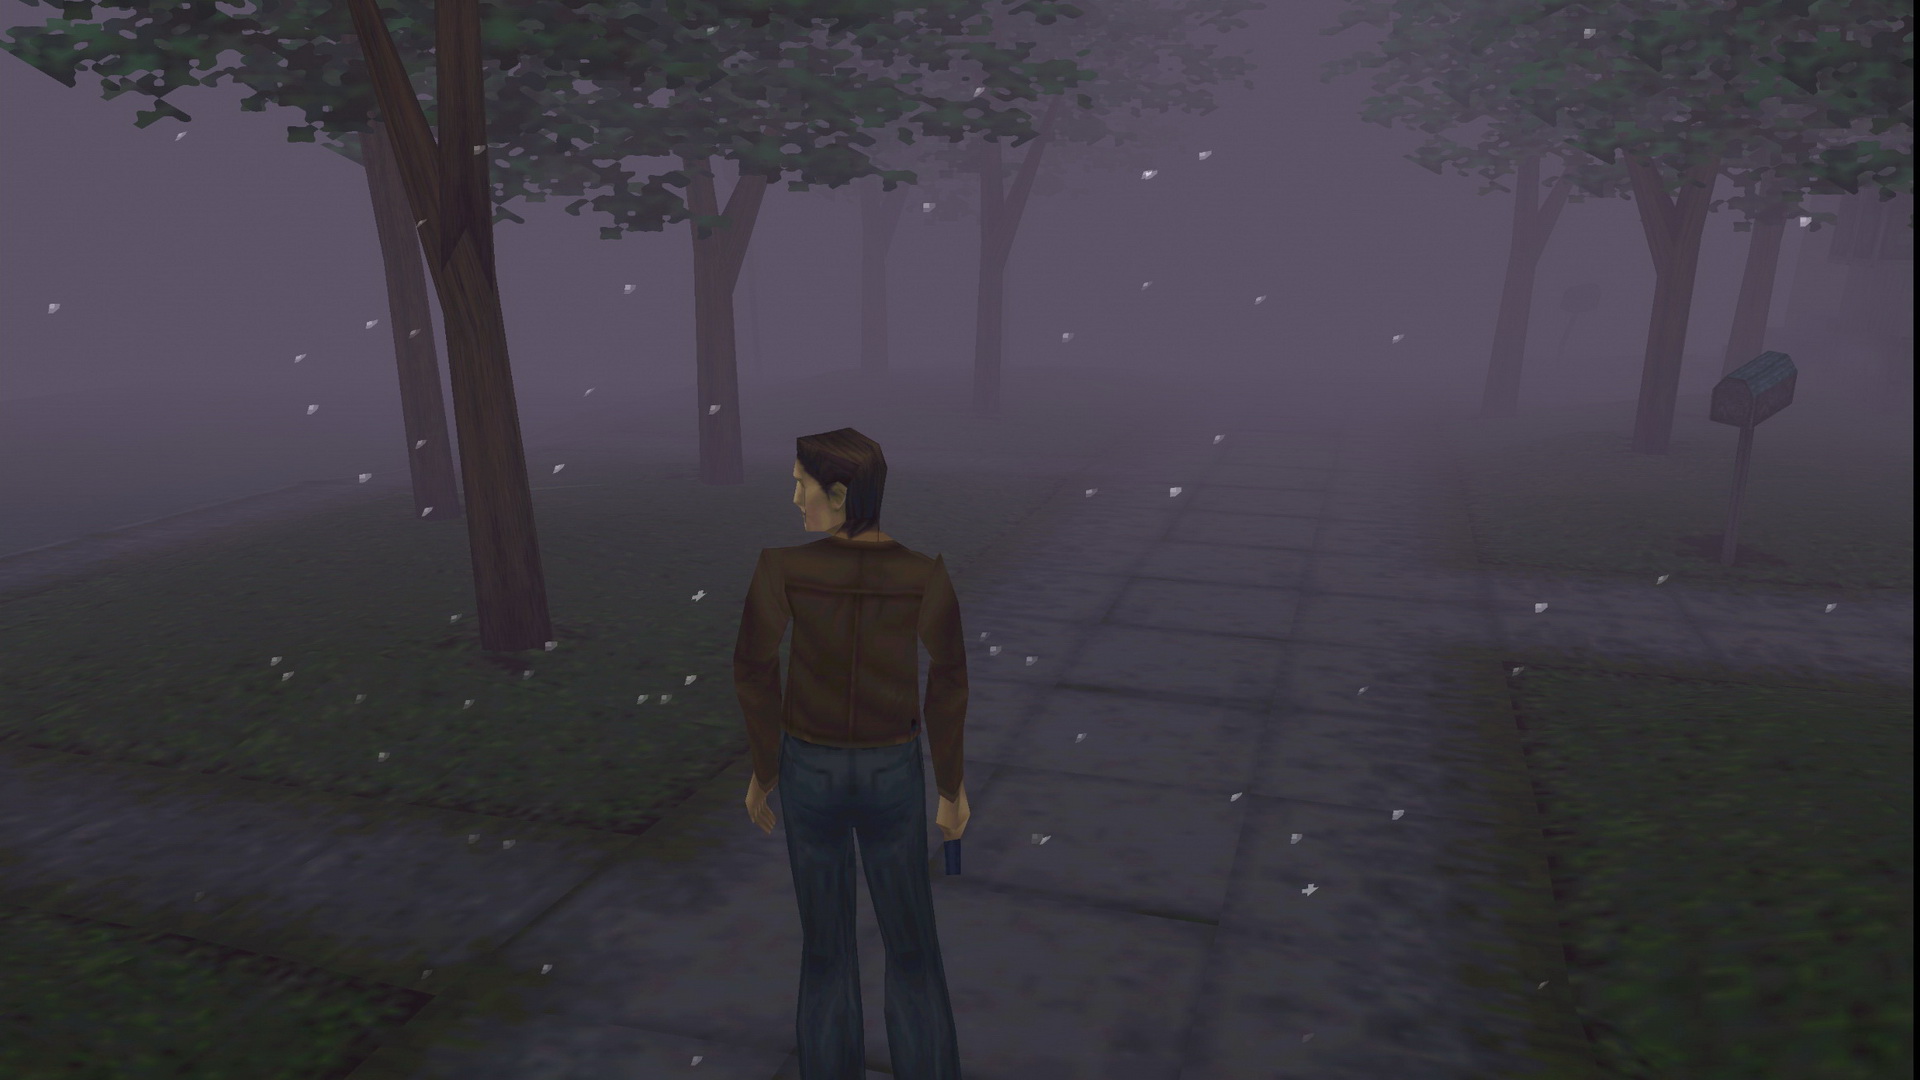 |
Notwithstanding these slight imperfections, the game runs pretty well in widescreen for the majority of the time. Unfortunately, this option causes the game to freeze in certain scenes. Please refer to the known issues section below for potential solutions.
60 FPS Option
You can experience Silent Hill with smoother animations at 60 FPS by following these steps:
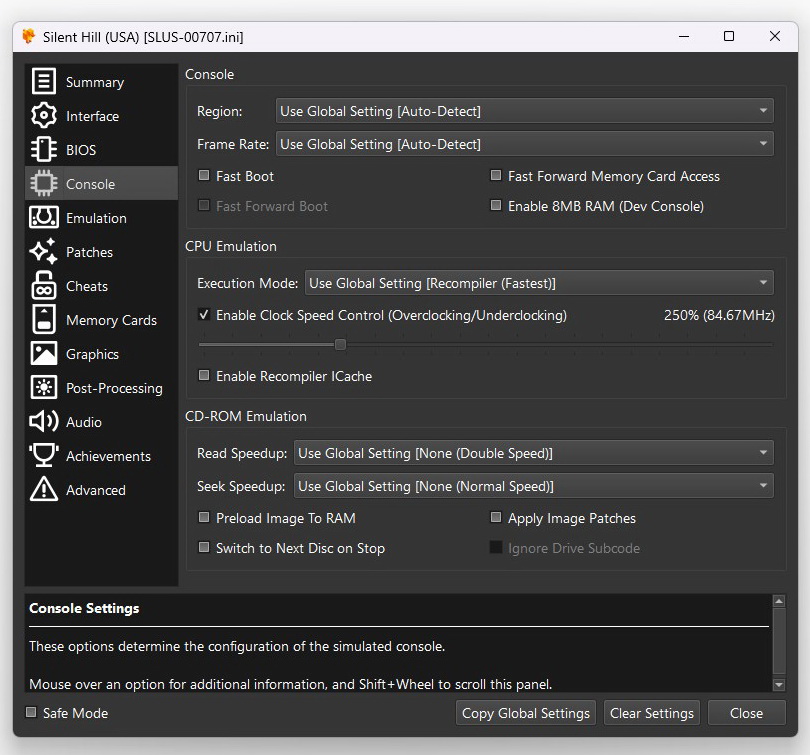
- Under Game Properties, go to Patches and enable the 60 FPS patch (preferred option). Alternatively, you can use the 60 FPS mode under Cheats (50 FPS mode for the PAL version).
- To maintain a stable framerate, overclock the CPU. In the Console, enable Clock Speed Control and set it to 250%.
Note: While the framerate may still occasionally drop below 60 FPS, avoid setting the clock speed higher (up to 460% per other recommendations) as it can cause audio glitches and looping sounds.
Post-Processing Options
You can also add post-processing filters to further adjust the look of the game. Go to Game Properties > Post-Processing, enable it, and add selected filters. Here are a couple of suggestions.
Cccalibrator
Add this filter for more contrasting vibrant colors with deeper blacks and whites. See the suggested settings and visual comparison below.
|
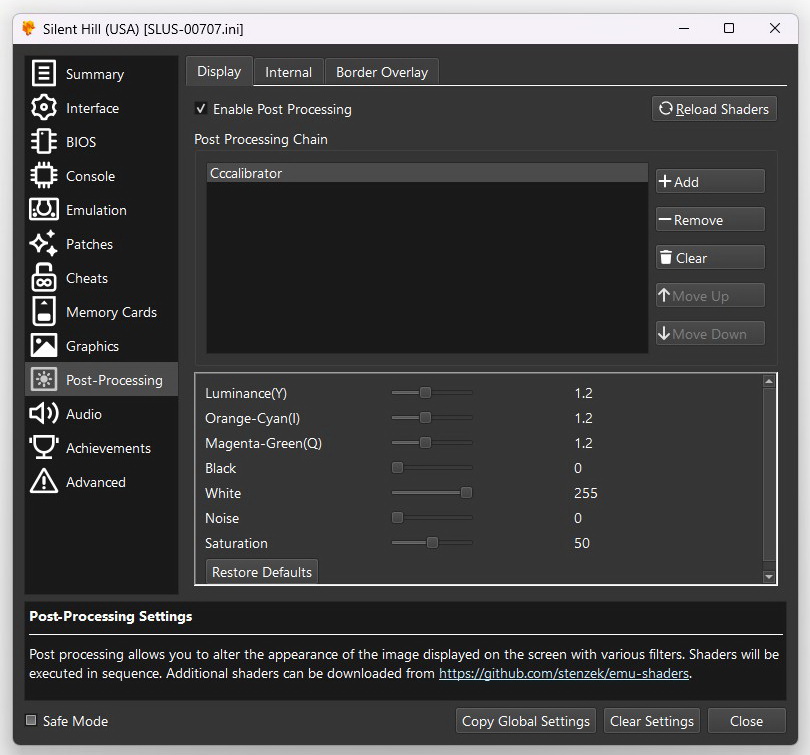
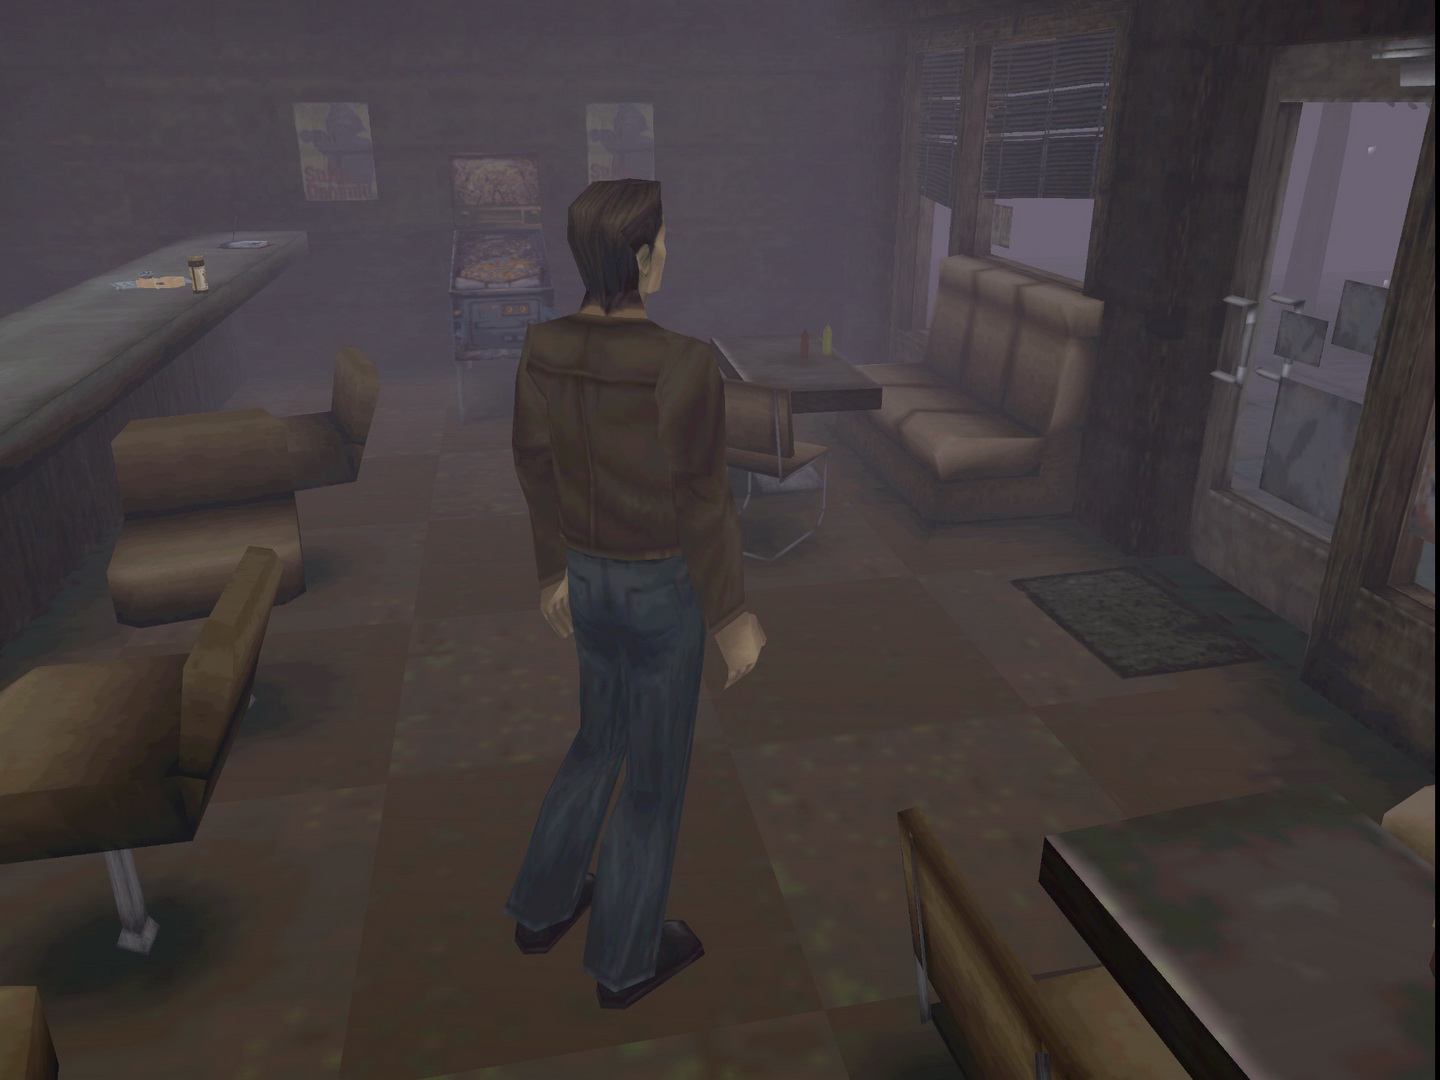 |
 |
crt-lottes
This is a cool filter that lets you adjust the graphics to make them look like the old CRT display. Add the filter from the list and adjust the settings to your liking. Set the Screen Warp to 0 if you don't like the default curved borders.
|
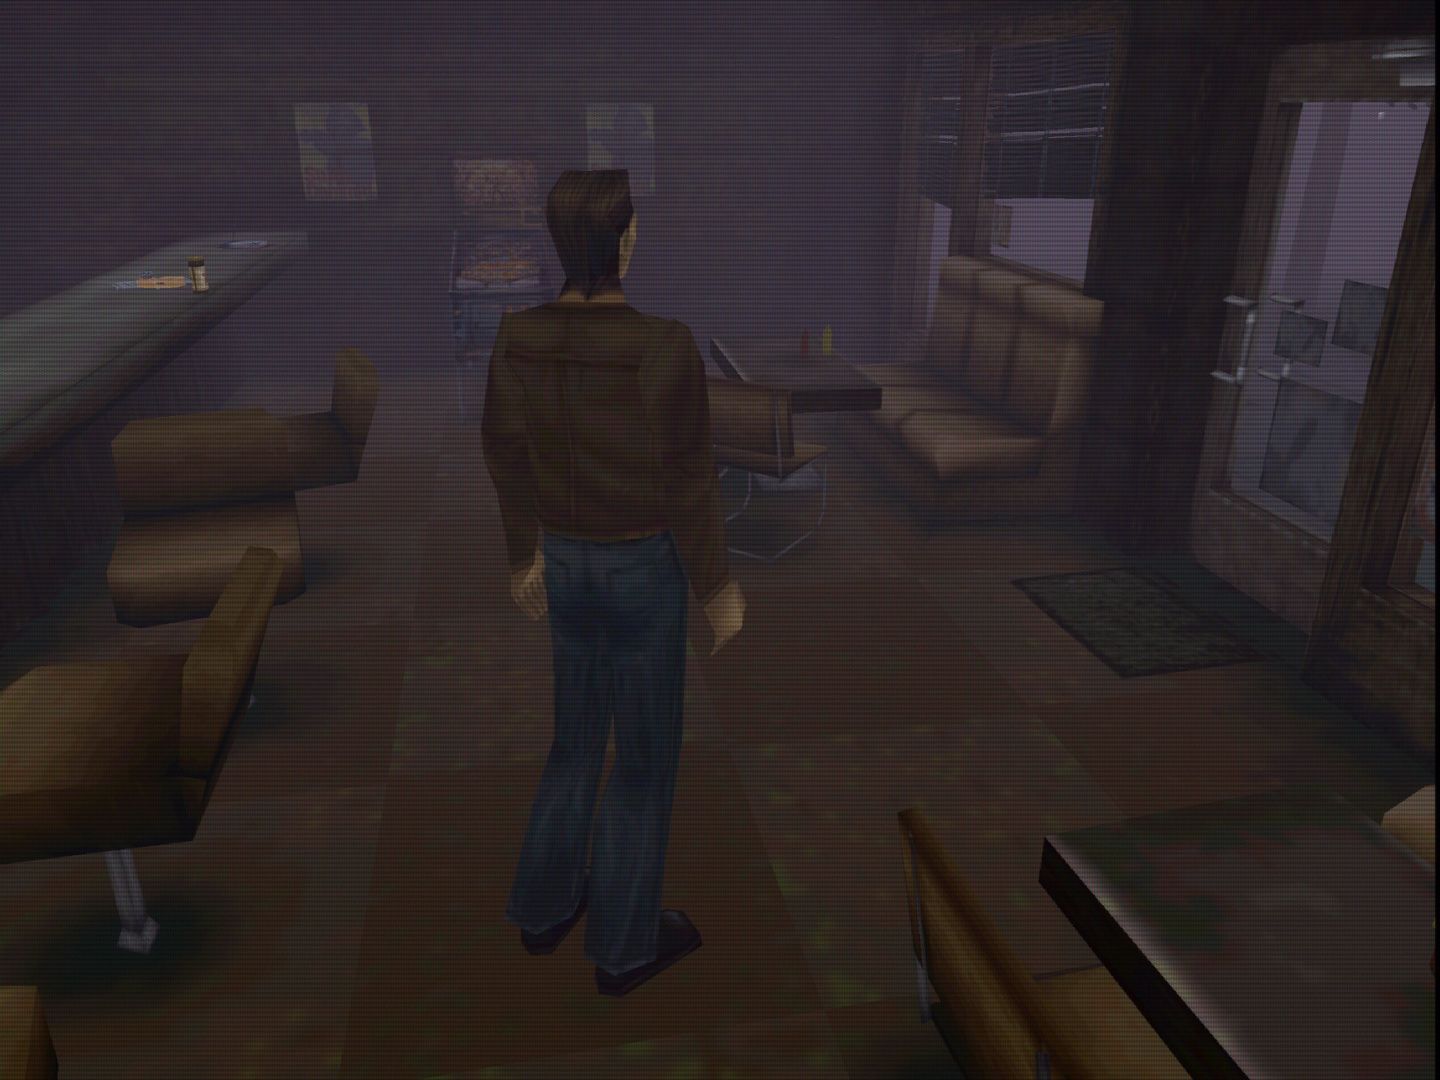 |
Save States
Use the emulator's save states to quickly save and load the game at any time. There are 10 game save slots (per title) and 10 global save slots. Access them via the System menu or use the following hotkeys:
- F1 - Load from selected slot
- F2 - Save to selected slot
- F3 - Select previous save slot
- F4 - Select next save slot
Known Issues
Game Freezes
The game will freeze or run very slow at certain moments with PGXP Geometry Correction (PGXP Culling Correction specifically) and sometimes widescreen (both widescreen rendering and widescreen cheat options) enabled:
- Old Silent Hill, part 2 (after school). Before entering the Balkan Church (critical game freeze caused by PGXP Geometry Correction and Widescreen).
- Old Silent Hill, part 2 (after school). Drawbridge control room, taking the Health Drink (the game is running extremely slow with PGXP Geometry Correction, not necessary, so you can simply skip it).
- Lakeside Amusement Park. During the cutscene after the boss battle with Cybil (critical game freeze caused by PGXP Geometry Correction).
- Nowhere. First scene with Lisa (this cutscene may not be played in full, but the game does not freeze and you can skip through it to continue).
Solutions:
Make a save state before the problematic moments just in case and use one of the suggested methods below:
- Disable PGXP Geometry Correction (for all three scenes) and also any Widescreen setting (for the church scene) temporarily before these moments to get past them. You can set the keyboard keys for these options under Settings > Hotkeys for quick toggle.
- Use the Fix PGXP and widescreen related glitches cheat by Unicorngoulash. However it causes a slowdown at the top of the lighthouse and a freeze after getting the Amulet of Solomon in Nowhere so it isn't something you can just leave enabled at all times. To add the fix go to Game Properties > Cheats > Import From Text... and paste this text:
#Fix PGXP and widescreen related glitches

A7038C0A 10621000 - Change the Renderer under Game Properties > Graphics to Software temporarily to disable all graphic enhancements (or enable the Safe Mode at the left bottom of the Game Properties).
Audio Glitches
The audio may loop (ex. radio sound), break and overlap.
Solution: Don't set the clock speed too high (over 250%) or don't use this option at all if not aiming for 60 FPS.