Walkthrough
RecommendationsRecommendations Before You Start As for setting the mood, I can't recommend enough that you allow this game to scare you as intended. To do so, play with the lights off at nighttime and crank the volume up. A good sound system or headphones will really immerse you in the terrifying world of Silent Hill. Maybe keep an extra pair of undies on standby. Note: This walkthrough was written while playing on Normal difficulty. Therefore enemy locations and numbers may vary on other difficulties, but even some areas may sometimes have a different number of enemies on the same difficulty. Otherwise, item locations will be the same. All riddles and puzzles will be thoroughly explained for all difficulties, as well as tips for each boss fight. Color legend |
00. Arrival"It's strange... It's quiet. Too quiet. This place is like a ghost town." Foggy Streets Run ahead for Harry to hear and follow footsteps around the corner. With Cheryl in sight, follow her across the road and into the alley. As you chase her down, you'll hear her pass through a gate. Do the same at the left end. Back Alley Eventually you'll be greeted by a surprise and things will escalate rather intensely. Try to keep your pants dry as there's only one way this is going to end, since the path is suddenly blocked if you try heading back. Note on Arrival: In a Next Fear playthrough, the game will skip this segment and begin in the cafe. |
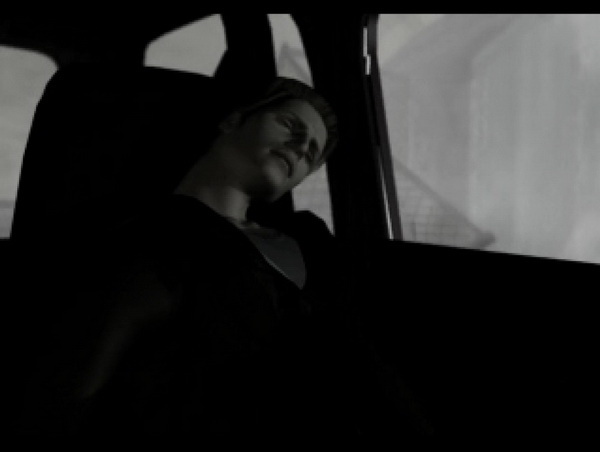
01. Old Silent Hill"What's that? Huh? Radio? What's going on with that radio?" Cafe 5 to 2: Meeting a New Friend Before stepping out for backup, Cybil gives you her 1 Handgun. On the nearby counter you'll also find a Health Drink, 2 Flashlight and Residential Area Map next to a notepad which is the first Save Point. At the other end there's another Health Drink and a 3 Kitchen Knife as your first melee weapon. There's a red radio on the nearby table but Harry is convinced it's broken. Once you try to leave it'll emit static and Harry will say one of his more memorable quotes. While checking the radio, an Air Screamer suddenly crashes through the window to say hello. Quickly equip the Handgun from your inventory to blast it down and the static will fade away. Grab the 4 Pocket Radio since it may be helpful after all. Now it's time to leave the cafe. Note on Radio and Flashlight:
Bachman Road Find the nearby bench by the now broken window for two packs of Handgun Bullets. If you do venture south you can also find a Health Drink by the door to Queen Burger on the east side. But let's continue north for now, and perhaps it's worth checking out the Convenience Store at the northeast corner of Bachman and Finney. Near the entrance, ignore or handle the Air Screamer on the trash bin and enter the store through the open door. Convenience Store
Back to the Alley Head past another Groaner and through the next gate. Take the two packs of Handgun Bullets and find the 5 Steel Pipe and 6 A Note "To School" just around the corner. This looks like it was ripped out of Cheryl's sketchbook which sits right beside it. Harry marks Midwich Elementary on his map, which is your next destination. Return to Finney Street, and be wary of a jumping Groaner when returning to the main alley. Levin Street: Figuring Out a Way to the School Continue south to Matheson, where you'll find some scattered papers and 7 A Note "Doghouse" where the road is destroyed to the west, preventing further access. The note reads "Doghouse" and "Levin St". But we just checked it... Maybe we need a closer look. Levin is destroyed farther south and there appears to be no other route to the school anyway. Head back to the doghouse on Levin and check it again for Harry to kneel and discover the 8 House Key taped to the inner roof. Take it and enter the nearby house up the steps with the House Key.
Levin Street House The back door is secured by three locks, but the map beside it reads, "Keys for Eclipse" and shows three different markings which must be the key locations. No, we're not looking for the keys to a Mitsubishi Eclipse. With Harry copying the locations on his map, leave the house to start your scout, knowing the backyard exit may allow passage to the school. Finding the Keys for Eclipse Find the wide gate on the west side not too far down and ignore the "Off Limits" sign as you step through it. In the small basketball court, take the 9 Key of "Woodman" beside the bloody dog head. Interesting way to play basketball. Also grab the Health Drink on the garbage bin to the left and leave the court. Now make you way back north, and at the east end of Finney you'll find a police car nearly tipping off the broken bridge. Watch out for the Air Screamer and grab the Handgun Bullets by the cop car, then check the open trunk for the 10 Key of "Lion". Turn around and take a left down Ellroy, passing an Air Screamer or two, and stay on the right side as you pass Matheson. You'll soon see a fallen tree that allows you to reach a small area with the 11 Key of "Scarecrow" in a bloody mailbox. What is this, The Wizard of Oz? Also grab the Health Drink on the porch just ahead.
With all three keys, return to the house on Levin Street. Matheson will take you straight there for the quickest route. On the way you can find two alleys on the south side of Matheson with some items. The first before Bachman contains an Air Screamer guarding two boxes of Handgun Bullets and the second before Levin has a few Groaners guarding a First Aid Kit. Inside the Levin Street house, check the back door to use the Key of "Lion", Key of "Woodman" and Key of "Scarecrow". Exit to the backyard. Making Your Way to Midwich in the Dark Take the two Health Drinks on the white lawn table and exit through the wooden gate. If you follow this alley north and then head to the northwest end of Midwich Street, you can find Handgun Bullets and a Health Drink amongst some rubble. From the backyard gate in the alley, head south and across Bloch Street to the next alley, where you'll find a Health Drink on a garbage bin on the left side. Farther south are more Handgun Bullets by more bins on the right side, while two Groaners are at the end and an Air Screamer may fly in. With the school almost in reach, head west and then south on Midwich Street. Hearing static near the entrance, continue south past the walkway to find a school bus patrolled by two Groaners. Enter the bus through the open door on the right side. In the bus you'll find two Health Drinks and a Save Point on the seats. Exit the bus and return to the school entrance pathway, where you'll meet two Groaners by the entrance doors and possibly another Air Screamer. Proceed inside through either door. |
03. Nightmare School"At this, the furious lizard hissed, 'I'll swallow you up in a single bite!' Then the huge creature attacked, jaws opened wide." Courtyard Note on school map: Still using the same map with north facing right, I'll continue using standard directions and descriptors for room and hall locations. First Floor Top Hallway The left and right hall doors are locked so enter the marked "Hall" at the top right. Just inside you'll be ambushed by five giant roaches called Creepers. Handle them with the Handgun or quickly run along the wall and through the other door to the right hall. First Floor Right Hallway Now on the other side of the hall, grab the Health Drink on the nearby bench. The stairs are blocked off here so pass through to the bottom hall. First Floor Bottom Hallway Back in the hall, the Lobby contains two Grey Children patrolling the outer perimeter while a hard-to-see Ampoule can be found on the wheelchair in the back right corner, which is the most powerful health item in the game. The exit doors won't open, so return to the hall and consider unlocking the courtyard doors for later use. With the left hall doors locked, kill the Grey Child by the Reception and enter the small room behind it.
First Floor Left Hallway: Warping to Second Floor Washrooms Now enter the Boys' washroom on 1F and examine the door ahead to come across a stunning sight and the awesome 17 Shotgun on the ground. You'll also find a note on the right wall, alluding to something called "The Monster Lurks". Take note and leave the room. Now enter the lower Teacher's Room since the hallway is blocked midway, and make your way past the Grey Children and a Creeper to enter the next Teacher's Room. In the upper Teacher's Room, quickly kill the Creeper and grab the Handgun Bullets on the chair. Three blue phones are on the table but they won't work for Harry. Try to leave through the far door close to the phones and one will suddenly ring... Harry will answer for a short call. Leave to the top part of the left hall after. Three more Grey Children and a Creeper swarm you out the door. Will it never end!? Use the right wall to avoid them if possible, and consider unlocking the top hallway doors before proceeding up the stairs to the second floor and then again to the rooftop, which is now unlocked. Rooftop Open your inventory with a creative mind and place the Rubber Ball over in that hole. Now open the valve and it'll reach the key to wash it down. But to where...? It might make sense for it to drain to the outside exterior, right? If you reference your maps, this spot should align with the top right of the inner courtyard, so perhaps we should check there. You can explore the second floor first and acquire another key, but ultimately you'll be unable to advance past the locked upper Classroom in the right hallway, so let's find that key. Head back down to the first floor from the top left staircase and proceed outside from the top hallway. Courtyard: Finding the Key in the Drainage Ditch Second Floor Left Hallway Second Floor Bottom Hallway Second Floor Top Hallway Pass through to the Library to find Handgun Bullets and a fairy tale on different tables. Pay attention to the fairy tale with the lizard since it will become very relevant in a matter of minutes. Exit through the other door. Second Floor Right Hallway Handle the three Creepers and find the Health Drink on the bench near the separating gate. Now use the lower stairway to head all the way down to the basement. Consider first unlocking and passing through the gate on the first floor to return to the Infirmary to save due to an upcoming boss fight. Basement Turnstile Valve Puzzle (Boiler Room)This isn't a very difficult puzzle although there's no riddle or clue to help you out. Instead you'll normally have to do a little trial and error, unless you use the solution below before touching anything. Note that whenever you turn a valve, the turnstile on each side will spin at differing speeds. What you need to do is turn each valve in such a way so that both turnstiles open up and allow passage. Go ahead and give it a try on your own, sometimes turning left and sometimes right for both valves until you find the solution. Otherwise, if you haven't touched anything the simplest solution is always: It doesn't matter which valve you turn first as long as those inputs are given, and you may find other solutions work but this one is the quickest. Even if you've messed it up you can easily find the correct solution by turning each valve in the opposite direction, one at a time back and forth. Eventually you will hit the solution with no bars blocking your way. Use the clear path to proceed ahead, where a surprise elevator floor will take you to the menacing depths below. There, Harry encounters a giant lizard in an open arena with a fire pit in the middle. So this is the hungry beast that was awakened when we turned on the boiler earlier... It's time for the first boss fight of the game. Boss 1: Split Head LizardA giant lizard, eh? Do you remember reading the fairy tale about the hunter and lizard just a few minutes ago in the Library? Let's recall the story:
If you just attack the Split Head normally you'll find it's one resilient sucker, so you'll need to follow the lead of the hunter. Note that the lizard dropped dead once he shot arrows into its gaping mouth. Surely our Shotgun shells should be sufficient instead.
After around six shells, the lizard will spew green liquid out of its mouth as it deeply growls while frozen and the music picks up. Now you've infuriated the lizard, so prepare for the crucial part of the fight. Now let it approach you and start backing up once it's close enough. When it opens its mouth, continue backing up as you empty shells into its mug. You should be able to fire two shells each time on Normal and Hard before it closes. If you don't back up or are too slow, the creature will swallow you whole and it'll be Game Over, so stay on your toes. On Hard it'll be even more aggressive with next to no margin for error, so consider bailing out and strafing if you get caught flat-footed. Repeat the strategy, always backing up while you fire in its open mouth and the fight should end after 5-6 shells on Normal/Hard or fewer on Easy. As a little trick, lower and re-raise your gun between attacks so that it automatically reloads, avoiding an untimely in-game reload or a visit to your inventory. The best method for firing in its mouth is to stand immediately in front of its head after first angering it. Once it re-activates, it'll open up right away. Be quick to move back and fire at it. Now just repeat the same method until it dies. Split Head's attacks: At the start of the fight the creature will resort to a headbutt attack when you're in range, inflicting a fair amount of damage. Once you've aggravated the Split Head, it will engage its gaping mouth attack, which is an insta-kill if you're caught. Always be backing up to avoid this. After firing enough shots into its gaping mouth, the screen will blur and the fight will be over. Well done, hunter. Return to Normal Midwich Elementary Proceed to the bottom hall where you may remember a list of teachers on the Reception desk earlier. Check it again and Harry will notice the name K. Gordon and copy over their address to his map. Well, that was helpful. Consider saving in the Infirmary and leave the school through the Lobby after unlocking both sets of doors. |
04. Old Silent Hill Part 2"Here, the Flauros, a cage of peace. It can break through the walls of darkness, and counteract the wrath of the underworld." Figuring Out a Way to the Church Find the Groaner waiting halfway up the alley and note the angle change. Approach the camera and enter K. Gordon's backyard through the wooden gate down the path. Enter the house with the K. Gordon Key. K. Gordon's House Heading to the Church Dodge the Air Screamers and grab the Handgun Bullets on the right side on your way up the alley to Bloch Street.
Make your way east and enter Balkan Church on the south side of Bloch up the short steps. Balkan Church On the left display you'll also find a Health Drink, while a Save Point sits on the desk near the entrance door. Leave when finished. Gas Station Detour Not too far down the road you'll find a Gas Station on the south side where there's a cracked-open door near a Groaner. Step inside the garage to find another Save Point on a small table and Handgun Bullets on the other side of the car along the wall.
Heading to the Drawbridge On the south side, head down the steps at the beginning of the bridge to get a First Aid Kit and Shotgun Shells (may be a bit hard to see on the left), but be wary of two patrolling Air Screamers. If you continue to the middle of the bridge you'll find that it's stuck open, so make your way to the Bridge Control Room on the south side. Bridge Control Room Find the Shopping District Map on the chair near a Save Point. Deeper in is a Health Drink beside the control panel. Now use the Drawbridge Key on the panel to lower the bridge. Make your way back out and down, then cross over to Central Silent Hill.
|
05. Central Silent Hill"Make haste to the hospital before it's too late." Sagan Street Near the entrance you'll meet two new enemies called Rompers. These ape-like creatures hop around very quickly and can totally surprise you with their speed, so always approach with caution and be ready to shoot them asap. Despite their intimidating speed and looks, they can be downed in only a few Handgun shots. Note the west entrance to the station on Crichton Street won't open, so enter from the front doors on Sagan Street. Police Station Making Haste to the Hospital Enter the courtyard with caution to be greeted by two Groaners. Quickly enter the hospital through the doors on Harry's right since the other solo door won't budge. |
06. Alchemilla Hospital"Everyone seems to have disappeared. And it's snowing out. This time of year. Something's gone seriously wrong." First Floor Reception Hall Harry meets Dr. Michael Kaufmann who kindly introduces himself with another gunshot, but thankfully he's a terrible shot. Once he leaves, pass through the empty Office on Harry's left to get behind the Reception counter where you can grab a First Aid Kit on a box and the Hospital Map posted on the information board. Pass back through to the Examination Room you met Kaufmann in and enter the Medicine Room through the far door. There's only a newspaper clipping in here which Harry won't bother to read, so exit from the other door to the east hall. First Floor East Hall
Back out in the hall, the elevator isn't functioning so the power must be out. Let's see what the problem is by accessing the basement stairway beside it with the Basement Key. Basement Elevator |
07. Nightmare Hospital"I just don't get it. It's like this is all some kind of bad dream." Fourth Floor Proceed through the doors only for them to lock behind you in the next hallway. With all the side doors jammed, continue through the next door to more of the same only in a darker hallway with a stairway at the end. Descend it and enter the third floor through the double doors. Third Floor West Wing Now back to having a map, inside the Men's room you'll find the 26 Plate of "Turtle" on the window sill. Room 301 only contains an empty birdcage, so enter 302 to find a Save Point and Shotgun Shells along with an old but usable TV with a VCR. Remember it for later. In room 304 is another Nurse, plus a Health Drink on a gurney and a steel plate screwed to the back wall. Note that you'll find a few things in the hospital that you won't quite be able to do anything with, like this plate and the birdcage, but it'll all make sense much later in the game. The Linen Room only contains dryers which are "useless now" to Harry who hasn't wet his pants just yet. Pass through either the Linen Room or the south double doors to the east corridor. Third Floor East Wing With access to the elevator after unlocking the north doors, the second floor foyer doors are locked but the first floor is all open to explore. Alternatively you can return to the stairs to explore the west 2F wing first, but we'll need something on 1F before advancing through there anyway. First Floor East Wing Skip the basement for now since you'll run into a locked Storeroom down there. Inside the Director's Office you'll find the 29 Plate of "Queen" on the table after almost pissing your pants, plus a Save Point by the far wall. A Doctor guards a Health Drink inside the Kitchen, while another Doctor awaits around the corner down the hall. Inside the Office on the south side are Handgun Bullets on the table, while another Doctor awaits in the Medicine Room in front of the locked door to the Examination Room, despite hearing some noise through the door. With that, proceed through the double doors to the west wing. First Floor West Wing Second Floor West Wing Hearing radio static, there aren't any Nurses in here but instead some monster tentacles coming out of the back wall, below another plate above it. If you try to grab it, the tentacles will grab Harry and suck his blood, so you'll have to find a way to distract them. You'll notice a small pool of blood already has their attention, so how about giving them a feast instead?
The doors to the east wing won't open and there's a slate on the wall there with a list of names, plus a blank slate at the north end of the corridor but neither are relevant at the moment. Enter the Nurse Center where you'll come across a strange locked door and a riddle posted on the wall. By now you should have all four plates to solve this puzzle. Plate Puzzle (Nurse Center)
The other door in the room is locked, containing four square depressions along with four other coloured squares. You must insert your four plates into the empty slots to unlock it, but first you must decipher the riddle on the wall to determine the order:
With four colours or shades already shown on the door plus the four coloured plates you have, it should be rather clear that each sentence here describes a colour. Therefore it's simply a matter of deciphering which sentence describes which colour, at least to start things off. "Clouds flowing over a hill." Despite possibly appearing as grey before or during rain, the natural colour of a cloud is white, flowing over a hill or not. You'll notice the plate at the top of the door is white, so that appears to be the starting point and doesn't refer to one of the plates you hold. "Sky on a sunny day" may possibly make you think of yellow or orange, which may be somewhat true during morning sunrise or evening sunset, but on a sunny day it will always appear clear blue. With no blue on the door yet, it does match the colour of the "Turtle" plate. But where does it go? Let's keep reading. "Tangerines that are bitter." Well, tangerines are orange regardless of being bitter or not. With no orange plate, the right square on the door is orange, indicating that we must be moving in a clockwise fashion starting from the white at the top with the blue "Turtle" plate between them. Let's keep going. "Lucky four-leaf-clover" clearly refers to a clover which is green in colour, lucky or unlucky, four-leaf or three-leaf. There's no green on the door so it looks like our green "Hatter" plate goes in the bottom right slot if we continue clockwise. "Violets in the garden" would be... violet, matching the square already at the bottom of the door. If you're not familiar with violet, while it's actually a separate colour from purple (with more blue than red), they're both in the same ballpark of colour. But it hardly matters here. "Dandelions along a path" refers to yellow, the main colour of a dandelion on any path. While their stems are green and their flowers do eventually close and in grow white fluffs instead, dandelions are more known by their initial yellow, which matches with the Cat plate, putting it in the bottom left slot. "Unavoidable sleeping time" finally provides us with a tricky one, so let's think about it. What colour would best represent sleep? Close your eyes and tell me what you see. It's black, or at least darkness, which is effectively what we see while sleeping. You can argue semantics whether we're seeing anything at all, but it's the colour that most identifies with sleeping and matches with the black square already at the left of the door. "Liquid flowing from a slashed wrist" finishes the riddle off, clearly referring to red blood, which is what would flow from a slashed wrist. This matches up with the final remaining plate of "Queen", which may actually look a little pink instead but it's close enough. And with that we're left with the following colours for each slot, including the plates already in the door: Colors going clockwise starting from white at the top are:
So to solve the puzzle, place the Plate of "Turtle" in the top right slot, the Plate of "Hatter" in the bottom right slot, the Plate of "Cat" in the bottom left slot and the Plate of "Queen" in the top left slot. Once all plates have been correctly placed, the door will unlock. Pass through the now unlocked door to the east wing. Second Floor East Wing Enter the Intensive Care Unit and grab the 33 Disinfecting Alcohol on the table. There's a Nurse behind the table, but it's easy enough to grab it and leave without facing her. To finish off the floor you can find a First Aid Kitin room 206. Then unlock and proceed through the double doors at the end of the hall to access the elevator and decend to the basement with your new key. Basement Avoid the respawning Nurse and enter the Generator Room to find the large 34 Hammer sitting against the generator, which is arguably the best melee weapon in the game and should not be missed.
Inside you'll find a large grate that cannot be opened due to the growing vines holding it shut. Remembering your Lighter, you can try it but it's not enough on its own. Although you did recently pick up something else... Use the Disinfecting Alcohol to soak the vines and then the Lighter to burn them away. Hop down to see what's below. Second Basement Only enter the first room on your left in the second hall if you feel like wetting yourself, but the first room on the right contains a 35 Video Tape guarded by a Nurse. You may remember a VCR in room 302 on the third floor where you can later return to view the Video Tape, but its recording is filled with static and hard to understand for the time being. Back in the second hallway, enter the last room on the left into a strange hospital room. Harry finds a photo of a young girl named Alessa who looks a bit like Cheryl. Grab the 36 Examination Room Key beside the photo. Now it's time to escape this hellhole second basement. Head back down the hall and through the end door, then go through the next door to Harry's right. Follow ahead and up the stairs to the first basement's Storeroom. First Floor Examination Room Meet Lisa Garland, a nurse who works at this hospital. Mid-conversation, Harry suddenly suffers from a major headache and shifts out of this nightmare realm. Return to Normal Hospital Take the 37 Antique Shop Key she left on the table and leave to the main Reception hall. If you check the phone by the Exam Room door, Harry will cycle through the phonebook to find the address to the antique shop he has the key for and mark it on his map. Well, that made things easy. Consider saving at the front desk and leave the hospital. Avoid the two Groaners in the courtyard and rejoin the streets through the gate. |
08. Central Silent Hill Part 2"Darkness devouring the town? Must be on drugs." Finding the Antique Shop Start by heading east on Koontz towards Simmons where you can find Handgun Bullets and a Health Drink in the alley southwest of the intersection where two Air Screamers will likely follow you in. There's also a Health Drink on one of the umbrella tables by Cafe Sun at the northwest of the same intersection, guarded by two Rompers nearby. With the crazy ambulance music keeping you on edge, head north up Simmons all the way to the antique shop, ignoring any enemies on the way. You'll soon reach the open doorway of the shop on the right side. Step through and down the stairs where you can proceed inside with the Antique Shop Key. Green Lion Antique Shop Cybil will drop by with some startling news before Harry decides to check out what's in the hole on his own. Proceed down the passage and through the next hole into a small room with an altar, which could be the "other church" that Dahlia spoke of. There's nothing you can do with it, but be sure to grab the 38 Axe on the wall near it for another weapon. Then head back to report to Cybil before things take an interesting turn. Hospital Examination Room |
09. Nightmare Central Silent Hill"I don't want to think so, but maybe this is all just going on in my head. I don't know what's real anymore..." Nightmare Antique Shop Streets: Figuring Out a Way to the Hospital If you make your way south you'll eventually find that the meshy "road" ends before Sagan Street, so we'll need to find an alternate route. On the east side of the road is a torn hole in the shutters of the Silent Hill Town Center which can be found on your map, where you may also notice a potential route behind it. Step inside and see what you can find. Silent Hill Town Center The right passage's floor is out, so take the left path where you can enter a shop on the left side. Inside the former jewelry shop are two packs of Rifle Shells, a First Aid Kit and a Save Point. Consider saving due to an upcoming boss fight, and fear not, you did not miss the Rifle. The other door won't open so exit the shop and continue down the path. Just ahead you'll see what looks like slugs sucking on a corpse. Once you approach it the floor will give and you'll land in a pit with a large larva that's happy to make your acquaintance. Boss 2: Twinfeeler
What the larva will do every now and then is rise up from the soil to spew acid at you as it crawls over the surface before shortly diving back into it, leaving you a brief window to shoot it. It may be hard to predict where it will rise and attack from, which makes running around fairly unpredictable, especially since it may rise right in your path. The best strategy here is to instead stand on the fallen grate in the middle which helps in multiple ways. Firstly, it prevents it from erupting anywhere near you while giving enough time to dodge its acid, but it also lures the larva over the grate where it cannot drop back into the soil until it reaches the other side, providing you with a very lengthy attack window. So stand on that grate and as soon as you hear it erupting, either run ahead or strafe to the side to dodge the acid, then immediately target the larva and start blasting away while closing the distance for peak power. Even on Hard you can end this fight in a matter of seconds and just one full clip. Twinfeeler's attacks: The larval creature has two attacks. One is spitting acid at you every time it climbs above the surface and the other is physically ramming into you when slithering above or just as it hits the surface. Stand on the metal grate to avoid being bumped into and be sure to run or strafe away as the Twinfeeler rises to avoid its acid every time. After just six well-placed Shotgun blasts from close range, or up to 10 or more Rifle shots, the Twinfeeler will curl up in a ball and the fight will be over. It doesn't die however and instead smashes through the closed doors on its escape, providing you with an exit as well. Town Center Back Road and Sagan Street Cross over Simmons Street, where there is no south route, and run like hell all the way west, pretending you're not being hounded by Night Flutters, Groaners and who knows what else. Hit the police station on the right side for a breather and more supplies. Nightmare Police Station Crichton and Koontz Street A Short Stay at the Nightmare Hospital Unfortunately Bachman Road is destroyed and prevents access to the lake, but Lisa remembers an abandoned waterworks with underground tunnels near Midwich that might take you to the lake. Despite her pleading for Harry to stay, he's a man on a mission and Lisa doesn't think she should leave the hospital either. Exit back to the streets. Koontz Street Rooftop Boss 3: Floatstinger MothRight at the start you'll be facing the giant menacing moth, so consider getting some breathing room before attacking. You can stay on this open part of the rooftop which lets you move around without much restriction, but you can also run up the nearby stairs to the higher roof and use the water tower as cover. It's quite hard to see the full moth and what it's doing from the lower spot so consider relocating up here for a better picture, but do keep in mind the open space makes quick shooting and running a very viable strategy.
If you'd like a better view and to create more distance, head up the stairs to the water tower and use the Rifle. Same thing here though, keep moving and take 1-2 shots at a time, with the occasional 3-4 shots if you really have the time. Take your shot and run a few feet as you likely dodge an acid spit, fire again and just keep dodging and repeating. Alternatively you can try running for a bit longer to create more space so you can fire more shots, but always be prepared to dodge acid at a moment's notice, and never remain close to its body for long or it'll smack you. Note that the Shotgun still works fairly well from this location but loses its power when the moth is farther away. Floatstinger's attacks: The creature attacks very similarly to how it did in its previous form with another acid-spewing attack and an abdomen-butting attack. Keep your distance to prevent the second attack from ever happening, while the acid is somewhat difficult to avoid but is telegraphed by a distinct sound each time. Once you hear it, strafe or run aside asap and get in your attacks, although it won't always be easy. After landing about 15-20 Rifle or Shotgun shells the creature will fall to the ground and die this time, as sirens sound in the distance. Return to Normal Central Silent Hill To reach the waterworks by the school, you'll need to return to Old Silent Hill. So head north up Crichton and take the bridge west back to the residential area. Return to Old Silent Hill: The Waterworks |
10. Sewers (To Resort Area)"There's an underground tunnel out there used for inspections, or something! I remember hearing it runs all the way to the lake!" First Tunnel At the end of the tunnel you'll hear clicking sounds, marking the presence of two new enemies called Hanged Scratchers approaching from either side of the next narrow path. They move quickly so step back in the tunnel and eliminate them carefully. The Handgun is most suitable for them one on one but the Shotgun will make quick work of them when needed. First Two Intersections Return to the intersection and continue the other way, first along the left side before crossing over on the right. Then head through the gate on the left side of the fence, since the right side is locked. Beyond the First Open Gate: Sewer Office Using the Sewer Key Follow along the right side as you pass the original tunnel, then use the 40 Sewer Key to pass through the fence gate at the south end. Follow the blue grating on the left side and you'll soon meet three Creepers crawling around. When the path diverts in two, you'll find a First Aid Kit on the left side before a dead end. The right path leads to a ladder. Ascend it. Upper Level Sewers East and Southward Tunnels South Tunnel: Finding and Using the Sewer Exit Key Immediately after you'll be ambushed by three Scratchers. Quickly bail and pass back through the gate on the right side, past another Scratcher waiting nearby (consider quickly blasting it with the Shotgun). Taking the left path instead will spell danger as it's a dead end and you'll get cornered. Continue through the next two gates on the left side, while the loud bang should encourage you to keep running. With up to three more Scratchers by the east gate, you can take them on or just quickly run up to the gate and slip through, using the Sewer Exit Key. Now on the safe side, you'll find a Save Point on a barrel next to the exit ladder ahead. Ascend to outside. |
11. Silent Hill Resort Area"This craziness can't go on forever. A military rescue squad should be here any time now." Bachman Road: Finding the Map
Heading to the Lake Under the "F" in SANDFORD St. on your map you can find a collapsed staircase with a Health Drink and Rifle Shells at the bottom. Continue west and cross the Sandford Street bridge to the sound of static. |
12. Nightmare Silent Hill Resort Area"Rather than shifting from reality to a nightmare, this is more like reality becoming a nightmare." Making Your Way to the Pier On the other side of the bridge, stay on the north side of the road to find a little detour farther north where there's Shotgun Shells and a Health Drink after an assortment of barrels. Also mind the Romper and Night Flutter nearby and head west past both large garages on your map. Take a left after the west garage and head south past a Night Flutter. The walkway will narrow as the pier extends southward from the right side. Follow it past two Wormheads and quickly rush down the stairs on the left side. Cross the wooden path onto the boat and enter its interior through the short double doors. Boat Once they both leave, you'll find Handgun Bullets, Rifle Shells, a Health Drink and a Save Point around the cabin. Exit through the double doors. Heading to the Lighthouse Follow over more boards of wood and along the red railing pathway, then cross back over to the pier. Continue past the fence to the right to meet two more Rompers. Stay on the right side and just keep running like hell as the path narrows. If you keep going past the upward stairs you can find a First Aid Kit guarded by two Night Flutters at the south end of the area, while the earlier Rompers may join in on the fun so be ready. Then head up those stairs to the center platform to continue your crazy journey. Take the first left around the corner on the higher path and head down the stairs on the right. Follow the narrow path up another set of narrow stairs where you'll encounter some Wormheads at the top. Just keep hauling ass as you take a right towards the Lighthouse which is now in sight. Enter it up the steps. Lighthouse Heading Back to the Mainland Head back over the platform onto the main path where two Wormheads will want to play. Head north all the way to W. Sandford Street. If you check your map you'll see a red arrow near a pink block on the north side of W. Sandford. Head there to find a fence-enclosed lot with a manhole opening leading below. Watch out for the two Wormheads in the lot and descend the ladder. |
13. Sewers (Connecting to Amusement Park)"Go to the lighthouse on the lake, and to the center of the amusement park. Make haste. You are the only hope." East and South Tunnels Make your way west towards the center tunnel to encounter absolutely terrifying new creatures called Mumblers. I wouldn't blame you for wetting yourself. Either blast them or just run past and you'll find a Health Drink at the west end of the path where it connects to the center tunnel. Center Tunnel West Tunnel Mind the holes in the grating on both sides and you'll soon encounter nearly the entire floor missing with a corpse in the water, but you can slip by on the narrow strip on the right. Soon you'll spot some merry-go-round horses and a ladder at the end of the path. Quickly approach and ascend it to exit the sewers. Note that locating and using the ladder fairly quickly is important since the craziness that is chasing you from behind, including Mumblers and Scratchers, can catch and corner you if you get caught up on either side. Take a deep breather as you exit to the surface. You survived. Well, hopefully you did. |
14. Lakeside Amusement Park"Cheryl is my daughter. I will save her. No matter what." Finding Cybil Starting off, run ahead and follow the path to the right along the ripped grate flooring where there's another pathetic Larval Stalker near the benches, which you may only hear rather than see. When you reach the circle fence for the ride ahead with a Grey Child approaching from the left, take a hard right and follow ahead while passing another ride on the right playing some carnival music. Take a left near that ride and you should approach an ice cream shop, where you'll find a Save Point on the front counter on the other side, also near a Larval Stalker. Consider saving due to an upcoming boss fight. You'll find a ferris wheel to the left while facing the ice cream shop counter, but there's only a Grey Child or two patrolling it. Turn around from the ice cream shop and run straight, while turning a bit to the right, then continue farther right where you may reach another Larval Stalker, as if these things are guiding you. As you continue you may even see one of them guide you up the steps of the nearby merry-go-round. Follow up the steps and through the gate onto the carousel. If you're totally lost here and can't find the merry-go-round, head back to the ice cream shop across from the ferris wheel. Find the garbage can on the side and stand in front of it where the building starts to corner to the front. Follow the thick line on the floor grating all the way forward until the floor ends, then take a right over to the merry-go-round now on your left side. Merry-Go-Round Boss 4: Cybil
To avoid her gunshots is actually a very simple task of strafing in a circle around her and not stopping until she runs out. To get set right from the start, hold R1 on its own to get moving, then quickly begin also holding left on the analog stick to start curving in a circle around Cybil. Once you've got the right arc, hold it and keep running circles around her as she fires her ammo, sometimes 2-3 bullets at a time before resetting. It'll look close but her bullets should just miss you each time. Try to stay clear of all objects like horses, poles or walls, since Harry will bump into and stumble on these things, leaving him open to an attack. Otherwise, you can also hide behind horses whenever she's about to attack, or even run away since her accuracy falls off at far range. You can also go on the offensive right away by firing back, preferably from a farther distance with the Rifle if you wish to have any chance of getting away. But honestly, the first strategy of circling around her is the most effective and will save you a lot of health. Once Cybil fires her 10 shots, she'll drop her gun and take matters into her own hands, although losing her long-range attack makes the fight very trivial as long as you don't let her get close. From this point just use the Rifle from afar to blast her and simply strafe away when she gets close. The Shotgun also works well, at least from a closer distance, and the Handgun can be effective as well but will take a bit longer. Be sure to back up while firing these weapons to keep your distance from Cybil. As long as you have the ammo for it, utilize the Rifle and its long range to fire at Cybil from safety. If you've run out of all ammo, the Hammer is the best melee weapon while the Axe is next best if you don't have it. Just be sure to get on the move after landing an attack or you'll get choked. remember this is your last chance to use the Unknown Liquid to save Cybil if you have it, otherwise keep firing or swinging away until she dies. Cybil's attacks: Cybil's simplest attack in the first part of the fight is a handgun shot, knocking Harry down while pushing your status into deep red. Two shots without healing will kill you (or just one if not close to full health), so always stay on top of your condition. Just circle around her, or stay far away, to avoid all her shots. Cybil's other attack in this phase is a pistol whip from close range, which isn't as deadly but wise to avoid. Once Cybil drops her handgun, she'll try to attack Harry by grabbing him by the neck and strangling him. Wiggle the shoulder and directional buttons to escape this attack more quickly while limiting damage, since it can be very harmful the longer it goes on. She may also try an arm chop although not nearly as frequently as the chokehold. Both are quite damaging so just be sure to heal up. After 26 Rifle Shells or some other combination, Cybil will fall to the ground and your friend will sadly be no more, unless you used the Unknown Liquid to expel her parasite and save her life. If you saved Cybil, the parasite will be expelled from her body and Harry will have a conversation with her about Cheryl. If not, Harry will leave her body and walk away. Either way, Harry soon discovers Alessa nearby and the "Flauros" is used automatically before Dahlia makes an appearance. Then you will shift into the final area of the game. |
15. Nowhere"Even when I change the bandages, the blood and pus just start oozing through! Why... What is keeping that child alive?" Examination Room Proceed through the door straight ahead and move down the unfamiliar walkway to the elevator. Note on navigating Nowhere: Remember that since this place isn't the hospital, you have no map for it and will not find one either. You must instead rely on your sense of direction, spatial awareness and short term memory... in a place that doesn't quite follow geographical logic. But I'll do my best to guide you through this maze. First Corridor You may notice an apparition of Alessa just ahead along with her chuckling on the soundtrack. The room directly across from the elevator is straight from the antique shop, with a Save Point on the counter, a First Aid Kit on a chair and Shotgun Shells on the farther counter. One hand of the clock by the door is a key, but Harry cannot access it as is. Note the square depression below the clock face for later and exit the room. Back in the hall, a couple Nurses have spawned so consider handling them. I'd advise using the Shotgun for the rest of the game if you have the ammo. You may also note a few doors in the hall are locked and marked with certain words, so you'll need to find some keys. All other doors here are locked except the last door on the right at the end of the corridor. Pass through it, down the stairs and into the room below. Classroom and Back Room Using the Pliers "Ophiel" Corridor The Grim Reaper's List ("Ophiel" Corridor)
With the crazy-looking keypad keeping the door locked, you'll need to decipher its code from the two slates in this corridor. Since the near one just contains a list of names without any context, first read the other one down the hall:
All right, so let's return and read the other list to which this one refers:
The first slate directly refers to the second in its first sentence, before then explaining the key to the puzzle in its second paragraph. "The headcount is set Young and old lined up In order of age". So we must rearrange The Grim Reaper's list of five names in order of their posted ages, like so:
If you check the keypad you'll find it has no numbers but only letters, utilizing the full alphabet to boot. So how can we get a code from this? What about the first letter of each name in order of age? Notice anything?
Interesting. Reading the final sentence of the instruction slate, it says "Awaiting them, the frenzied; Uproar, the feast of death!" That sounds like quite the alert, doesn't it?
Turn to the keypad and enter in the code "ALERT" to unlock the door. Pass through the door after unlocking it with the keypad. Looks like an empty storage room so pass through the next doors to a morgue where you'll find the 50 Amulet of Solomon on the back wall. Head back to the previous room to meet a scared Lisa. Enjoy the beautiful scene before Harry leaves back to the Ophiel hallway. After, you can re-enter the storage room and read Lisa's diary on the floor. Back in the Ophiel hall, turn around the corner and enter the second room on the left side, which is the only other unlocked room in the hall. Inside you'll find a bunch of zodiac signs posted along with a series of keypads at the back of the room above a square stone plate. It's time for yet another puzzle. Astrology Puzzle (Astrology Room)
This is probably the most difficult puzzle in the game and requires an open and observational mind to even understand the basis of it, but it ultimately comes down to a very simple concept. Firstly, you'll find two zodiac signs on the left wall and two more on the right, each with a number underneath it. Additionally there are three more zodiac signs with keypads instead of numbers under them on the center pillar at the back of the room. Your task is to find the pattern between the four wall signs and their numbers and apply that same pattern to the signs above the keypads to determine the correct codes. With the keypad buttons resetting for every press, the resulting codes will be just one number. Let's take a look at the symbols on the walls and numbers underneath:
Then there are three symbols on the pillar with keypads:
The use of astrology signs is ultimately a red herring and completely irrelevant to understanding the puzzle, but what do these numbers mean? That mystery is the entire key, so give the symbols each a good look and see if you can gather the correlation to the numbers. The Libra scale may throw you off because it's an inanimate object while all the others are animal forms. But the fact that there's 2 sides to the scale and its number is 2 should begin to clue you in to something. The 0 of Pisces may also be confusing so let's look at Aries and Cancer. Aries is a ram with the number 4 while Cancer is a crab with the number 10. The ram has 4 legs, doesn't it... And the crab? 8 legs plus 2 large arms for 10... And with that we've unlocked the key to the puzzle. The numbers correspond to the number of limbs each sign has. But what about Pisces? Well, it seems a tail doesn't count as a limb, nor do gills or fins, and so Pisces remains 0. You may have your thoughts about it, but that's the logic here. And while the Libra is an inanimate object, it still has 2 arms. With that, let's turn to the three signs on the pillar and apply the same pattern.
Remember the fish tails of Pisces didn't count so the Taurus tail doesn't either. And with that, press 6 on the left Sagittarius keypad, 4 on the center Taurus keypad and 8 on the right Gemini keypad. Upon inputting the correct third key, the stone plate will fall to the floor. With the puzzle completed, grab the 51 Stone of Time on the floor and leave the room. Remembering the clock in the first hallway shop, return there past some newly-spawning Nurses. First Corridor: Using the Stone of Time Take a right in the hall and use the Key of "Hagith" to pass through the double doors at the end, allowing access to the elevator. Ride up to the second floor and pass through the doors into the first hallway up there. Second Floor First Corridor Back in the hall, avoid the Nurse and pass through the double doors to the next hallway. Second Floor Second Corridor Two more Nurses linger down the hall back outside, where you can enter the last room on the left. On the back wall in there you'll find the same screwed-in plate from the hospital, but this time you have a tool to remove it. Use the Screwdriver to reveal a key with electricity flowing through it. Harry can't grab it as is, so you'll need to find a way to de-electrify it and come back later, perhaps by turning off the power. Back in the hall, you can head up the other way and unlock the last door on the right by the corner, which will then transport you to the first hallway on the first floor if you pass through it. Of course it does, this is Nowhere after all. Either way, return to the elevator from the first floor (take a right and through the end double doors) or the second floor (pass through the previous two double doors) and head up to 3F. In case you're curious, there's no button for the basement so we'll have to wait to turn off the power. Third Floor Altar Hall The Light Puzzle (Third Floor)
On either side of the short hall you will find locked doors, each with three sets of very peculiar keypads. As many buttons can be pressed as you choose, so we must first uncover the key to the puzzle. With no hint at how to operate these, let's instead turn to the paintings on either side of the altar which together provide the only clues in solving this puzzle. They each come with different captions although they seem to share a theme:
So what do they have in common? They both have the word "light" in their captions. Do you have anything that you can use here? How about the Camera with its description, "Camera with flash"? Use it in front of each painting for its flash to expose hidden shapes within them like so:
So now what? Well, let's take a look at those weird keypads again. Notice anything? The three shapes line up in the same way as the three keypads on each door, don't they? The idea of this puzzle is to input the three shapes from the painting on each side into the keypads on the same side door. To do that, push the keypads like so:
As you can see we've drawn the same shapes from the paintings into the corresponding keypads. Each door will unlock once you push the correct buttons as shown above. With both doors now unlocked, the room on the left contains the 56 Bird Cage Key on a chair. Inside the right room is a Health Drink on the counter beside a red botany book about an herb called White Claudia, which can only be read if you checked the chalkboard in the Police Station. On the back desk may also be a newspaper article about a fire highly relevant to the story, but it only appears in the PAL and Japanese versions and only sometimes. Return to the elevator and head to the first floor. First Floor: Using the Bird Cage Key "Phaleg" Corridor Enter the first room on your right to find a suspicious-looking fridge that's been re-positioned at the center of the room and also has the 58 Dagger of Melchior stabbed into it. While taking it, Harry will also notice a broken chain link below, which may have been why the dagger was stabbed into it... This is all very suspicious so think carefully before leaving.
Back in the hall, another Stalker may appear so act accordingly. The next door on the right down the hall leads to a storage room where you'll find Handgun Bullets, a Health Drink and a bag of jellybeans of all things. Open the bag for Harry to carelessly tear it and send jellybeans flying everywhere. Good job, buddy... Guess there's no jellybeans left for Harry. Check the floor afterwards and pick up the 59 Key of "Bethor" that was in the bag. Pass through the other door, and I don't blame you if you're still laughing at that jellybean incident. In here is a familiar hospital room with a TV and VCR. Insert the Video Tape you got all the way back in the actual hospital, if you did. If you went back and viewed it in the hospital it was very staticky and hard to understand, but now you can listen to the entire recording without issue. Leave both rooms back to the hall when done. Enter the room directly ahead to hear a girl crying and see another apparition of Alessa in a graffiti-filled room. Grab the 60 Ankh on the wall and leave the room. With the right end door locked and marked "Aratron", the last door at the left end of the hallway leads to a child's bedroom with another locked door that has five depressions for items to be inserted, some of which you have. But you're still missing one of them so leave it for now. Head back down the hall and use the Key of "Bethor" to pass through the marked door on the right side. In the familiar Generator Room, turn off the generator. Remember that electrified key on the second floor? Now we can go back and get it. Retrieving and Using the Electrified Key So use that door to warp to the 2F second hall and enter the last room on the left. Grab the no longer electrified 61 Key of "Aratron" at the back (unscrew the plate with the Screwdriver if you haven't yet). Exit the room to meet more Stalkers on each side. Plow through them and return through the warp door to 1F in the corner. With more Stalkers here, turn left and pass through the Phaleg door in front of you. Use the Key of "Aratron" to pass through the right end door into a familiar hospital room where a cutscene will take place. After, take the 62 Disk of Ouroboros on the life support machine panel by Alessa's photo. Now leave the room and pass through the door directly ahead into Alessa's bedroom. Alessa's Bedroom If you're missing any of these, read back in the walkthrough to find its location. Do not forget to save your game before leaving this room. Pass through the now unlocked door when ready. Beyond The Five Rites Door: Unveiling Thy Fate A long cutscene will play in the open arena below, differing depending on your actions regarding Cybil in the amusement park and whether you completed the optional quest involving Kaufmann in the resort area. After, it'll be time to fight the final boss, which again will take on a specific form depending on whether you completed the optional quest in the resort area that ends with the discovery of a relevant item that reappears in this scene if found. Either way, prepare to fight the final boss, which is no pushover. Boss 5: Incubus / IncubatorIf you and Kaufmann found the vial in the resort area, he'll make an entrance to alter things here, making you fight the Incubus which is the more menacing demon creature with wings. If you did not complete that optional quest, you'll instead fight the Incubator, which appears as a strikingly bright and holy-looking young girl as the combination of Alessa and Cheryl, but no less evil than the Incubus. Refer to the strategies below for each form, noting you will only see one or the other, not both. Incubus (Good & Good+ Endings)
To start things off, equip the Hunting Rifle and unload 5-6 shots into the Incubus, then prepare to run around the arena to avoid its red lightning strikes. For best success, try running in an aggressive circle until the lightning stops striking and then start shooting again and repeat. If you're ever hit by a lightning strike, immediately enter your inventory and heal to full health, since you may die if you just stand there and let the lightning keep striking you, as it will do for another few seconds unless you luckily only caught the last strike. Once you heal upon the initial strike, you will not take any more damage despite being continuously hit by the lightning. So don't mess around and always heal immediately to avoid any risk of death, as long as you have the health needed. When firing, never take more than six shots in a row since Harry will be forced to reload in-game. Instead, lower and re-raise your weapon to automatically reload, or just run around and reset after the incoming lightning strikes. You may only be able to get 4-5 shots off safely before the lightning comes if you're a little late to start shooting during the window. On Hard especially, the lightning becomes insanely ridiculous to avoid. I'm serious, it seems to be 50/50 at best whether you can avoid it even through the best aggressive circle-running strategy, so it can be insanely frustrating to avoid damage here, or to beat it at all if your health is limited. But if you have enough health supplies you can more or less tank all the hits and just focus on shooting it enough to drop it. If you ever run out of ammo, switch to the Shotgun or the Handgun to finish it off, knowing it may take a while longer but it's all you've got. Incubus' attacks: The one and only attack during this fight is a series of lightning strikes which inflict insane amounts of damage and can kill you if hit for more than a second or two consecutively without healing. Always heal to full health immediately upon being stricken to make sure you don't die, and note that despite continuous strikes immediately upon healing you will not take any more damage. Also try not to get too frustrated from being hit since it can be rather difficult to avoid it. Just try to hang in there and fire back after taking any damage, while managing your health. Note that the lightning attacks are telegraphed by red static electricity appearing near the creature before the strikes are about to come, so get moving if you want any chance of avoiding them. Always run in an aggressive circle for the best chance at doing so. After firing 24-26 Rifle Shots at the Incubus on Normal and Hard, it'll drop dead and the fight will be over. Incubator (Bad and Bad+ Endings)
To start things off, unload 5-6 Rifle shots to empty the Rifle and then prepare to run in a circle around it as it fires blue lightning at you. It can be very difficult to avoid, and nearly impossible sometimes on Hard, so if it does hit you, immediately enter your inventory and heal to full health. Once you return to the game after healing, the lightning will continue to strike you but will deal no more damage since you already healed during the attack. Use this trick to your advantage throughout. Continue the same strategy of firing 5-6 shots each time, while using L2 to focus the camera on the Incubator. Always start running in an aggressive circle around her to avoid her incoming lightning attacks, and remember to immediately heal if hit to avoid dying, which can happen if you don't heal and continuously take damage for a second or two, or if you don't heal up enough and die on the first strike of the next series of strikes. Just as well you can just stand there and eat all her lightning attacks while healing in the inventory when needed and otherwise firing back constantly. As long as you have enough health to last a few hits then you'll be fine and you can avoid running around the arena. If you ever run out of Rifle ammo, pull out the Shotgun or the Handgun to finish things off and just hang in there. Incubator's attacks: The Incubator uses the same lightning attacks as the Incubus except they are blue instead of red. They are just as lethal and capable of killing Harry when consecutively struck. However just as with the Incubus, as long as you heal to full health immediately upon being struck, you will not take any more damage as the current lightning attacks continue to strike you. Additionally, the Incubator has a forcefield around her which will throw Harry down if he gets too close to her. Simply stay far enough away on her perimeter while running around to avoid this attack entirely. The Incubator will drop dead after about 20 Rifle shots Normal and Hard. The End Note that there are still four more endings to receive on subsequent playthroughs, plus a bunch of unlockable weapons and items to find. After completing the game your first time you will unlock Next Fear upon saving your file. What this does is up the difficulty to the next level for your next run where you can acquire said extra weapons, items and remaining endings. For more information, refer to both the Endings and the Unlockables and Secrets sections. Additionally, check out the 10-Star Ranking Guide section to learn more about how to increase your ranking stats revealed at the very end, including advice for attaining the highest possible ranking, which while quite the challenge is achievable with enough practice. While completing successive runs, consider using the following speed walkthrough as a quick reference for the bare essentials to get you through the game most efficiently. |
||||||||
by Andrew Haffenden aka Conquerer (Silent Hill FAQ/Walktrough) |