Nightmare Hospital
00. Arrival
01. Old Silent Hill
02. Midwich Elementary School
03. Nightmare School
04. Old Silent Hill Part 2
05. Central Silent Hill
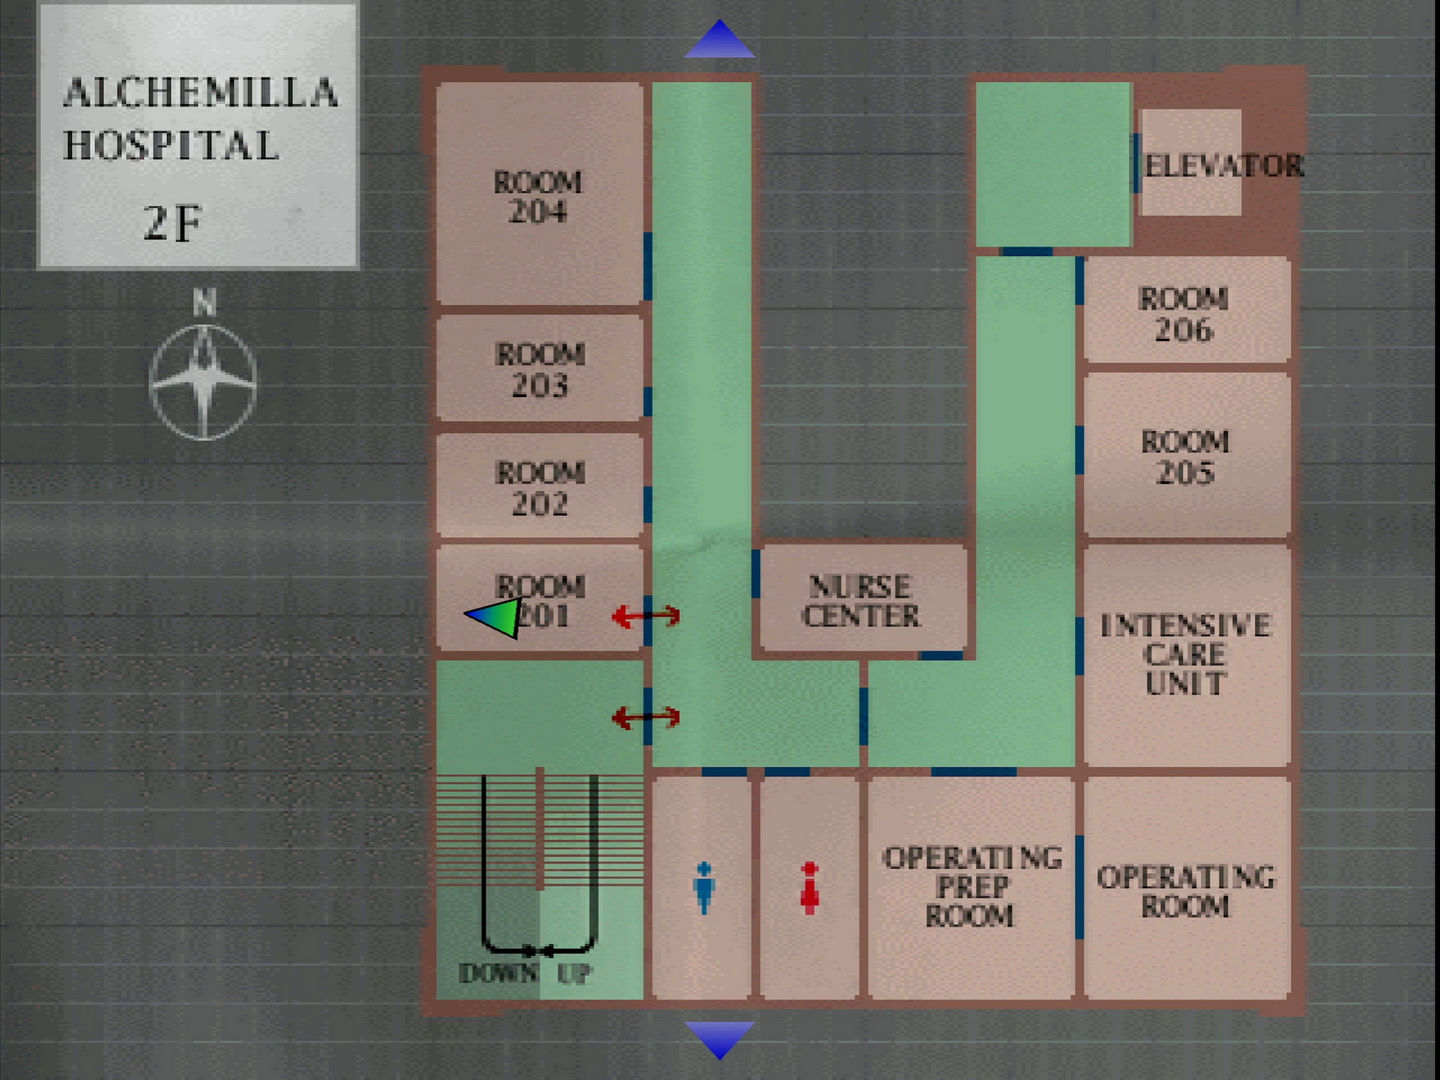
06. Alchemilla Hospital
07. Nightmare Hospital
08. Central Silent Hill Part 2
09. Nightmare Central Silent Hill
10. Sewers (Connecting to Resort Area)
11. Silent Hill Resort Area
12. Nightmare Silent Hill Resort Area
13. Sewers (Connecting to Amusement Park)
14. Lakeside Amusement Park
15. Nowhere
Welcome to the seventh chapter of the complete walkthrough guide for the original Silent Hill (1999), covering Otherworld Alchemilla Hospital. This guide provides a comprehensive walkthrough with all item locations, detailed puzzle solutions and boss strategies.
Color legend
Flashlight - items
Handgun - weapons
Health Drink - supplies
Residential Area Map - maps and notes
Save Point - save points
Contents
Walkthrough
"I just don't get it. It's like this is all some kind of bad dream."
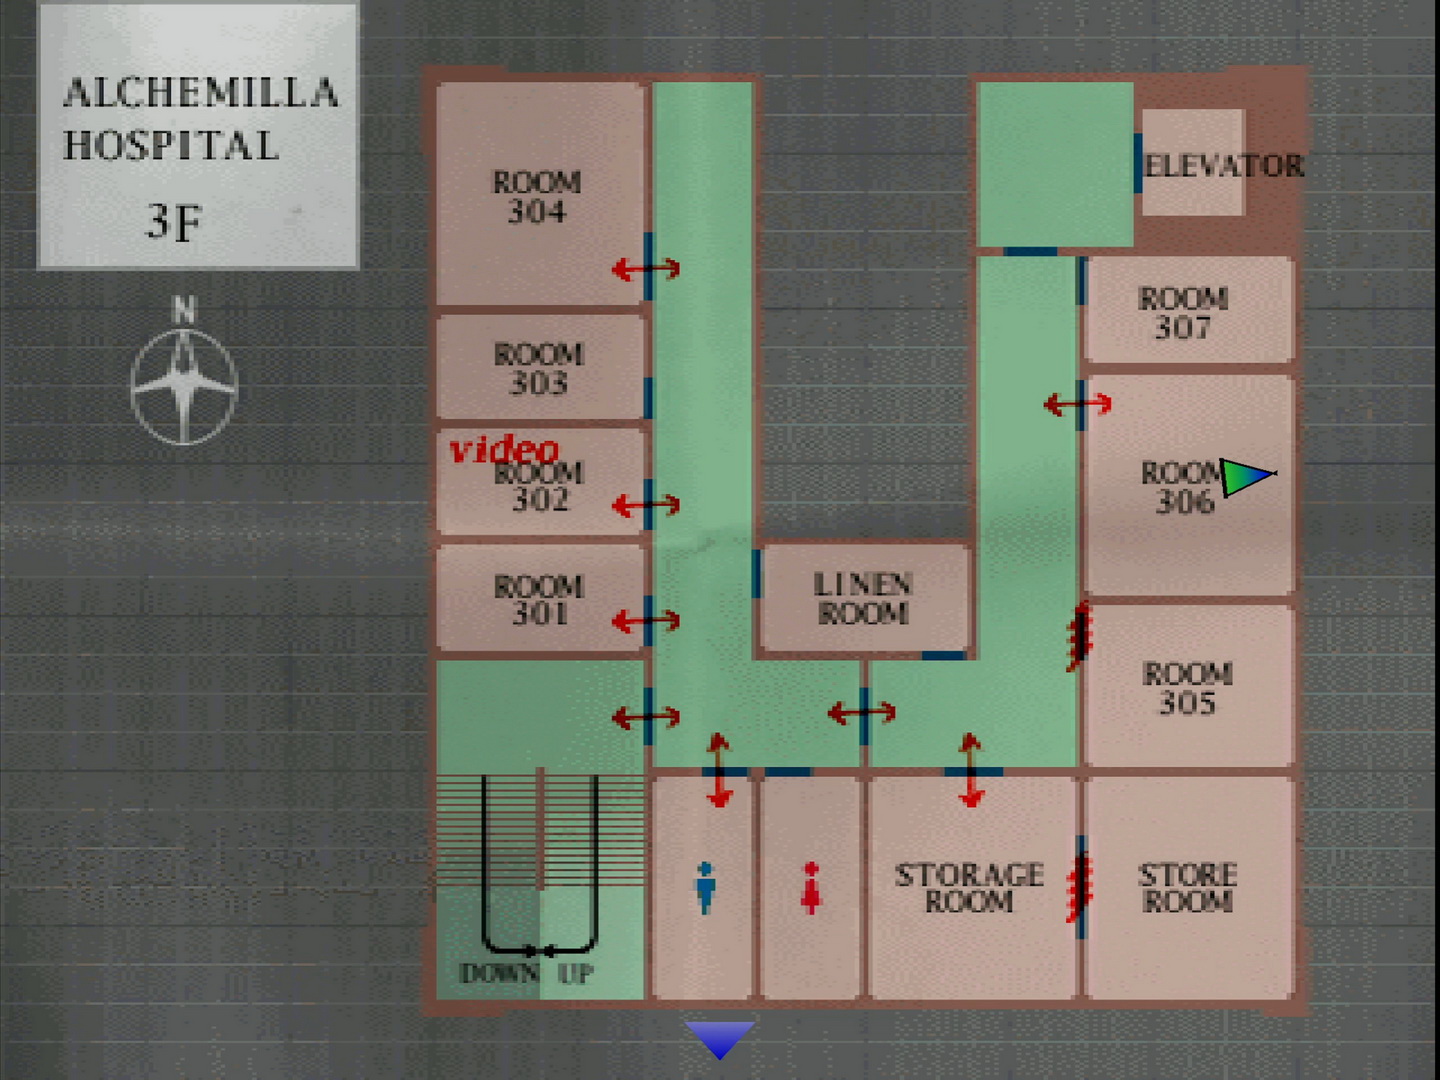
Fourth Floor
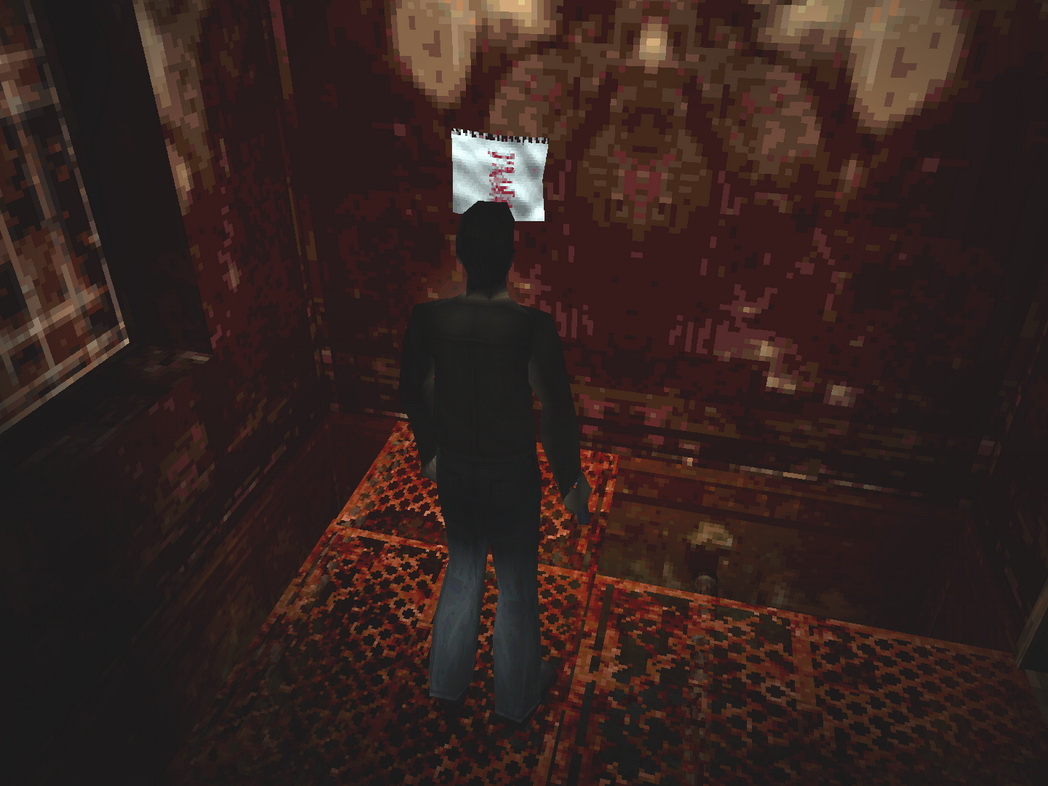
After a brief vision of someone walking into a shop somewhere, Harry finds himself in the rotted-looking supposed fourth floor of the hospital. Since this floor doesn't technically exist you do not have a map for it.
Proceed through the doors only for them to lock behind you in the next hallway. With all the side doors jammed, continue through the next door to more of the same only in a darker hallway with a stairway at the end. Descend it and enter the third floor through the double doors.
Third Floor West Wing
Here you will be greeted by a new enemy called a Puppet Nurse, with many more to come in the hospital. Use the Handgun to drop them with about six shots on Normal, while the Shotgun is better for the occasional quick kill if surrounded. Note that if you try to return to floor 4 now you'll just find a wall there...
Now back to having a map, inside the Men's room you'll find the 26 Plate of "Turtle" on the window sill.
 |
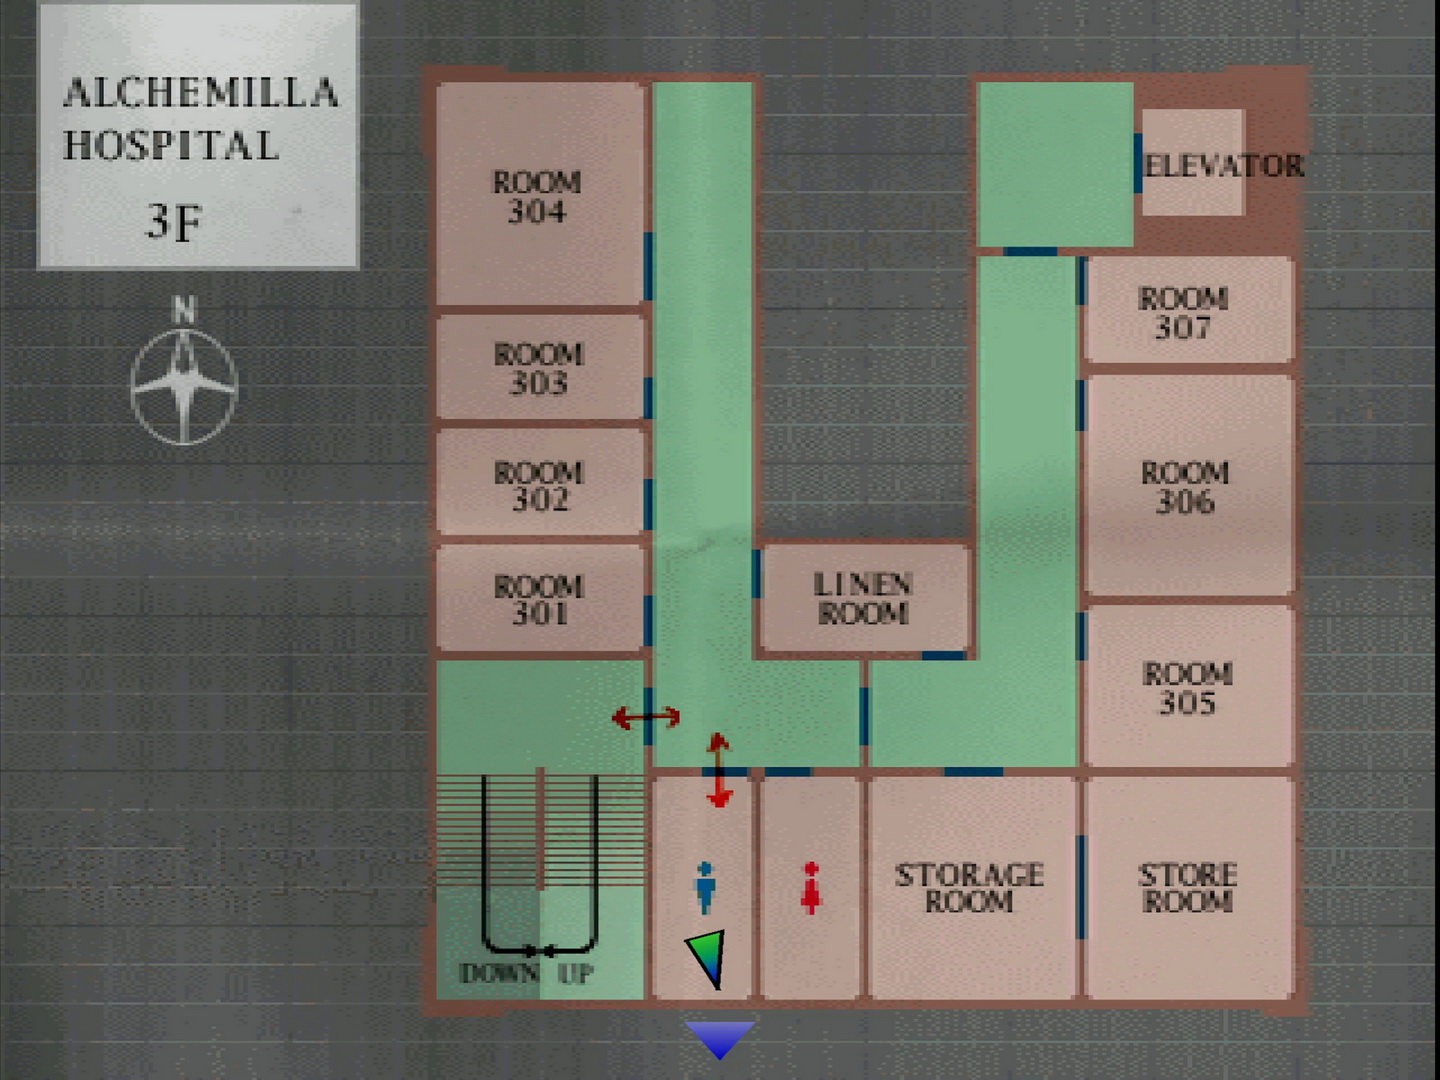 |
Room 301 only contains an empty birdcage, so enter 302 to find a Save Point and Shotgun Shells along with an old but usable TV with a VCR. Remember it for later.
 |
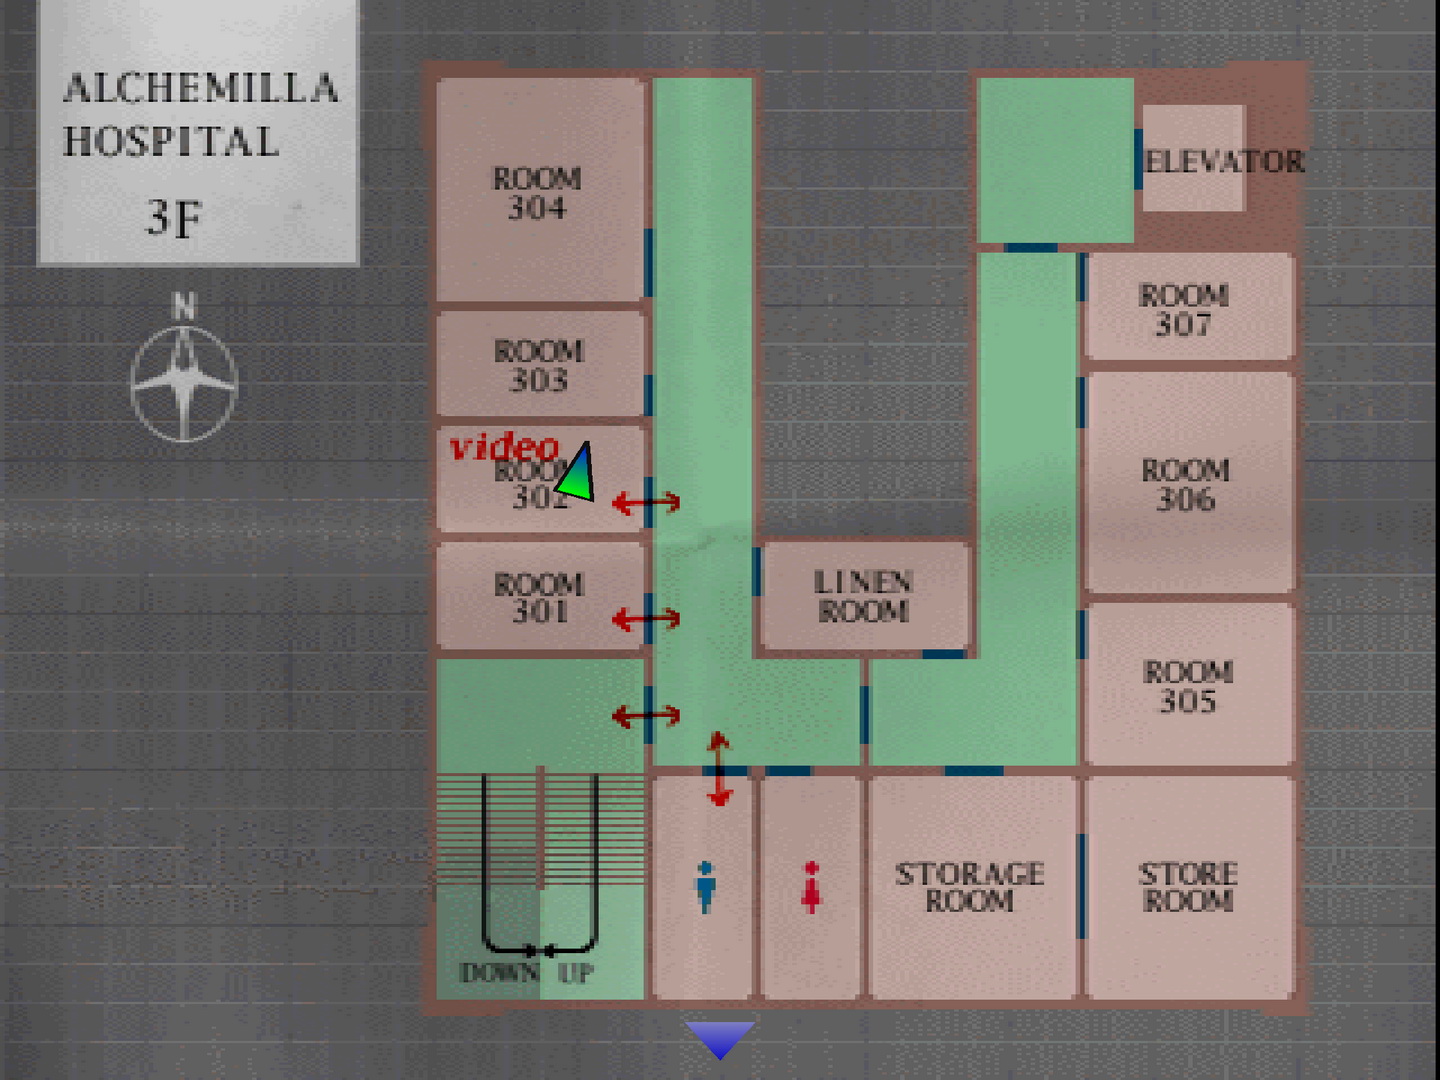 |
In room 304 is another Nurse, plus a Health Drink on a gurney and a steel plate screwed to the back wall. Note that you'll find a few things in the hospital that you won't quite be able to do anything with, like this plate and the birdcage, but it'll all make sense much later in the game.
The Linen Room only contains dryers which are "useless now" to Harry who hasn't wet his pants just yet. Pass through either the Linen Room or the south double doors to the east corridor.
Third Floor East Wing
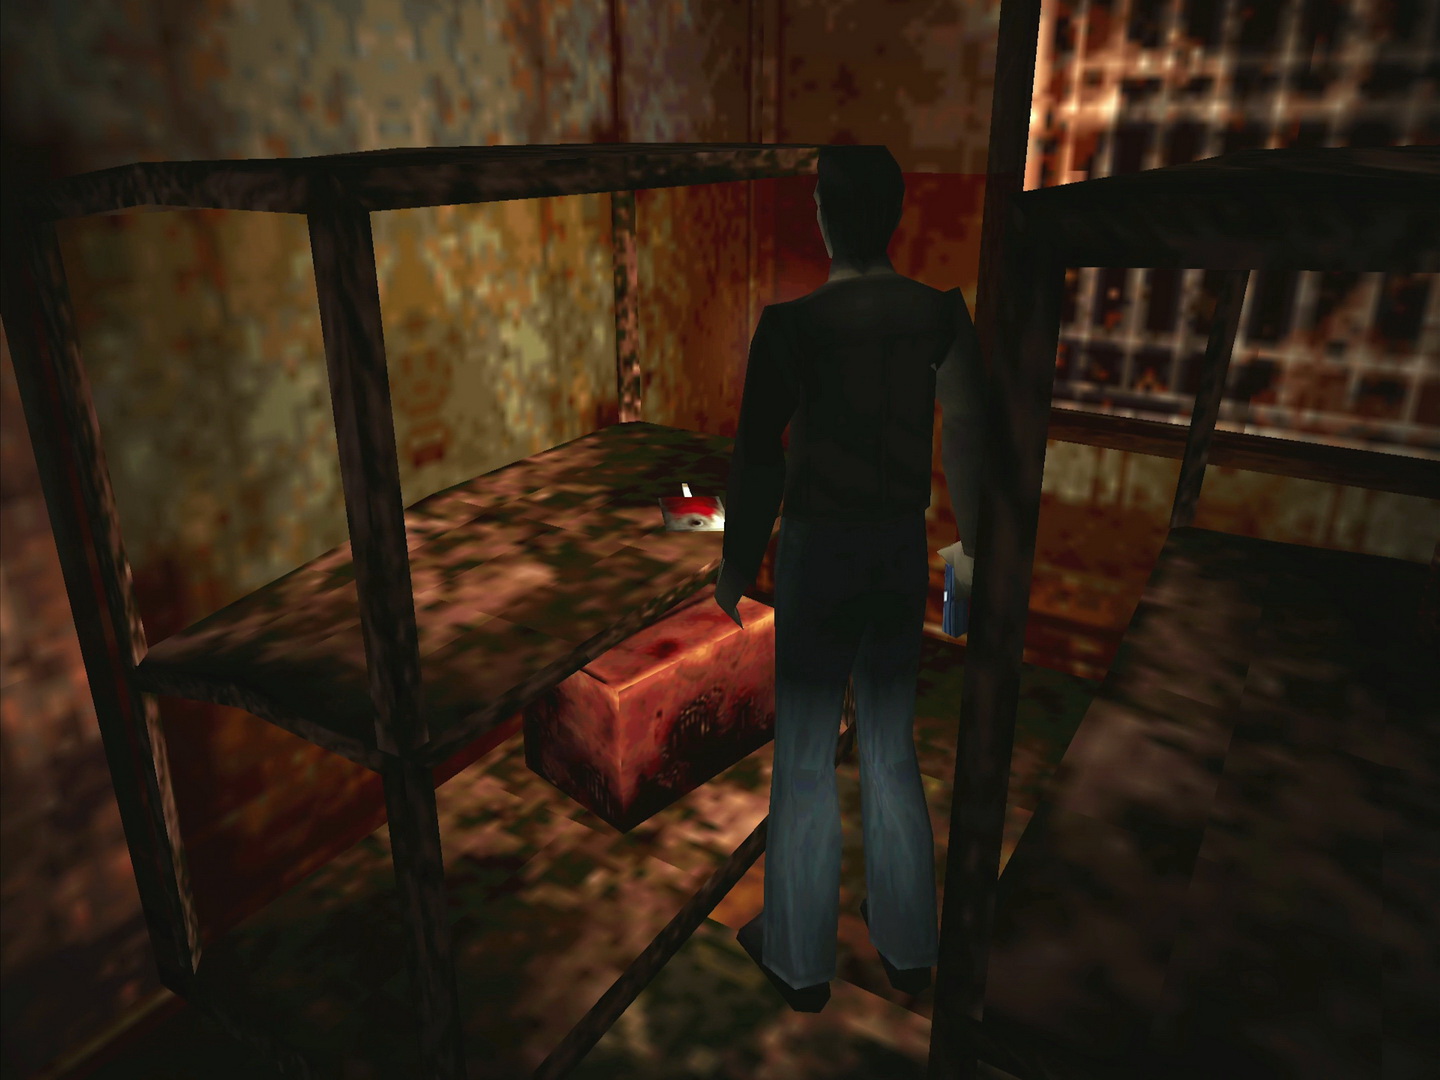
Watch out for a couple more Nurses, then enter the Storage Room to find Handgun Bullets, a First Aid Kit, and a 27 Blood Pack of all things, on various shelves.
 |
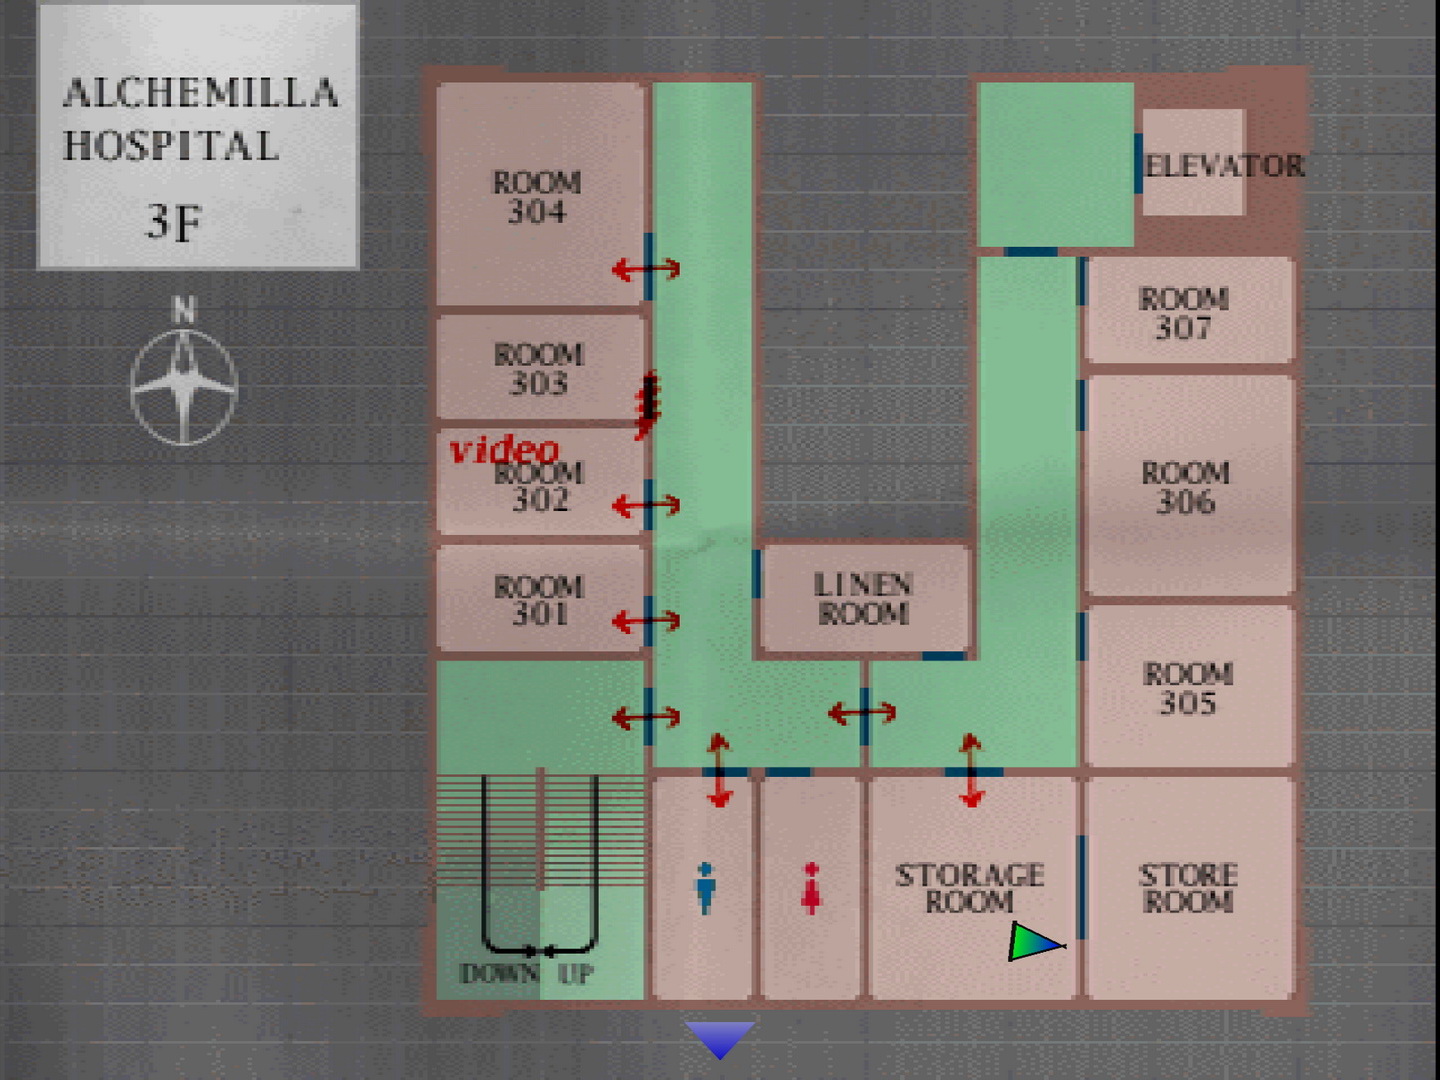 |
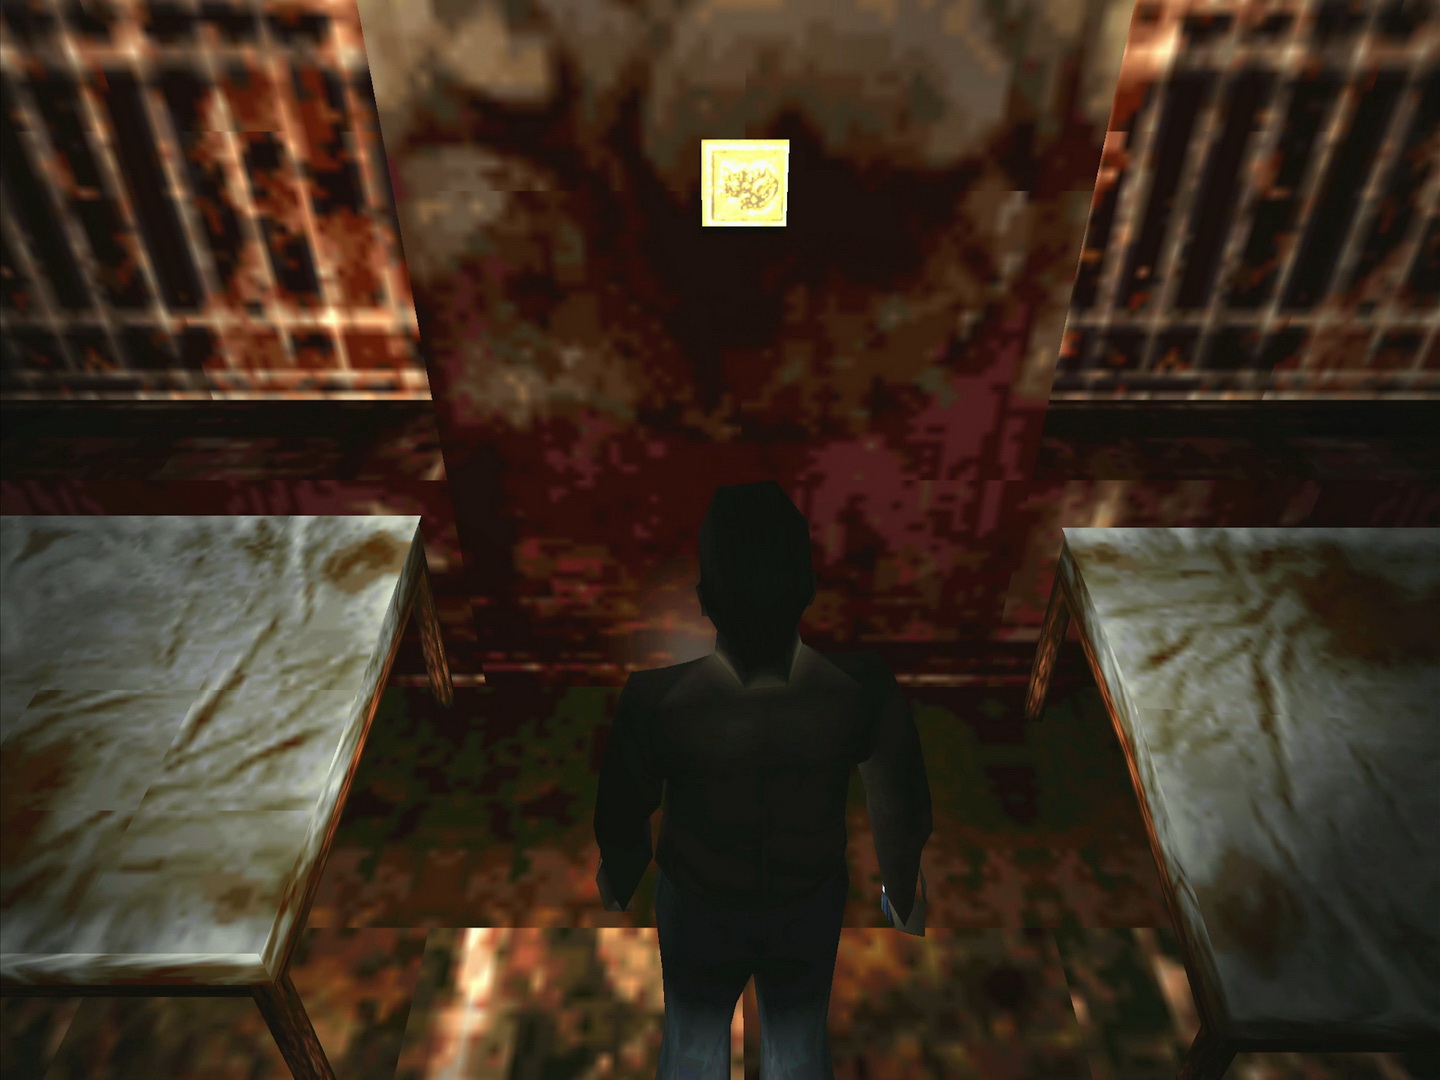
Enter room 306 and grab the 28 Plate of "Cat" on the far wall to finish off business on this floor.
 |
 |
With access to the elevator after unlocking the north doors, the second floor foyer doors are locked but the first floor is all open to explore. Alternatively you can return to the stairs to explore the west 2F wing first, but we'll need something on 1F before advancing through there anyway.
First Floor East Wing
Just out of the elevator, check the broken vending machines for three Health Drinks! Down the hall you'll be greeted by an unhappy Puppet Doctor, slightly stronger than its Nurse counterpart.
Skip the basement for now since you'll run into a locked Storeroom down there. Inside the Director's Office you'll find the 29 Plate of "Queen" on the table after almost pissing your pants, plus a Save Point by the far wall.
 |
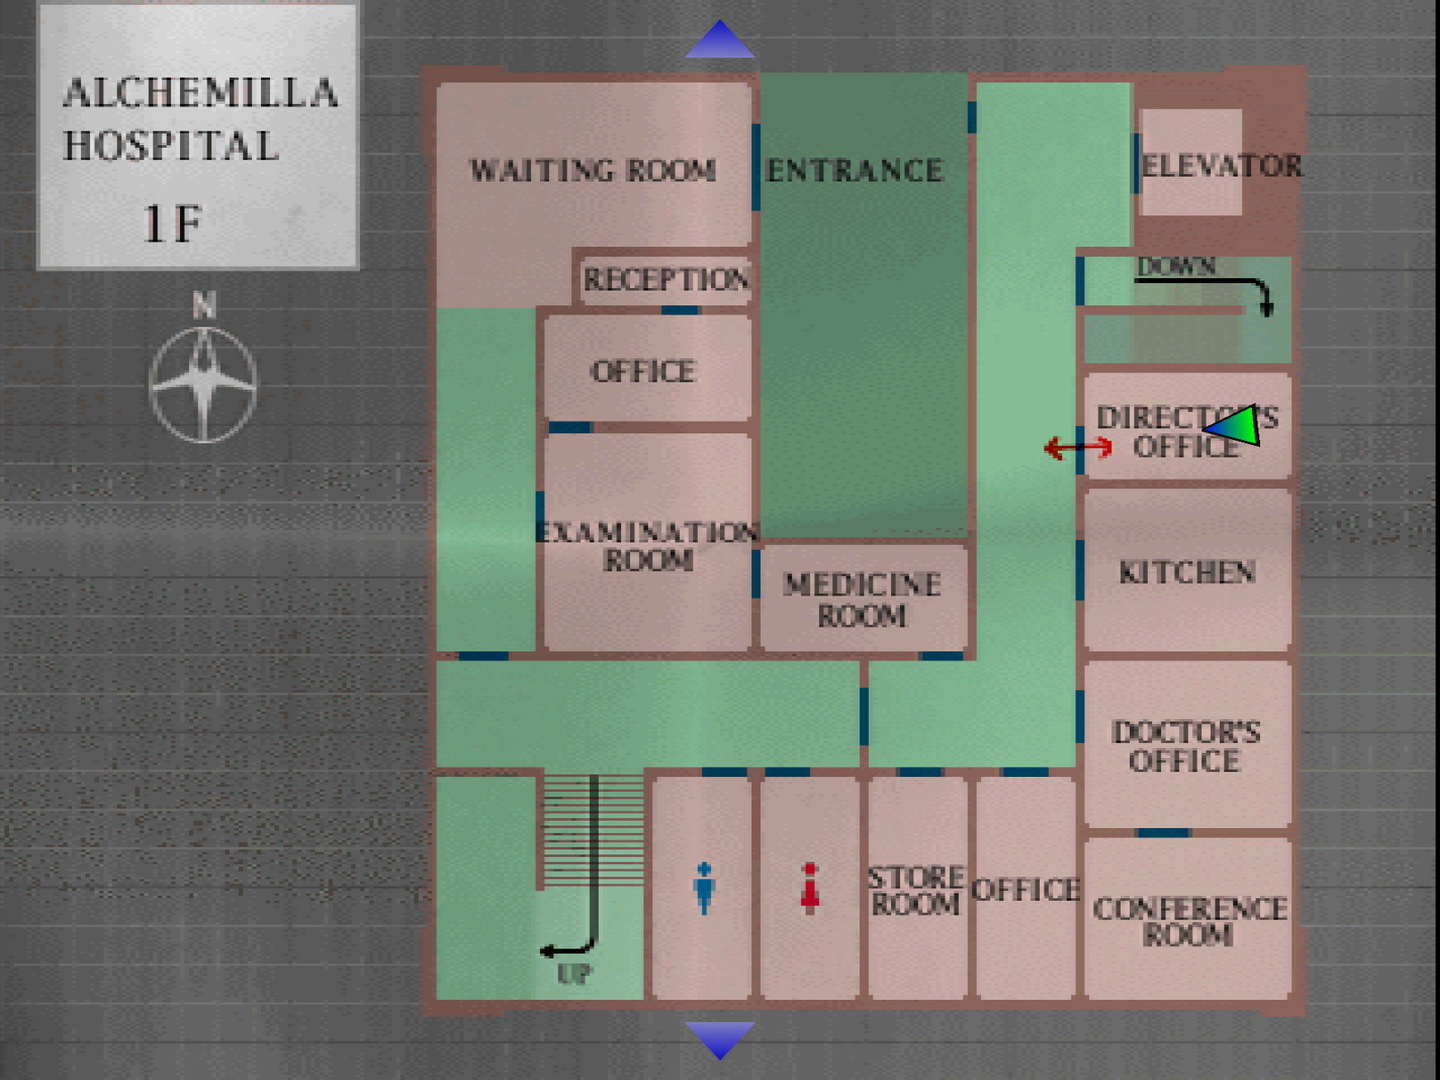 |
A Doctor guards a Health Drink inside the Kitchen, while another Doctor awaits around the corner down the hall.
Inside the Office on the south side are Handgun Bullets on the table, while another Doctor awaits in the Medicine Room in front of the locked door to the Examination Room, despite hearing some noise through the door. With that, proceed through the double doors to the west wing.
First Floor West Wing
Here you'll meet another Puppet Doctor by the stairs. With none of the doors opening, you've now cleared this floor, so head up the stairs and enter the 2F west wing.
Second Floor West Wing
Mind the Nurse and enter room 201 where you'll find a brass Zippo 30 Lighter on the table guarded by another Nurse.
 |
 |
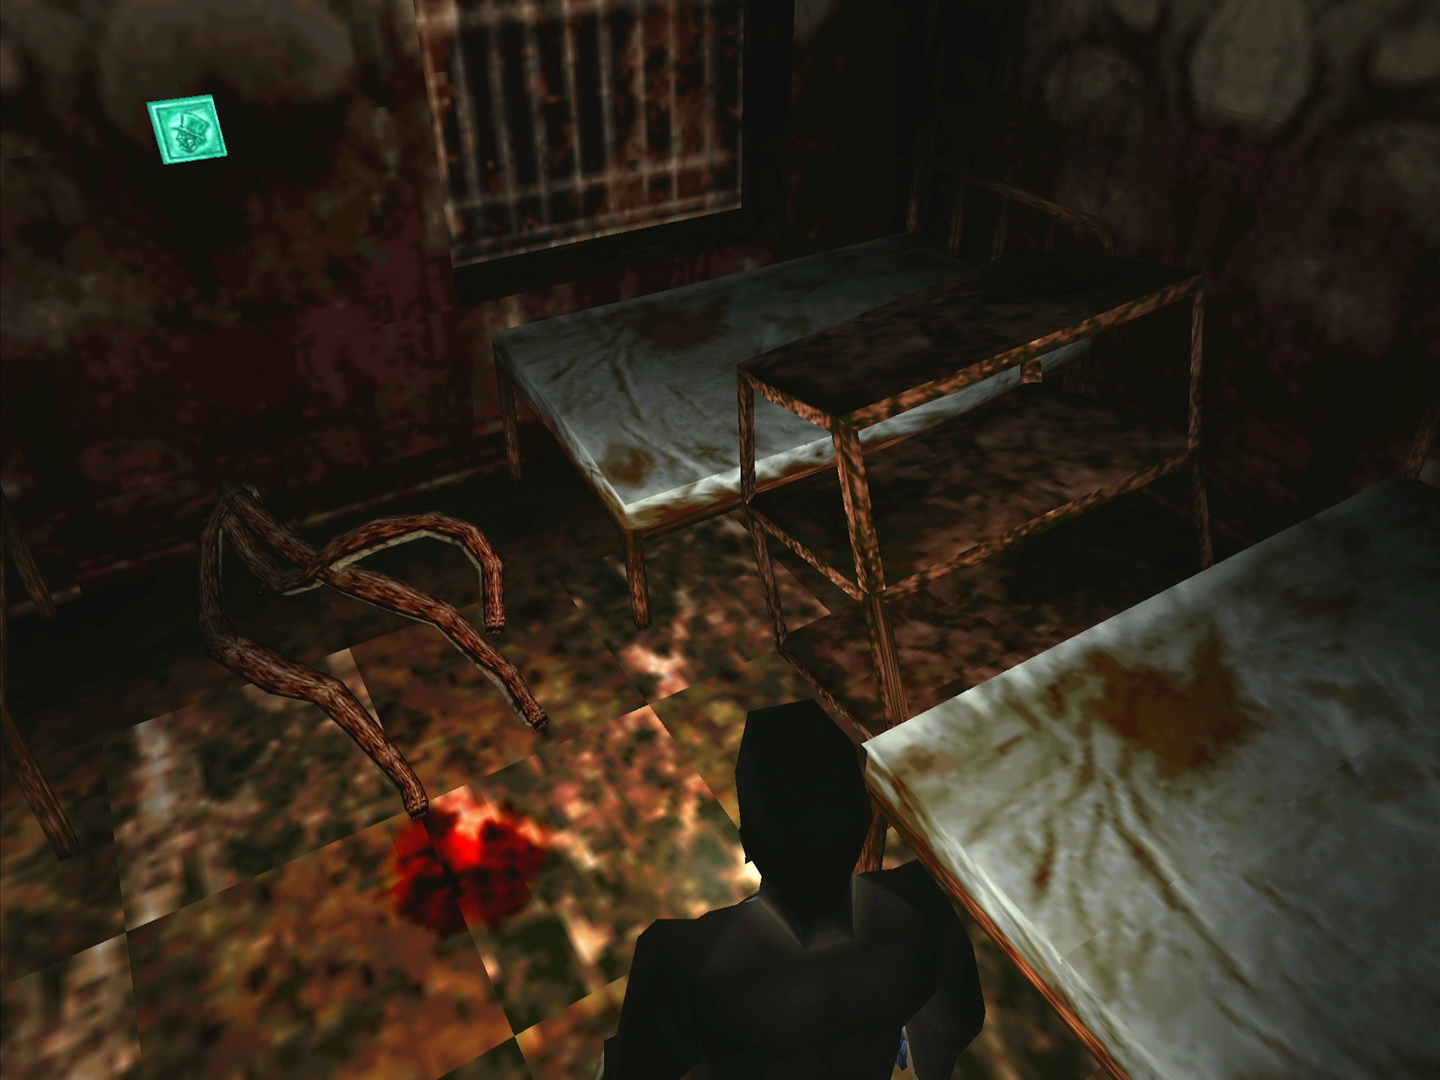
Leave and head north up the hall where there's one more Nurse, and enter room 204 at the left end. Hearing radio static, there aren't any Nurses in here but instead some monster tentacles coming out of the back wall, below another plate above it. If you try to grab it, the tentacles will grab Harry and suck his blood, so you'll have to find a way to distract them. You'll notice a small pool of blood already has their attention, so how about giving them a feast instead?
To do that, open your inventory and use the Blood Pack. Brilliant foresight to pick that up, Harry! He'll drop it to the left to get their attention, leaving you with an open line to grab the 31 Plate of "Hatter" on the wall. Pat yourself on the back and leave the room.
 |
 |
The doors to the east wing won't open and there's a slate on the wall there with a list of names, plus a blank slate at the north end of the corridor but neither are relevant at the moment.
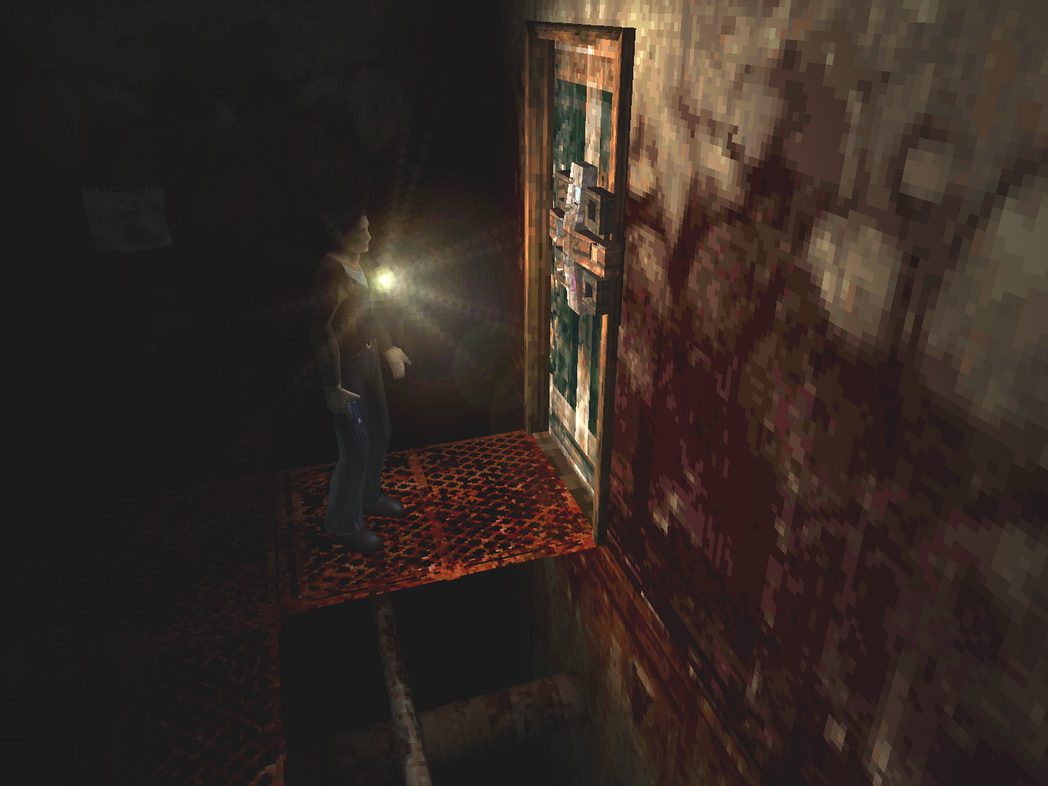
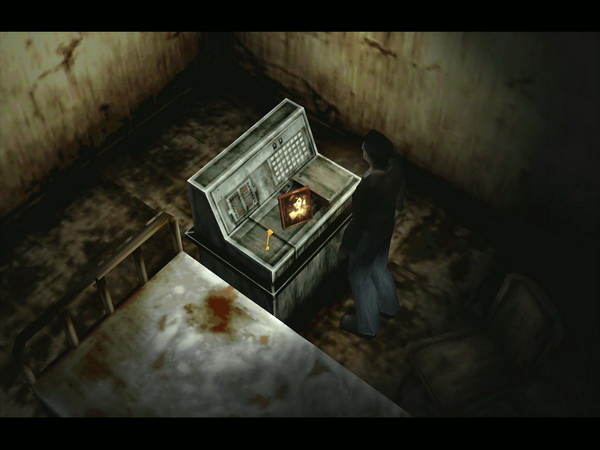
Enter the Nurse Center where you'll come across a strange locked door and a riddle posted on the wall. By now you should have all four plates to solve this puzzle.
Plate Puzzle (Nurse Center)
|
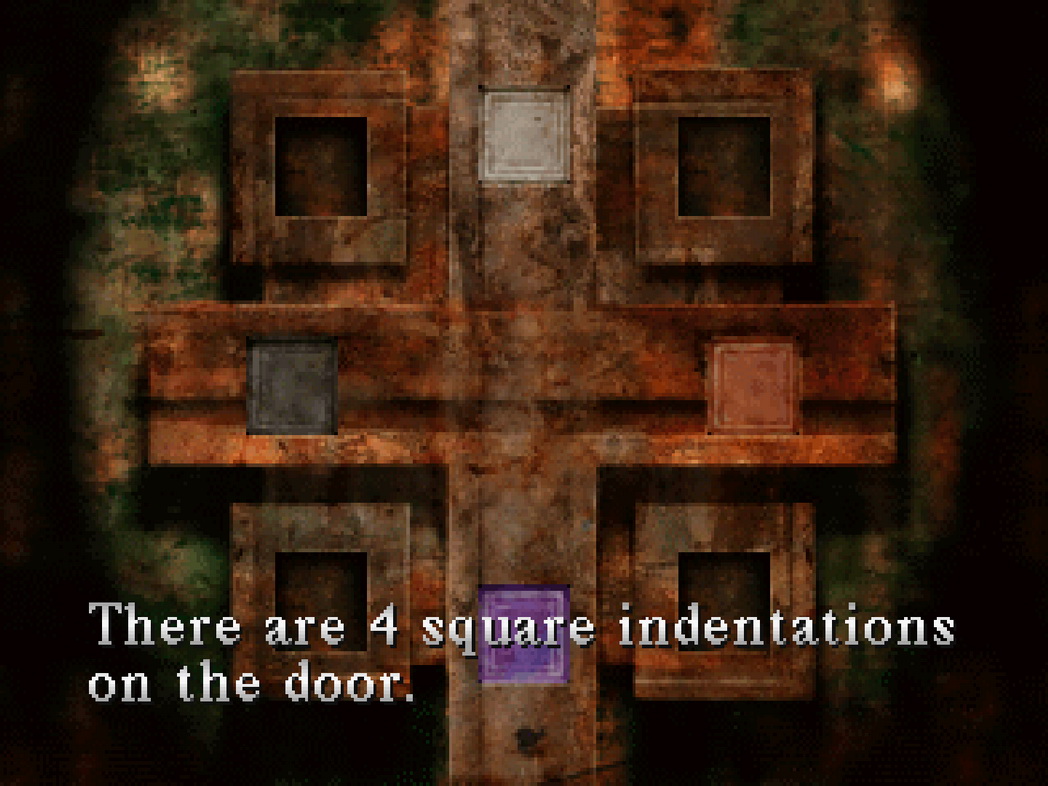
The other door in the room is locked, containing four square depressions along with four other coloured squares. You must insert your four plates into the empty slots to unlock it, but first you must decipher the riddle on the wall to determine the order:
Clouds flowing over a hill.
Sky on a sunny day.
Tangerines that are bitter.
Lucky four-leaf-clover.
Violets in the garden.
Dandelions along a path.
Unavoidable sleeping time.
Liquid flowing from a slashed wrist.
With four colours or shades already shown on the door plus the four coloured plates you have, it should be rather clear that each sentence here describes a colour. Therefore it's simply a matter of deciphering which sentence describes which colour, at least to start things off.
"Clouds flowing over a hill." Despite possibly appearing as grey before or during rain, the natural colour of a cloud is white, flowing over a hill or not. You'll notice the plate at the top of the door is white, so that appears to be the starting point and doesn't refer to one of the plates you hold.
"Sky on a sunny day" may possibly make you think of yellow or orange, which may be somewhat true during morning sunrise or evening sunset, but on a sunny day it will always appear clear blue. With no blue on the door yet, it does match the colour of the "Turtle" plate. But where does it go? Let's keep reading.
"Tangerines that are bitter." Well, tangerines are orange regardless of being bitter or not. With no orange plate, the right square on the door is orange, indicating that we must be moving in a clockwise fashion starting from the white at the top with the blue "Turtle" plate between them. Let's keep going.
"Lucky four-leaf-clover" clearly refers to a clover which is green in colour, lucky or unlucky, four-leaf or three-leaf. There's no green on the door so it looks like our green "Hatter" plate goes in the bottom right slot if we continue clockwise.
"Violets in the garden" would be... violet, matching the square already at the bottom of the door. If you're not familiar with violet, while it's actually a separate colour from purple (with more blue than red), they're both in the same ballpark of colour. But it hardly matters here.
"Dandelions along a path" refers to yellow, the main colour of a dandelion on any path. While their stems are green and their flowers do eventually close and in grow white fluffs instead, dandelions are more known by their initial yellow, which matches with the Cat plate, putting it in the bottom left slot.
"Unavoidable sleeping time" finally provides us with a tricky one, so let's think about it. What colour would best represent sleep? Close your eyes and tell me what you see. It's black, or at least darkness, which is effectively what we see while sleeping. You can argue semantics whether we're seeing anything at all, but it's the colour that most identifies with sleeping and matches with the black square already at the left of the door.
"Liquid flowing from a slashed wrist" finishes the riddle off, clearly referring to red blood, which is what would flow from a slashed wrist. This matches up with the final remaining plate of "Queen", which may actually look a little pink instead but it's close enough.
And with that we're left with the following colours for each slot, including the plates already in the door:
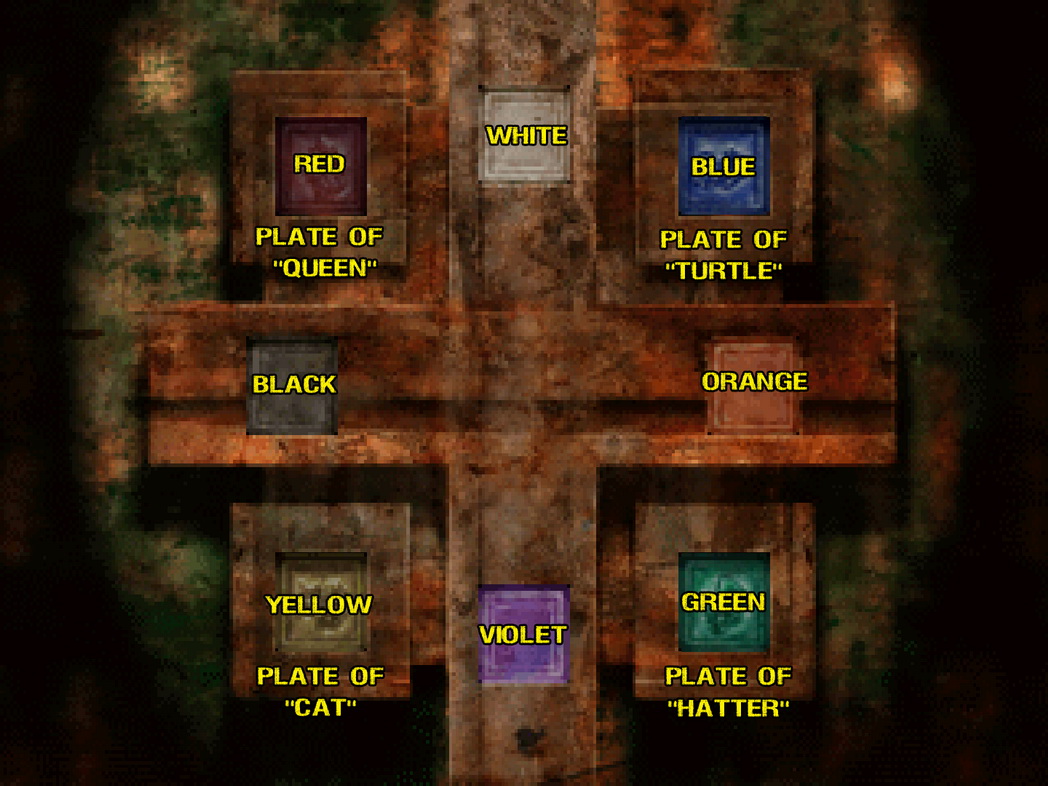
Colors going clockwise starting from white at the top are:
- White
- Blue (Plate of "Turtle")
- Orange
- Green (Plate of "Hatter")
- Violet
- Yellow (Plate of "Cat")
- Black
- Red (Plate of "Queen")
So to solve the puzzle, place the Plate of "Turtle" in the top right slot, the Plate of "Hatter" in the bottom right slot, the Plate of "Cat" in the bottom left slot and the Plate of "Queen" in the top left slot. Once all plates have been correctly placed, the door will unlock.
Pass through the now unlocked door to the east wing.
Second Floor East Wing
With a Nurse right beside you and another two in the corridor, enter the Operating Prep Room just ahead, where you'll stand on an outer walkway with two Nurses that wish to treat you with some wounds. Handle them and head through the other door to the Operating Room to meet the Nurse who looks in charge here. Luckily she ain't no Nurse Ratched, so pop her and take the 32 Basement Storeroom Key on the table and exit to the hall.
 |
 |
Enter the Intensive Care Unit and grab the 33 Disinfecting Alcohol on the table. There's a Nurse behind the table, but it's easy enough to grab it and leave without facing her.
 |
 |
To finish off the floor you can find a First Aid Kit in room 206. Then unlock and proceed through the double doors at the end of the hall to access the elevator and decend to the basement with your new key.
Basement
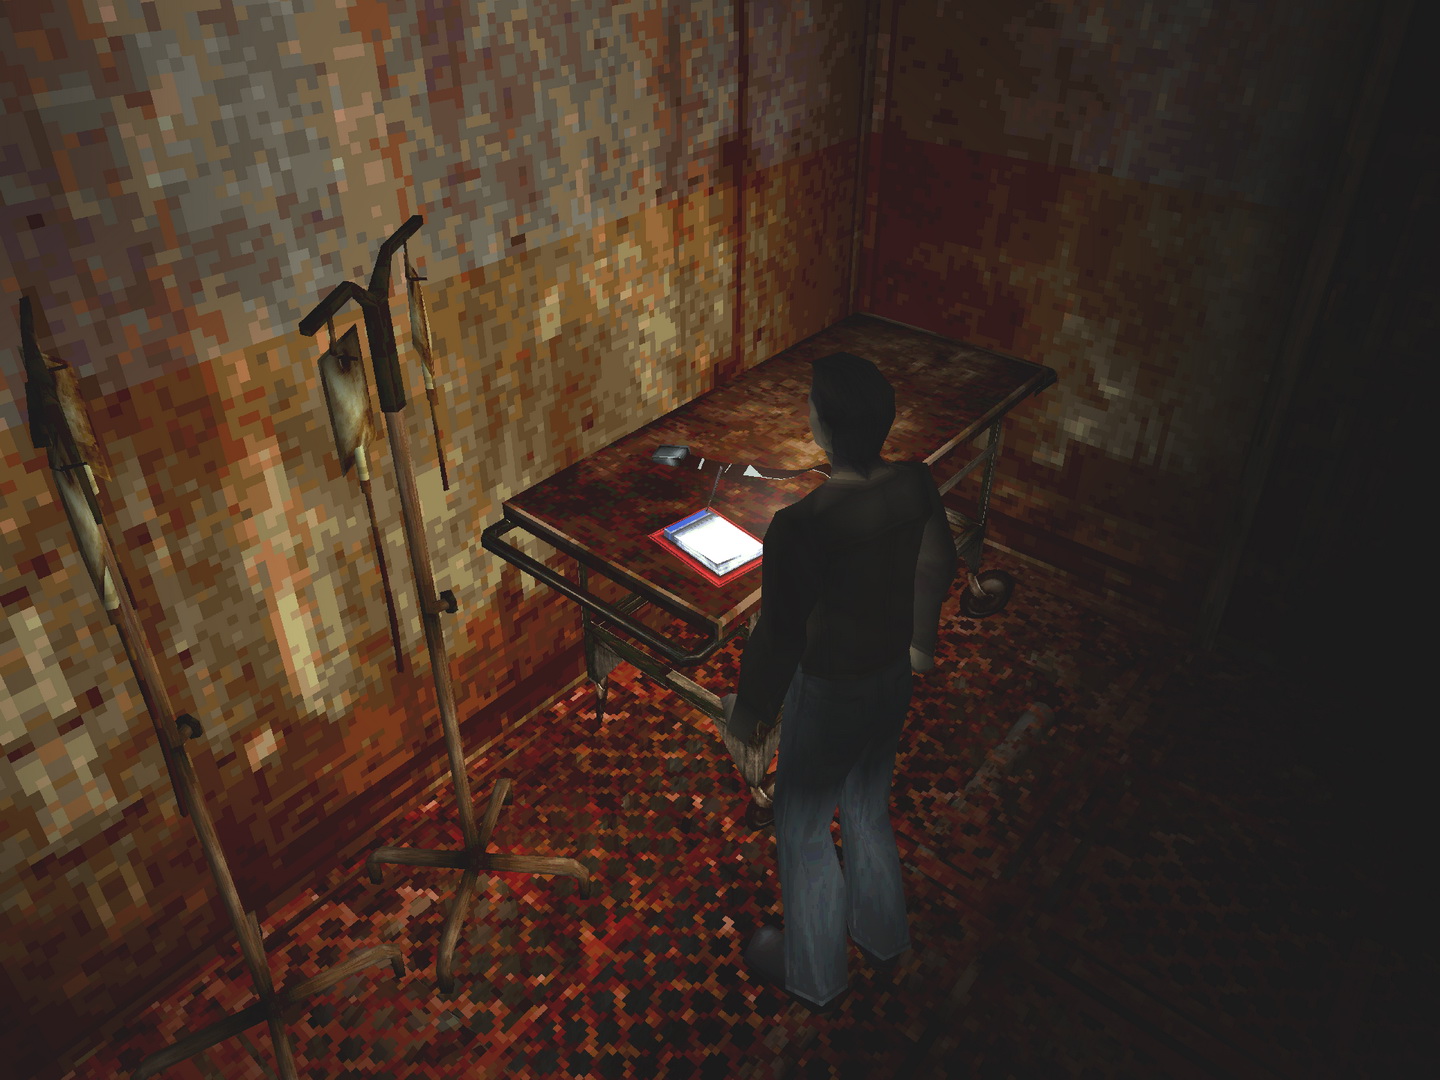
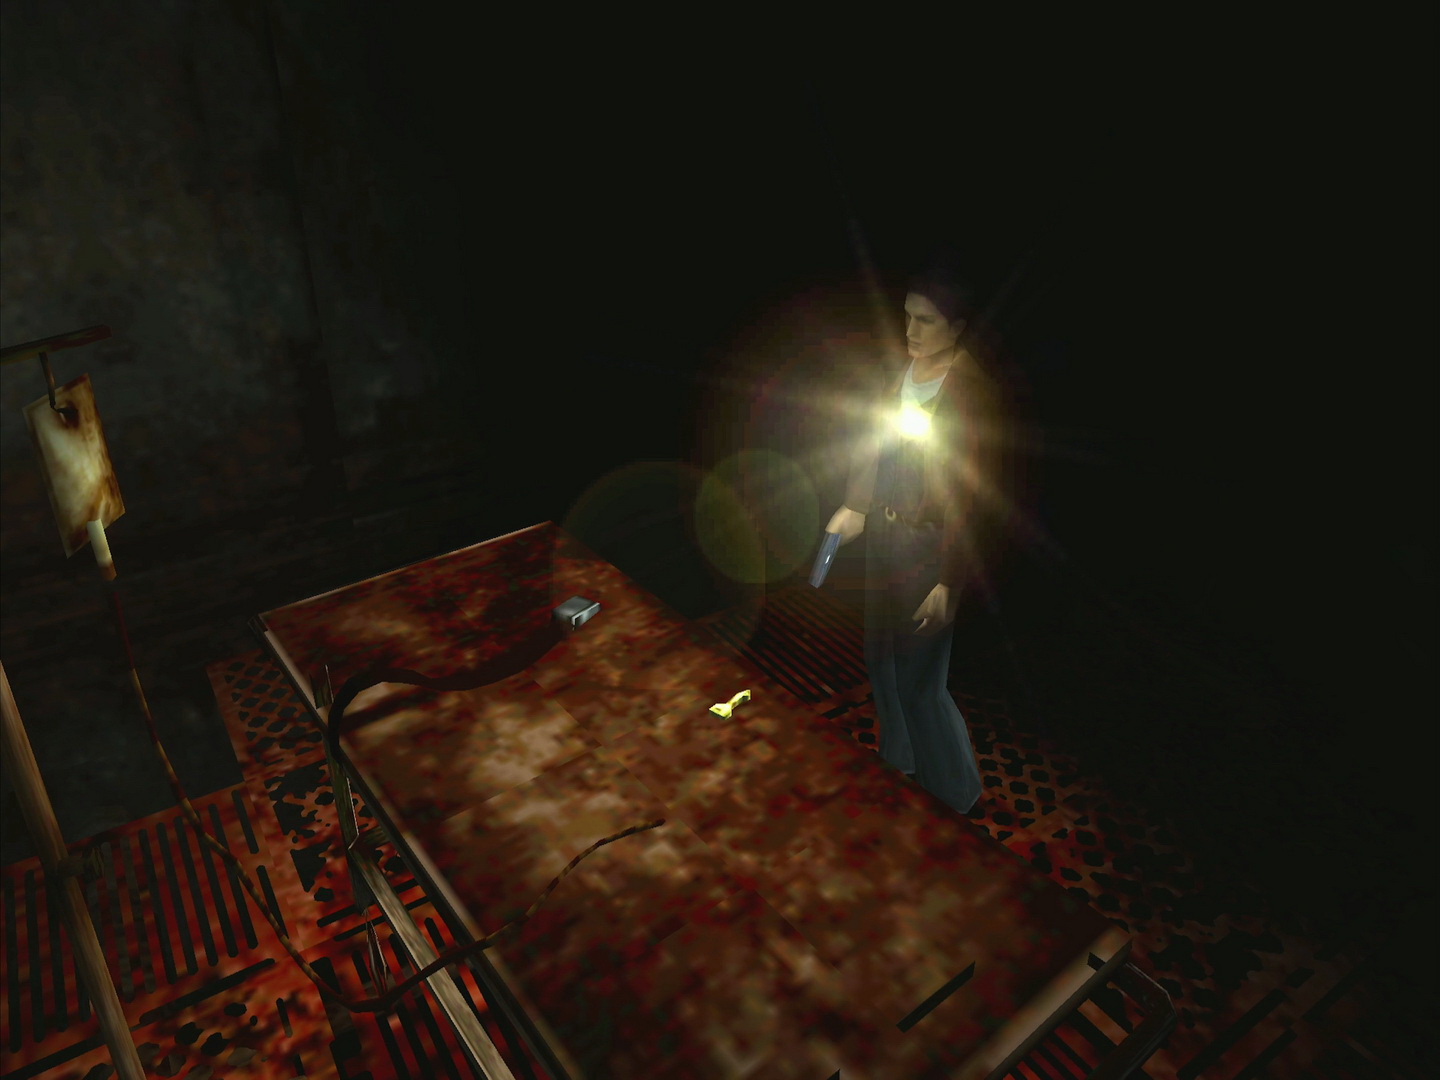
Helloooo Nurse! Quickly handle her and enter the Morgue if you dare. Inside you'll be ambushed by two Nurses from either side so consider running a bit ahead to escape their reach and then using the Shotgun for best results. Find the Ampoule and Health Drink on two different gurneys and leave the room.
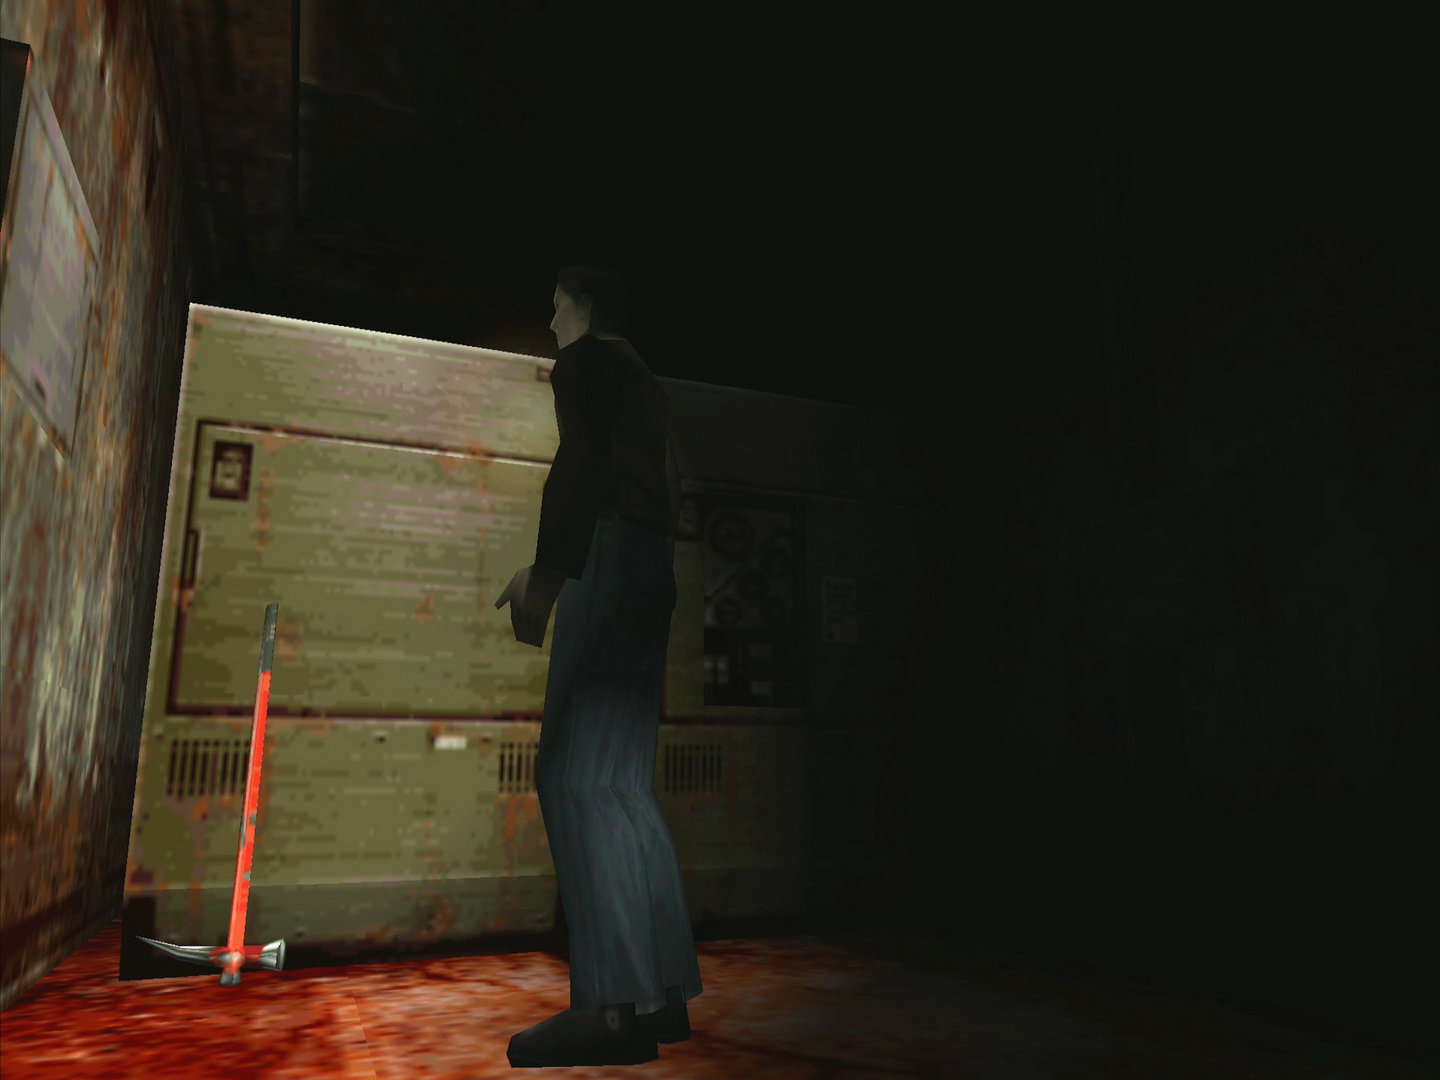
Enter the Generator Room to find the large 34 Hammer sitting against the generator, which is arguably the best melee weapon in the game and should not be missed.
 |
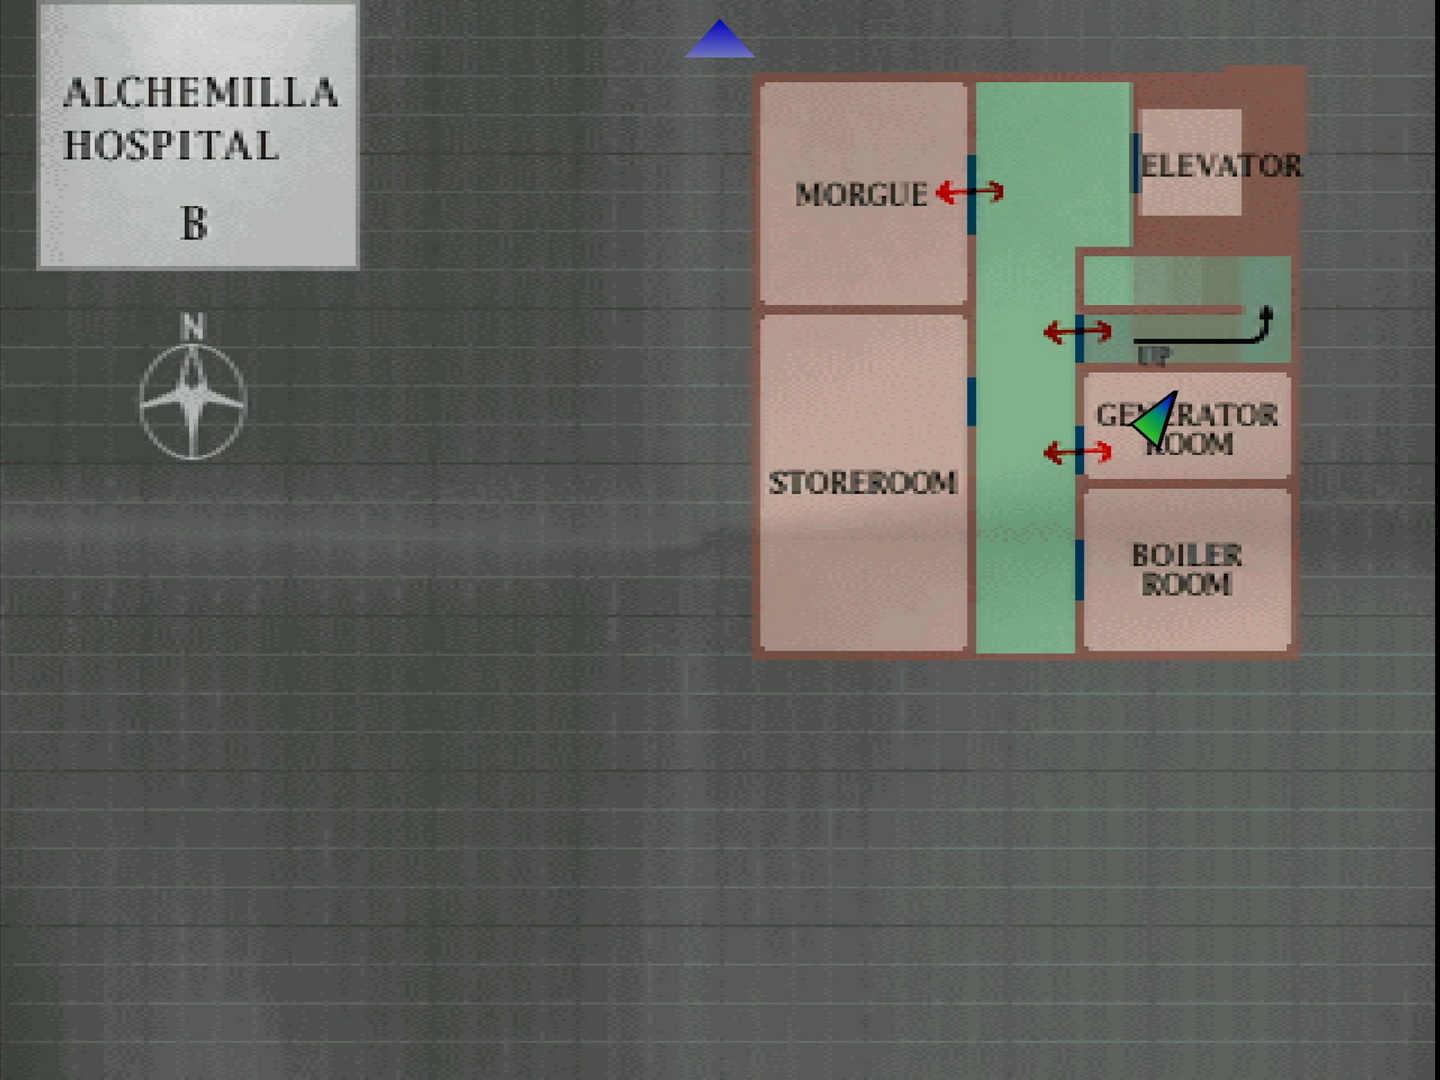 |
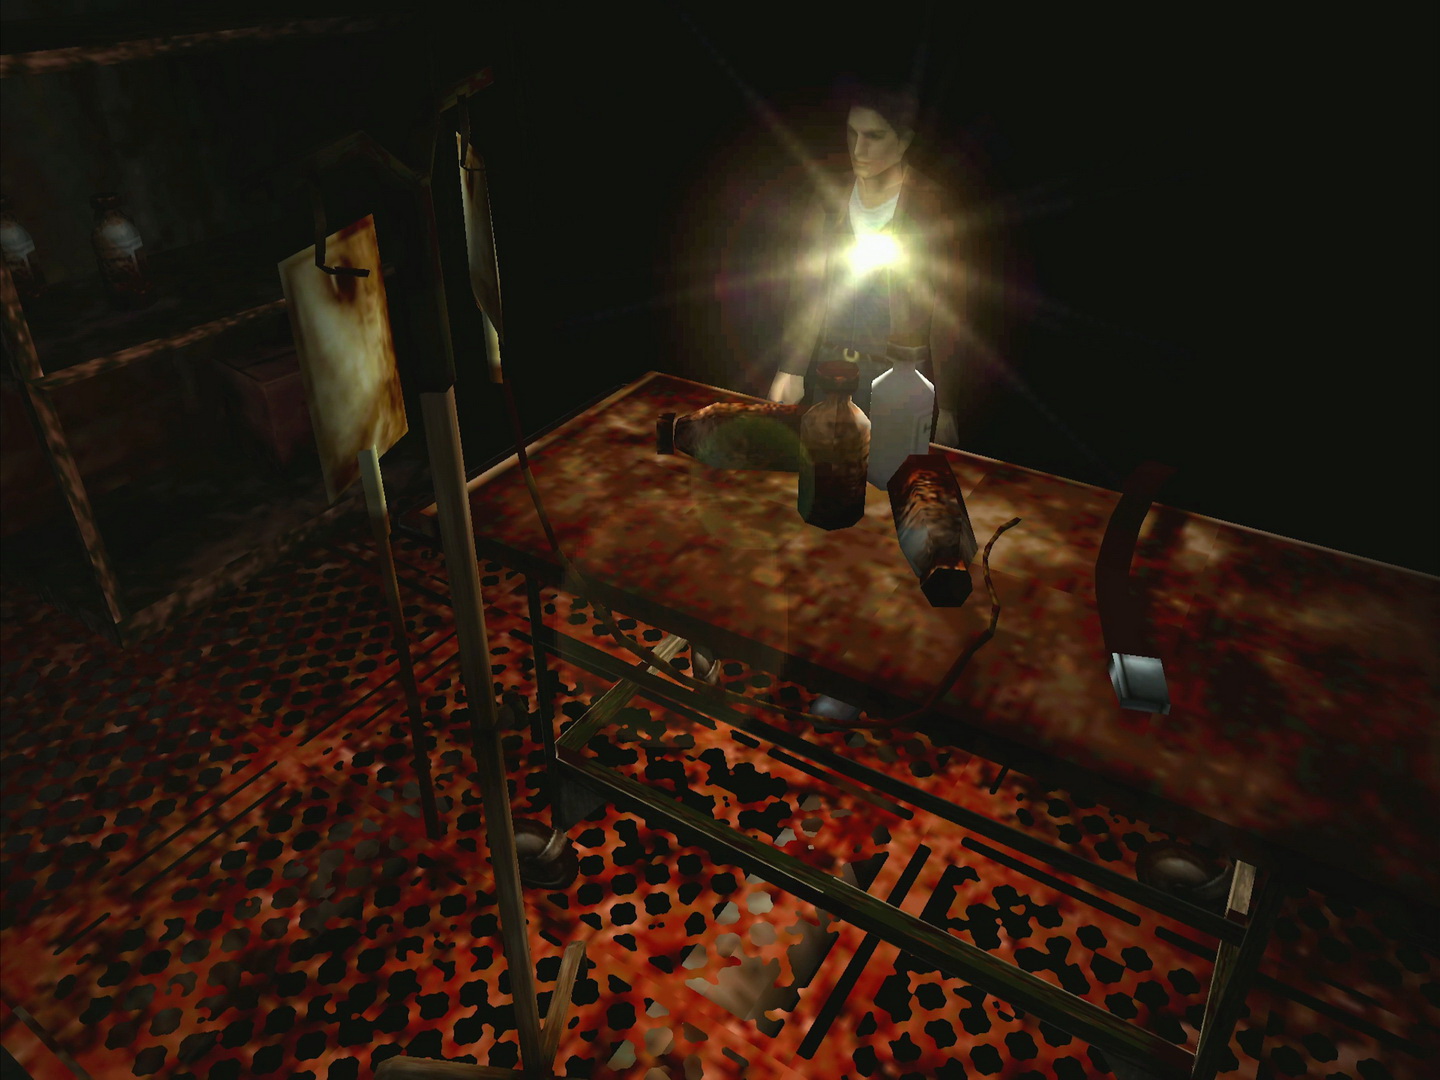
Now enter the Storeroom with the Basement Storeroom Key. First grab the Handgun Bullets and Shotgun Shells on the shelves, then check out the big cabinet at the back. At its base you can see scrape marks from it being moved over time. You may also notice this room is smaller than it appears on the map. Move to the shelf's right side and push it to reveal a door. Proceed through.
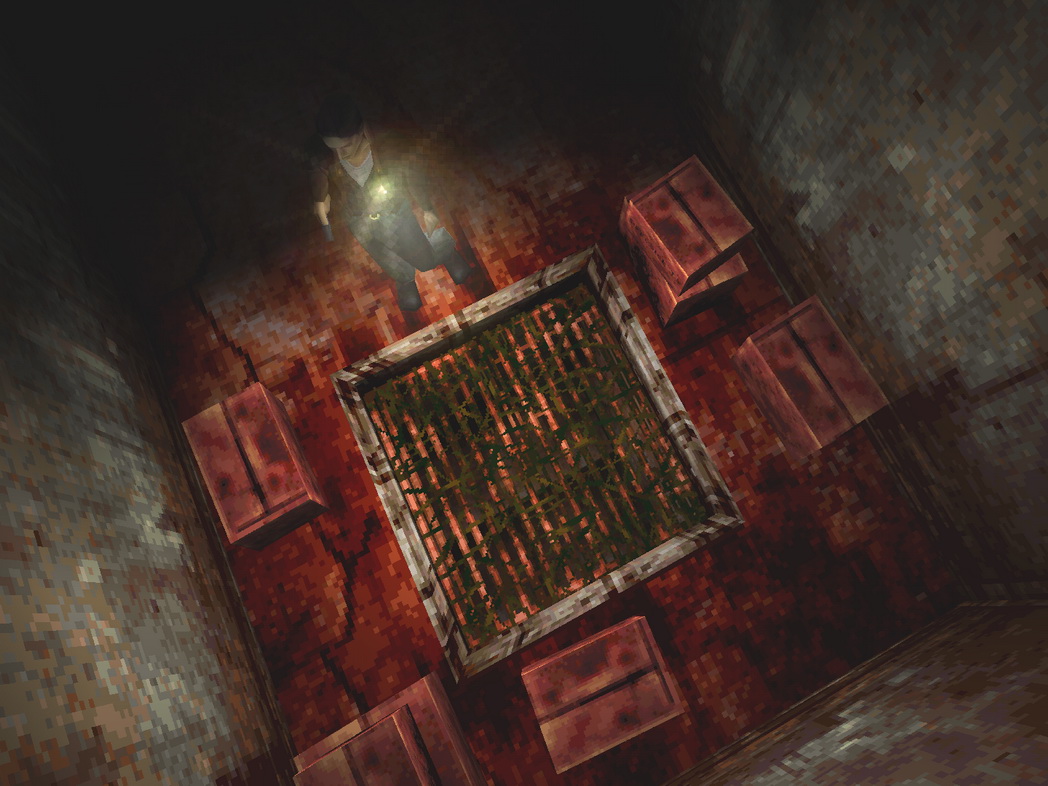
Inside you'll find a large grate that cannot be opened due to the growing vines holding it shut. Remembering your Lighter, you can try it but it's not enough on its own. Although you did recently pick up something else... Use the Disinfecting Alcohol to soak the vines and then the Lighter to burn them away. Hop down to see what's below.
Second Basement
In this unmapped area, follow the narrow hall through the next door. Say hello to three more Nurses and head through the first door on your left to another hallway with two more Nurses.
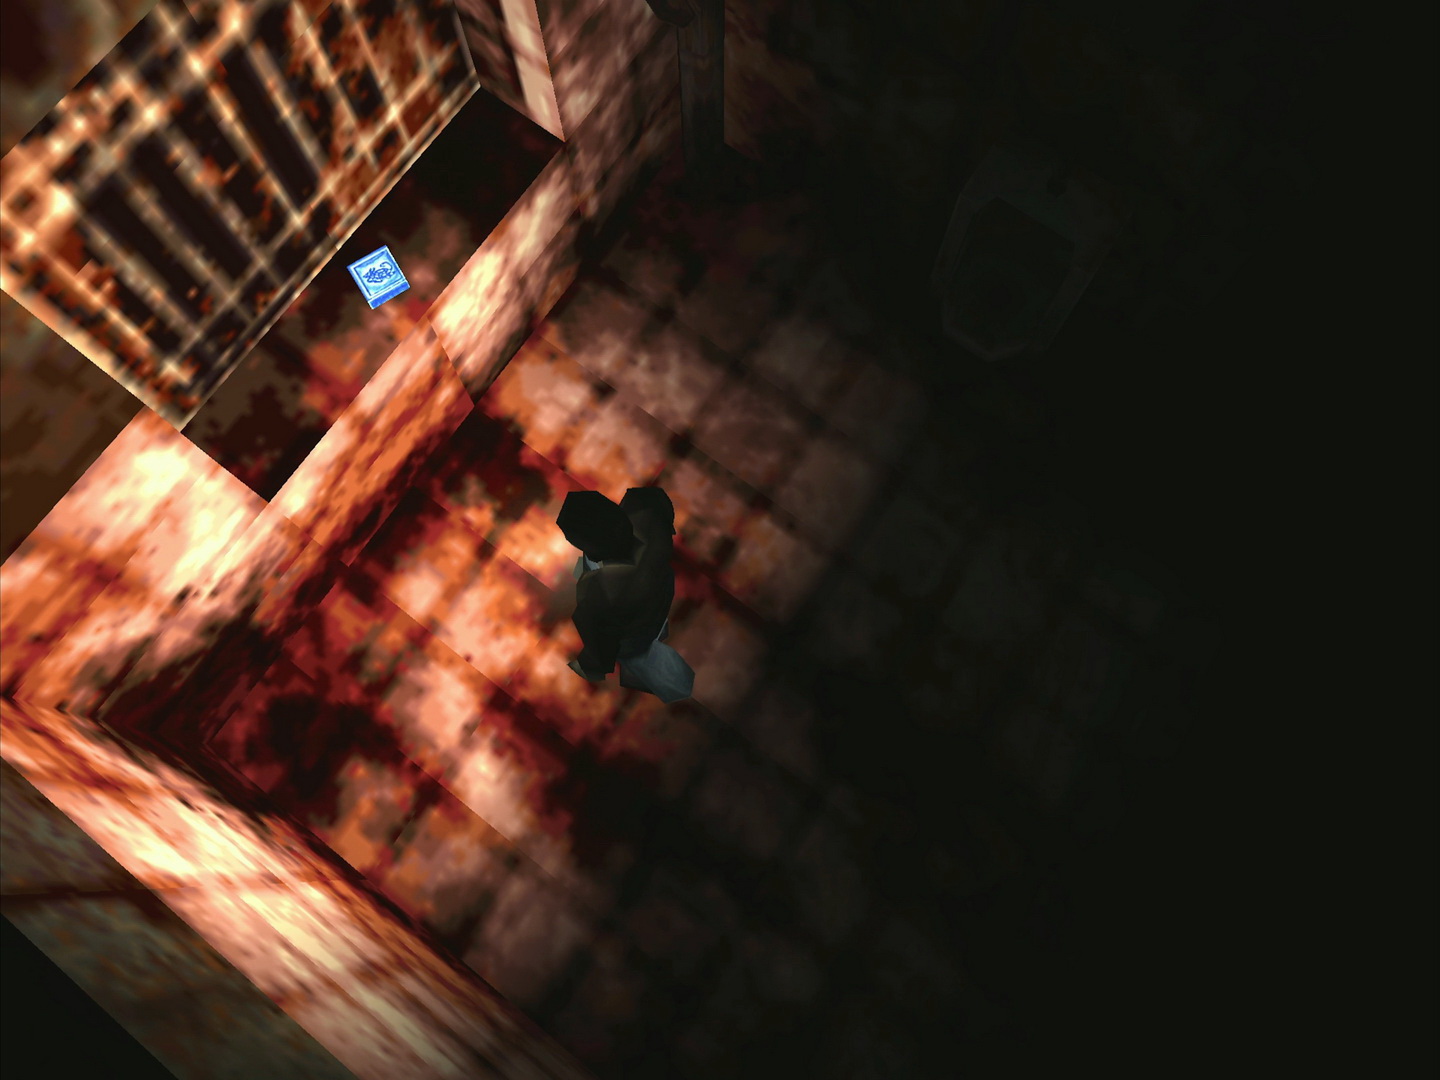
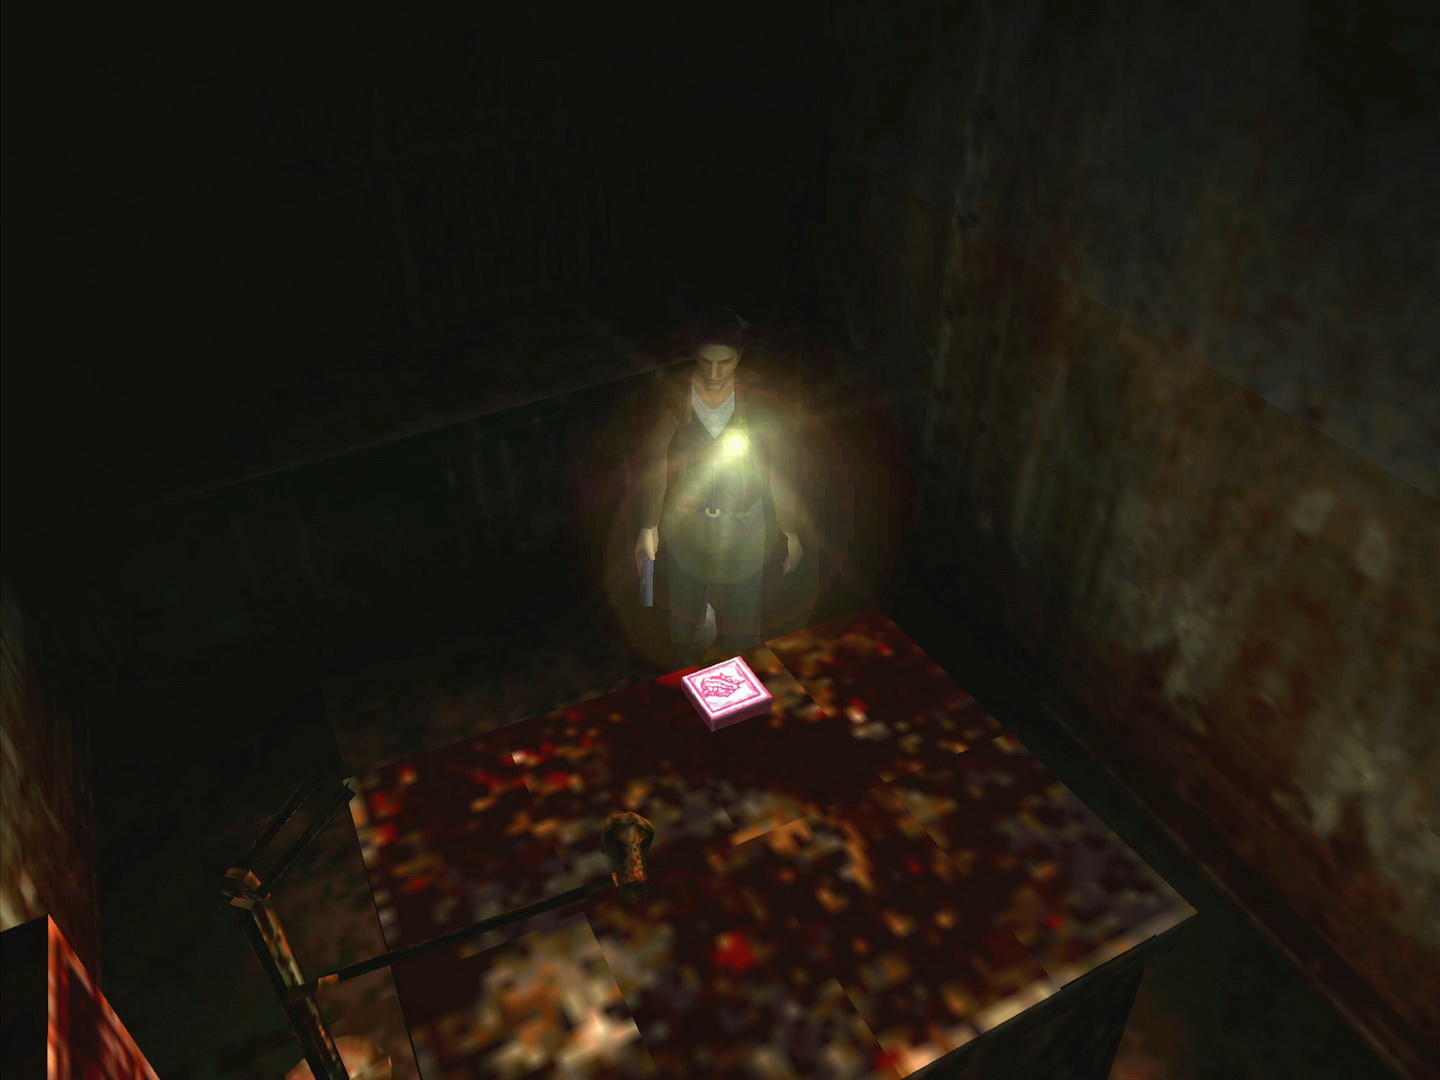
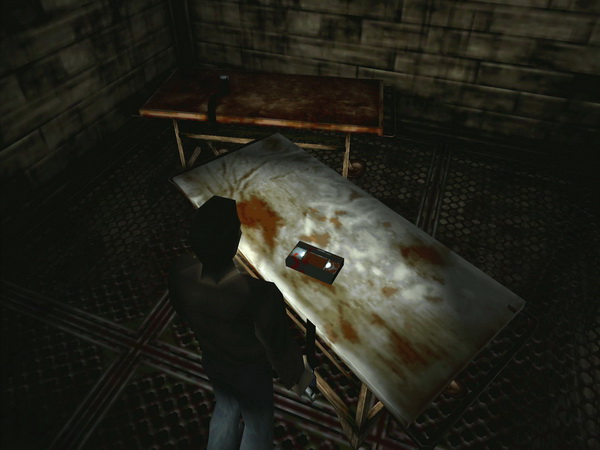
Only enter the first room on your left in the second hall if you feel like wetting yourself, but the first room on the right contains a 35 Video Tape guarded by a Nurse. You may remember a VCR in room 302 on the third floor where you can later return to view the Video Tape, but its recording is filled with static and hard to understand for the time being.
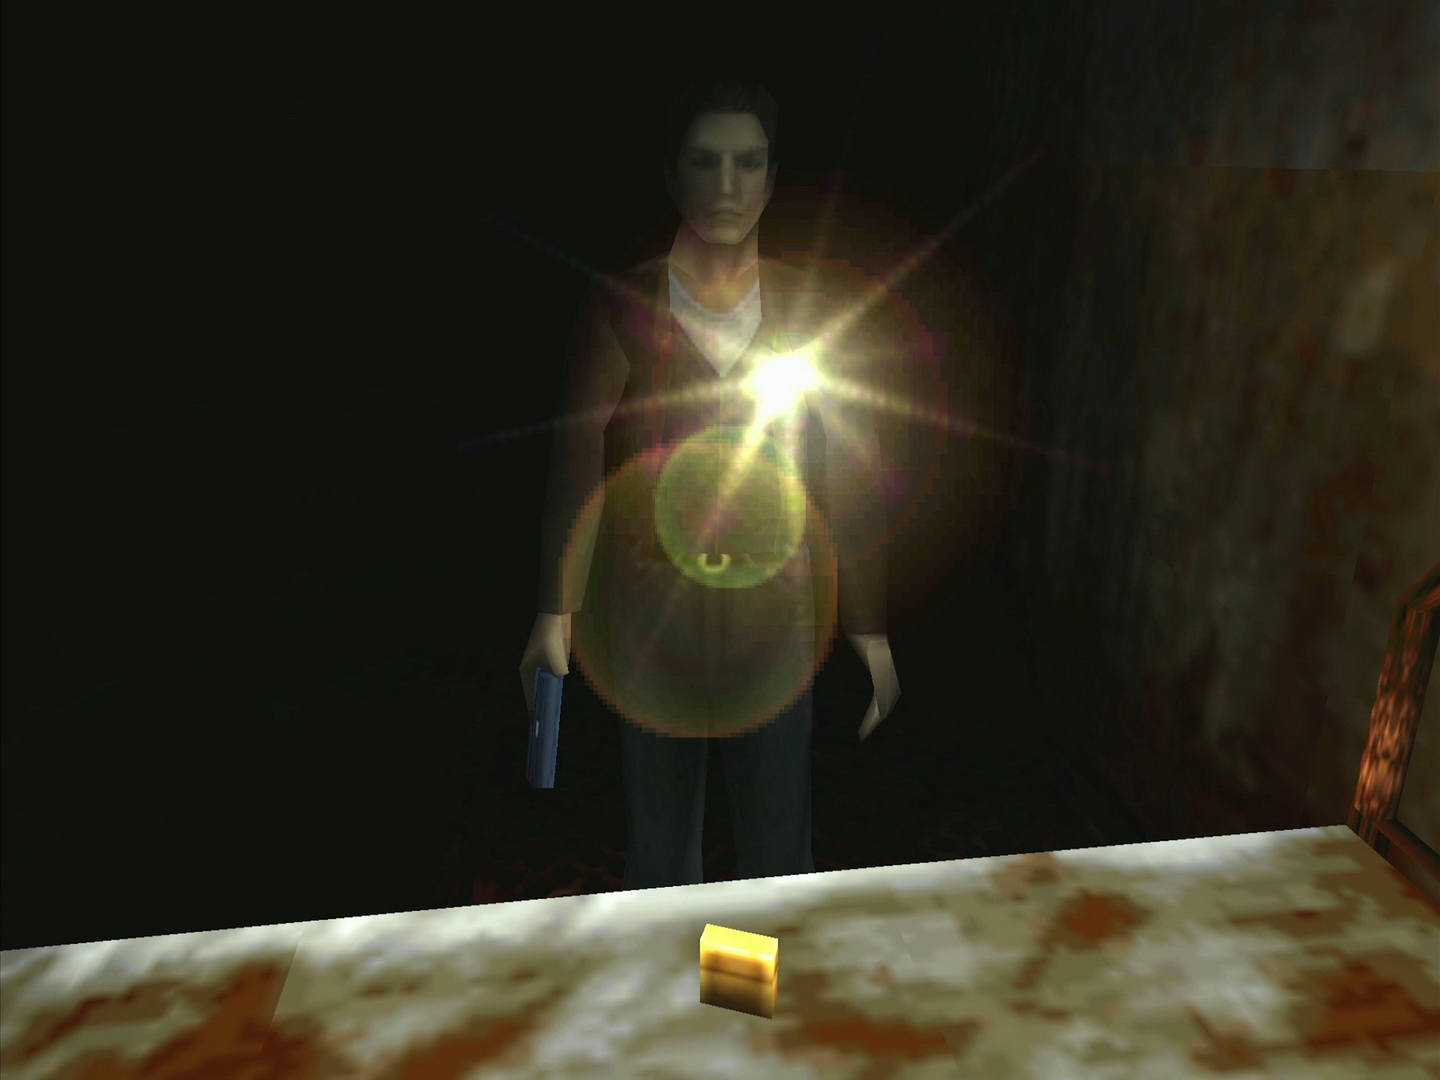
Back in the second hallway, enter the last room on the left into a strange hospital room. Harry finds a photo of a young girl named Alessa who looks a bit like Cheryl. Grab the 36 Examination Room Key beside the photo.
Now it's time to escape this hellhole second basement. Head back down the hall and through the end door, then go through the next door to Harry's right. Follow ahead and up the stairs to the first basement's Storeroom.
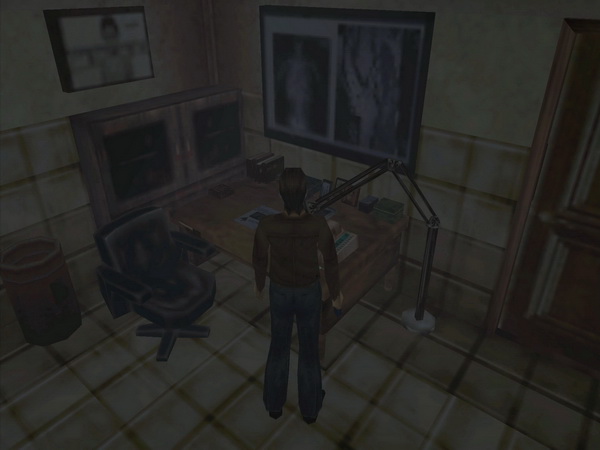
First Floor Examination Room
With the key in hand, use the stairs or elevator to head to the Medicine Room at the center of 1F and pass through to the next room with the Examination Room Key after handling the Doctor inside.
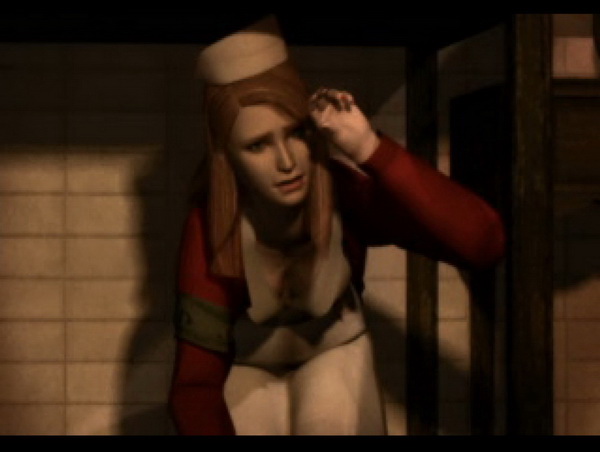
Meet Lisa Garland, a nurse who works at this hospital. Mid-conversation, Harry suddenly suffers from a major headache and shifts out of this nightmare realm.
Return to Normal Hospital
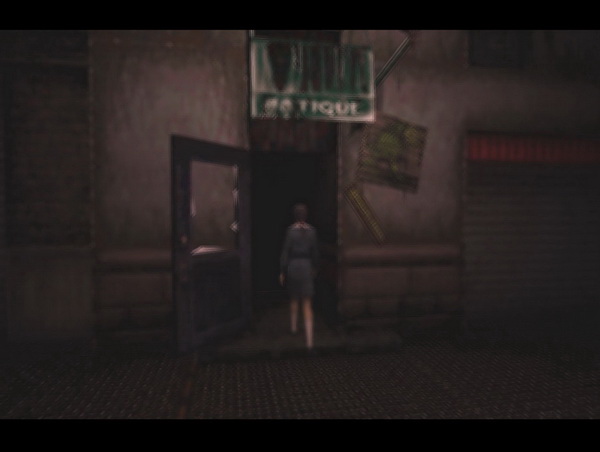
Awakening in the normal hospital's Examination Room, the crazy old lady from the church is here to spout more nonsense, finally revealing her name to be Dahlia Gillespie. She tells you to head to the "other church" which you'll first have to find, but she's at least left you the key for it. Take the 37 Antique Shop Key she left on the table and leave to the main Reception hall.
If you check the phone by the Exam Room door, Harry will cycle through the phonebook to find the address to the antique shop he has the key for and mark it on his map. Well, that made things easy.
Consider saving at the front desk and leave the hospital. Avoid the two Groaners in the courtyard and rejoin the streets through the gate.
| 06. Alchemilla Hospital | 08. Central Silent Hill Part 2 |