Home

Playing the Game

This section serves as a guide to learning the basics of the game, from navigating menus and changing options to learning gameplay concepts and understanding the health system.

Contents

01. Menus
02. Game Basics
03. Combat Strategies
04. Items
05. Health System
06. Controls
07. Difficulty Settings

01. Menus

This section explains all the options and features of the different menus found in the game.

Main Menu
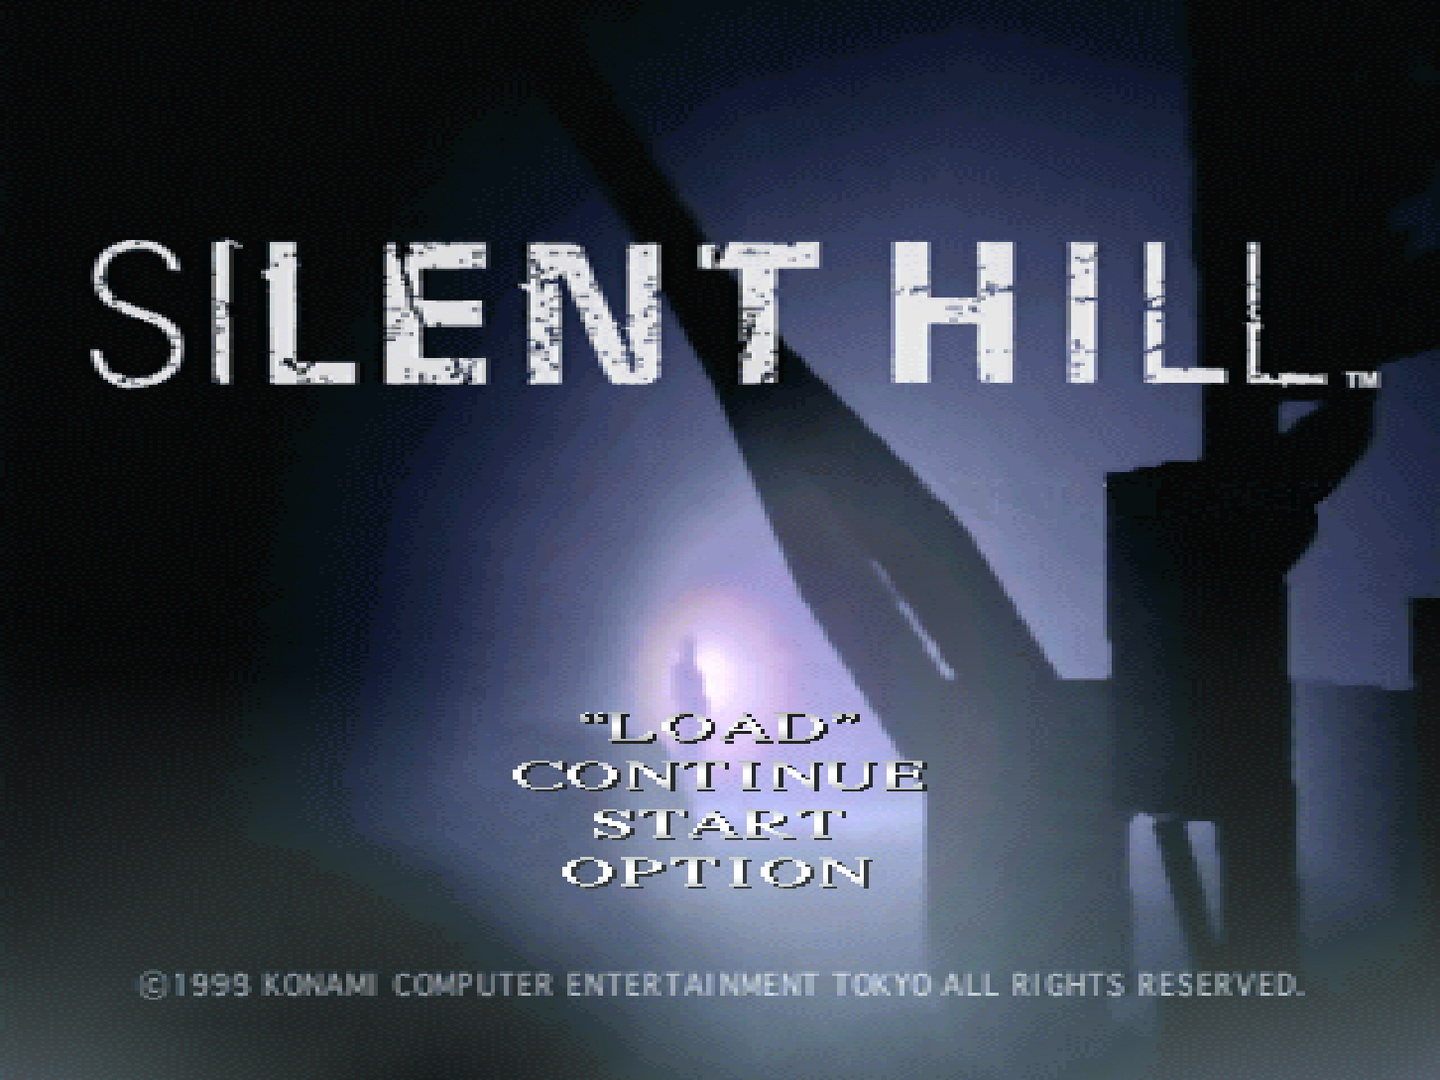
Opening Movie
This plays upon startup, featuring a bunch of CG cutscenes from the game, and can be seen again by remaining idle at the main menu. It also serves as the full prologue to the game with Harry and Cheryl on their way to Silent Hill. Note that Harry's wife in the beginning may be replaced by a certain character should they survive through the game.

New Game
Predictably starts a New Game after prompting you with a difficulty level choice. Only use this option on your first attempt, instead turning to Next Fear runs by loading your completed save file to keep your unlockables and view more endings.

Continue
Use this option to quickly load your most recent save from startup. If you die and return to the main menu, using this option starts you at the beginning of the area you died in while slapping you with a "continue" in your final ranking.

Load
Here you can load a file from your memory card, either in progress or completed. Use this option to start a new game via a completed save with the label of "Next Fear" to keep all unlockables while also upping your difficulty by one until the max of Hard.

Option
Here you can view the options and change whatever you like, from display, audio or control options to more specific controls in the Extra Options. View both menus below for more details.

Save/Load Menu

This is the menu you see what saving or loading your game, although they are technically for different purposes. Your save file will state your current location and time played, or if you've unlocked a Hyper Blaster upgrade. Scroll up or down to see all the save files on your memory card.
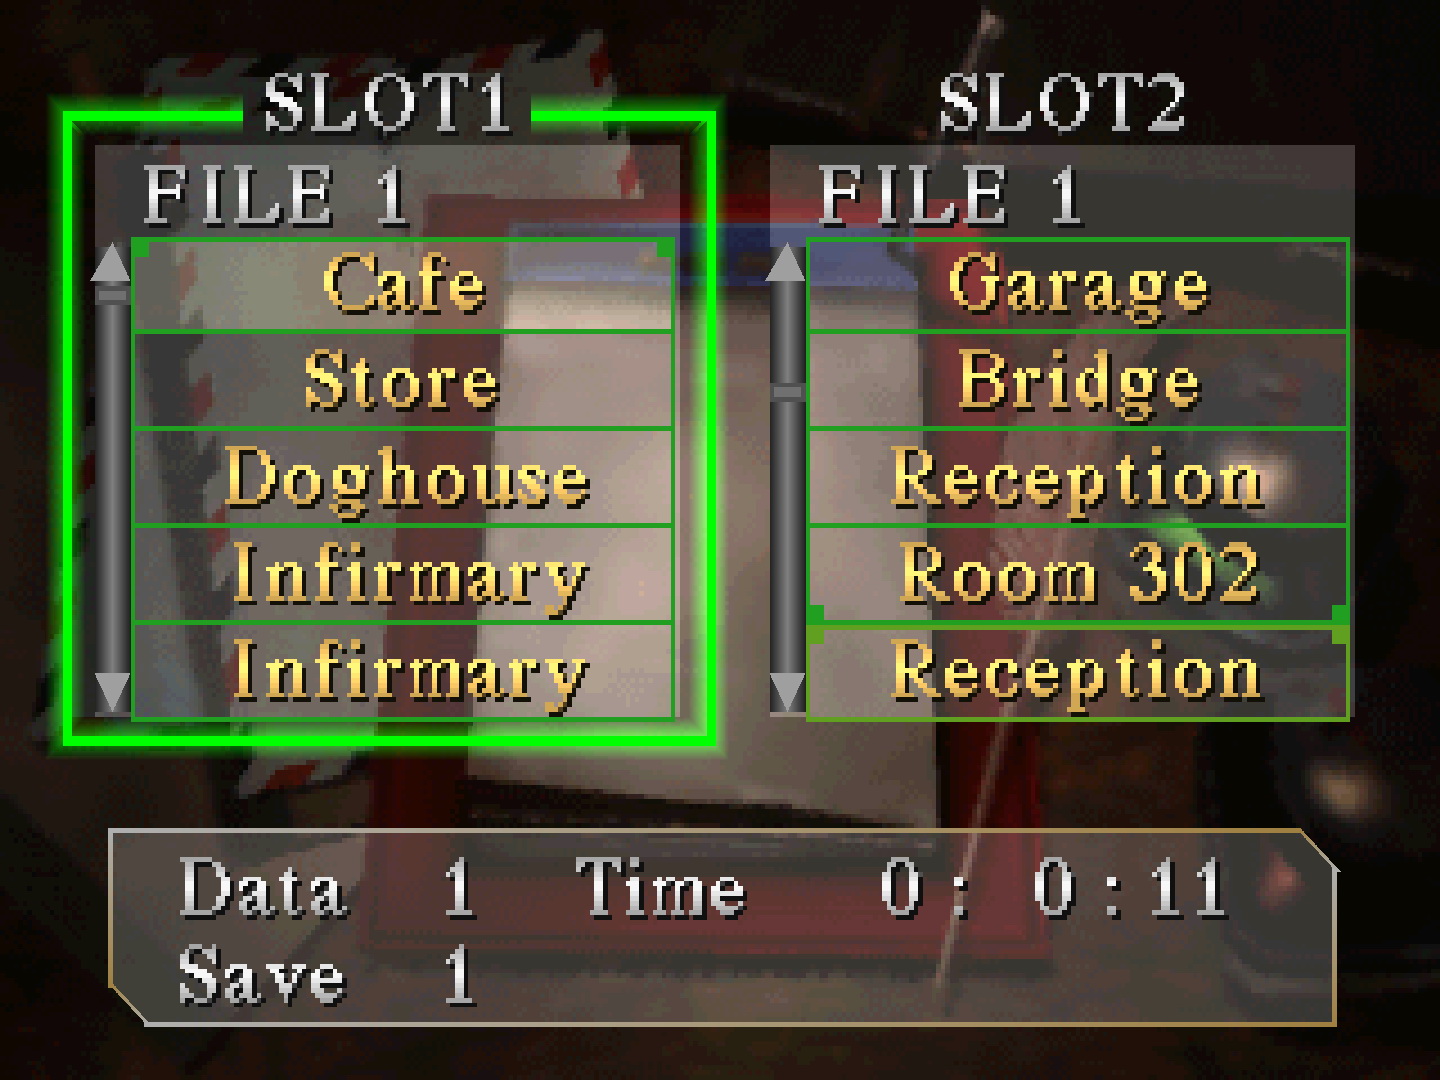
Saving and Loading
You must find and use notepads with red clipboards to save your game during gameplay. From there, select an empty file or overwrite another one to save. Use the Load option from the main menu to choose a file to continue from. The cursor will default to your current save, while you can also confirm with the play timer and location at the bottom.

Normally, your save location will be written in white, while it will turn to yellow or gold writing with "Next fear" written after a completed playthrough. Loading one of these saves will act as a sort of New Game Plus where you will keep any unlockables, unlock more and receive more endings in your file. Next Fear also ups the difficulty by one until the max of Hard is reached. If you ever start a regular New Game, that file will lose all unlockables. Be sure not to overwrite your Next Fear file with a standard one, or just avoid starting a fresh New Game or keep them separate.

Options Menu

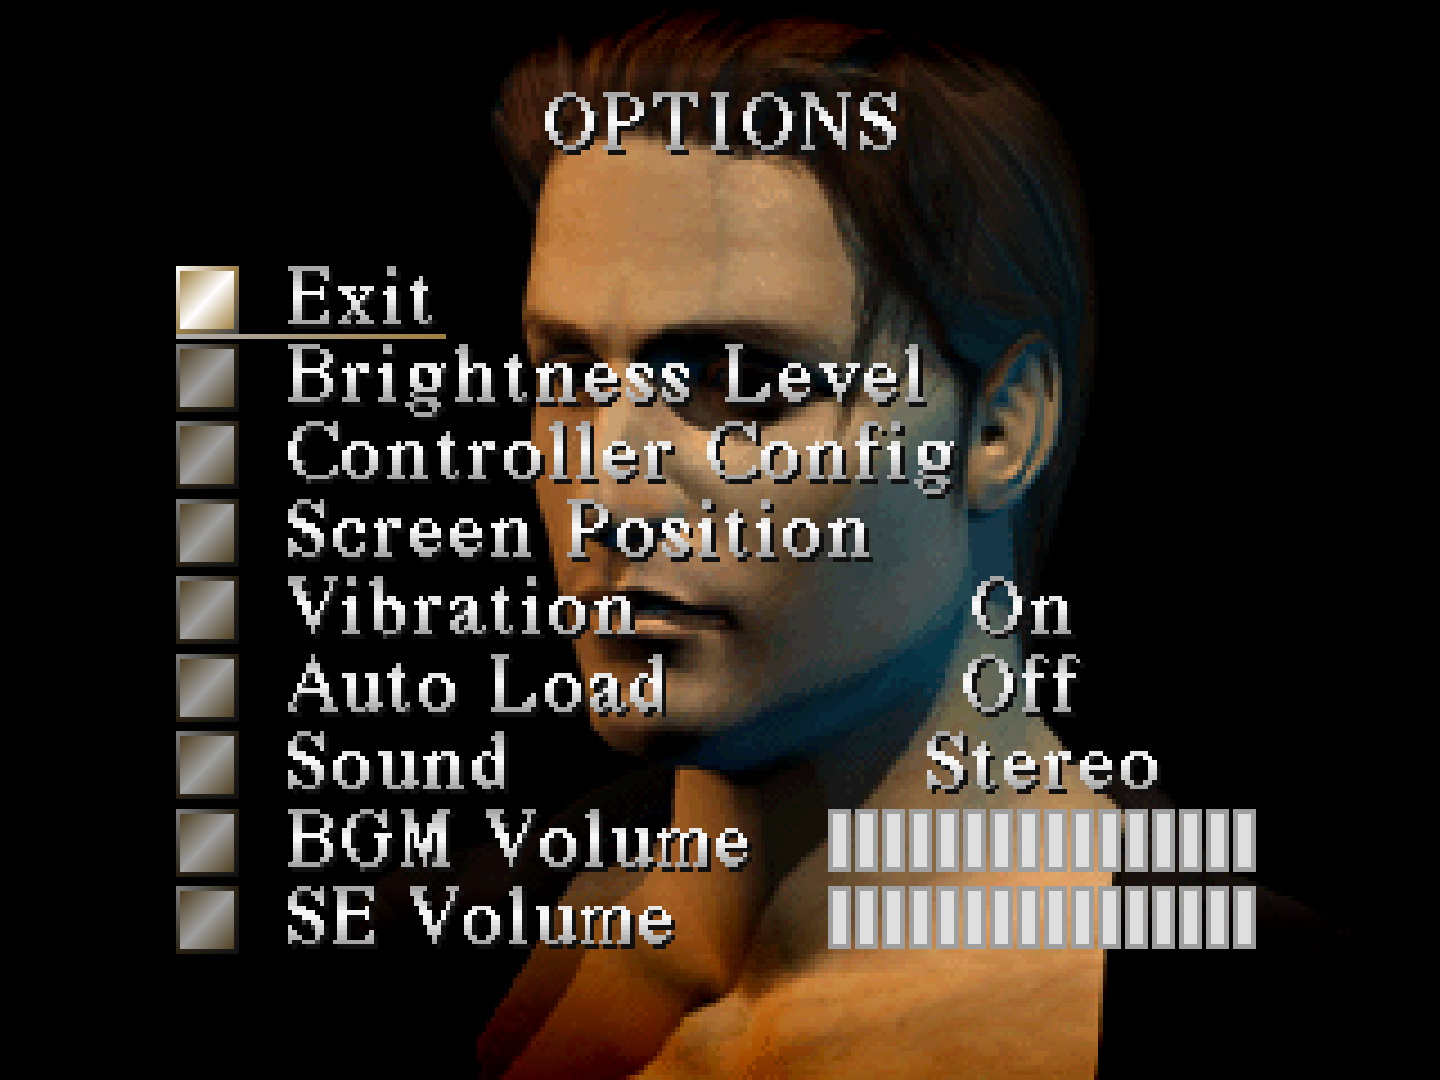
Several options can be changed in the Options menu, including:

OPTION SELECTIONS
Brightness Level Level 0, Level 1, Level 2, Level 3, Level 4, Level 5, Level 6, Level 7
Controller Config Type 1, Type 2, Type 3
Screen Position X and Y Coordinates
Vibration Off, On
Auto Load Off, On
Sound Stereo, Monaural
BGM Volume |||||||||||||||| (1-16)
SE Volume |||||||||||||||| (1-16)

Extra Options

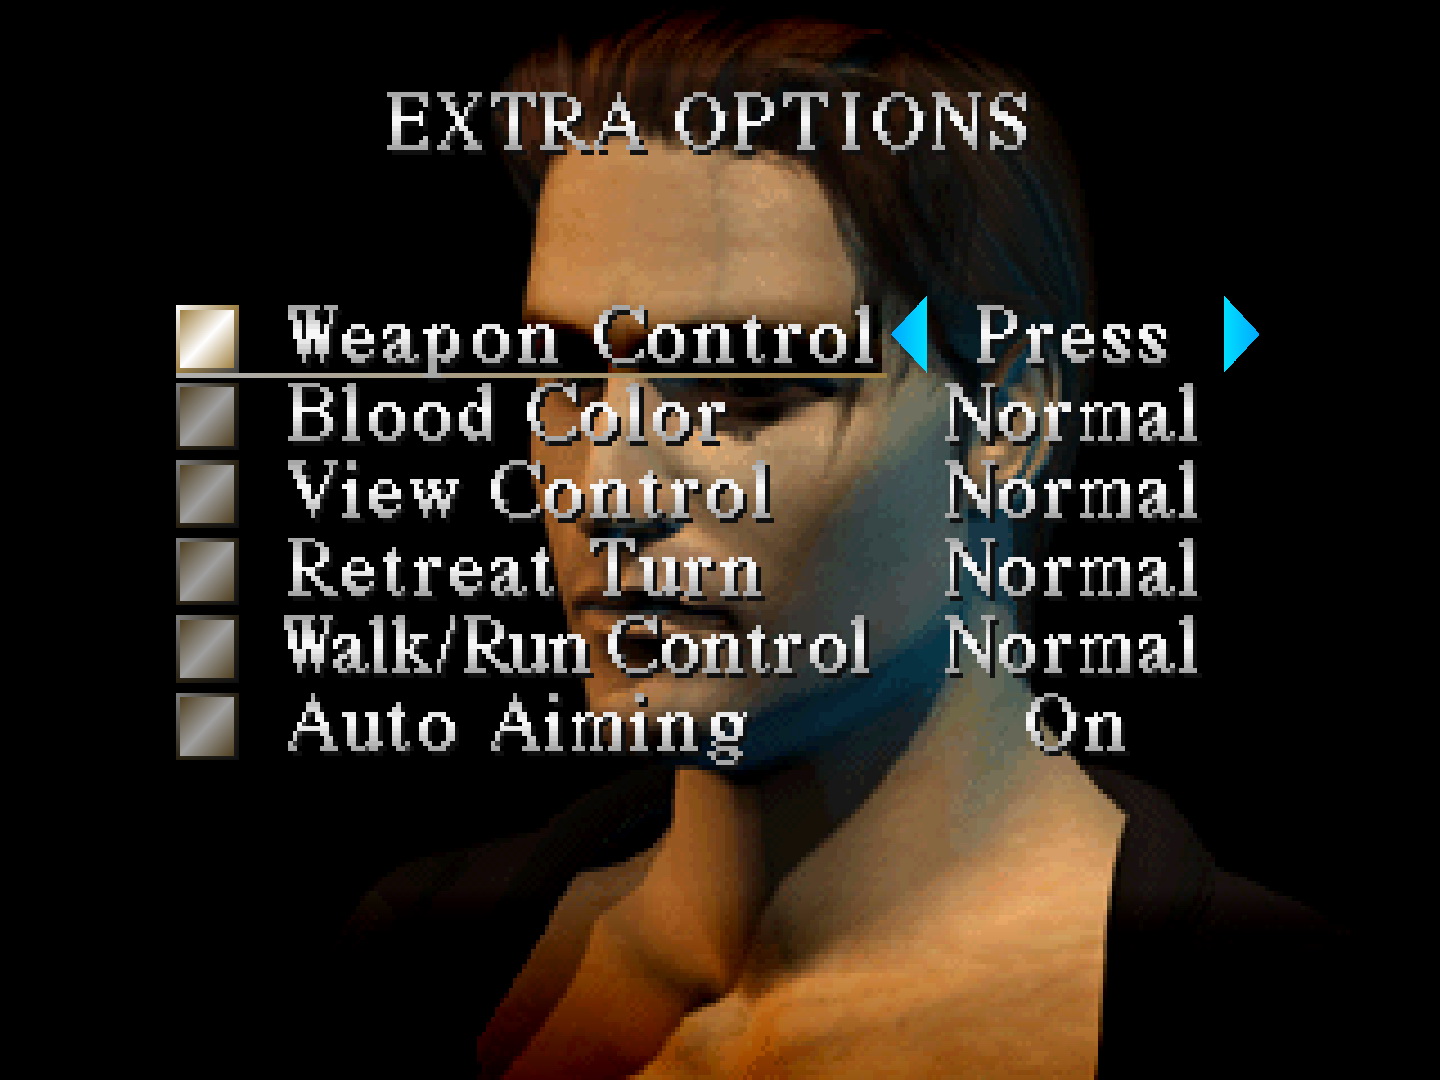
Press L1, R1, L2 or R2 to view this hidden menu from the Options menu, where the following can be changed:

OPTION SELECTIONS
Weapon Control Press, Switch
Blood Color Normal, Green, Violet, Black
View Control Normal, Reverse
Retreat Turn Normal, Reverse
Walk/Run Control Normal, Reverse
Auto Aiming On, Off
View Mode* Normal, Self View
Bullet Adjust* x1, x2, x3, x4, x5, x6

Note: View Mode, specifically the Self View option, must be unlocked by completing the game once. Bullet Adjust is unlocked the same way, whereby x1 and x2 will be available. Each new ending received after that will unlock the next level up to x6.

Inventory Menu

The inventory is a key tool that you will be required to use throughout the game to view and use key items, equip weapons, view your status and use health items, and so on. Refer to the image below for a breakdown of the menu, with detailed explanations of each option below.
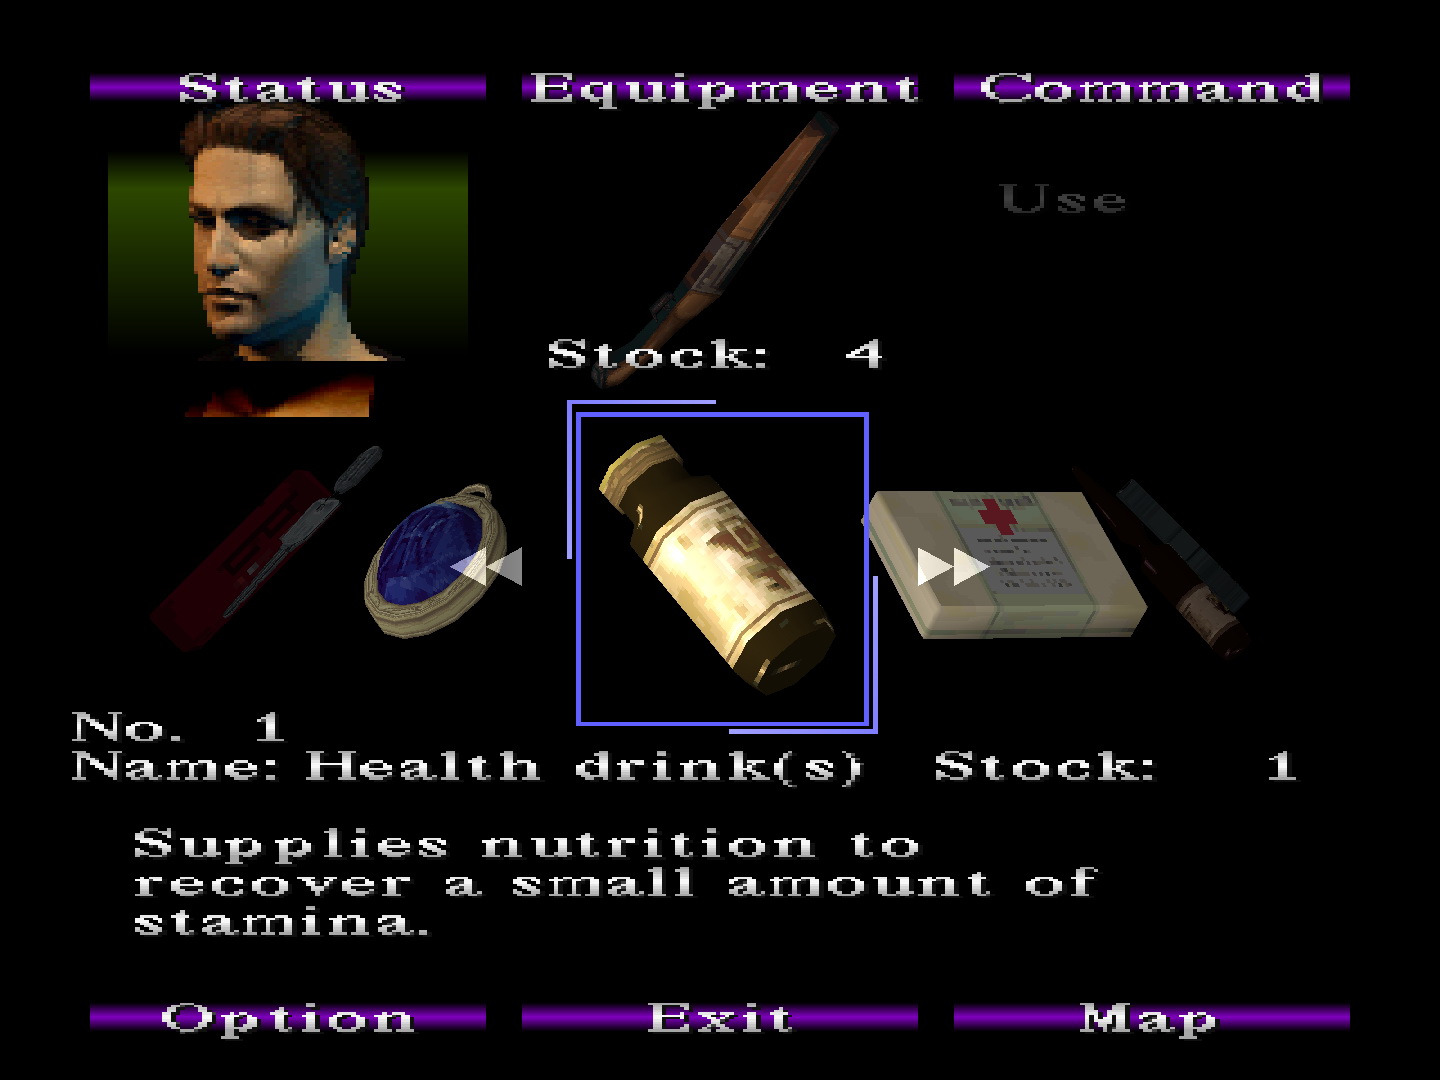
Status
The top left corner of the inventory menu displays Harry's health status, displayed by a colour. Refer to the Health System section of Playing the Game below for more details.

Equipment
Under this title is where your equipped weapon is displayed, or it will be blank if holding nothing. All weapons must be equipped from your inventory, and while there's also a reload option, it's never necessary to reload in-game since you can just lower and raise your weapon to do so without any animation.

Command
When you move the cursor over an item or weapon you will see one or two options in the Command box, such as Use, Look, Un/Equip, Reload, or On/Off options for the Flashlight and Radio.

Option
Hitting this function sends you to the Options and Extra Options menus, allowing you to change whatever desired without quitting to the main menu. View those menus below.

Exit
This function simply closes your inventory but is never necessary since Triangle or Circle performs the same command. If you wish to exit the game itself to the main menu, simply perform a soft reset with Start + Select.

Map
This allows you to view the map while in your inventory, but is never really necessary since you can instead press Triangle to go straight to the map during gameplay.

02. Game Basics

Here we'll cover basic concepts that are important to the game.

Camera

Now a staple of the survival horror genre, Silent Hill uses a variety of camera angles from different perspectives to craft its horror experience. It often restricts what you can immediately see, so you'll have to adapt and learn to shoot enemies approaching from offscreen or the side rather than from the front. That said, you have an override control of the camera by holding L2, which generally shifts the camera behind Harry or at least adjusts it to look forward when possible. Use it to your advantage to get a better sense of your surroundings, while also paying attention to angle shifts that may provide hints. Alternatively you can try the Self View option under View Mode in the Extra Options, which shifts the camera behind Harry's head when L2 is held.

Using Maps

Often found near the entrance of buildings or starting points of outside locations, the map is your best friend and most valuable tool in the game. Make regular use of it to track where you've been and where to explore next by pressing Triangle to bring it up during gameplay. Harry will update the map as he goes, marking open, locked and jammed doors with arrows, solid lines and squiggly lines respectively, plus other points of interest with circles, arrows or brief notes. Don't ever feel ashamed for checking your map too often since it's exactly designed to help you with your surroundings.

Using the Radio and Flashlight

Harry finds both a Flashlight and a Radio in the cafe at the beginning of the game, both invaluable tools on your adventure. The Radio will emit a droning static whenever enemies are nearby to warn you of their presence, while the Flashlight will be key to illuminate dark areas to see what you're doing and allow you to pick up certain items. Both these items can, however, alert you to the enemy. Turning off the Flashlight with Circle for brief periods will help you slip by enemies. Also consider turning off the Radio in your inventory to remain even more discreet if desired.

Game Concepts

Running
Don't feel like a wussie if you find yourself running away from enemies all the time, especially on the streets where it's easy enough to escape. It's almost always the best strategy to stay out of trouble, especially around multiple enemies, and can help save ammo for when it's needed.

Ammo Conservation
As a survival horror game with limited supplies, you'll need to manage your ammo or you will run out and potentially struggle in the tougher moments. Instead of killing everything, pick your battles carefully and instead run past enemies that don't pose a threat to you. Or consider using melee weapons while building up your ammo supply whenever low, and save it for the tougher enemies and bosses.

Searching Areas
Most of the game will be spent searching for keys and other items to help you progress, so you'll need to have a sharp eye in each room you access. Shift the camera with L2 to help see what you want to, and pay attention to any angle shifts that may hint at specific areas or items. Also utilize your map to see where you've been and which rooms you've yet to explore.

Checking Doors
An overwhelming majority of doors in Silent Hill are jammed and cannot be opened. These doors are denoted with a squiggly line on your map and should be disregarded. When a door is locked it generally means you will find a key for it or find a way to get to its other side where it can be unlocked, so keep an eye out for both of these.

Memos and Codes
Throughout the game you'll find several memos that sometimes serve as lore, but others will provide key information for solving puzzles such as riddles or codes. In one case a hint will even be given for how to defeat a boss, so pay attention and be prepared to jot down codes for later use since these memos are never stored in your inventory as they are in later games. Refer to the Memos section for a full list of all memos and additional notes.

Nightmare Areas
Also known as the otherworld or alternate world, Nightmare areas are commonly found and traversed in Silent Hill. They are easily identified by their terrifying appearances with dark and bloody imagery, often with grating replacing regular flooring. They also contain a lot more enemies than usual, making them true nightmares. Ammo is perhaps best saved for these areas indoors, while out in the streets things get too crazy to the point that running is usually the best bet.

Soft Reset

Like most survival horror games from the era, there is no menu or regular option during gameplay that allows you to quit to the main menu. This is where soft reset comes in, which is a combination of buttons that when pressed does just that. At any time while playing, press and hold Start + Select for a couple seconds to return to the main menu. This is helpful if you wish to reload your save file in case you messed something up.

03. Combat Strategies

This section deals with all things combat and how to survive the enemy threat. For more specific strategies for each enemy, refer to the Enemies section.

Targeting Enemies
Silent Hill uses a lock-on targeting system where Harry will auto-aim at nearby enemies when holding R2. Sometimes this is faster than turning around when close enough, although if far enough away it may help to first turn around or get close to help Harry find the enemy. When targeting, approach or back away from enemies while firing or between shots.

Shooting/Fighting Enemies
In the end ranking screen you'll find kill types segmented by shooting and fighting. A shooting kill is one where a bullet is the killing blow, while fighting kills end with a melee strike or a kick, regardless of how the fight started. Choose whichever way you wish to finish them off, but the most practical way is to swing or shoot at them and immediately go for the kick which will kill them on the spot. Otherwise, another bullet or two does the same trick.

Kicking Enemies
For the most part, shooting or beating an enemy down just makes it prone so Harry can kick it. There are exceptions, and sometimes monsters will die without a finishing kick. But you should always expect to finish the job accordingly. You'll notice that the radio static doesn't stop sometimes when enemies are on the ground, usually indicating they're still alive. Snuff them out with a quick stomp in these cases, and be quick to do it or they may get straight back up.

Fighting Multiple Enemies
You'll need to get used to fighting multiple enemies throughout the game, especially in heavily-populated nightmare areas. Always consider running to the safest spot to avoid an all-around ambush, or to let you kill enemies one by one as they approach you. Also consider switching to the Shotgun or even Rifle for a quick kill and then back to the Handgun or a melee weapon for the remaining enemy or two if you can get by that way. Also make use of movement while shooting to keep a distance between you and other enemies trying to gang up on you.

Pushing Enemies
Enemies may sometimes block paths or even surround you. In these situations if you don't have or would rather save the ammo, you can instead just run at them and slowly push them to the side. Try running at the narrow gap between them and the wall or the gap between two enemies to open up enough space to slip by. You may still take a hit but surely you'll be better off escaping.

Surrounded
You've gone and done it, huh? You are completely surrounded by monsters. In this situation, first see if there's a small gap that you can flee from and do so immediately. If not, creating a hole by pushing can also work, while you may take a hit or two. Alternatively, you can pull out the Shotgun and blast your way out, or sometimes a big weapon like the Hammer might help you knock a couple enemies down.

Escaping Grapple Attacks
Certain enemies have the ability to grab a hold of you during an attack, doing more damage in the process. While Harry is held up in these attacks, mash the directional and shoulder buttons to escape more quickly and prevent further damage.

Switching Walk/Run Control
Normal movement in Silent Hill is walking, while you must hold Square for Harry to run. You can however, and should, change this in the Extra Options menu. Switching this to Reverse will allow you to run with the analog stick alone, while if you choose to walk on occasion you can do so by holding Square. You will be running for the majority of the game, so trust me that you're better off changing it. If I could make just one recommendation to new or even all players it would be this.

Strafing
In addition to normal movement, Harry has the ability to sidestep and strafe (running to the side). With Normal Walk/Run Control, L1 or R1 will make Harry sidestep to either side, while holding Square as well will allow him to strafe. Changing Walk/Run Control to Reverse will allow you to strafe with L1 or R1 alone, or sidestep while holding Square. Learning to strafe is a tactical advantage that will help you in cases where running forward is not the best action, so try it out and prepare to use it when needed, especially for boss fights.

Reloading
In later Silent Hill games it became a staple to reload in your inventory on Normal and above difficulties to avoid untimely in-game reloads, however this game has a trick where on all difficulties you will magically reload your weapon by lowering and raising it. Say if using the Handgun, raise it with R2 and shoot 15 times to empty the magazine, then release R2 to lower it and hold it again to raise and magically refresh its clip if you have the ammo. Use this to your advantage to avoid in-game reloads or even reloading in your inventory.

04. Items

Silent Hill is all about locating and using items, and this sections covers all the basics.

Finding Items

Make use of your map to explore every open room and search every corner looking for any item that stands out, usually brighter in colour than the background. Also pay attention to any camera angle changes that may hint at anything. Note that in dark areas you will need the Flashlight on to see and pick things up.

Using Items

Normally this may be common sense but there are different ways that certain items are used, either in your inventory or just by approaching a door. Read more below.

Keys
Around half of the main items you'll find in Silent Hill will be keys, which are the simplest form of item to use. Simply approach the door it unlocks and hit X and Harry will use it accordingly. Note that you can also use these items from your inventory but it's an extra step that's unnecessary. Some keys however like a safe key will need to be used from your inventory.

Other Items
In addition to keys you'll find an assortment of other key items like liquids, tools or plates to use to open doors, solve puzzles and so on. To use these items, approach where you wish to use them, then enter your inventory to find and use the item there. If Harry says the item can't be used there, you've got the wrong idea or you may possibly be standing a bit off. Readjust and test by examining where you're trying to use these to make sure and try again when applicable, but otherwise you may just be using the wrong item.

Additionally, in some cases you may need to use two items in a certain order. Say if you want to burn something but may require an additional liquid to start it. In later games the Combine function was added to make things easier, but here items need to be used individually. Same for placing multiple objects in a puzzle. Lastly, some items have no locational use by the player, such as notes, a receipt, or a certain pyramidal object, so don't worry yourself too much if you're unsure about some items.

Examining Items
Some items have an option called "Look" where Harry can check more closely to see any fine details, such as what the tag says. So if you pick up a key that you're unsure where to use, see if it has the Look function for more information. In later games, this function was renamed "Examine" but works the same way.

05. Health System

This section covers all things health-related, such as interpreting your status, and finding and using supplies.

Health Status
The top left Status screen in the inventory displays your health status, indicated by the colour beside Harry's face. While adhering to fairly common standards, each colour indicates the following status:

  • Green: Excellent
  • Green-ish Yellow: Good
  • Yellow: Okay
  • Faint Orange: So-so
  • Colourful Orange: Bad
  • Faint Red: Very Bad
  • Colourful Red: Close to Death

Health Supplies
You will find three variations of health supplies in varying frequency throughout your journey. Health Drinks are the most common and heal a quarter of your health, while First Aid Kits heal half your health and Ampoules bring a full recovery no matter how bad. Generally you can wait until your status at least yellow until you need to worry about using even a Health Drink.

Recovering Health
Always check on your health every now and then in your inventory to get a sense of your status. Additionally, your controller will vibrate once you're in the orange zone or worse and will get more intense the worse you're off, hinting that you should probably heal. To heal, find one of the three health items mentioned above in your inventory and use it. Use them wisely and appropriately based on how bad your wounds are.

06. Controls

Refer to the tables below for a full list of controls and functions, while below we'll go into detail about control types and other control options that can be adjusted.

CONTROL FUNCTION
D-Pad Character movement, Menu navigation
Left Analog Stick Character movement, Menu navigation
START Pause game, Skip scene
SELECT Open inventory
X Accept, Examine, Attack, Stomp or Kick
Square Run
Circle Cancel, Exit menu/puzzle, Toggle Flashlight ON/OFF
Triangle Cancel, Exit menu/puzzle, Quick Map
L1 Sidestep left
R1 Sidestep right
R2 Ready weapon
L2 Position camera behind character
L1 + R1 Turn 180 degrees
Down + Square Backwards hop
Start + Select Soft Reset

3D Type

Silent Hill uses 3D control for movement, otherwise known as tank controls. This means that holding forward will move your character in the direction they are facing, regardless of where the camera is aimed. Use left and right to turn your character accordingly, always relative to where they are facing, independent from the camera. It may take some getting used to for first timers, but it's relatively easy to operate otherwise.

Extra Options

This is a hidden menu that is accessible from the Options menu by pressing L1, R1, L2 or R2. Several different options that affect gameplay can be changed here. If there's one thing I recommend it's switching Walk/Run Control to Reverse. Read about each function below.

Weapon Control
With the default Press selection you must hold R2 to aim your weapon, while Switch makes it a toggle where you must press R2 once to raise your weapon and again to lower it when finished attacking. It depends what better suits you but I'd recommend the default.

Blood Color
This one is just for fun. I'd recommend keeping it Normal for your first run to keep things serious and as intended, but feel free to play around with other colours on additional runs. Other than Normal (red) there's Green, Violet and Black.

View Control
Normally the camera focuses more on Harry than the environment, while holding L2 will position the camera behind Harry or at least shift the angle to focus ahead. Switching this to Reverse will make the default camera always try to look ahead rather than prioritize Harry on the screen. I suggest leaving it as is.

Retreat Turn
I've tested this and found no difference between Normal and Reverse options. It could be that this was meant to disable the quick 180 turn but it is available on either setting. Simply ignore it.

Walk/Run Control
Normally your standard movement is to walk, requiring Square to be held to run. Switching this to Reverse will change your default movement to running, while holding Square will initiate a walk. Since you'll be running through most of the game, I cannot recommend enough that you switch this function to give yourself an easier time.

Auto Aiming
With the default of On, Harry will automatically lock on to nearby targets, allowing you to swing at or shoot and hit them without any additional adjustments, although he may still miss sometimes due to his poor accuracy. You can also move forward or backward while locked on, guiding you straight to the enemy. With this turned Off, Harry will simply raise his gun with an R2 press without automatically targeting nearby enemies. Instead you must manually aim left or right accordingly. I'd suggest leaving it on to make the game more manageable, but the challenge is always there if you'd like to disable it.

View Mode
This must first be unlocked by completing the game once. It controls what happens when you press L2 to adjust the camera. Normally the camera is focused on Harry a distance away from him, while holding L2 will focus the camera ahead, possibly shifting it behind him. However with Self View under this option, holding L2 will shift to a very unique camera right behind Harry's head, working somewhat like an over shoulder cam. Releasing L2 will return to the normal camera. If you switch View Control to Reverse, this special view will become the default camera and holding L2 will switch back to the more traditional angle behind Harry. I'd suggest giving it a try at some point but maybe more for the novelty than anything else. Playing the whole game like this may prove a little too much with the pixelated graphics and jagged movement from up close, but it's definitely a cool new angle to experience on your second run or later.

Bullet Adjust
This function must first be unlocked by completing the game, upon which your ammo count from pickups will be multiplied accordingly by what you set it as, from x1 all the way to x6. Each time you receive a new ending you will unlock one level up until the max of x6 after the fifth and final ending.

07. Difficulty Settings

A difficultly level must be selected upon starting a new game, most notably affecting health and attack damage of enemies and bosses. All puzzles will be unaffected since they have fixed solutions no matter the difficulty. Consider your choices carefully and choose the difficulty that sounds most appropriate for your first time.
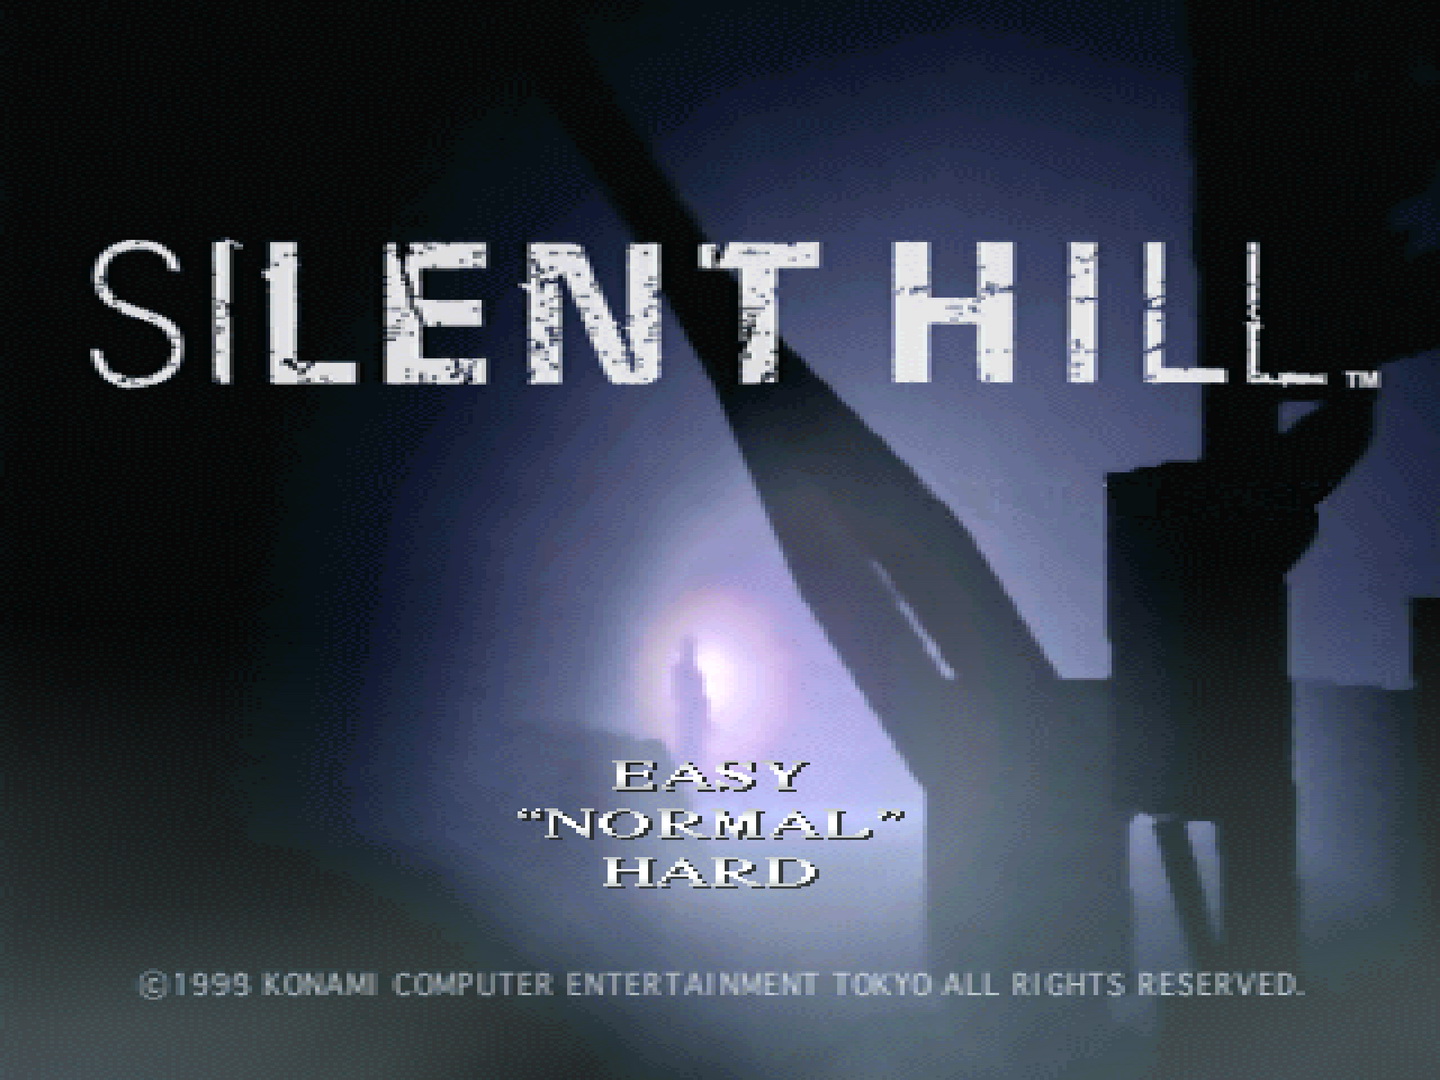
Easy
The simplest way the game can be played, recommended for those new to the series or classic survival horror. Enemies will have lower health, do limited damage, take minimal shots or hits to drop and will rarely respawn. Bosses have around half their normal strength, speed, and are less aggressive.

Normal
The way the game is truly meant to be played for a first time experience, recommended for anyone familiar with the Silent Hill series or the classic survival horror genre. Enemies have their normal strengths, damage output, take a reasonable amount of shots or hits to drop and will sometimes respawn. Bosses take their normal length while having their standard health, power and speed.

Hard
Hard mode is a thrilling experience and is only recommended for hardcore players and veterans of Silent Hill, as well as players who have beaten the game at least once or twice. I'd advise to avoid it on a first run unless extremely confident since everything is amplified up to 10 and can get really crazy. Enemies are stronger, do more damage, take more shots or hits to drop, and will respawn very often. Bosses become stronger, faster, and are more aggressive while outputting higher damage.

Suggested Difficulty Level

For players completely new to the Silent Hill series, it's smart to go with Easy. If you're not familiar with this style of the game, it's not uncommon to die a lot or really struggle with health even on Normal, so that's why Easy is recommended. Otherwise, survival horror fans or those who have survived another Silent Hill game should be able to manage on Normal, while Hard should be reserved for a later run or for those who have proven skilled at other Silent Hill or survival horror games. Be warned, it gets pretty crazy at times. Unlocking bullet adjust first is also recommended.

Next Fear

After completing the game once and saving, you will see your current save titled as "Next Fear". This works as a type of New Game Plus where you can play the game again using any obtained unlockables, which you'll usually have to find first. Note that Next Fear also ups the difficulty once each time. So if you beat the game on Easy, your first Next Fear will be Normal, and the next after that will be Hard. Each successive run after that will remain as Hard and there's no way to lower the difficulty without starting a fresh New Game and losing all unlockables.