Speed Walkthrough
RecommendationsThis speed walkthrough is intended for players who have beaten the game at least once (as a quick reference to speed up their times), or for players who wish for only the bare minimum of instructions to make their way through the game. Boss strategies will be very simplified, enemies will hardly be mentioned, and you'll be expected to supply yourself with ammo and health as it will not be covered here. Do your best to just run past enemies if going for speed, turning your flashlight off to be more discreet. Also consider using bullet adjust if you've unlocked it to multiply the amount of ammo in each pickup. While most maps can be avoided if going for speed, I'll still list them as optional pickups since they can help you in a pinch. Extra items and weapons will also be mentioned as optional pickups, while they add to a better ranking if acquired. Note that save points will not be listed so it's up to you to find one if needed. Refer to the Save Point Locations section for quick reference. If playing a Next Fear run, unlocked after your first completion, the initial arrival section will be skipped and you'll start in the cafe, reducing your play time. Note: Silent Hill has a unique timer that does not ever stop until the final boss is defeated. That includes during cutscenes, when in your inventory and even when the game is paused with the Start button. Therefore if going for speed, you'll want to skip all cutscenes and minimize these other moments, perhaps saving your game and exiting if you need to take a break. Color legend |
00. Silent Hill Arrival
|
01. Old Silent HillSave Point Locations
Walkthrough
|
02. Midwich Elementary SchoolSave Point Locations
Walkthrough
|
03. Nightmare SchoolSave Point Locations
Walkthrough
Valve Puzzle
Boss 1: Split Head Lizard
|
04. Old Silent Hill Part 2Save Point Locations
Walkthrough
|
05. Central Silent HillSave Point Locations
Walkthrough
|
06. Alchemilla HospitalSave Point Locations
Walkthrough
|
07. Nightmare HospitalSave Point Locations
Walkthrough
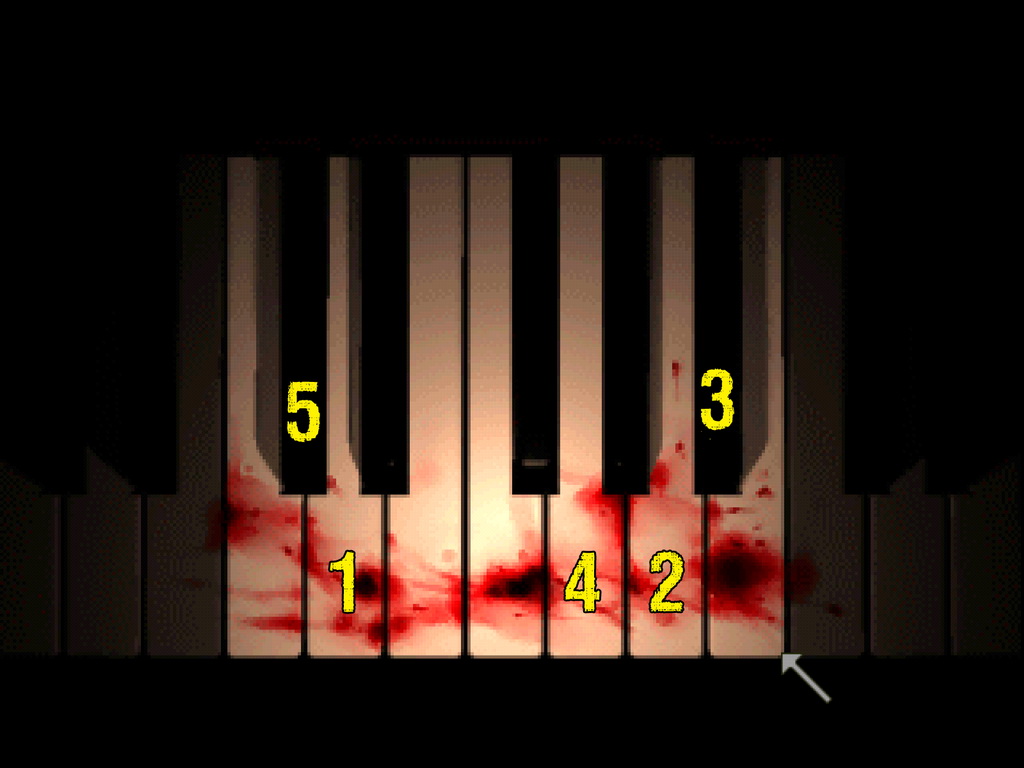
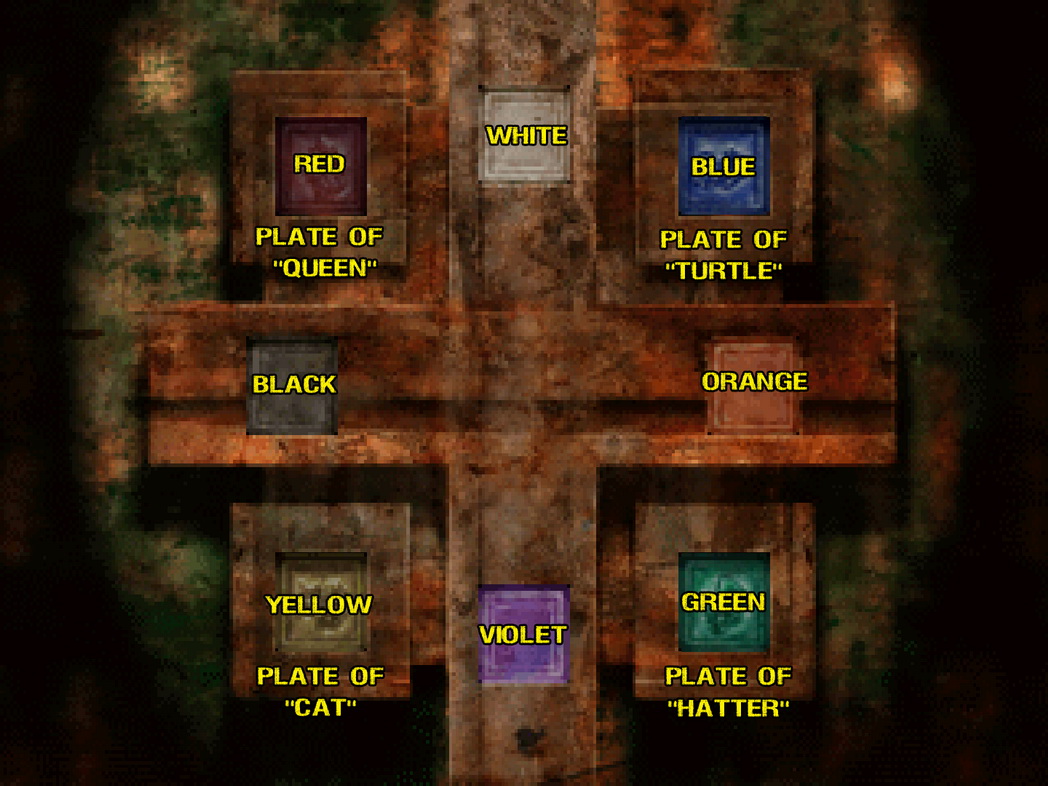
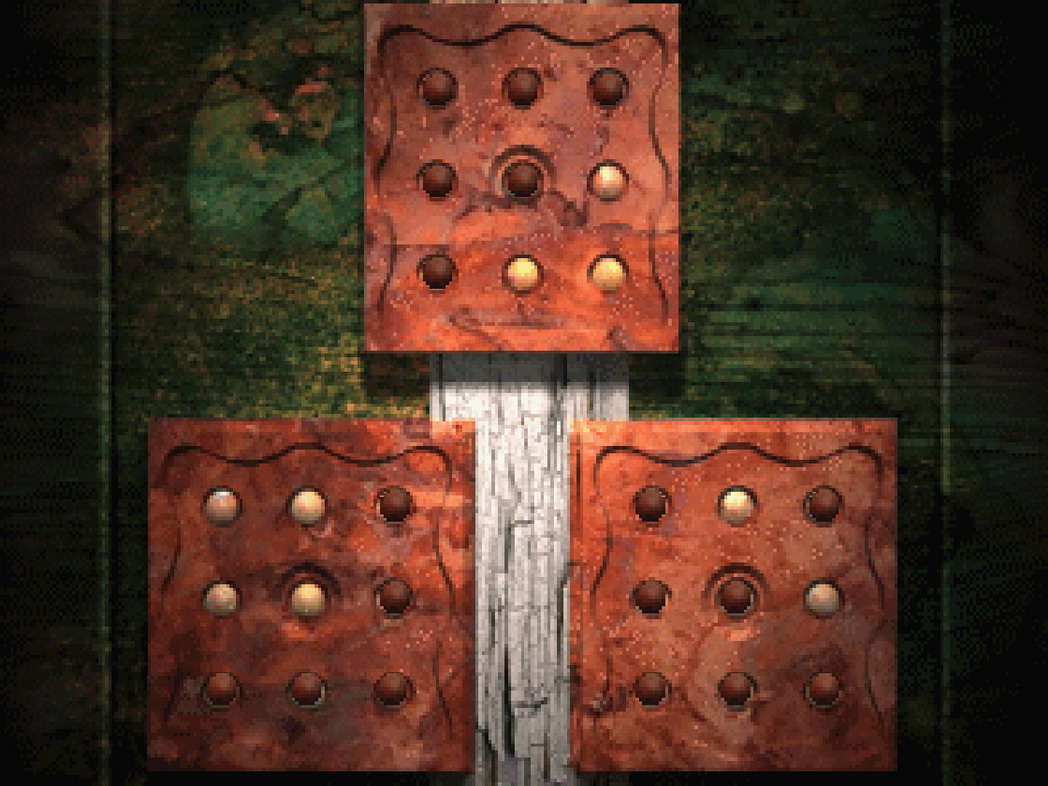
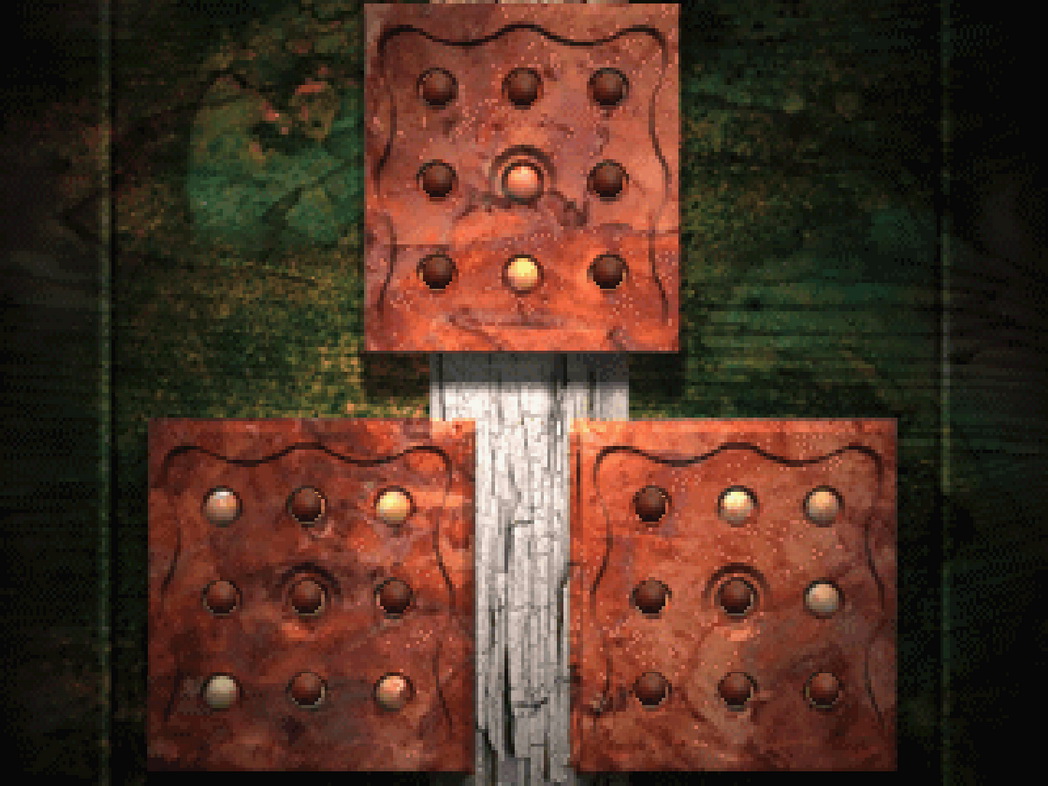
Plate Puzzle
|
08. Central Silent Hill Part 2Save Point Locations
Walkthrough
|
09. Nightmare Central Silent HillSave Point Locations
Walkthrough
Boss 2: Twinfeeler
Boss 3: Floatstinger
|
10. Sewers (To Resort Area)Save Point Locations
Walkthrough
|
11. Silent Hill Resort AreaSave Point Locations
Walkthrough
|
12. Nightmare Silent Hill Resort AreaSave Point Locations
Walkthrough
|
13. Sewers (To Amusement Park)Save Point Locations
Walkthrough
|
14. Lakeside Amusement ParkSave Point Locations
Walkthrough
Boss 4: Cybil
|
15. NowhereSave Point Locations
Walkthrough
Astrology Puzzle
The Grim Reaper's List
The Light Puzzle
Boss 5: Incubus / Incubator
Congratulations on completing your speed run through the game. A time under 2 hours should be easily achievable on your first attempt, while under an hour is very achievable once you have a good understanding of the game. Feel free to keep practicing and do consider going for a 10-star ranking, also very much a speed run, with help from the 10-Star Ranking Guide . |
|
| by Andrew Haffenden aka Conquerer (Silent Hill FAQ/Walktrough) |