"Louise" Box Puzzle (Hospital)
Letter from Silent Heaven
- Grandfather Clock (Apartments)
- Safe Combination (Apartments)
- Old Coin Desk (Apartments)
- 3F Patient Wing Keypad (Hospital)
- "Louise" Box (Hospital)
- Trick or Treat Chest (Hospital)
- Trap Room Keypad (Historical Society)
- Box of Faces (Labyrinth)
- Free the Innocent Man (Labyrinth)
- Locked Briefcase (Hotel)
- Music Box Player (Hotel)
Born from a Wish
Location: Brookhaven Hospital, Room S14 3F
Requires:
- "Purple Bull" Key: On the desk in the Document Room 1F.
- "Lapis Eye" Key: Inside the open drawer of room M2 2F.
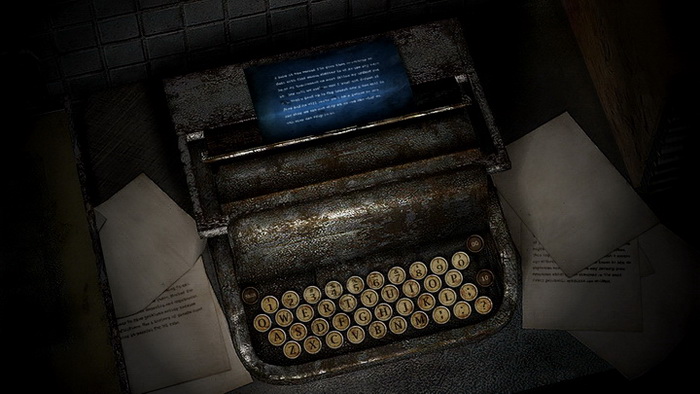
- Code: "Imprint on carbon paper": Typewriter, Examining Room 3 2F.
- Code: "Tern tern tern the numbers": 3F Special Treatment Room padded cell.
Contents
Intro
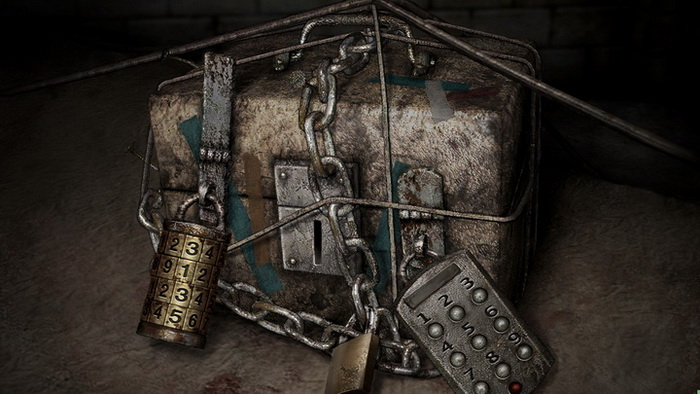
Examining the box, it has two key locks and two combination locks keeping it closed. When you acquired the "Purple Bull" Key in the Document Room, there was a note that said it was probably for "that box". Additionally, the "Lapis Eye" Key has a blue center described by James as being "lapis lazuli", which is a deep-blue rock known for its unique colour. On the box you may notice some blue tape, matching the two together.
Solution
So there we go. To speed things up, combine and use the "Purple Bull" Key and "Lapis Eye" Key from your inventory (or use them separately, doesn't matter). That takes care of the two key locks, with two combination locks remaining.
If you remember, the bloody wall code had a message written under it that began with "Tern tern tern the numbers", implying it's for a turning lock. So input that code into the turning lock on the left, referring to the memo with the same title in the Memo section of your inventory to see it again.
You also found another code in the "Imprint on carbon paper" memo in Examining Room 3, also now found in that Memo section. On Easy/Normal Riddle Levels, this memo mentions "the button key doesnt scare me", so go ahead and input the code into the button lock on the right. On Hard/Extra Riddle Levels it doesn't specify, but it's obvious enough through the process of elimination. Once all four locks have been released, the box will open.
Deciphering the Bloody Wall Code
Now, the bloody wall code is extremely notorious for being difficult to read due to how messy it is. Unfortunately the code is random every time so this is going to be up to you to solve exactly what the numbers are, but I can give you some tips to do that.
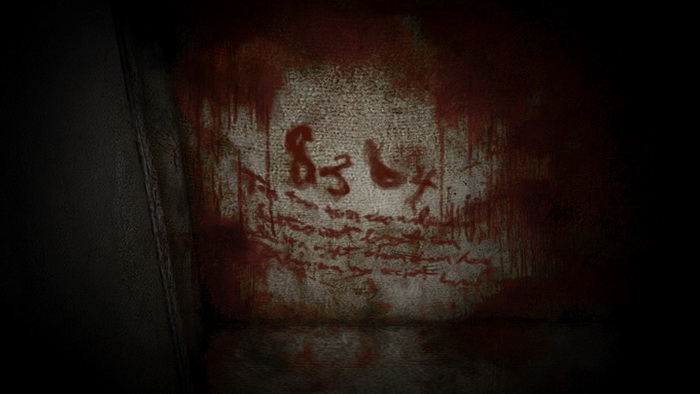
My first word of advice would be to look at the code and write down all the possibilities that each number could be to give you some solutions to try. Fives can look like sixes or even just random lines, sevens can look like twos, threes or nines, and ones can look like bent lines. But really, fives and sevens are the most troublesome so consider trying those out if your numbers are in the ballpark of looking like them – remember, the code was written by a psychotic mental patient at the end of the day.
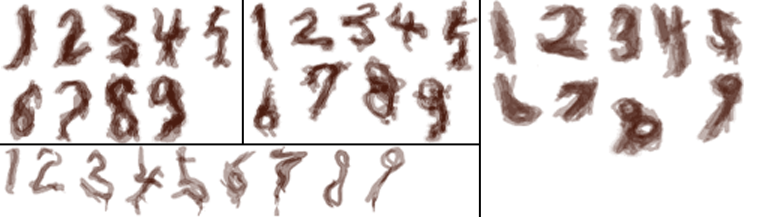
Note that although the code is randomly selected, there is only one way a number in each specific column can look. So a five as the third number will always look the same in that column, but it will look different than the fives that can appear in the other columns. Therefore this code should become easier to decipher the more you play, and you may see troubling codes like 5757 appear more than once.
One last note for the lost souls who are trying to decipher the code from the third person view without examining the wall, press X for the close-up view. Yes, I've interacted with people who didn't know this before, so just putting it out there.
Again, my best advice is to just write down the code as it appears and keep guessing possible numbers for each digit. Some will appear obvious so you can more or less lock them in, but keep experimenting with the hard to read ones and try a bunch of potential combinations. With enough effort or trial and error, you will decipher the code correctly. Just hang in there.
In case you lost all hope to decipher the code yourself, here's the texture image from the game's files where you can easily locate each digit's depiction for all four positions of the code.
by Andrew Haffenden aka Conquerer (Silent Hill 2 Puzzle Guide) |