Safe Combination Puzzle (Apartments)
Letter from Silent Heaven
- Grandfather Clock (Apartments)
- Safe Combination (Apartments)
- Old Coin Desk (Apartments)
- 3F Patient Wing Keypad (Hospital)
- "Louise" Box (Hospital)
- Trick or Treat Chest (Hospital)
- Trap Room Keypad (Historical Society)
- Box of Faces (Labyrinth)
- Free the Innocent Man (Labyrinth)
- Locked Briefcase (Hotel)
- Music Box Player (Hotel)
Born from a Wish
Location: Blue Creek Apartments, Room 203 2F
Requires: "Wallet in toilet bowl" memo found in 203's toilet, containing the combination.
Contents
- Intro
- Solution
Intro
First of all, this puzzle is optional, so if you really don't want to bother with it you can just move on. However, there's a whole bunch of ammo inside and it's quite a simple puzzle.
The combination is random each time so you will get your own unique code, but it'll follow the format of four numbers separated by three sections of arrows like so:
## >> ## << ## >> ##
Now, depending on your riddle level you will see either all numbers or some combination of numbers with roman numerals or letters. Refer to the difficulty levels below for each solution.
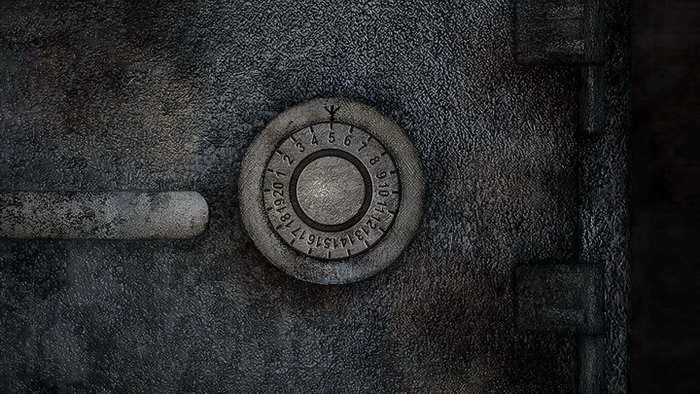
As for the safe and inputting the code, it works the same way on all difficulty levels so let me clarify. You must rotate the safe dial in any direction to the first number, then rotate right to the second number, then left to the third number, then right to the final number upon which the safe will open without any additional input.
What may confuse you here is that the dial counts down when you turn right and up when you turn left, but that's exactly as it would in real life. If you find it confusing, just remember that the arrows mean for you to press that direction until you reach the correct number, regardless of how it's turning. So that means: go to first number, press right until second number, press left until third number, press right until fourth number and it'll open.
Solution
Easy/Normal
Here you will get the simplest code with plain old numbers. Let's grab a random code to demonstrate: 15 >> 08 << 12 >> 06. If this were your code, you would turn the dial in any direction to 15. Then you would turn the dial right until 8. Next, you'd turn the dial left until 12. Finally, you'd turn the dial right and stop at 6, at which point the safe would open.
Hard
Now you'll get a code with some normal numbers and roman numerals mixed in, but it's super simple. The only two numerals that will appear here are V (5) and X (10), however they can be used on their own, in multiples, or mixed with regular numbers.
Therefore you may see VV, XV or XX. VV is 5 + 5 = 10; XV is 10 + 5 = 15; and XX is 10 + 10 = 20. Normally 10 would just be X, but in this case the goal is always to add numerals together so you may see VV instead.
You may also see numerals mixed with regular numbers, for example: X5, VV2 or XV4. X5 would be 10 + 5 = 15; VV2 would be 5 + 5 + 2 = 12; and XV4 would be 10 + 5 + 4 = 19.
Taking this into account, here's an example code: 9 >> 6 << VV1 >> X0. If this were your code, you would turn the dial in any direction to 9. Next, you'd turn the dial right until 6. Then you'd turn the dial left until 11 (5 + 5 + 1 = 11). Finally, you'd turn the dial right and stop at 10 (10 + 0 = 10) and the safe would open.
Extra
Combinations on this level tend to look like shockers at first, but it's quite simple to understand. This time the combination in the memo will be composed of numbers and letters. Each of the four numbers can only be either a number or a letter, not combined together, which makes things easier.
There's no real in-game clue as to what the letters mean, however you may or may not have some general understanding of different numbering systems of the world. Normally we use the decimal or base-10 system, which only uses numbers 0-9 for counting, with multiple digits used together for figures above 9. Another system is the hexadecimal or base-16 system, which uses 0-9 as well, but also A, B, C, D, E and F to represent 10, 11, 12, 13, 14, and 15.
The vigesimal or base-20 system takes this further by adding G-J to represent 16-19. It stops there, thus with a finite number of 20 different symbols for number representation (and thus "base-20"), but you can always extrapolate this system to make use of the full alphabet. In our case we only need to extend it one more letter for K to represent 20, the highest number on the dial. And with that we have unlocked the key to the puzzle.
While numbers 0 through 9 still exist normally, numbers 10 through 20 will be replaced with letters a through k (displayed in lowercase). Basically we can simplify it by taking each letter's position in the alphabet (1-26) and adding 9 to determine what each letter represents. Nothing past k (11 + 9) matters and will not be seen in this puzzle since the dial tops out at 20.
Therefore we can determine all the possible numbers and letters that can appear and what each of them represent like so:
| 0 | 1 | 2 | 3 | 4 | 5 | 6 | 7 | 8 | 9 | a | b | c | d | e | f | g | h | i | j | k |
| 10 | 11 | 12 | 13 | 14 | 15 | 16 | 17 | 18 | 19 | 20 | ||||||||||
For example, c is the third letter of the alphabet (3 + 9 = 12) and i is the ninth letter (9 + 9 = 18).
All right, let's now make up a code: 3 >> j << 4 << b. If this were your code, you would turn the dial in any direction to 3. Next, you'd turn the dial right to 19 (10 + 9 = 19). Next, you'd turn the dial left to 4. Finally, you'd turn the dial right and stop at 11 (2 + 9 = 11), where the safe would open.
With the safe open, grab the four boxes of Handgun Bullets inside.
by Andrew Haffenden aka Conquerer (Silent Hill 2 Puzzle Guide) |