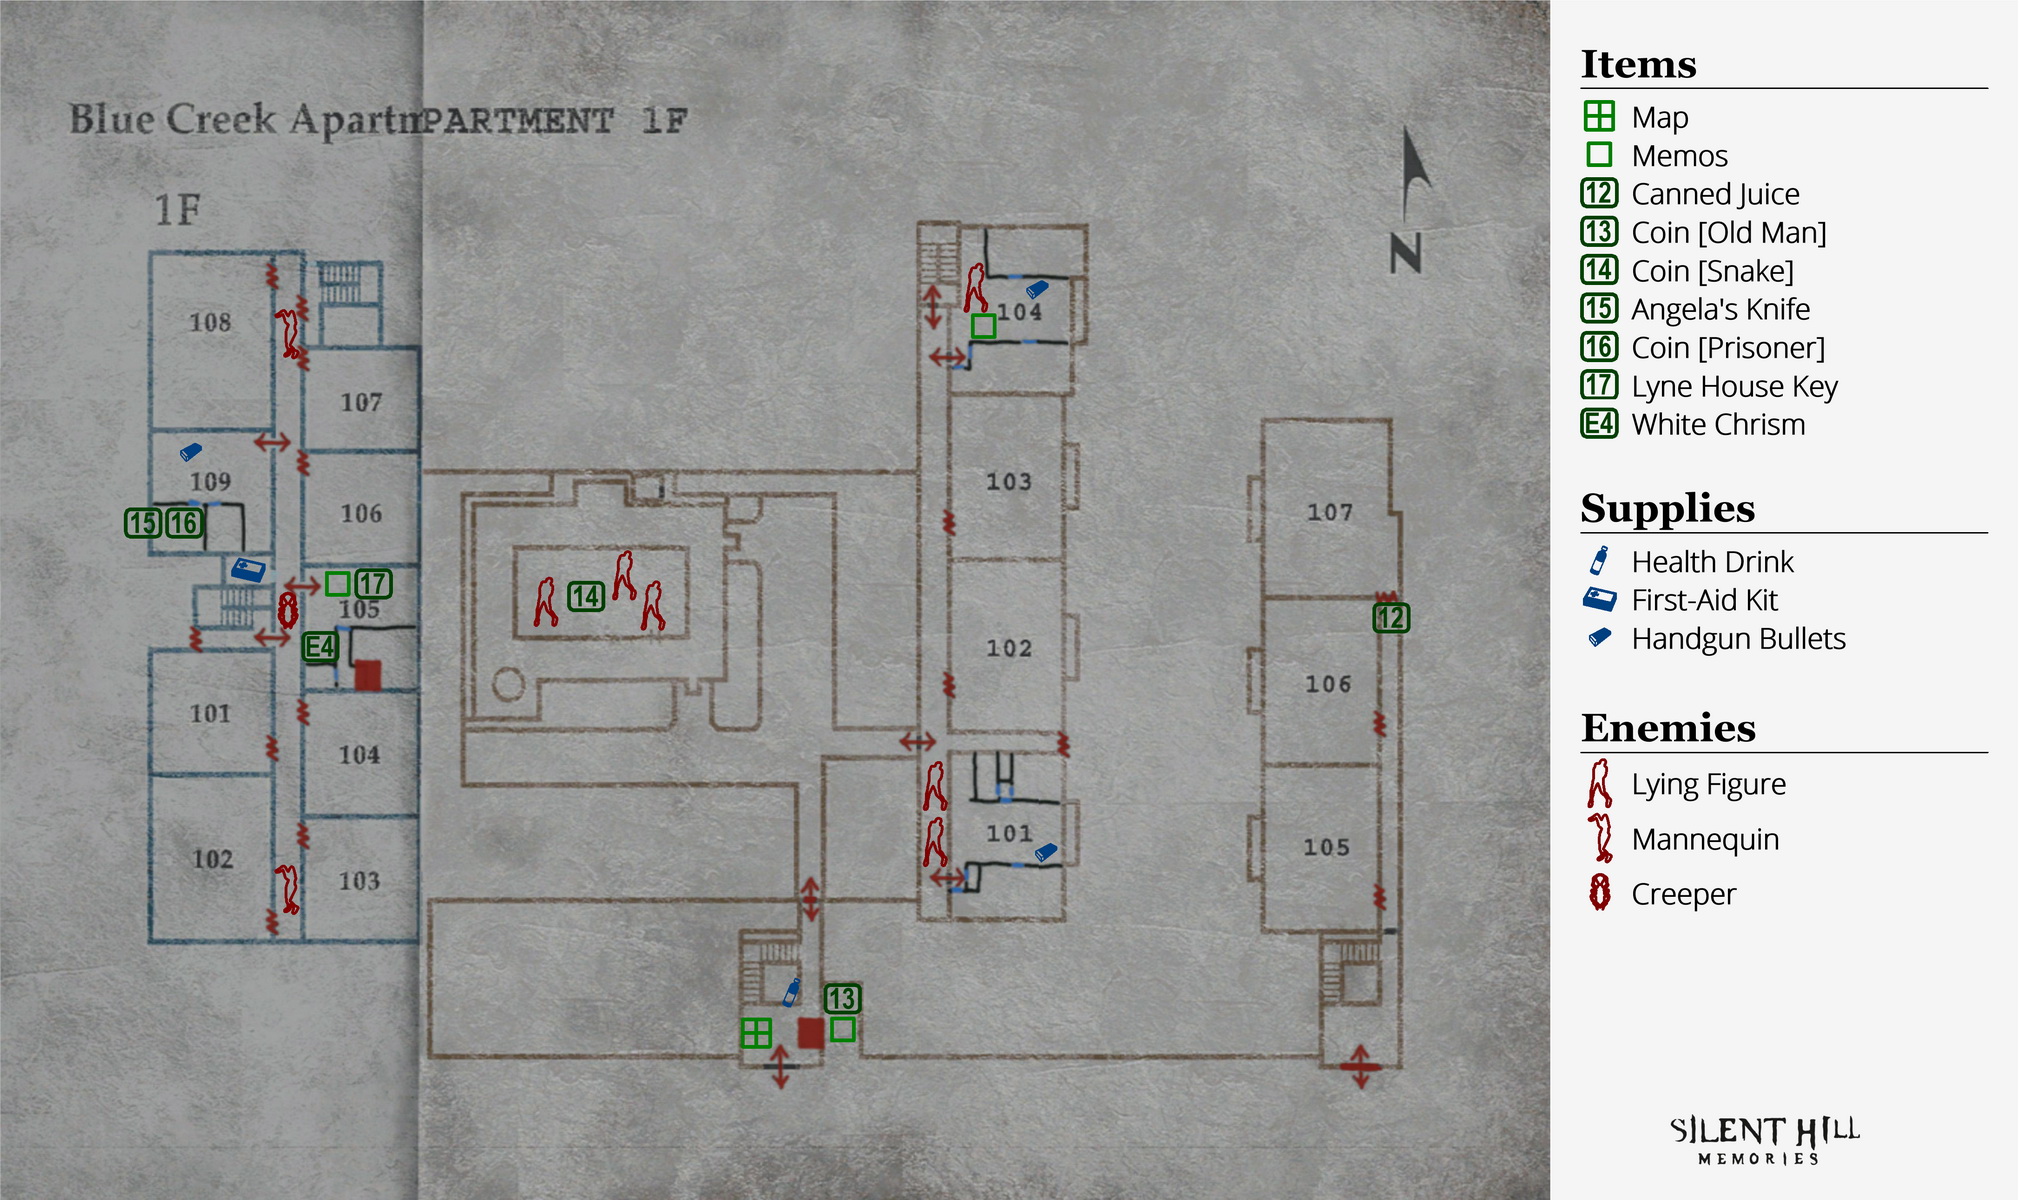
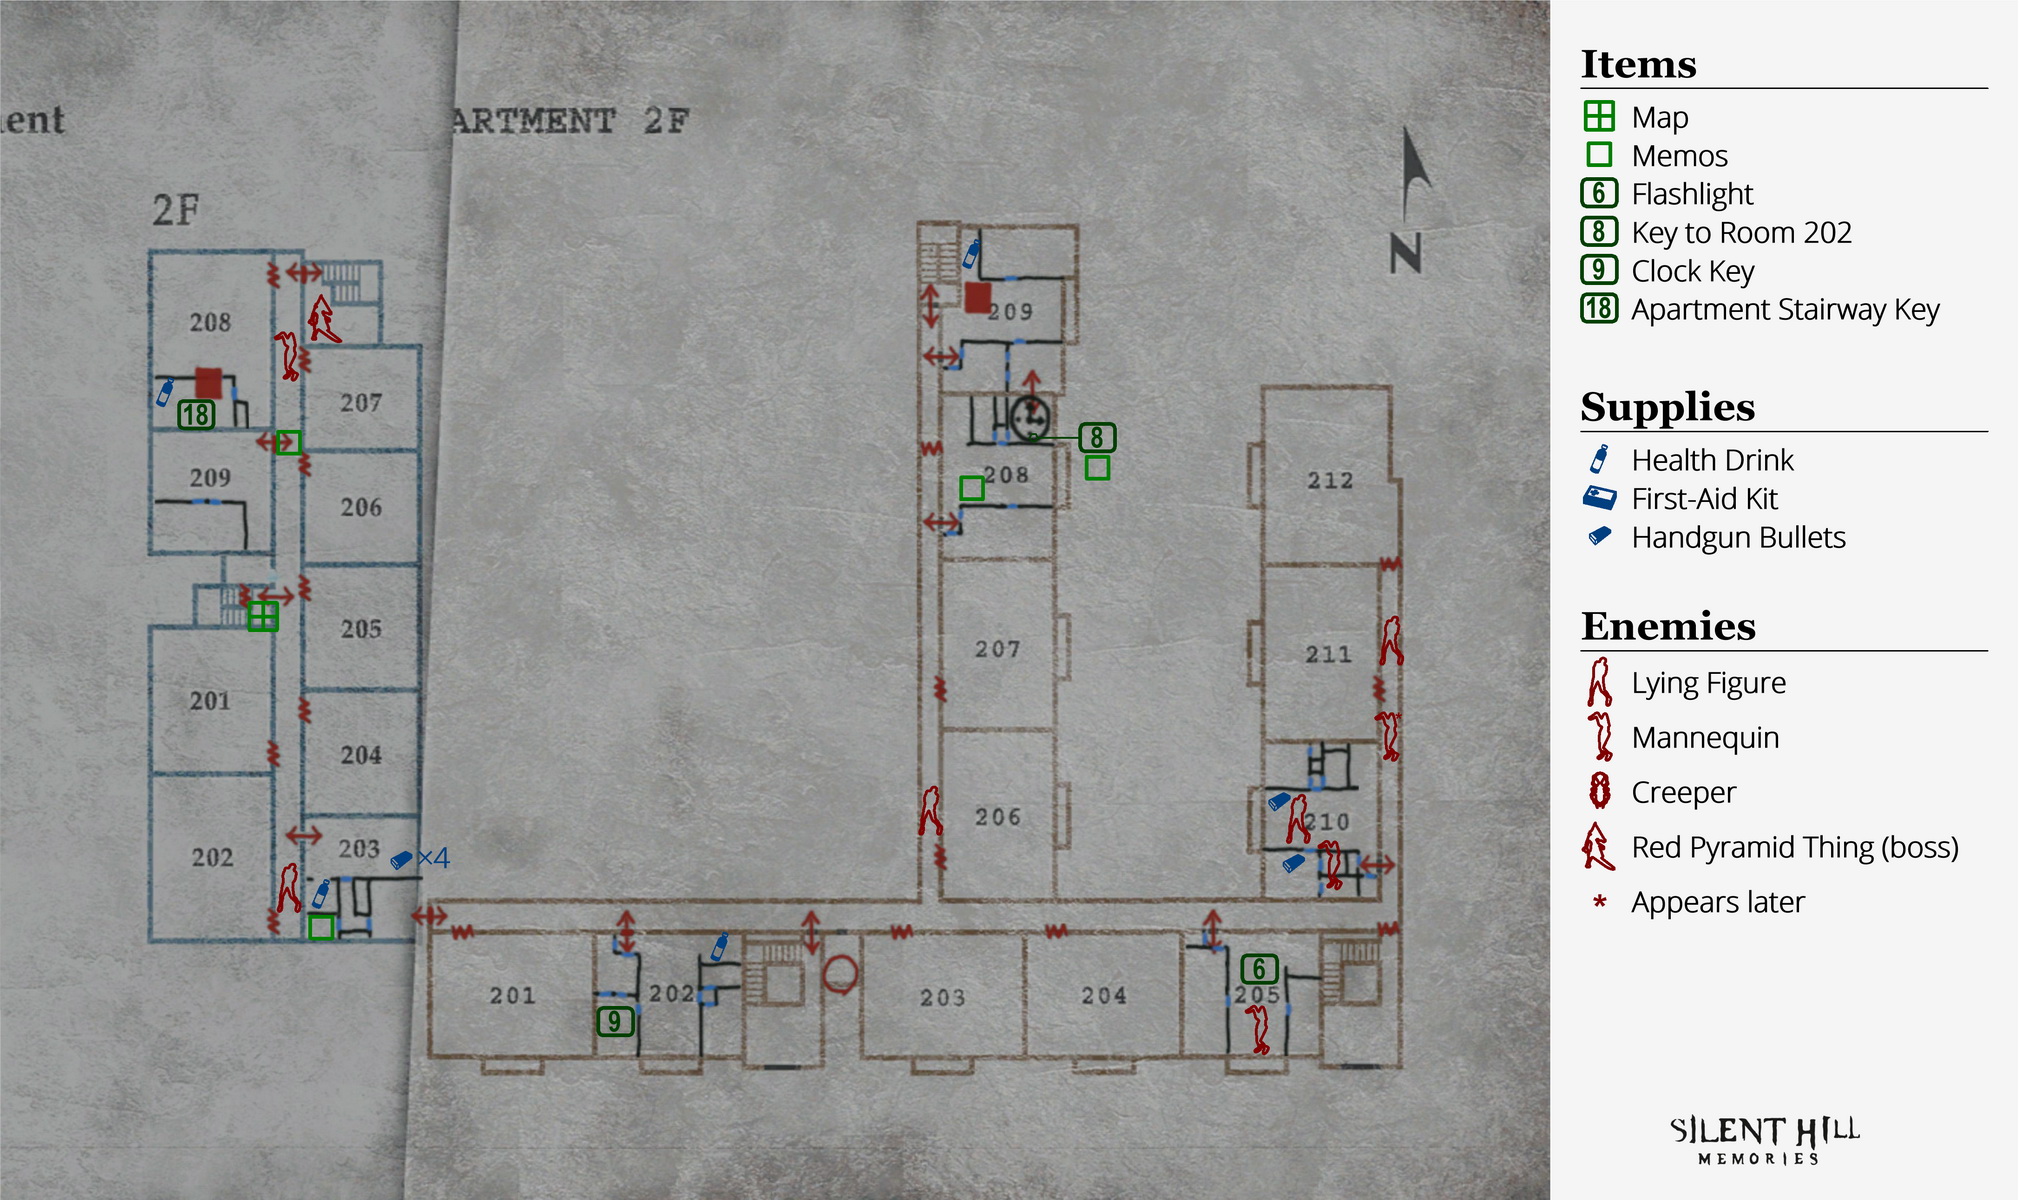
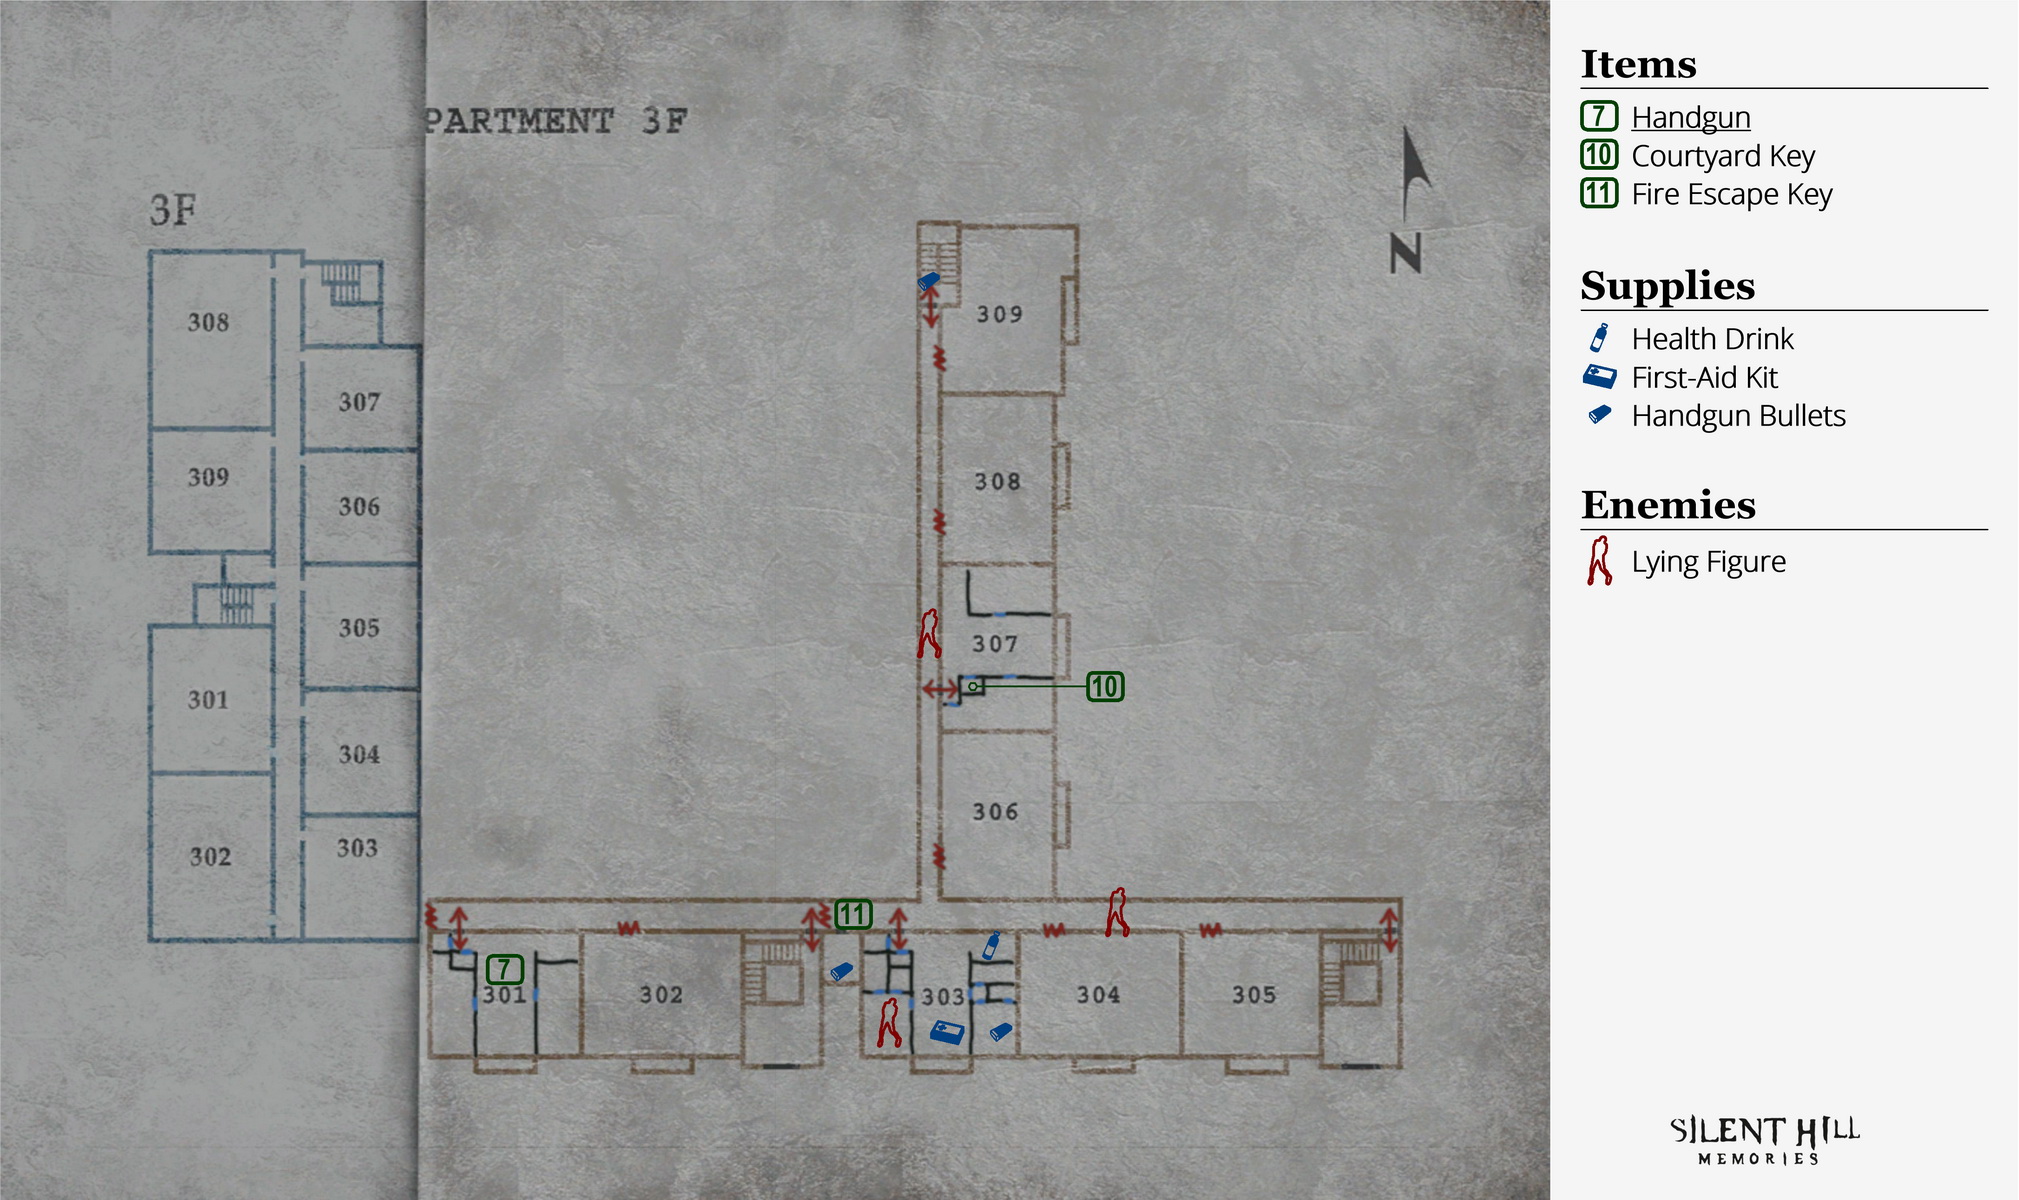
Blue Creek Apartments
Letter from Silent Heaven
- East South Vale
- Wood Side Apartments
- Blue Creek Apartments
- West South Vale
- Brookhaven Hospital
- Nightmare Hospital
- Dark South Vale
- Silent Hill Historical Society
- Toluca Prison
- The Labyrinth
- Toluca Lake
- Lake View Hotel
- Nightmare Hotel
Born from a Wish
Welcome to the third chapter of the complete walkthrough guide for the original Silent Hill 2 (2001, PS2, Xbox, PC), covering Blue Creek Apartments. This guide provides a comprehensive walkthrough with all item locations, detailed puzzle solutions, and boss strategies. This walkthrough also includes complete maps with all items and monsters marked for easy reference.
This is a walkthrough guide for the original Silent Hill 2. For the walkthrough for the Silent Hill 2 Remake (2024), please go to this page.
Color legend
Letter from Mary – items
Wooden Plank – weapons
Health Drink – supplies
Map of Silent Hill – maps
Save Point – save points
Contents
Complete Maps |
|
Walkthrough
"But... You're the same as me. It's easier just to run. Besides, it's what we deserve."
Room 203
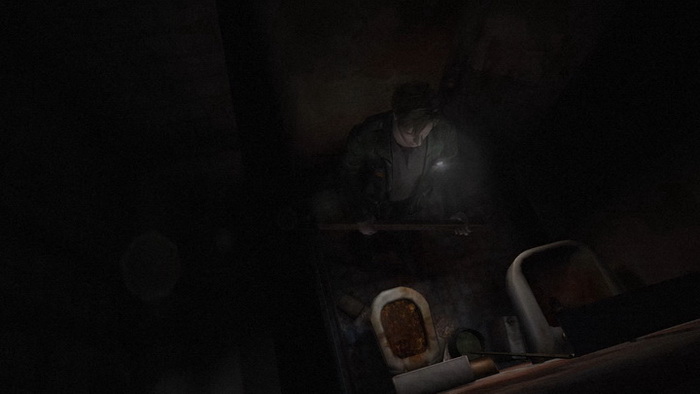
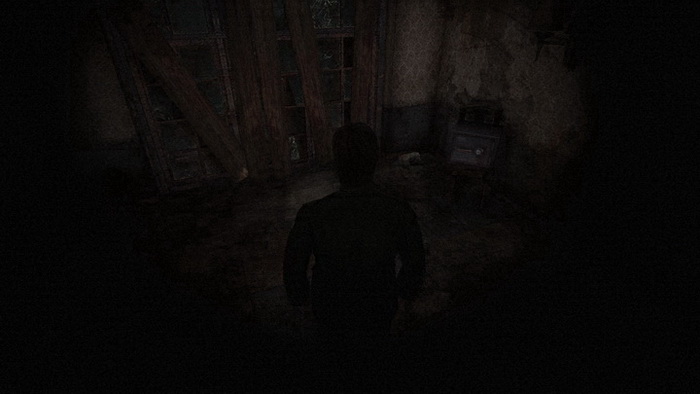
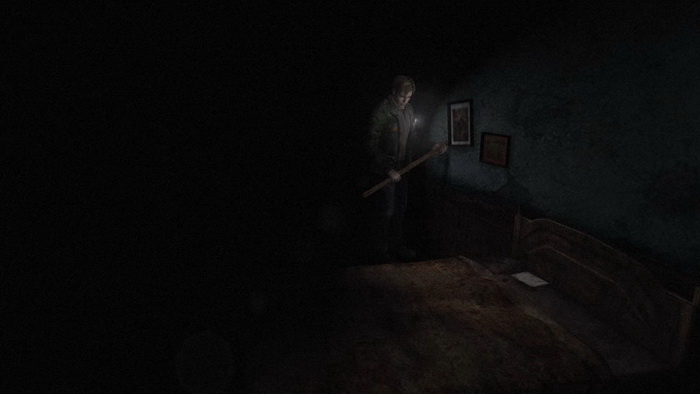
Through the window, you'll find yourself in a bedroom of room 203 of Blue Creek Apartments. It's a different apartment building, so you'll need to find another map. There's nothing in the bedroom, so move ahead to the washroom. If you check the toilet, James says there's something in there. Oh dear... Prepare yourself and stick your hand into the unknown. Hey, it's not even the first time James has done this so far.
James finds a wallet in the toilet bowl with a memo inside, containing arrows and numbers (and possibly roman numerals or letters depending on your difficulty level). If you head into the living room of the apartment, you'll find a locked safe on a chair. It appears that this is the combination to the safe, so get ready to solve a puzzle.
Puzzle: Safe Combination (Room 203)
First of all, this puzzle is optional, so if you really don't want to bother with it you can just move on. However, there's a whole bunch of ammo inside and it's quite a simple puzzle.
The combination is random each time so you will get your own unique code, but it'll follow the format of four numbers separated by three sections of arrows like so:
## >> ## << ## >> ##
Now, depending on your riddle level you will see either all numbers or some combination of numbers with roman numerals or letters. Refer to the difficulty levels below for each solution.
As for the safe and inputting the code, it works the same way on all difficulty levels so let me clarify. You must rotate the safe dial in any direction to the first number, then rotate right to the second number, then left to the third number, then right to the final number upon which the safe will open without any additional input.
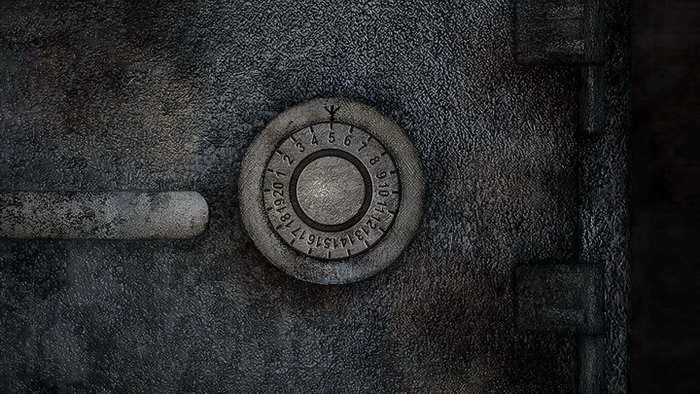
What may confuse you here is that the dial counts down when you turn right and up when you turn left, but that's exactly as it would in real life. If you find it confusing, just remember that the arrows mean for you to press that direction until you reach the correct number, regardless of how it's turning. So that means: go to first number, press right until second number, press left until third number, press right until fourth number and it'll open.
Easy/Normal
Here you will get the simplest code with plain old numbers. Let's grab a random code to demonstrate: 15 >> 08 << 12 >> 06. If this were your code, you would turn the dial in any direction to 15. Then you would turn the dial right until 8. Next, you'd turn the dial left until 12. Finally, you'd turn the dial right and stop at 6, at which point the safe would open.
Hard
Now you'll get a code with some normal numbers and roman numerals mixed in, but it's super simple. The only two numerals that will appear here are V (5) and X (10), however they can be used on their own, in multiples, or mixed with regular numbers.
Therefore you may see VV, XV or XX. VV is 5 + 5 = 10; XV is 10 + 5 = 15; and XX is 10 + 10 = 20. Normally 10 would just be X, but in this case the goal is always to add numerals together so you may see VV instead.
You may also see numerals mixed with regular numbers, for example: X5, VV2 or XV4. X5 would be 10 + 5 = 15; VV2 would be 5 + 5 + 2 = 12; and XV4 would be 10 + 5 + 4 = 19.
Taking this into account, here's an example code: 9 >> 6 << VV1 >> X0. If this were your code, you would turn the dial in any direction to 9. Next, you'd turn the dial right until 6. Then you'd turn the dial left until 11 (5 + 5 + 1 = 11). Finally, you'd turn the dial right and stop at 10 (10 + 0 = 10) and the safe would open.
Extra
Combinations on this level tend to look like shockers at first, but it's quite simple to understand. This time the combination in the memo will be composed of numbers and letters. Each of the four numbers can only be either a number or a letter, not combined together, which makes things easier.
There's no real in-game clue as to what the letters mean, however you may or may not have some general understanding of different numbering systems of the world. Normally we use the decimal or base-10 system, which only uses numbers 0-9 for counting, with multiple digits used together for figures above 9. Another system is the hexadecimal or base-16 system, which uses 0-9 as well, but also A, B, C, D, E and F to represent 10, 11, 12, 13, 14, and 15.
The vigesimal or base-20 system takes this further by adding G-J to represent 16-19. It stops there, thus with a finite number of 20 different symbols for number representation (and thus "base-20"), but you can always extrapolate this system to make use of the full alphabet. In our case we only need to extend it one more letter for K to represent 20, the highest number on the dial. And with that we have unlocked the key to the puzzle.
While numbers 0 through 9 still exist normally, numbers 10 through 20 will be replaced with letters a through k (displayed in lowercase). Basically we can simplify it by taking each letter's position in the alphabet (1-26) and adding 9 to determine what each letter represents. Nothing past k (11 + 9) matters and will not be seen in this puzzle since the dial tops out at 20.
Therefore we can determine all the possible numbers and letters that can appear and what each of them represent like so:
| 0 | 1 | 2 | 3 | 4 | 5 | 6 | 7 | 8 | 9 | a | b | c | d | e | f | g | h | i | j | k |
| 10 | 11 | 12 | 13 | 14 | 15 | 16 | 17 | 18 | 19 | 20 | ||||||||||
For example, c is the third letter of the alphabet (3 + 9 = 12) and i is the ninth letter (9 + 9 = 18).
All right, let's now make up a code: 3 >> j << 4 << b. If this were your code, you would turn the dial in any direction to 3. Next, you'd turn the dial right to 19 (10 + 9 = 19). Next, you'd turn the dial left to 4. Finally, you'd turn the dial right and stop at 11 (2 + 9 = 11), where the safe would open.
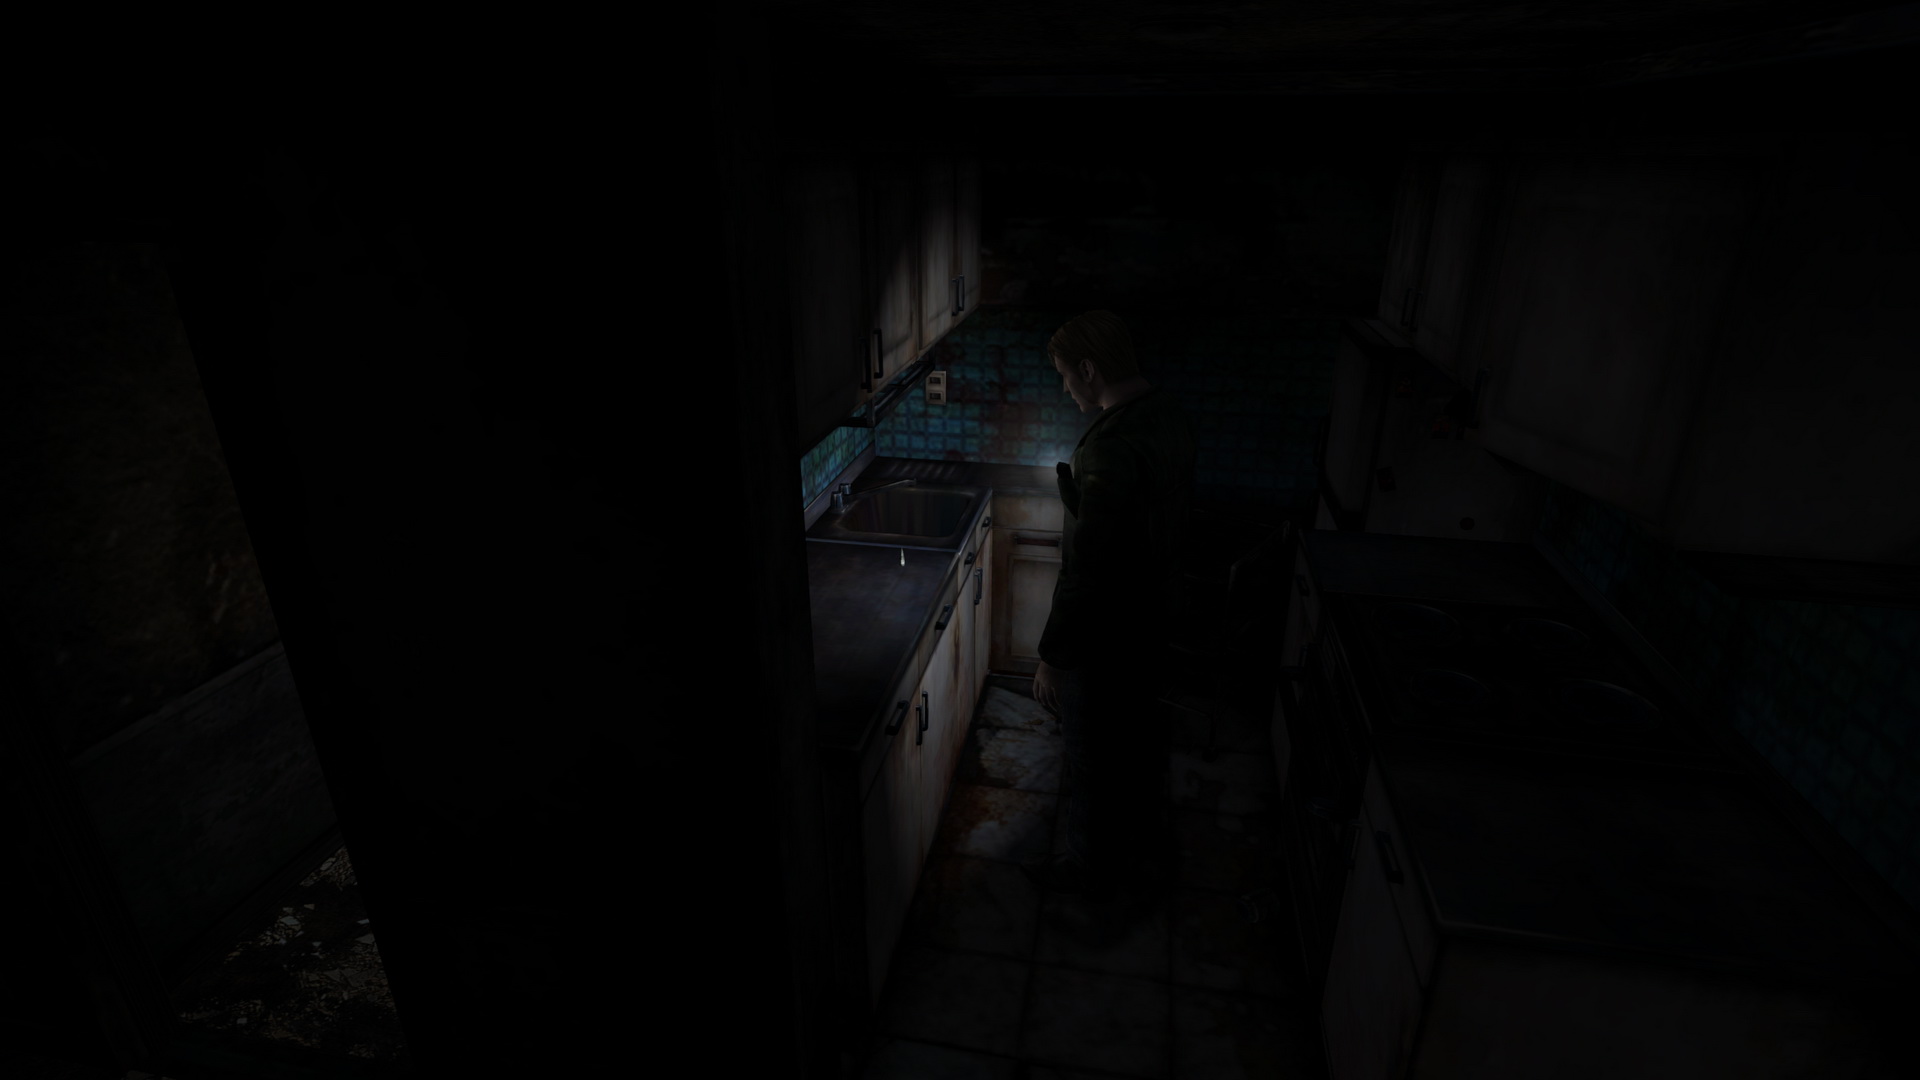
Once the safe is open, you'll find four boxes of Handgun Bullets inside. Damn right – that's the reward a man gets for sticking his hand in a scummy toilet without even questioning it. Anyway, in the nearby kitchenette is a Health Drink as well. Leave the now empty room.
Second Floor
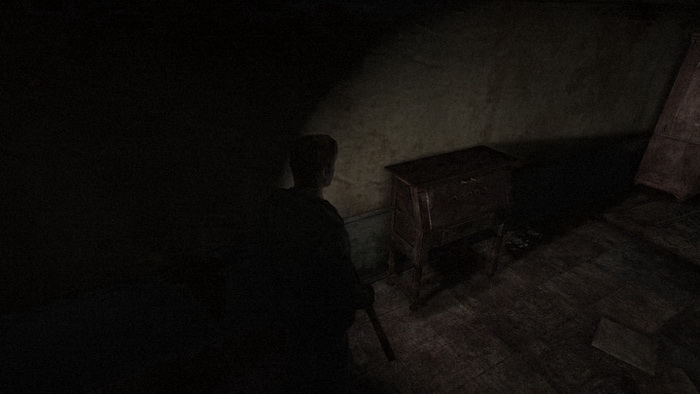
Out in the hall, ignore the Lying Figure to your left. You won't find any other open rooms here, but you will find a note on the locked door to room 209. It tells you that the key for that room is in one of the apartments near the stairwell on the first floor, so that's your destination. Look for the glowing "EXIT" sign on the roof to locate the blue stairwell door. Inside, look to James' left with the Flashlight on to find the Map of the West Apt. Bldg.
Despite the map covering the third floor, the stairs up there are blocked off and you cannot access it. Anyway, enter the first floor hallway through the door just down the stairs.
First Floor: Finding the Key to Room 209
Note the sound of the nearby Creeper and shoot it if it comes near you. Find the laundry room to the left for a First-Aid Kit on a washing machine.
There are two unlocked rooms on this floor (105 and 109) and both are near the staircase, as the earlier note described. Room 105 won't do you any good right now since you'll only find an odd desk that looks like a riddle that you're not ready for (you'll still need another coin for it). So enter room 109 just north of the stairwell, ignoring the still Mannequin ahead.
Note on Room 109:
If the door to room 109 will not open no matter how hard James tries, you need to see Eddie in room 101 of Wood Side Apartments first. You'll need to go back through the window in room 203 of Blue Creek and through the first floor courtyard to get there.
Inside 109, find the Handgun Bullets sitting on the couch. There's nothing else useful in this main section of the apartment, but you'll notice a vibrant white door near the couch, which is unlocked. Take a moment to acknowledge the visual metaphor of it and the boarded up black door right beside it, along with the teddy bear on the floor. Interesting. Pass through the white door for a cutscene and to be properly introduced to Angela. Here you will receive 15 Angela's Knife from her and then she'll leave the room.
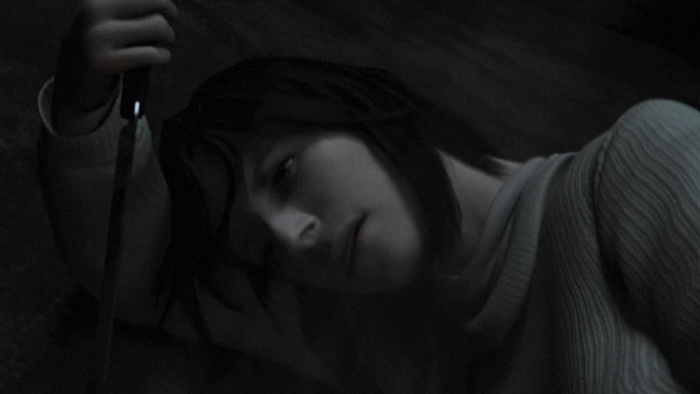
Note on Angela's Knife:
If you enter your inventory to take a look at the knife, you'll notice the "Examine" function. If you ever examine this knife, especially on multiple occasions, it may influence the outcome of the ending you'll receive at the end of the game. I suggest you play as you would normally, but more can be read in the Endings section upon completing the game.
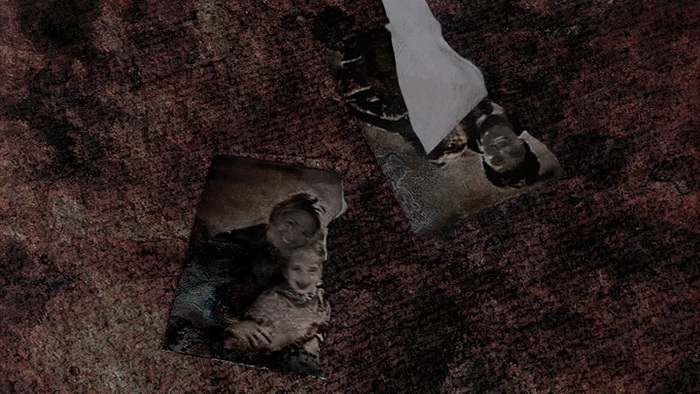
Once Angela leaves, grab the 16 Coin [Prisoner] sitting on the nightstand. If you have a good eye, you may spot something in the middle of the floor in the room. It's a ripped photo, which reveals a bit more about Angela's character if you can decipher the message along with her behaviour. More will be revealed in time anyway.
Exit the room and the apartment altogether. Remembering the other unlocked room on this floor, enter room 105. The key for room 209 wasn't in 109, so it must be in here. Noticing a strange-looking secretarial desk in the living room, examine it. It's time for another puzzle.
Puzzle: Old Coin Desk (Room 105)
Examining the desk, you'll find an engraving of a riddle and five circular slots approximately one-inch wide, similar in size to your three coins. Therefore you must insert your three coins into the correct slots as described in the riddle. To get a better understating of how to coins correspond to the riddle, enter your inventory and examine each coin. You'll notice the following images on the coins:
To insert a coin into a slot, stand in front of the desk and use one from your inventory. You will then be able to select a slot to insert the coin. To remove an inserted coin, examine the desk, skip the riddle to view the five holes, and then you will be able to select a coin to remove.
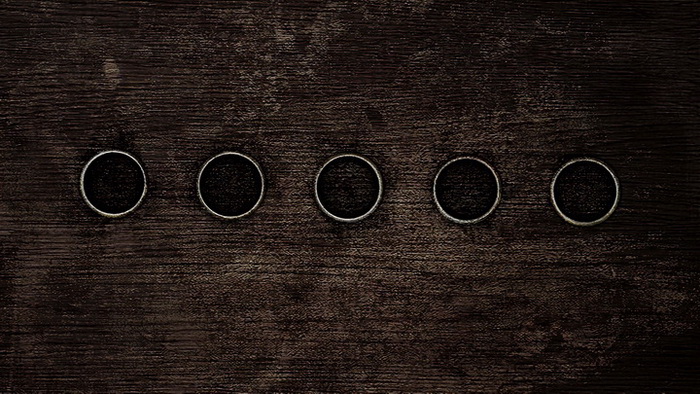
How complex the riddle is depends on your riddle level. View all riddles and their solutions below. Easy
This couldn't be any simpler. The first line, "To the right is the lady", explains that the Prisoner, who is a woman as shown on the coin and the only woman here, sits in the right end slot. The next line, "To the left is the old one", clearly states that the Old Man sits in the left end slot. Lastly, "In the center crawls the other" explains that the Snake, the only one remaining and a creature that naturally crawls, sits in the middle slot. The rest of the riddle just explains that only three coins are needed for this puzzle, not five. Now that you have the solution, put the Coin [Old Man] in the left end slot, the Coin [Snake] in the middle slot, and the Coin [Prisoner] in the right end slot as shown below.
Normal
The first line, "Three bright coins in five holes be", simply describes that three coins fit into the five slots and no more are needed. "At one end sits the seducer of she" tells us that the Snake sits in one of the two end slots. It was the Snake who seduced Eve to eat the apple in the Garden of Eden after all. The next line, "The wind from behind the woman doth play", describes which end the Snake sits at, and the Prisoner in relation to it. If you take a look at the Prisoner coin (which is the woman), you'll notice that she faces to the left. If the woman is causing the wind and is behind the Snake, she has to be on the Snake's left. And to clarify the English, it's the "wind from behind" that the woman is playing, not wind that is behind the woman. Moreover, the wind could be interpreted as a slot in itself, between the Snake and the Prisoner. "The formless one, null, lies furthest from they" signifies that the slot furthest from the Prisoner and Snake is empty (formless). This has to be the leftmost slot as the Snake has already taken the right end slot in order for the right-facing woman to play the wind behind it. "The old one beside the serpent sits not" states that the Old Man doesn't sit immediately left of the Snake, which we've already interpreted as the slot that occupies the wind the woman is playing anyway. "Tis to the prisoner's left that he doth rot" explains the rest. So the Old Man sits in the slot to the left of the Prisoner, and thus to the right of the formless one (empty) that occupies the left end slot. Now that you have the solution, place the Coin [Old Man] in the second slot, the Coin [Prisoner] in the middle slot, and the Coin [Snake] in the fifth slot as shown below.
Hard
This riddle plays out a little differently and like a story, listing all the slots in order as it goes. Whether the first slot lies on the left or right we'll have to wait for the end to find out, so we'll keep the order in mind as numbers until then. "First lies the seat of He who is Peerless; Silent and empty, heartless and fearless" explains that the first slot is empty. Silent, empty, heartless, fearless – this cannot be the Old Man, Prisoner or Snake. They all have hearts for one, the humans likely have fears, perhaps the Snake cannot be silent, and none of them are empty. Therefore the first slot is empty and not a coin. "Beside him sits one who knows The place of the servant is next to the throne" is somewhat difficult to interpret. "One who knows" seems to signify an Old Man, who has come to know because of his age. The entire sentence together eliminates the Snake, which under normal thinking could not possibly know where a servant belongs. Further, the Prisoner isn't likely to know this either since she's locked away, so this appears to fit the Old Man the best, putting him in the second slot. "Dozens of feet, yet not a single toe" clarifies that there is no human (but possibly the Snake) between the second and fourth slots – "feet" being a unit of measure and "toe" simply serving as a pun. "The One that is Hidden beside him doth go" applies to the same slot, being hidden and beside "him" (Old Man). So the third slot is the "One that is Hidden" and not a coin. "Seducer of dreams, creature of Hades" may be somewhat misleading, as the creature of Hades should be a three-headed dog named Cerberus. However Hades has been portrayed while holding or accompanied by snakes in various portraits. Further, "Seducer of dreams" could signify the Snake in the Garden of Eden, seducing Eve to eat the apple. The Snake could also be interpreted as the only "creature" in this riddle, amongst men and women as humans, and silent or hidden ones. Therefore, the Snake appears to take the fourth slot. The meaning of "Lying further from Man and closer to Lady" is rather clear in placing the Snake relative to the (Old) Man and Lady (Prisoner). At the moment, the Old Man sits in the second slot and the Snake in the fourth. Taking this into account, the Prisoner can't be placed in the first or third slots, which would make her closer to the Man or equal distance to the Man and the Snake, and not correct. These two slots are already taken anyway by silent and hidden ones as we're about to shortly confirm, but if placed in the fifth slot, the Prisoner (Lady) is now closer to the Snake and further from Man as described. It also follows the format so far of listing every slot in order. "Man and Woman seeing all Heedless to the Raven's call" tells us that between the man (Old Man) and woman (Prisoner), they must see all five slots, perhaps directly. With the arrangement we currently have, this works out. The Prisoner sees the Snake's slot and her own, and the Old Man sees the two slots on his sides and his own. Man and Woman see all. The riddle goes on, stating that "Silent and Hidden the two may be They be not there for you to see". This confirms that the two slots mentioned earlier as being empty are in fact empty – the first slot, which is "silent", and the middle slot, which is "hidden". While we've only determined slot numbers so far, we don't yet know if the first slot starts on the left or right, so we turn to the final paragraph to clarify. "I speak thus with the North Star behind me; The birth of the sun is the start of the story". If the author speaks with the North Star behind them, then they'd be facing the south. And the birth of the sun? Well, it rises from the east every day. If facing south, the east is to the left. So the start of the story, the first slot, is on the left. Now that you have the solution, put the Coin [Old Man] in the second slot, the Coin [Snake] in the fourth slot, and the Coin [Prisoner] in the fifth slot as demonstrated below.
Extra
This riddle is very complex and requires very deep examining and thinking. The sentence, "Our souls must by their sinful weight; Descend to earth with lightness lost" seems to imply that the sins become greater as they descend to the earth. The next verse clarifies how that pertains to the coins. "To 'right' the sins that they hath laid" serves as a pun, signifying that the more sinful one is, the farther to the right of the five holes they belong. "When thrice in falling they intone The Happiness shall be thy own" just implies that three (thrice) coins fit into the five slots and that you shall be happy once you place them correctly and receive the prize. "The first note be not by the Horned One rung though it be there that all sins be sprung" determines that the Snake does not hold the first slot, however it is because of the Snake that "all sins be sprung". The key here is the Snake being represented as the Devil, the "Horned One", and the first sin. To connect the Devil (Horned One) to the Snake, there is what James describes as a crescent moon on the back of the Snake coin if you examine it, which can also appear to be a horn. Elaborating on the first sin, in the Garden of Eden with Adam and Eve, the Devil took the form of a Snake to seduce Eve to eat the apple, and from there sprung all sins – that's the context. "The Bringer of Life and the Bringer of Shame; the sins of the latter be ever more tame" says that the Snake, the Bringer of Shame, is less sinful (more tame) than the Prisoner (woman), the Bringer of Life. Women give birth to children and thus life, furthered by an image of eggs on the back of the Prisoner coin. Additionally, in the Garden of Eden, Adam and Eve walked naked and felt no shame, until the snake convinced Eve to eat the apple. After this, Adam and Eve covered themselves up with fig leaves, ashamed of their nakedness but also for disobeying their God and sinning. Thus, the Snake is the Bringer of Shame. The word "latter" in this case signifies the second of two things mentioned, so the sins of the Bringer of Shame (Snake) are lesser than the Bringer of Life (Woman/Prisoner). Therefore the Prisoner lies farther right than the Snake. "Though coming in the Aged One's wake the Formless One's soul in fear doth quake" mentions that there is an empty slot beside the Old Man, but we don't yet know where and on which side either will be placed. One could think being in the wake of (behind) the Aged One (Old Man), similar to being in the wake behind a ship passing through the water, puts the Formless One (empty slot) behind the Old Man. In the coin photo, the Old Man faces to the right, which would put the Formless One to its left in that case. However, as we'll shortly find out, this doesn't work, so perhaps it's simply referring to the Formless One attending the wake of the Old Man. A wake is a social gathering associated with death, usually held before a funeral, and serves as a celebration of the life of the dead. Further, there is a gravestone located on the back of the Old Man coin, signifying death, so this fits. Even more to the point, the verse signifies that the Formless One is trembling in fear of the Old Man. Why? Well, perhaps because he's looking at a dead man. One could suggest even further that the Formless One is fearful because he is more sinful than the Old Man, possibly placing him to his right, but we'll wait before we lock that in. "The Needless One, silent, with hungers all sated Is least then in sin with his lusts all abated" states that the Old Man is the least sinful of them all, with all his lusts removed. This is furthered by the idea of him being dead with the gravestone on the back of the coin. No longer alive, he is silent, his hungers satisfied and his lusts all gone, and thus it is impossible for him to sin any more. So that situates the Old Man at the left end as the least sinful and an empty slot (the Formless One quaking in fear) beside him. Otherwise, we know that the Snake will be farther left than the Prisoner since it is less sinful, but we don't know in which slots they fit just yet. So onto the final verse. "For the gravest of sinners His place be appointed And if he be lucky May his soul be anointed" states that a new person fits in the right end slot since they are the most serious and greatest sinner of them all. Although it is a "he", it cannot be the Old Man who is already the least sinful. Further it cannot be the Snake or the Prisoner (woman), nor the Formless One who is already situated beside the Old Man at the left. Thus the fifth and final slot is empty. Now we have the first, second, and fifth slots set into stone, leaving only the third and fourth slots left for the Snake and Prisoner. The Snake is less sinful than the Prisoner and therefore belongs in the third slot with the Prisoner in the fourth beside it. Now that you have the solution, put the Coin [Old Man] in the first slot, the Coin [Snake] in the middle slot, and the Coin [Prisoner] in the fourth slot like below.
|
Once you've solved the old coin puzzle, the secretarial desk will open and reveal the 17 Lyne House Key inside. Directly behind you opposite the desk you will also find a small path that leads to a Save Point on the wall.
New Game Plus Item: White Chrism
|
Now with the key to room 209, exit the room and head back up to 2F via the stairwell.
Second Floor: Getting the Exit Stairway Key
Enter room 209 using the Lyne House Key. Inside the apartment, you may hear some whispers, but that's not important right now. Move out to the balcony from the living room, which connects to room 208. In 208, grab the Handgun Bullets on the chair and take the 18 Apartment Stairway Key on the envelope on the bed. Using the Save Point on the wall in the bedroom is recommended because a boss fight is coming up very shortly.
Cross back over to room 209 and exit to the hallway from there. The locked stairway is at the north end of this floor, so head past the Mannequin and enter it with the Apartment Stairway Key.
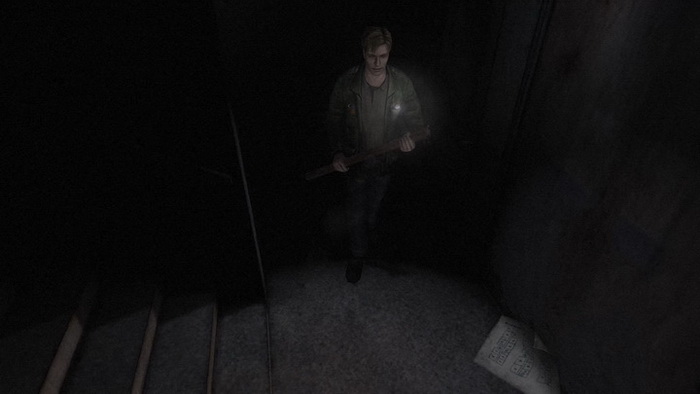
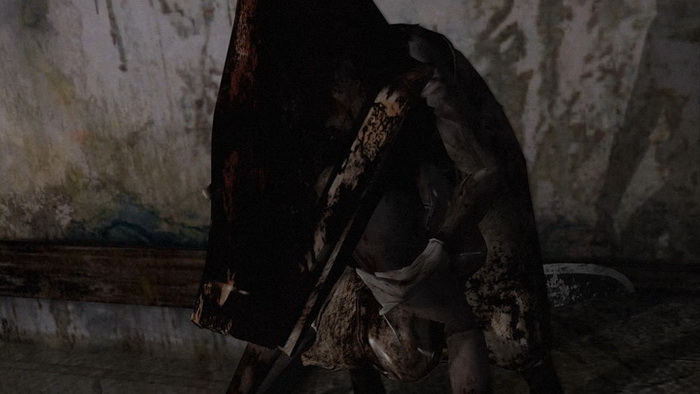
In the stairway, it's not a pretty sight. The door becomes jammed behind you and you'll have to endure a short battle with Pyramid Head.
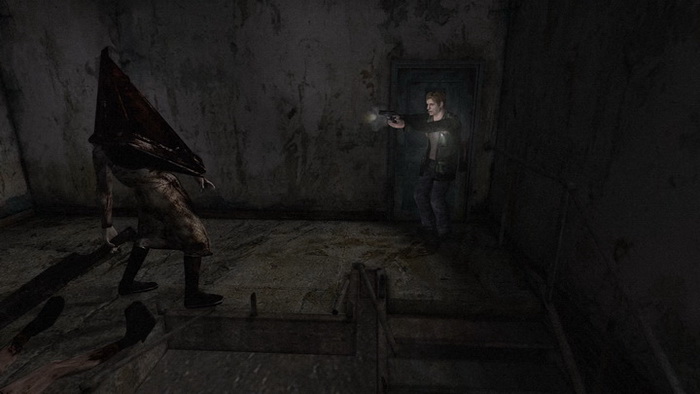
Boss 1: Red Pyramid Thing (North Stairwell)
Note on using Handgun:
First of all, let me mention that you do not have to fire off a single shot in this boss fight, however it will take noticeably longer if you don't. While bullets don't appear to damage Pyramid Head directly, they do slow him down, making his attacks easier to avoid, and also cause him to leave more quickly. That said, it's an easy fight either way and if you want to save 40 bullets rather than use them, consider the cat and mouse game.
Since Pyramid Head can't be eliminated, the idea here is to avoid his attacks and stay alive until he leaves. Whether using the Handgun or not, you'll accomplish this by running to the opposite corner of the room each time he comes near you. Pyramid Head wields a massive Great Knife which he drags behind him, limiting his speed a fair bit. So long as you move quickly and carefully you should be able to avoid any attack.
So starting off, let Pyramid Head approach you whether firing or not. When he gets close he should stop short with a swing and miss. Use this as an opportunity to run past him to the far end corner opposite the one by the door.
Continue firing away from there as he's out of the shot, or just patiently wait for him to come back this way. This time, Pyramid Head may or may not stop short when he swings, so once he gets a bit close to you, dart along the wall back to the first corner. As you run by, he'll either swing at you (and likely miss), or you'll be too quick and he'll just turn and start following you back.
Soon enough, Pyramid Head will stop trying to swipe at you in each corner and instead he'll try to perform an executioner-style overhead swing, which will indeed kill you on contact. While this attack is more dangerous, it's much easier to avoid since it takes so long to land. You'll notice when Pyramid Head starts to do this attack because he'll stop a decent distance away from you and start winding his knife arm back. When you see him do this, quickly get the hell out of there and go back to the other corner.
Pyramid Head's attacks:
As we've already discussed, the first of Pyramid Head's attacks is a standard swipe, which inflicts moderate damage. This is performed mostly at the beginning and is harder to avoid than the others due to its speed, but still shouldn't be a bother if you're quick. If you ever wish to slow him down, pump him with a few bullets.
His second Great Knife attack is an overhead executioner swing, which as previously mentioned is a one-hit kill. No matter what your health status, you will die if it hits you. It will even kill you if it catches you on the upswing from the floor, so do be careful when running past. That said, since this attack is so slow it's very easy to avoid as long as you run out of the way. However the accuracy of this attack increases at the very end of the battle when the siren sounds, especially on Hard, so always run past as quickly as possible.
Lastly, Pyramid Head can punch you with his free hand if within range, or perform a strangling grapple while lifting James with his hand, but this will only happen if you run directly into or near him. If he does grab you, mash the shoulder and directional buttons to escape more quickly.
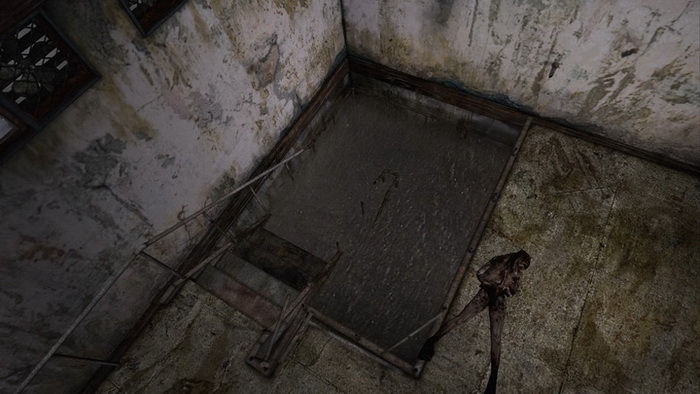
Should you be able to survive, the end of the battle will soon be signified by a siren sounding off in the distance, to which Pyramid Head responds by moving down the water-filled staircase and leaving through the exit door. He's got other business to attend to. Do not follow him to the stairs as he will not hesitate to turn around and slay you if within range. No worth risking it with the battle already won.
Do be aware that once the siren sounds, Pyramid Head's accuracy with his executioner swing increases dramatically, especially on Hard. It is just too easy to be caught off guard and killed this way if you're in a bad position as the siren sounds. Do consider firing some bullets into him to slow him down as you sense the end of the battle nearing to combat this, and try to spend a bit more time on the left side so you don't have to run past him once the siren does go off.
If out of ammo or not firing at him however, try to move as quickly as possible to get past him, and if you have lots of space between you and him, do consider moving a bit closer to bait an attack, then get out of the way and use his attack recovery time to get to the other side safely. Additionally, switching to 2D control (free movement) and just running around wildly in a very unpredictable manner (and not in the same spot) can confuse him and cause him to just abort the swing, so consider that.
To sum it up, this fight can contrastingly be somewhat long or very short, depending on if you shoot Pyramid Head or not. On all action levels the battle can end in less than one minute if you shoot Pyramid Head but can last up to five minutes on Hard if you don't, and around three on Normal.
Once Pyramid Head decides to go for a swim in the staircase, he'll descend to the bottom and leave through the exit door, draining the staircase. Now you can also descend the staircase and leave the apartment building. Yes, the same place the pyramid dude went cause we have no other options.
| 02. Wood Side Apartments | 04. West South Vale |