Nightmare Hospital
Letter from Silent Heaven
- East South Vale
- Wood Side Apartments
- Blue Creek Apartments
- West South Vale
- Brookhaven Hospital
- Nightmare Hospital
- Dark South Vale
- Silent Hill Historical Society
- Toluca Prison
- The Labyrinth
- Toluca Lake
- Lake View Hotel
- Nightmare Hotel
Born from a Wish
Welcome to the sixth chapter of the complete walkthrough guide for the original Silent Hill 2 (2001, PS2, Xbox, PC), covering Nightmare Hospital. This guide provides a comprehensive walkthrough with all item locations, detailed puzzle solutions, and boss strategies. This walkthrough also includes complete maps with all items and monsters marked for easy reference.
This is a walkthrough guide for the original Silent Hill 2. For the walkthrough for the Silent Hill 2 Remake (2024), please go to this page.
Color legend
Letter from Mary – items
Wooden Plank – weapons
Health Drink – supplies
Map of Silent Hill – maps
Save Point – save points
Contents
Complete Maps |
|
Walkthrough
"All you care about is that dead wife of yours!"
Garden
After the transition to the first nightmare world in the game, James finds himself outside in the first floor Garden of the hospital, which is much smaller than on the map. But just how did he get here, and where is the gurney, or was there even one? With too many questions in your head, pass through the double doors beside you to re-enter the hospital.
I suggest switching back to the Handgun for now after the boss fight, although the Shotgun can certainly help for quick kills or gang-ups.
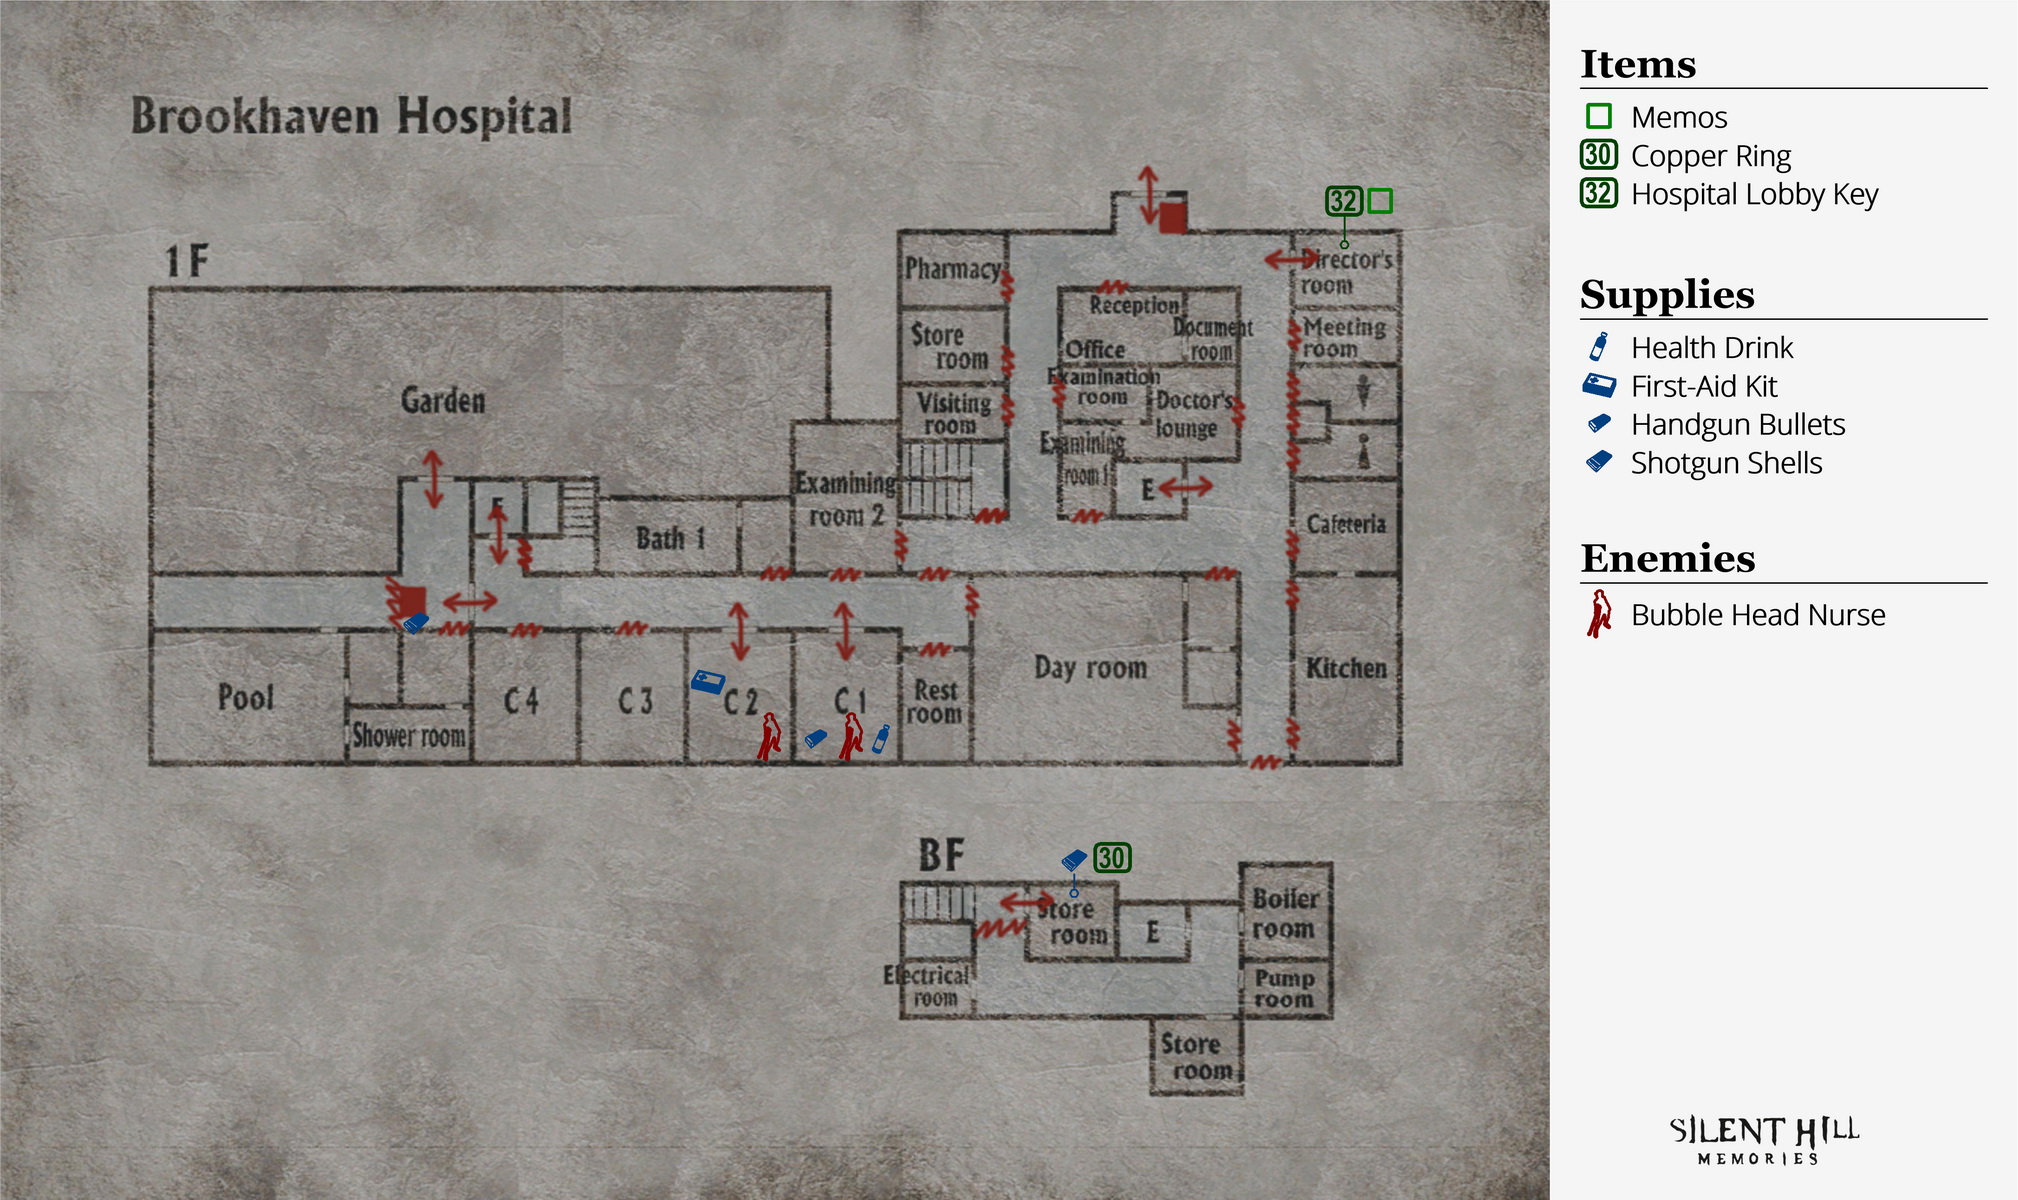
First Floor
Get the Shotgun Shells in the corner and use the Save Point on the fence if you wish, then pass through the double doors to the patient wing. After taking in the beautiful redecorating, you can find a First-Aid Kit along with a Bubble Head Nurse in room C2.
Enter C1 with your Handgun blazing to pop the Nurse who may surprise you right by the entry door, then you can grab the Health Drink on the left and Handgun Bullets to the right. Exit the room and use the elevator to head up to 2F since there's nothing else open down here.
Second Floor
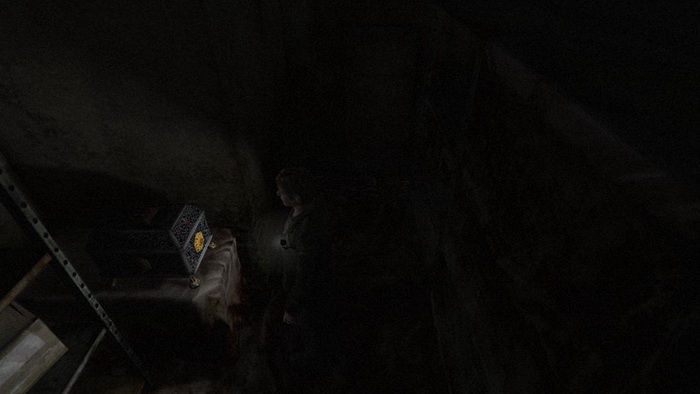
In room M4 there's two Nurses guarding a Health Drink and Shotgun Shells – you decide if it's worth it. Enter M6 past the Bubble Head in the hallway and take the Handgun Bullets to the left and First-Aid Kit by the camera. Farther right is a memo that explains a ring is in the "basement's basement", while there's a 28 Dry Cell Battery and the 29 Basement Storeroom Key on the small ledge above the eerie reaching arms. Leave the room.
The employee wing double doors down the hall won't open, so you can't get to the basement just yet. If you check the Day Room by the double doors, you'll find a knocked over fridge which James can't open. Remember that for later and take the elevator up to 3F.
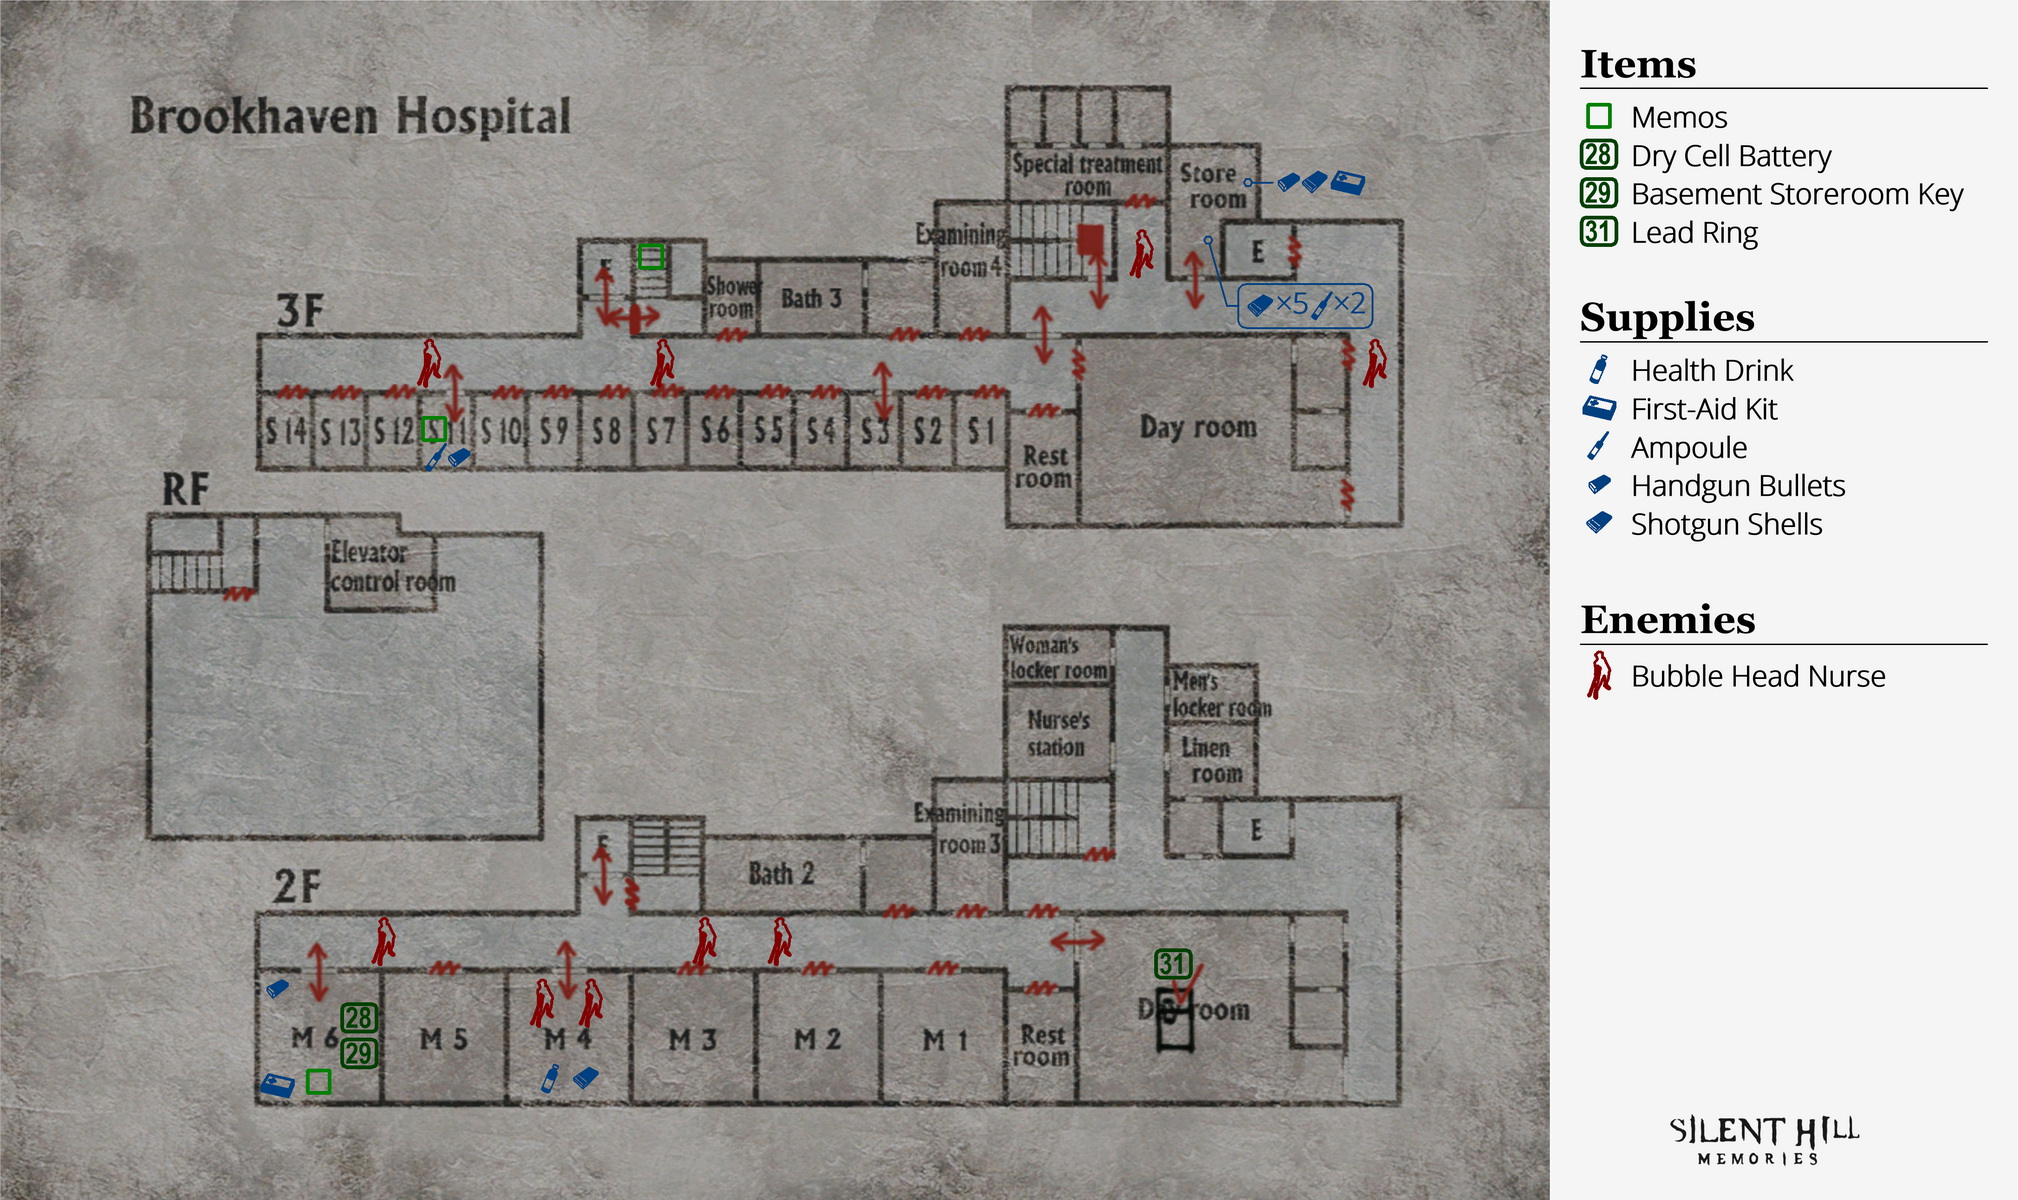
Third Floor
Arriving on the third floor, you'll notice an extremely odd-looking locked door with two hands sticking out of it... With nothing to use here yet, remember it for later and move on.
Out in the hall, there are Nurses to the left and right. Take the right and enter room S11. Grab the Handgun Bullets and the Ampoule on the stand and read the memo on the bed, which explains the odd stairwell door. Exit the room and enter room S3 down the hall, past the two Bubble Heads if they're there again.
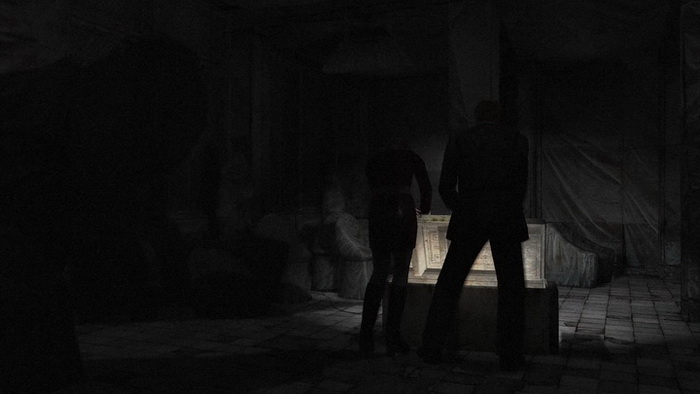
Inside S3, Maria is no longer here but she's left her medication on the nightstand and some eerie, deep breathing is heard on the soundtrack. Exit the room and enter the employee wing through the nearby double doors.
Watch out for the Nurses in the corridor and enter the Storeroom. Inside, grab the First-Aid Kit, Shotgun Shells and Handgun Bullets on the shelf at the back of the room. Exit the Storeroom and enter the stairwell by the double doors.
The Basement's Basement
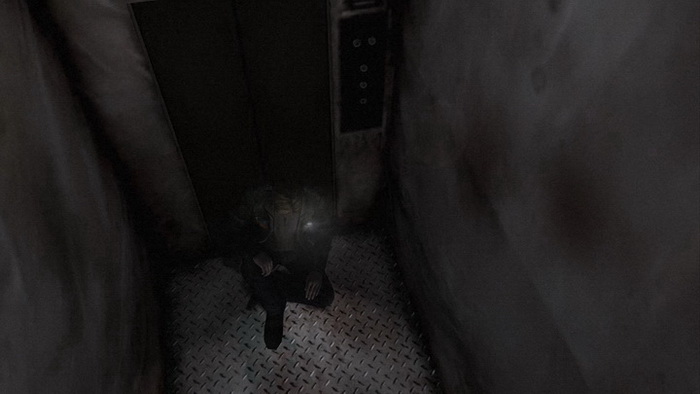
It's time to go check out the basement. Just inside the stairwell is a Save Point on the pillar. Start down the stairs, and you'll notice that the 2F and 1F doors won't open on the way. Continue to the bottom of the stairs, where you'll hear a freaky screeching sound. Try to ignore it and enter the basement with the Basement Storeroom Key.
Once inside the basement Storeroom, get the Shotgun Shells on the floor by the wreckage and take a look at the shelf in view by the wall. You'll notice bloody handprints on it, so examine it and push it aside. This reveals a ladder to down below, which must be the "basement's basement". Try to move down the ladder for Maria to burst in and berate you for things that aren't your fault. She will now accompany you again for the next portion of the game, so do protect her as you did before.
Go down the ladder with Maria to the basement's basement. Take the 30 Copper Ring in the middle of the floor and go back up the ladder, exiting the room altogether. If you remember, there was a fridge James couldn't open by himself on 2F, so maybe Maria can help. To get back there, we'll first need to go all the way up to 3F, then use the elevator in the patient wing to descend to 2F.
Fallen Fridge and Trick or Treat?
Once the elevator starts its descent, a strange radio broadcast emits from somewhere. As crazy as it sounds, a game show host asks three questions, specifically to James Sunderland, during one hell of a long elevator ride down just one floor. Listen carefully to the questions and see if you can figure them out. The announcer informs you to go to the third floor Storeroom to claim your prizes.
Since you'll just now hit the second floor, leave that for later and return to the Day Room in the patient wing. With Maria's help, open the fallen fridge to get the 31 Lead Ring inside. It's nasty enough that Maria instantly offers it to James after picking it up, so that's nice of her. Now that we have two rings, we can prepare to leave the hospital, but we also have yet to claim our Trick or Treat prizes. Return to the elevator and head back up to 3F.
You may remember the weird-looking door with protruding hands on it right right by the elevator here, but if you want to collect your prizes for the Trick or Treat announcement in the elevator, head to the employee wing and enter the Storeroom. Kill the Nurse outside first to make things easier when you pass through again.
Inside the Storeroom, there will be some supplies on the shelf if you didn't grab them earlier, but most importantly there will be a big blue mystery chest on the counter. Examine it and prepare to lock in your answers.
Puzzle: Trick or Treat Chest (3F Storeroom)
On the top of the Trick or Treat chest is a panel with nine buttons, which appears as so:
| 1 | 2 | 3 | ||
| Q1 | ○ | ○ | ○ | |
| Q2 | ○ | ○ | ○ | |
| Q3 | ○ | ○ | ○ |
In order to claim your prize, you must answer the three multiple choice questions correctly by pressing one button for each question on the box. If you answer correctly, the box will open and you can take your prizes. If you answer incorrectly however, spray will come down from the roof to inflict damage and the box will be permanently locked. Note that your answers will be locked in once three answers are selected, so make sure they're correct.

The three questions were given to you on the elevator ride to 2F with Maria. These questions and answers are always the same, no matter what riddle level you're on, so let's go through them, straight from the host's mouth:
1. Merry-Go-Round, haunted house, roller coaster, ferris wheel and tea cups. Silent Hill is home to a thrilling amusement park that both children and adults love. The question is: What is the name of this amusement park?
- One, Fantasy Land
- Two, Silent Hill Amusement Park
- Three, Lakeside Amusement Park
2. Silent Hill witnessed a gruesome murder a few years back. A brother and sister were playing in the road when they were attacked and chopped into pieces with an axe. Torn flesh, smashed bones, splattered blood, and finally... What a terrible tragedy. What gruesome end to such innocent lives. What was the name of the murderer who committed this vile act?
- One, Walter Sullivan
- Two, Scott Fairbanks
- Three, Eric Gein
3. South of the lake is a deserted old neighborhood called South Vale. From there to Paleville, the central resort area northwest of the lake, there's only one road you can take. Just one road, no more. The third and final question is: What is the name of that road?
- One, Bachman Road
- Two, Rendell Street
- Three, Nathan Avenue
Now that you know the questions, you have the ability to answer them all entirely by yourself. Check your map for the answers to 1 and 3 and read the "Article about murder incident" in the Memo section of your inventory for the answer to 2. But we can go over it together just to be sure:
1. The name of Silent Hill's amusement park. Where could you find that? Check your map and find the map of Silent Hill by scrolling up or down. Looking at the full large map, check the top just beside the Lake View Hotel to find the answer: Lakeside Amusement Park.
2. The killer of the two kids. Do you remember reading an article about this? At the bottom of the Wood Side Apartments garbage chute? Enter your inventory and go to the Memo section. The name of the memo is "Article about murder incident". Read it to find the murderer's name, which is Walter Sullivan.
3. The name of the road that goes from South Vale to Paleville. Check your map of Silent Hill again for the answer. Looking at South Vale south of the lake, the road at the top of that area is called Nathan Avenue. If you follow it west, it connects to Sandford Street, which moves north to Paleville. So the answer is Nathan Avenue.
Now that you have the answers, you can solve the puzzle. Press the 3, 1 and 3 buttons like so:
| 1 | 2 | 3 | |
| Q1 | ○ | ○ | ● |
| Q2 | ● | ○ | ○ |
| Q3 | ○ | ○ | ● |
You should be very happy with the contents inside.
Once the Trick or Treat chest is open, collect the five boxes of Shotgun Shells and two Ampoules inside. Pretty damn good reward, I'd say. Now that we're done here, it's time to leave this hellhole. Leave the room and consider saving in the employee wing stairwell, since there's an upcoming section which could catch you off guard.
Escaping the Nightmare Hospital
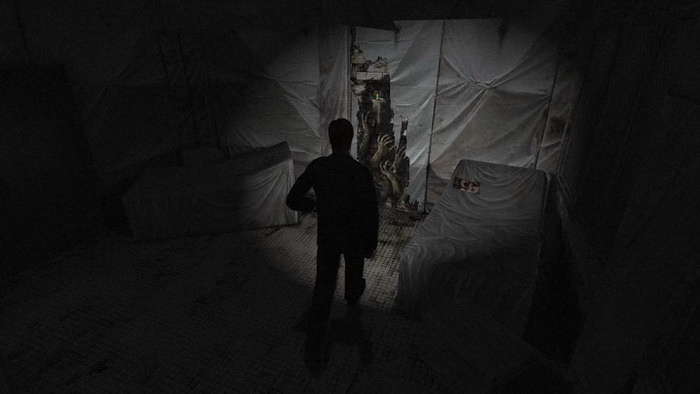
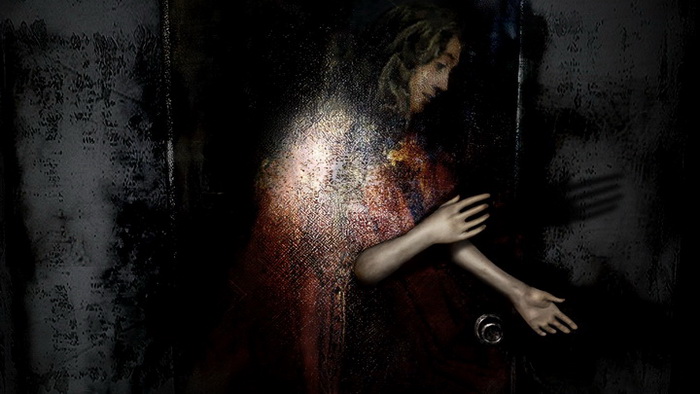
Now head to the strange door right beside the elevator in the patient wing of 3F. If you examine it, you'll see there's a woman painted on the door with 3D hands, ready to be used in some way.
Although it's simple enough to just guess what to do here, the only real hint was mentioned in the room S11 memo about the "Lady of the Door". While praising this woman, the author writes, "Like bloated and ugly corpses their sins she devours them". If you examine the two rings you acquired in your inventory, the lead one has a "disgusting, bloated" face on it while the copper one has a spider, which can also be interpreted as ugly perhaps. So go ahead and combine and use the Copper Ring and Lead Ring on the door (combining is optional but faster) to unlock it.
Head through the creepy door and move down the stairs to find a memo on the ground. Read it to learn about the key to the "mooseum" and continue down to the bottom of the stairwell. Pass through the door.
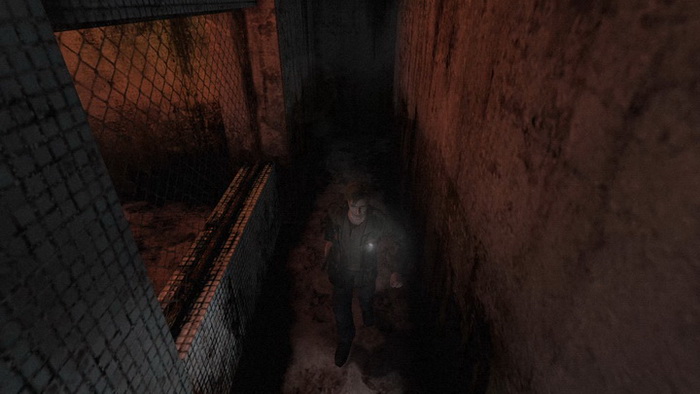
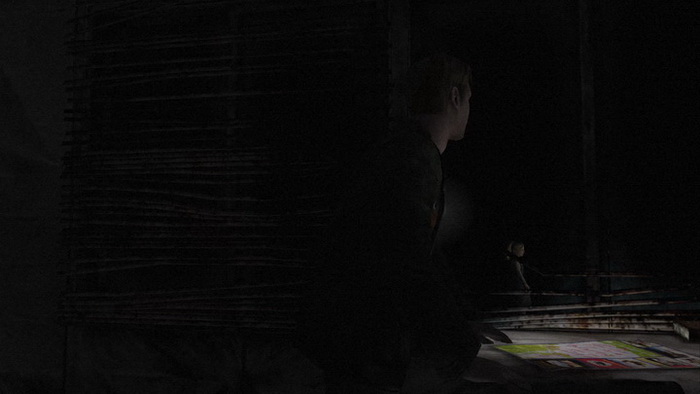
Pyramid Head in the Basement Hallway
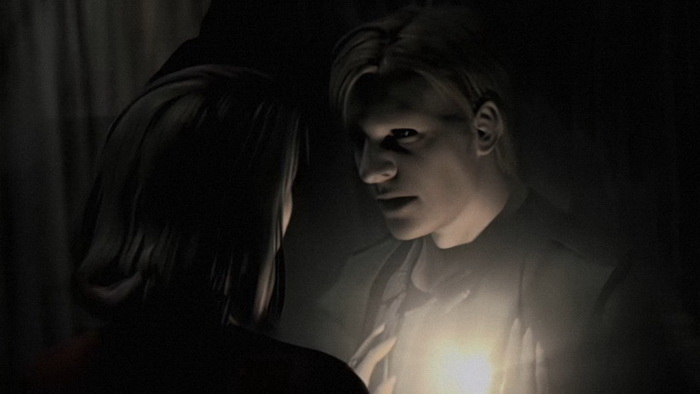
In a tight basement hallway, make your way around the first corner. You may hear a noise, and shortly, Pyramid Head will appear from behind you and Maria, which is definitely terrible news. He'll chase you as you run the pathway, poking Maria (closest to him) with his new spear on the way. If you're not fast enough, Maria may die here and it will be Game Over.
If you're playing on Normal Action Level or lower, this is fairly simple so don't fret too much here. Just run at all times and follow the odd hallway as it keeps turning in new directions, all the way to the elevator at the end, at which point you'll be safe. Pyramid Head will probably hit Maria once or twice as she follows behind you, but she's a strong gal so she'll live. Skip the following long note if on Normal or lower.
Note on Hard Action Level:
Hard Action Level is a different story. On this difficulty level, James stumbles and falls into walls when running, and this will slow you down quite a lot. When you slow down, Maria slows down and will be open to attacks. Beyond that, it's already difficult enough as Pyramid Head is much more aggressive on Hard and will do more damage to Maria. It may sometimes be possible to have a near flawless run and make it to the elevator before Maria dies, but don't count on this since it's extremely difficult. Instead you will have to slow down Pyramid Head by attacking him.
The best method here is to equip the Handgun and fire a clip into Pyramid Head once he appears. Be careful not to hit Maria though, since she might sometimes step right into the line of fire. If she gets hit once, she's dead and it's Game Over.
So once our buddy Pyramid Head appears, move towards him and unload a full Handgun clip into him. You'll notice his motions immediately begin to slow and he won't attack Maria for a while. This allows you to start running the hallway, but don't expect that to be enough.
Once you reach the fenced-window area, move to the other side of it and wait for Pyramid Head to come into sight, then fire another full clip at him through the fence. Now you can run the rest of the hallway. Once you head around the next corner and see Maria following behind as you run down the long straight hallway, you're in the clear. Just run straight to the elevator for a cutscene. Refer to the diagram below for the route to the elevator for quick reference.

As an alternative to the Handgun method, using the Steel Pipe also works, but it does require a lot more time and effort. Right when Pyramid Head appears, whack him once. Step back and whack him again when he moves towards you. Rinse and repeat, staying close enough to Pyramid Head to get in your whacks after few seconds. Once you reach the fenced-window area you can finally run for it. I definitely recommend the Handgun method, but if you don't have the ammo to spare then this will work if you keep to it.
Hospital Lobby
Once you get near the elevator, a cutscene will play. After all the events, the elevator will travel up to the first floor. This appears to be the other elevator in the employee wings and lobby that we had not yet accessed. Back in the lobby, the front doors are locked and only the Director's Room is open so enter it.
Inside on the desk, James finds a map that reveals the location of a letter and a wrench on Lindsey Street, which he marks on his own map. Why this letter and wrench are important, you'll have to wait to find out. But for now, that location on Lindsey is our next destination.
You'll get the 32 Hospital Lobby Key after reading the memo. After the short cutscene that follows, exit the room and find the lobby doors where there's also a Save Point on the right side. Exit the hospital through the lobby doors using the Hospital Lobby Key.
| 05. Brookhaven Hospital | 07. Dark South Vale |